Arduino 上手教程
2. 设备开发 & 案例程序
3. M5Unified
4. M5GFX
5. 拓展模块
Unit
Base
IoT
Unit TimerPWR Arduino 使用教程
1.准备工作
1.环境配置: 参考Arduino IDE上手教程完成IDE安装, 并根据实际使用的开发板安装对应的板管理, 与需要的驱动库。
2.使用到的驱动库:
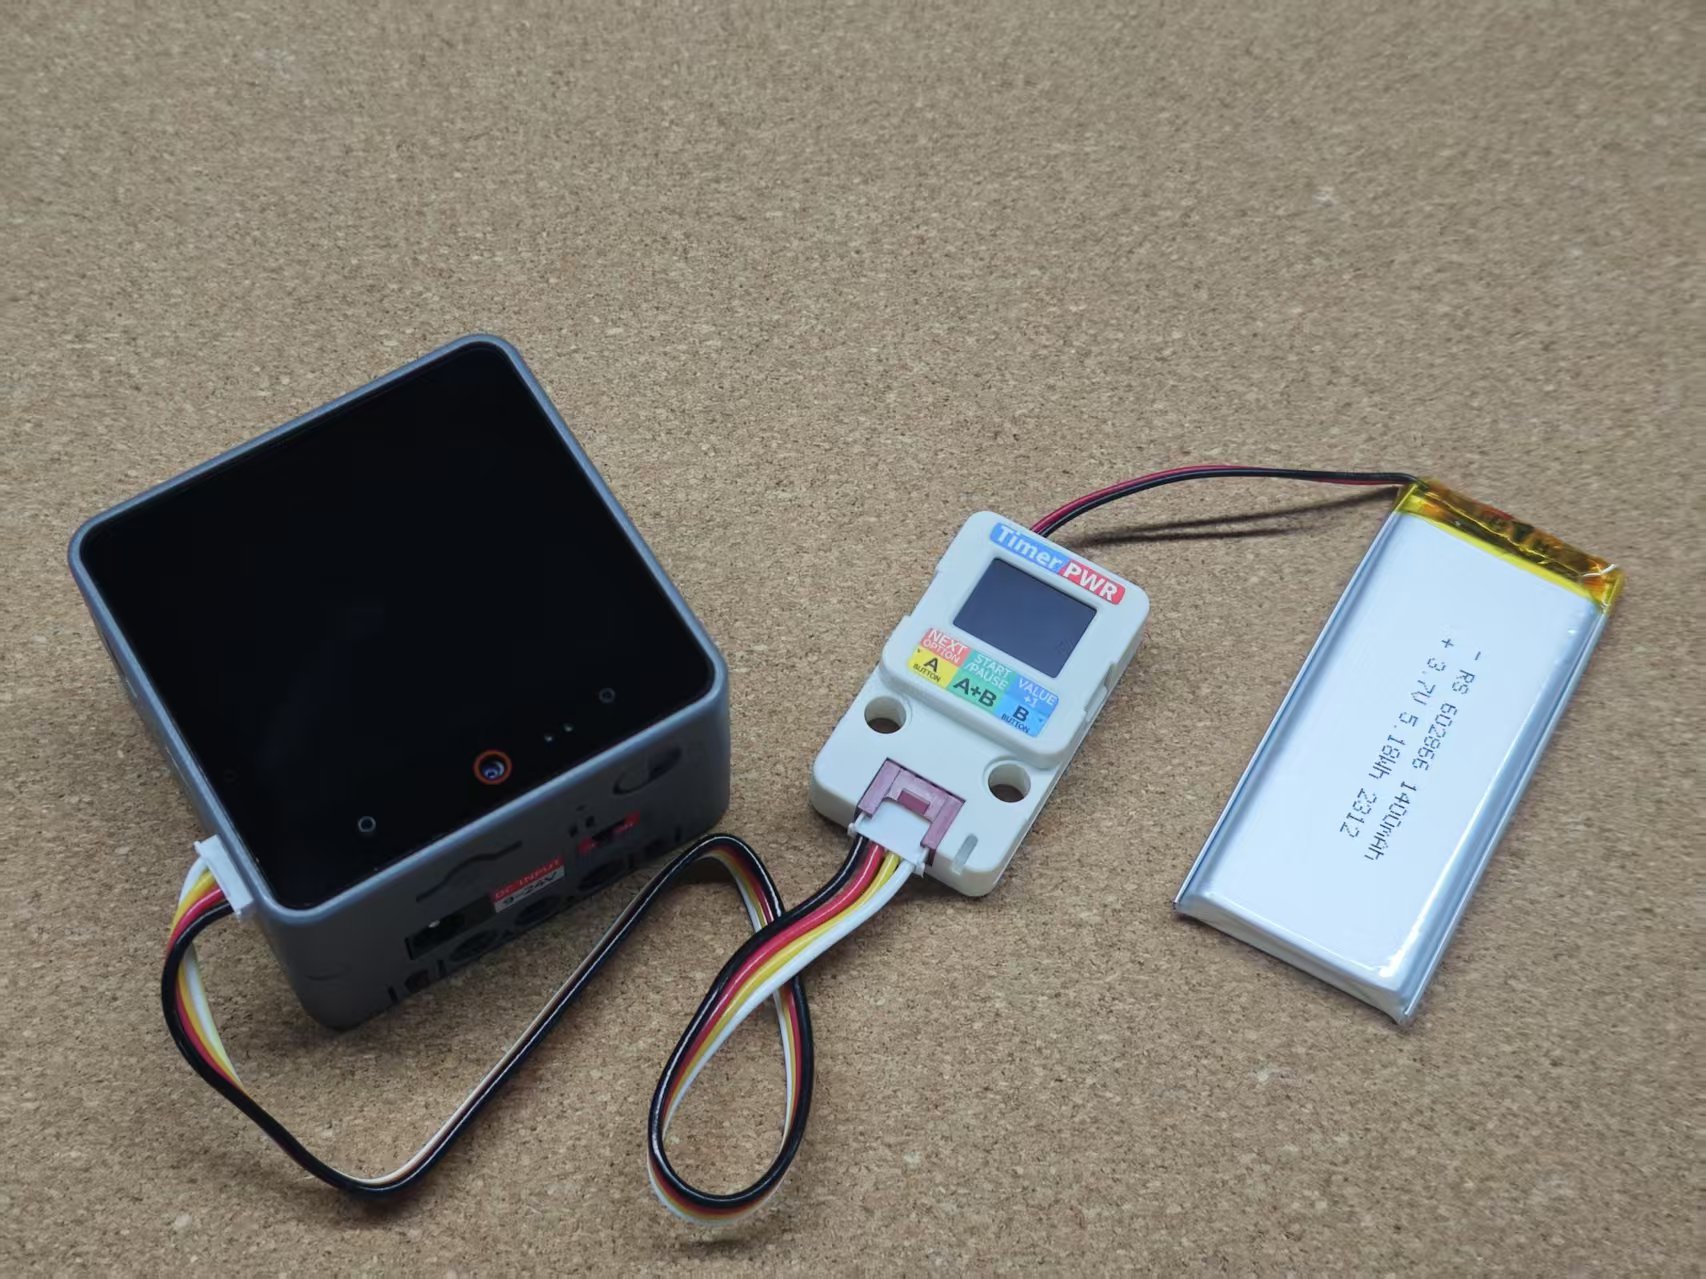
3.使用到的硬件产品:

2.案例程序
案例说明
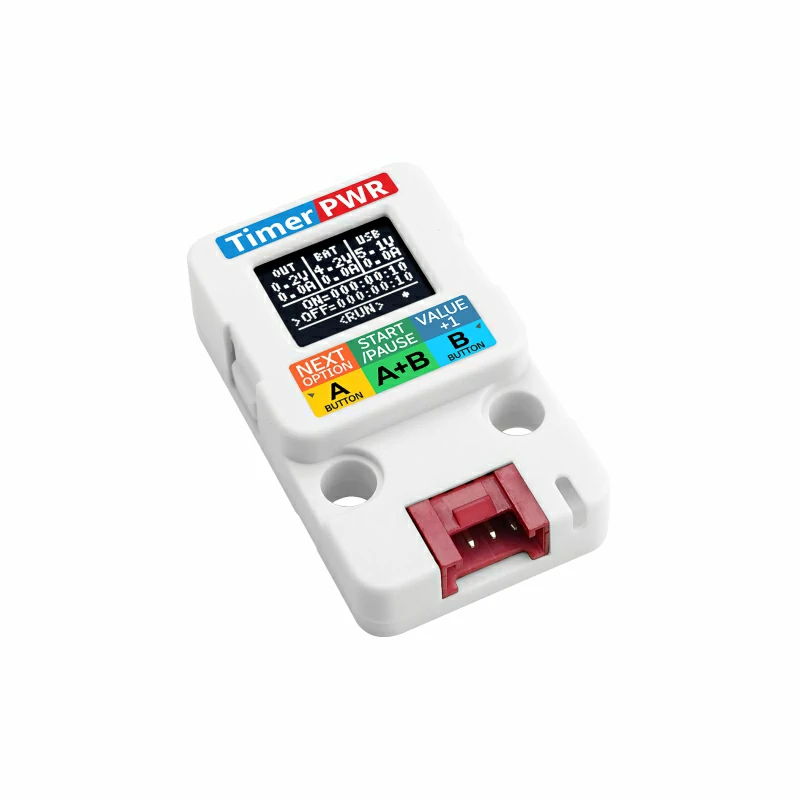
Unit TimerPWR 是一款是一款定时供电单元,能够根据需求定时开关 HY2.0-4P Grove 接口的5V输出,实现对外供电控制。本案例我们将通过 I2C 指令写入的方式配置 Unit TimerPWR 开关输出供电的循环周期。使得我们的主设备能够定时执行完操作后。彻底关断电源,实现低功耗。
设置单次唤醒
取消循环模式,触摸 CoreS3 后执行立即执行断电,并在 off time 时间结束后,恢复供电。
cpp
1 2 3 4 5 6 7 8 9 10 11 12 13 14 15 16 17 18 19 20 21 22 23 24 25 26 27 28 29 30 31 32 33 34 35 36 37 38 39 40 41 42
#include "M5Unified.h"
#include "Wire.h"
#include "m5_unit_timerpwr.hpp"

M5UnitTimerPWR timer_pwr;

void setup()
{
    M5.begin();
    Serial.begin(115200);
    M5.Display.setTextDatum(middle_center);
    M5.Display.setFont(&fonts::lgfxJapanMinchoP_24);

    while (!timer_pwr.begin(&Wire, TIMERPWR_ADDR, 2, 1, 400000U)) {
        M5.Display.drawString("Unit TimerPWR init Fail!", M5.Display.width() / 2, M5.Display.height() / 2);

        delay(1000);
    };
    M5.Display.clear();
    M5.Display.drawString("Unit TimerPWR init OK", M5.Display.width() / 2, M5.Display.height() / 2 - 20);
    M5.Display.drawString("Touch To Sleep 10S", M5.Display.width() / 2, M5.Display.height() / 2 + 20);

    // do something before sleep...

    // disable cycle sleep mode
    timer_pwr.set_cycle_sleep(false);
}

void loop()
{
    M5.update();
    auto t = M5.Touch.getDetail();

    if (t.wasClicked() || M5.BtnA.wasClicked()) {
        M5.Display.clear();
        M5.Display.drawString("Sleep 10S!", M5.Display.width() / 2, M5.Display.height() / 2);
        delay(1000);
        timer_pwr.set_power_on_time(0, 0, 0);
        timer_pwr.set_power_off_time(0, 0, 10);
        timer_pwr.set_sleep();
    }
}设置周期唤醒
启用循环模式,分别配置 on/off time 时间,执行后开始计时, on time 运行时间后结束立即执行断电。并在 off time 时间结束后,恢复供电。循环以上供电周期,直到有新的配置写入或电池电量完全消耗。
cpp
1 2 3 4 5 6 7 8 9 10 11 12 13 14 15 16 17 18 19 20 21 22 23 24 25 26 27 28 29 30 31 32 33 34 35 36 37 38 39 40 41 42 43 44 45 46 47
#include "M5Unified.h"
#include "Wire.h"
#include "m5_unit_timerpwr.hpp"

M5UnitTimerPWR timer_pwr;

void setup()
{
    M5.begin();
    Serial.begin(115200);
    M5.Display.setTextDatum(middle_center);
    M5.Display.setFont(&fonts::lgfxJapanMinchoP_24);

    while (!timer_pwr.begin(&Wire, TIMERPWR_ADDR, 2, 1, 400000U)) {
        M5.Display.drawString("Unit TimerPWR init Fail!", M5.Display.width() / 2, M5.Display.height() / 2);

        delay(1000);
    };
    M5.Display.clear();
    M5.Display.drawString("Unit TimerPWR init OK", M5.Display.width() / 2, M5.Display.height() / 2 - 20);
    M5.Display.drawString("ON 10S / OFF 5S", M5.Display.width() / 2, M5.Display.height() / 2 + 20);
}

void loop()
{
    M5.update();
    auto t = M5.Touch.getDetail();

    if (t.wasClicked() || M5.BtnA.wasClicked()) {
        M5.Display.clear();
        M5.Display.drawString("Start Cycle ON/OFF!", M5.Display.width() / 2, M5.Display.height() / 2);
        delay(1000);
        // enable cycle sleep mode
        timer_pwr.set_cycle_sleep(false);
        timer_pwr.set_power_on_time(0, 0, 10);
        timer_pwr.set_power_off_time(0, 0, 20);
        timer_pwr.save_flash();
        timer_pwr.set_cycle_sleep(true);
    }
    if (t.wasHold() || M5.BtnA.wasHold()) {
        // disable cycle sleep mode
        timer_pwr.set_cycle_sleep(false);
        M5.Display.clear();
        M5.Display.drawString("Stop Cycle ON/OFF!", M5.Display.width() / 2, M5.Display.height() / 2);
        delay(1000);
    }
}3.编译上传
1.下载模式: 不同设备进行程序烧录前需要下载模式, 不同的主控设备该步骤可能有所不同。详情可参考Arduino IDE上手教程页面底部的设备程序下载教程列表, 查看具体的操作方式。
CoreS3长按复位按键(大约2秒)直到内部绿色LED灯亮起,便可松开,此时设备已进入下载模式,等待烧录。
.gif)
- 2.选中设备端口, 点击Arduino IDE左上角编译上传按钮, 等待程序完成编译并上传至设备。

4.Timer Wakeup
使用 Unit TimerPWR 为 CoreS3提供定时唤醒。 (注: 实现效果需将CoreS3底座电池电源关闭连接)。

触摸 CoreS3 屏幕控制进入单次休眠唤醒操作。

已进入休眠。