


Arduino Quick Start
2. Devices & Examples
3. M5Unified
4. M5GFX
5. Extensions
Unit
Atomic
Tab5
IoT
Accessories
NanoC6 Arduino Program Compilation & Upload
1.Preparation
- 1.Arduino IDE Installation: Refer to the Arduino IDE Installation Guide to complete the IDE installation.
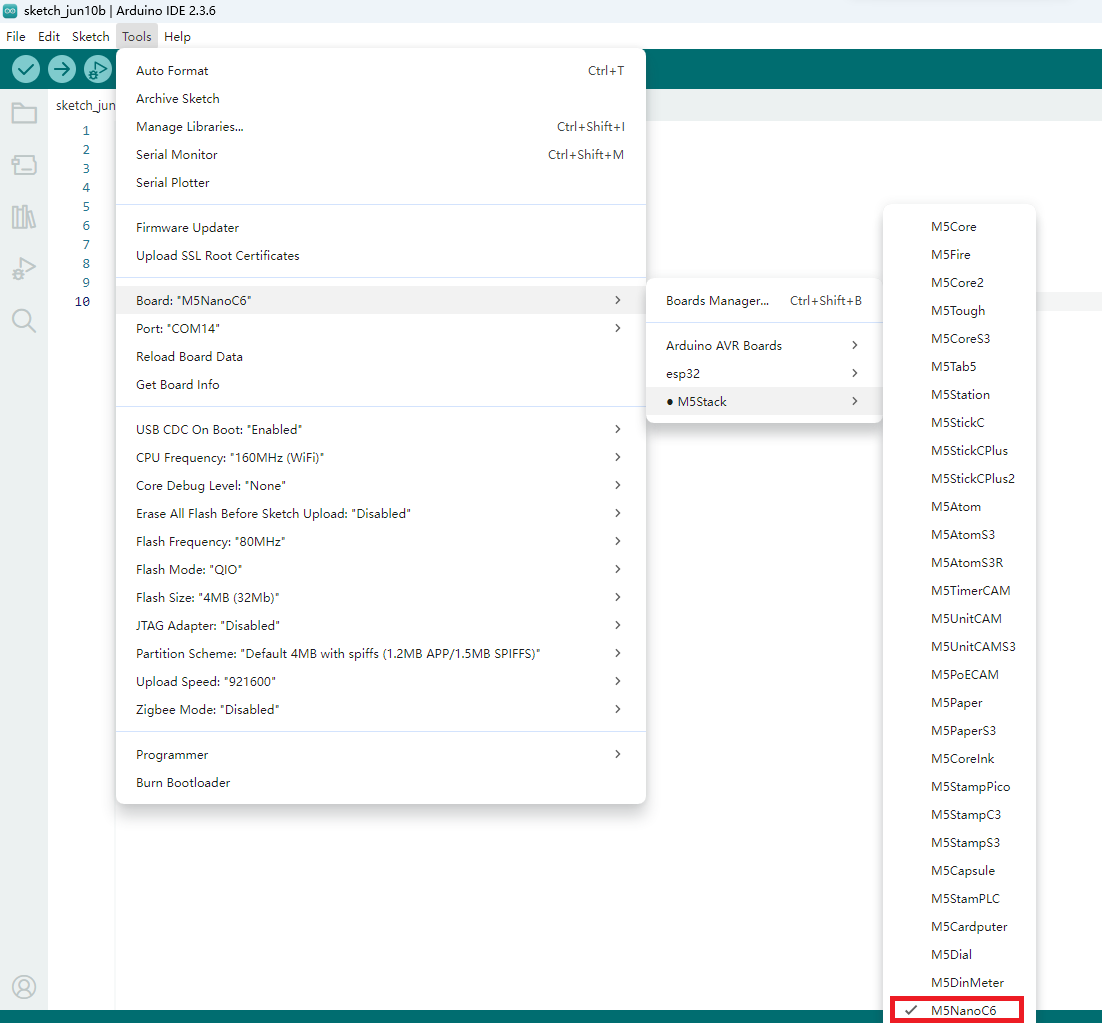
- 2.Board Manager Installation: Refer to the Basic Environment Setup Guide to complete the M5Stack board management installation and select the development board
M5NanoC6。
2. Download Mode
Press and hold the GPIO9 button, then connect the data cable to enter download mode.
.gif)
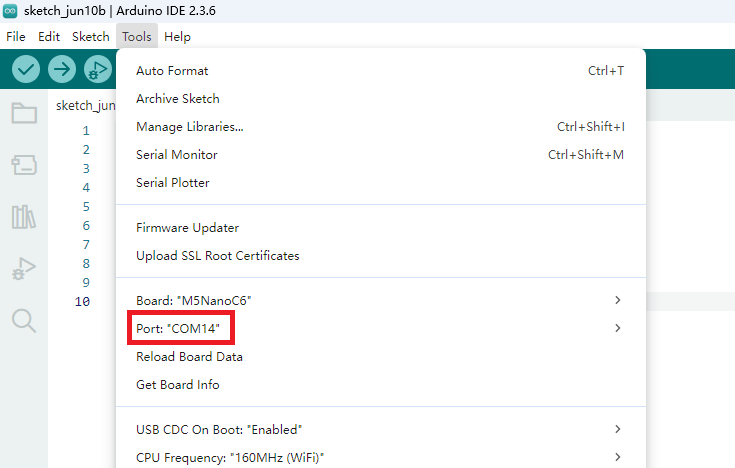
3.Port Selection
Connect the device to the computer via a USB cable. In the Arduino IDE, you can select the corresponding port for the device.
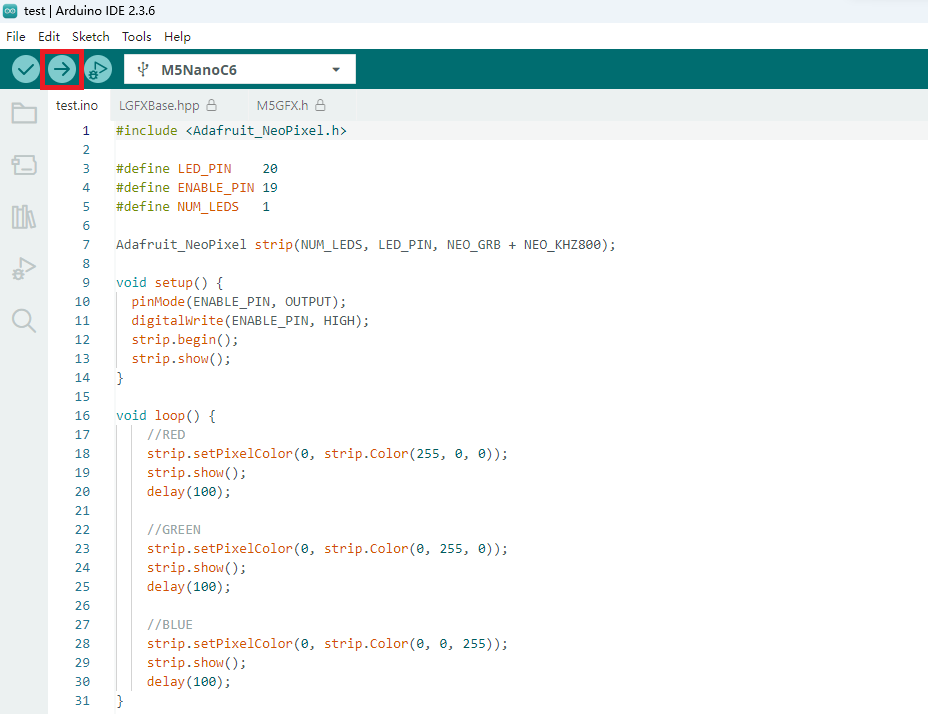
4.Program Compilation & Upload
Enter the following code in the Arduino IDE workspace, and click the upload button. The program will be automatically compiled and uploaded.
Note:
1. This example is realized based on Adafruit NeoPixel library, please install Adafruit NeoPixel dependency library through the library manager before use.
2.To control the standby power consumption, the NanoC6 RGB LED needs to enable the LED chips, which means it requires a high-level control of the
2.To control the standby power consumption, the NanoC6 RGB LED needs to enable the LED chips, which means it requires a high-level control of the
ENABLE_PIN in the following code.cpp
1 2 3 4 5 6 7 8 9 10 11 12 13 14 15 16 17 18 19 20 21 22 23 24 25 26 27 28 29 30 31
#include <Adafruit_NeoPixel.h>

#define LED_PIN    20
#define ENABLE_PIN 19
#define NUM_LEDS   1

Adafruit_NeoPixel strip(NUM_LEDS, LED_PIN, NEO_GRB + NEO_KHZ800);

void setup() {
  pinMode(ENABLE_PIN, OUTPUT);
  digitalWrite(ENABLE_PIN, HIGH);
  strip.begin();
  strip.show();
}

void loop() {
    //RED
    strip.setPixelColor(0, strip.Color(255, 0, 0));
    strip.show();
    delay(100);

    //GREEN
    strip.setPixelColor(0, strip.Color(0, 255, 0));
    strip.show();
    delay(100);

    //BLUE
    strip.setPixelColor(0, strip.Color(0, 0, 255));
    strip.show();
    delay(100);
}
After uploading the code, you will be able to see the RGB LED lights on the M5NanoC6 device cycling through the colors red, green, and blue.