Arduino Quick Start
2. Devices & Examples
3. M5Unified
4. M5GFX
5. Extensions
Unit
Atomic
Tab5
IoT
Accessories
Unit ENV Arduino Tutorial
1. Preparations
- Environment configuration: Refer to the Arduino IDE Quick Start Guide to install the IDE, and install the corresponding board manager and required driver libraries according to the development board you are using.
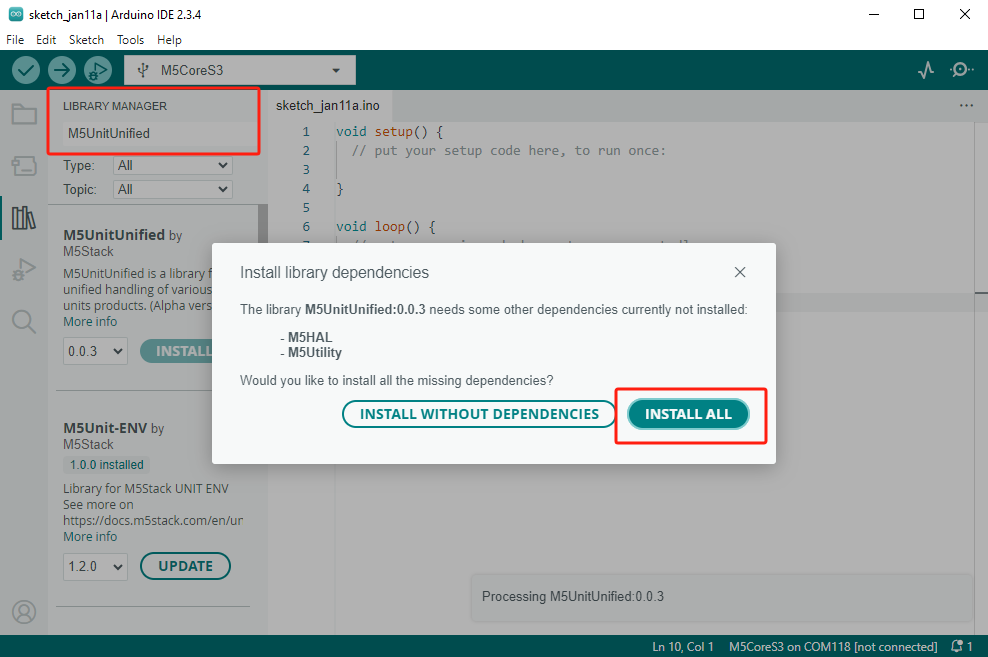
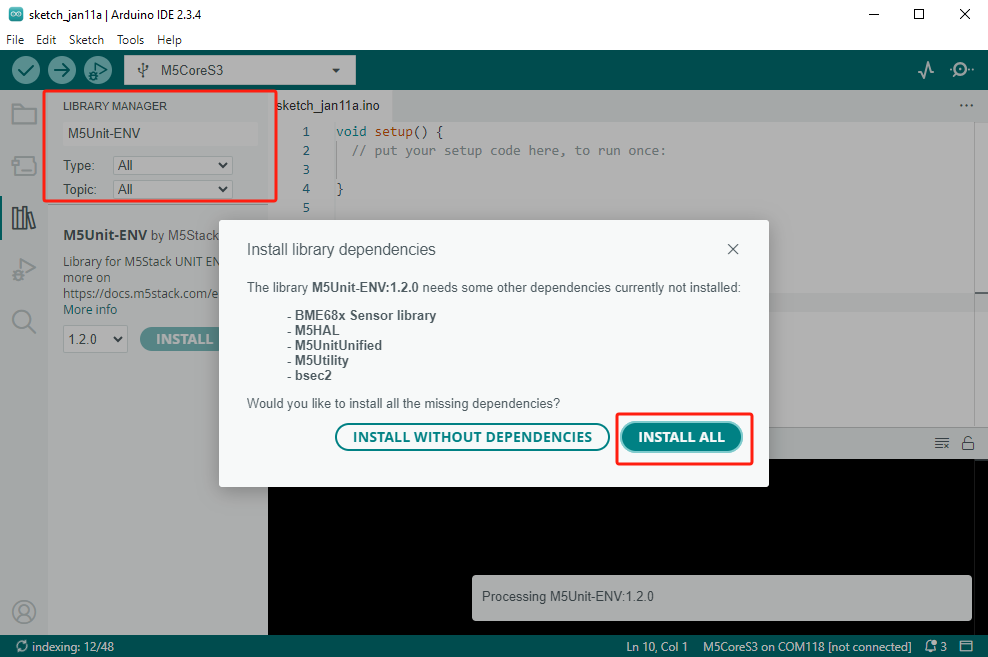
- Driver Libraries Used:
Driver Libraries
Although the main sensor IC solutions differ among Unit ENV/II/III/IV/PRO, the M5Unit-ENV library includes corresponding drivers and examples, making sensor data reading very convenient.
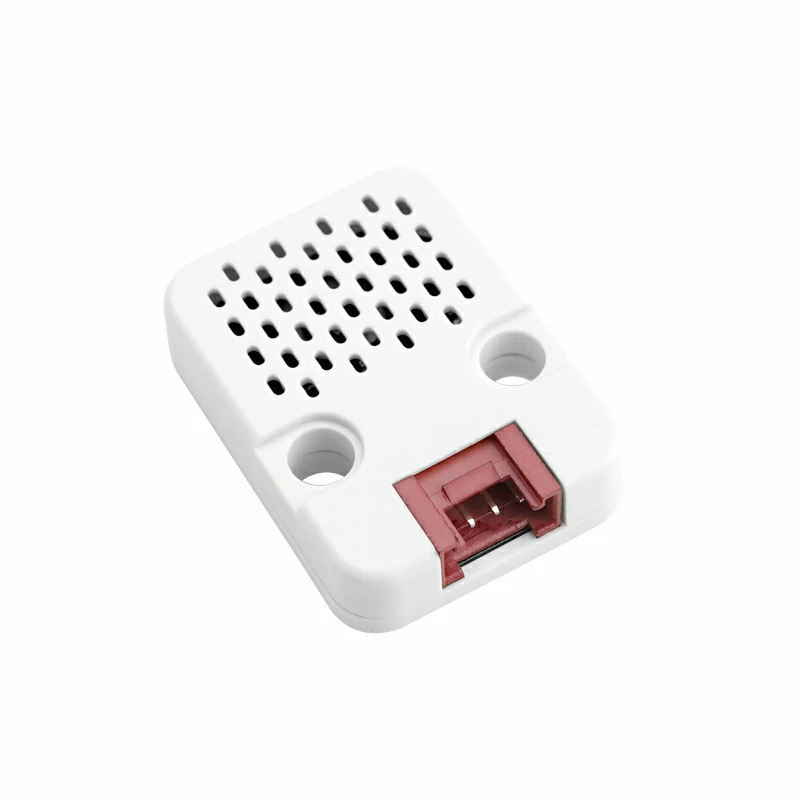
- Hardware Products Used:

Dependent Libraries
2. Example
Example Explanation
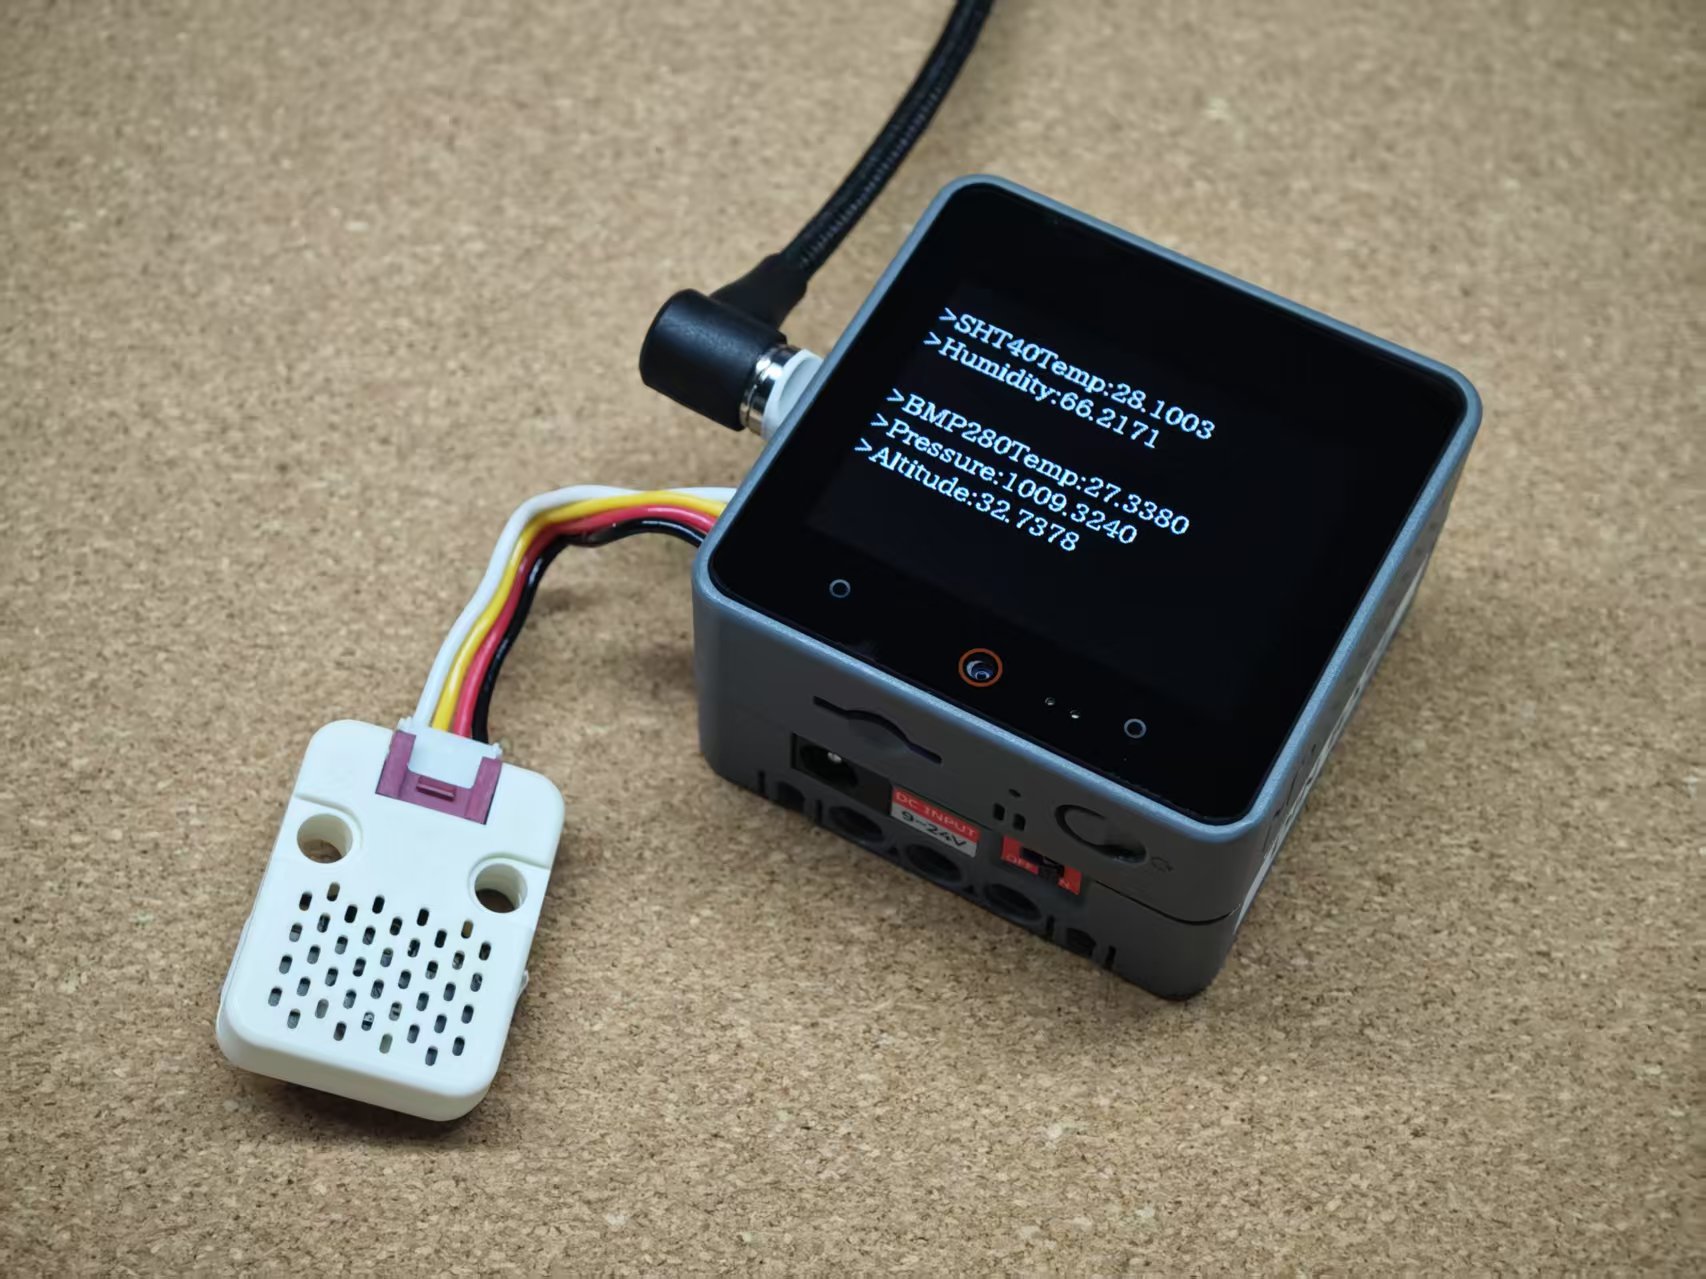
This example uses Unit ENV-IV to read temperature and humidity data. If you are using Unit ENV-III, you can enable a different instance by switching the
USING_ENV3 comment. For other models of Unit ENV, please refer to the link below to view more example programs.cpp
1 2 3 4 5 6 7 8 9 10 11 12 13 14 15 16 17 18 19 20 21 22 23 24 25 26 27 28 29 30 31 32 33 34 35 36 37 38 39 40 41 42 43 44 45 46 47 48 49 50 51 52 53 54 55 56 57 58 59 60 61 62 63 64 65 66 67 68 69 70 71 72 73 74 75 76 77 78 79 80 81 82 83 84 85 86 87 88 89 90 91 92 93 94 95 96 97 98 99 100 101 102 103 104 105 106 107 108 109 110
#include <M5Unified.h>
#include <M5UnitUnified.h>
#include <M5UnitUnifiedENV.h>

M5Canvas canvas(&M5.Display);

m5::unit::UnitUnified Units;

// #define USING_ENV3
#define USING_ENV4

#if defined(USING_ENV3)

m5::unit::UnitENV3 unitENV3;
auto& sht30   = unitENV3.sht30;
auto& qmp6988 = unitENV3.qmp6988;

#elif defined(USING_ENV4)

m5::unit::UnitENV4 unitENV4;
auto& sht40  = unitENV4.sht40;
auto& bmp280 = unitENV4.bmp280;

#endif

float calculate_altitude(const float pressure, const float seaLvhPa = 1013.25f)
{
    return 44330.f * (1.0f - pow((pressure / 100.f) / seaLvhPa, 0.1903f));
}

void setup()
{
    M5.begin();
    Serial.begin(115200);
    M5.Display.setFont(&fonts::lgfxJapanMinchoP_20);
    M5.Display.setTextSize(1);
    auto pin_num_sda = M5.getPin(m5::pin_name_t::port_a_sda);
    auto pin_num_scl = M5.getPin(m5::pin_name_t::port_a_scl);
    M5_LOGI("getPin: SDA:%u SCL:%u", pin_num_sda, pin_num_scl);

    Wire.begin(pin_num_sda, pin_num_scl, 400000U);

#if defined(USING_ENV3)
    if (!Units.add(unitENV3, Wire) || !Units.begin()) {
        M5_LOGE("Failed to begin Unit ENV3");
        M5.Display.clear(TFT_RED);
        while (true) {
            m5::utility::delay(10000);
        }
    }

#elif defined(USING_ENV4)
    if (!Units.add(unitENV4, Wire) || !Units.begin()) {
        M5_LOGE("Failed to begin Unit ENV4");
        M5.Display.clear(TFT_RED);
        while (true) {
            m5::utility::delay(10000);
        }
    }

#endif
}

void loop()
{
    M5.update();
    Units.update();
#if defined(USING_ENV3)

    if (sht30.updated()) {
        M5.Display.setCursor(0, 0);
        M5.Display.fillRect(0, 0, 320, 80, TFT_BLACK);
        M5.Display.printf(
            "\n>SHT30Temp:%.4f\n"
            ">Humidity:%.4f",
            sht30.temperature(), sht30.humidity());
    }
    if (qmp6988.updated()) {
        M5.Display.setCursor(0, 80);
        M5.Display.fillRect(0, 80, 320, 80, TFT_BLACK);
        auto p = qmp6988.pressure();
        M5.Display.printf(
            "\n>QMP6988Temp:%.4f\n"
            ">Pressure:%.4f\n"
            ">Altitude:%.4f",
            qmp6988.temperature(), p * 0.01f /* To hPa */, calculate_altitude(p));
    }

#elif defined(USING_ENV4)
    if (sht40.updated()) {
        M5.Display.setCursor(0, 0);
        M5.Display.fillRect(0, 0, 320, 80, TFT_BLACK);
        M5.Display.printf(
            "\n>SHT40Temp:%.4f\n"
            ">Humidity:%.4f",
            sht40.temperature(), sht40.humidity());
    }
    if (bmp280.updated()) {
        M5.Display.setCursor(0, 80);
        M5.Display.fillRect(0, 80, 320, 80, TFT_BLACK);
        auto p = bmp280.pressure();
        M5.Display.printf(
            "\n>BMP280Temp:%.4f\n"
            ">Pressure:%.4f\n"
            ">Altitude:%.4f",
            bmp280.temperature(), p * 0.01f /* To hPa */, calculate_altitude(p));
    }
#endif
    delay(1000);
}3. Compile and Upload
- Download Mode:
Before programming, different devices need to enter download mode. The procedure may vary depending on the main controller. For details, please refer to the device programming download tutorials listed at the bottom of the Arduino IDE Quick Start Guide.
- Download Mode:
For CoreS3, press and hold the reset button (for about 2 seconds) until the internal green LED lights up, then release it. The device will then enter download mode and await programming.
.gif)
- Select the Device Port:
Click the compile and upload button at the top left of the Arduino IDE, and wait for the program to compile and be uploaded to the device.
- Select the Device Port:
4. Temperature and Humidity Data Reading