

Arduino Quick Start
2. Devices & Examples
3. M5Unified
4. M5GFX
5. Extensions
Unit
Module
Atomic
Tab5
IoT
Accessories
Atom Voice Arduino Program Compilation & Upload
1. Preparation
- Arduino IDE Installation: Refer to the Arduino IDE Installation Guide to complete the IDE installation.
- Board Manager Installation: Refer to the Basic Environment Setup Guide to complete the M5Stack board management installation and select the development board
M5Atom(the same controller is used for M5AtomEcho).
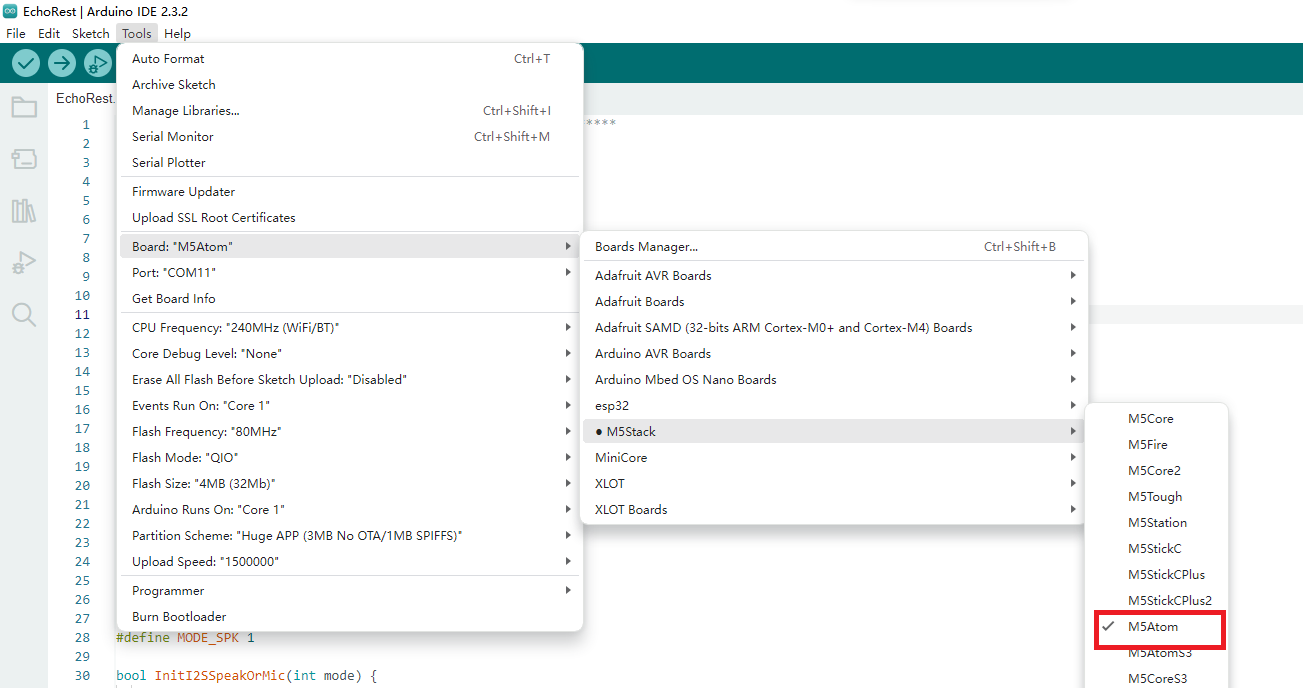
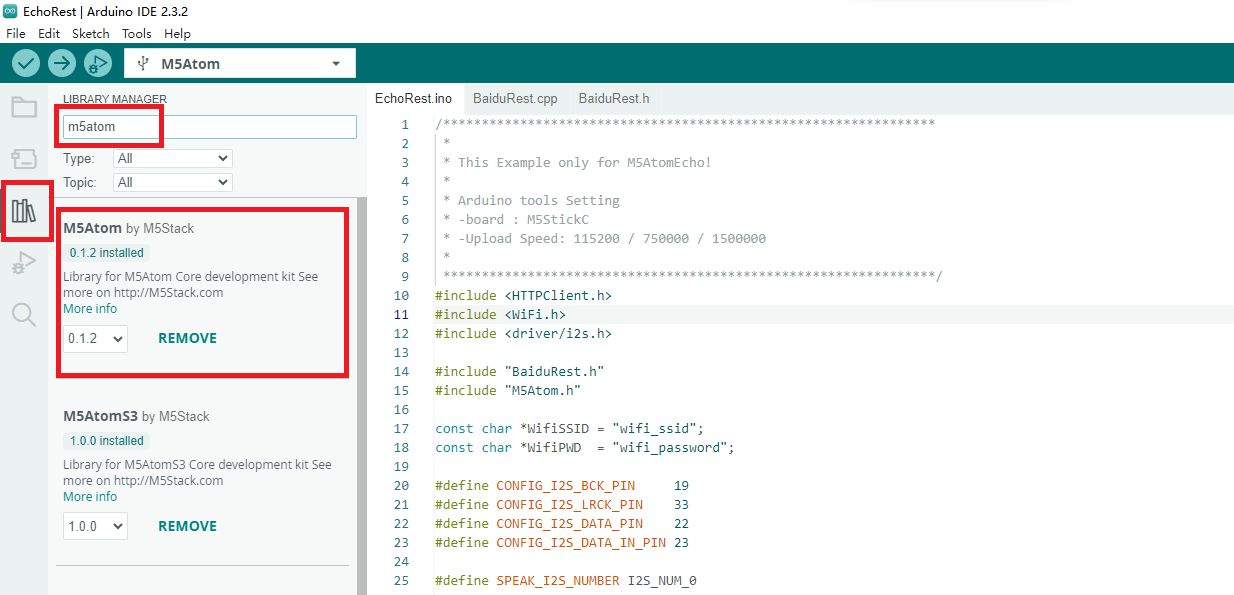
- Library Installation: Refer to the Library Management Installation Guide to complete the installation of the
M5Atomdriver library. and download all the dependent libraries according to the prompts.
2. USB Driver Installation
Baud Rate Limit
When performing the device program download operation, it is recommended to select the following serial port baud rate options. If other speeds are used, it may result in the program being unable to be downloaded properly.
1500000 bps / 750000 bps / 500000 bps / 250000 bps / 115200 bps
1500000 bps / 750000 bps / 500000 bps / 250000 bps / 115200 bps
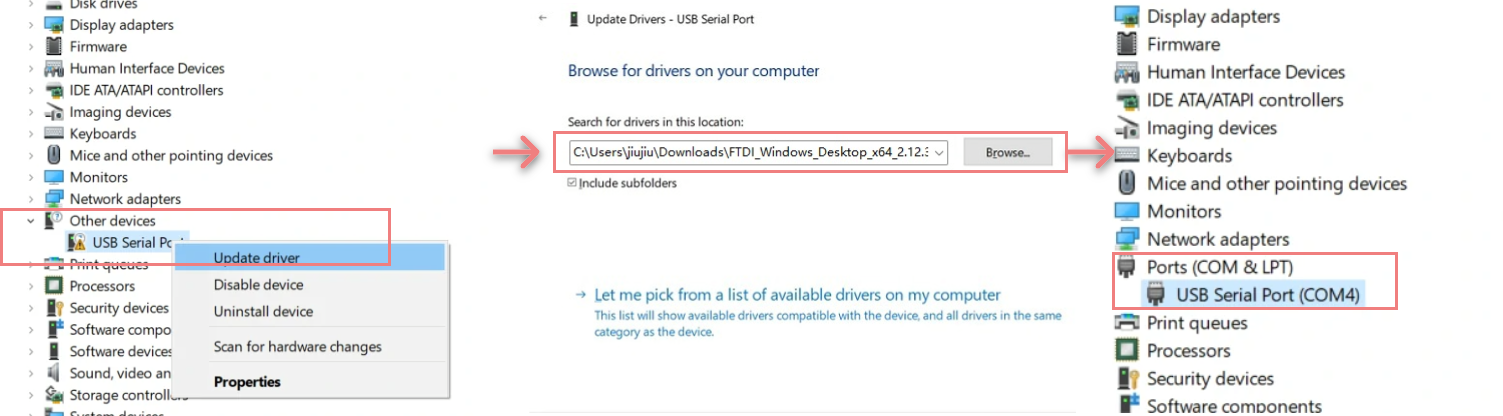
Select the driver file that matches your operating system from the list below, download it, and extract it. You can also visit the FTDI Chip official website for additional FTDI driver versions. Then connect the device to your PC, open Device Manager, and install the FTDI driver (the screenshot below uses Windows 10 as an example). (Note: On some systems, you may need to install the driver twice for it to take effect. The unrecognized device is usually named M5Stack or USB Serial.)
| Driver Name | Download Link |
|---|---|
| Windows_Desktop_x64 | Download |
| Windows_Desktop_x86_32 | Download |
| Windows_Desktop_ARM | Download |
| MacOS_Intel | Download |
| MacOS_ARM64 | Download |
MacOS Notes
For MacOS users, before installation, go to
System Preferences -> Security & Privacy -> General -> Allow apps downloaded from -> App Store and identified developers.3. Port Selection
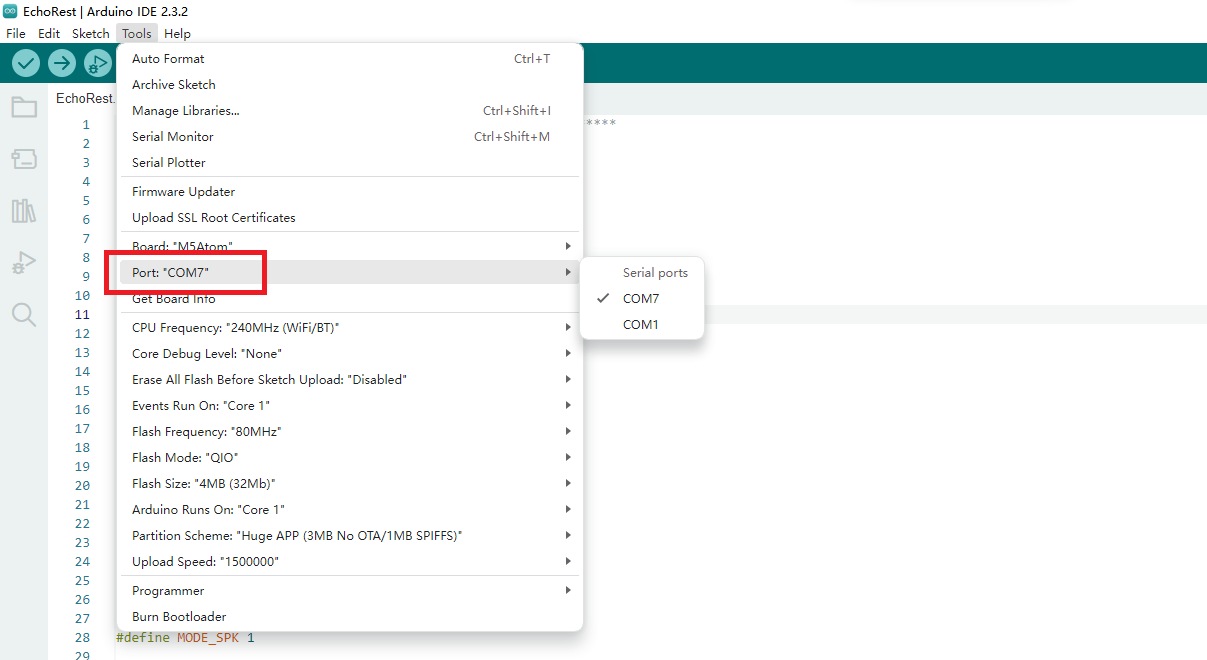
Connect the device to the computer via a USB cable. After completing the driver installation, select the corresponding device port in the Arduino IDE.
4. Program Compilation & Upload
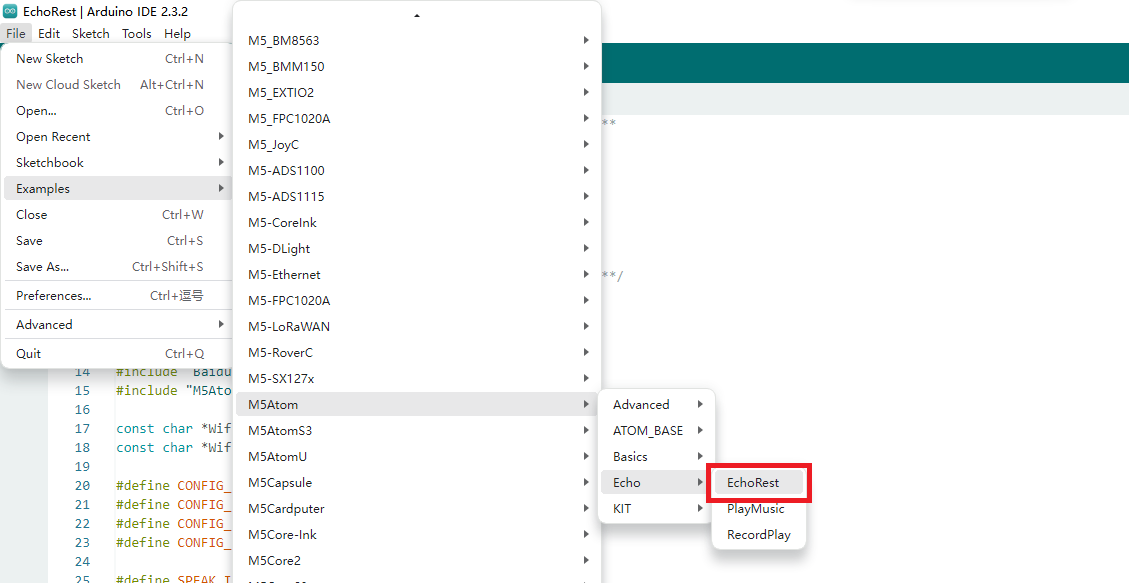
- Open the example program “EchoRest” from the driver library.
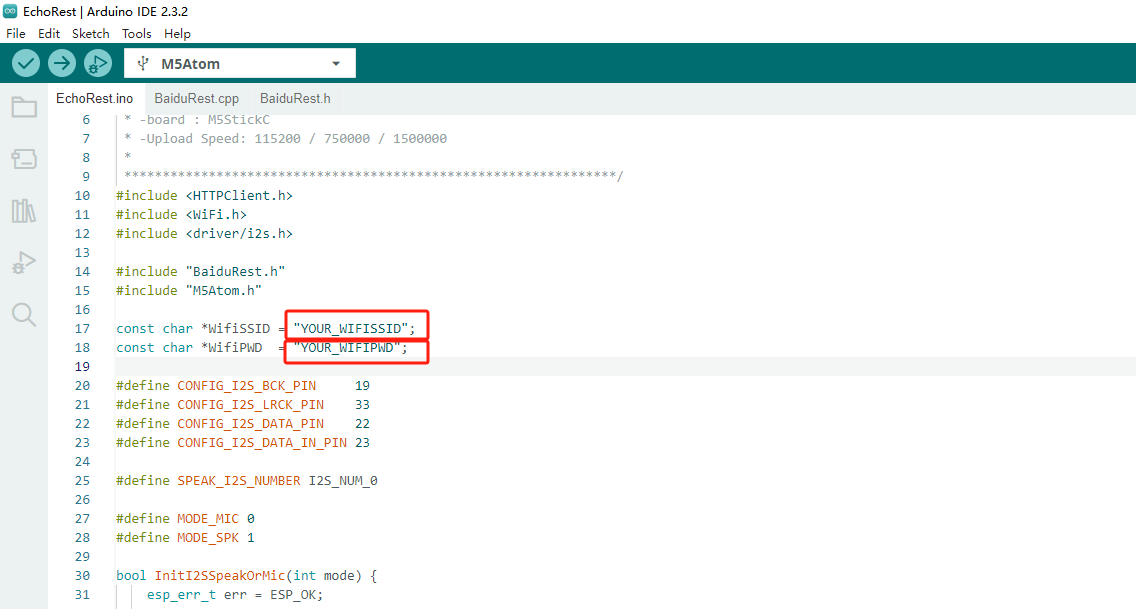
- Fill in the WiFi name and password in the code.
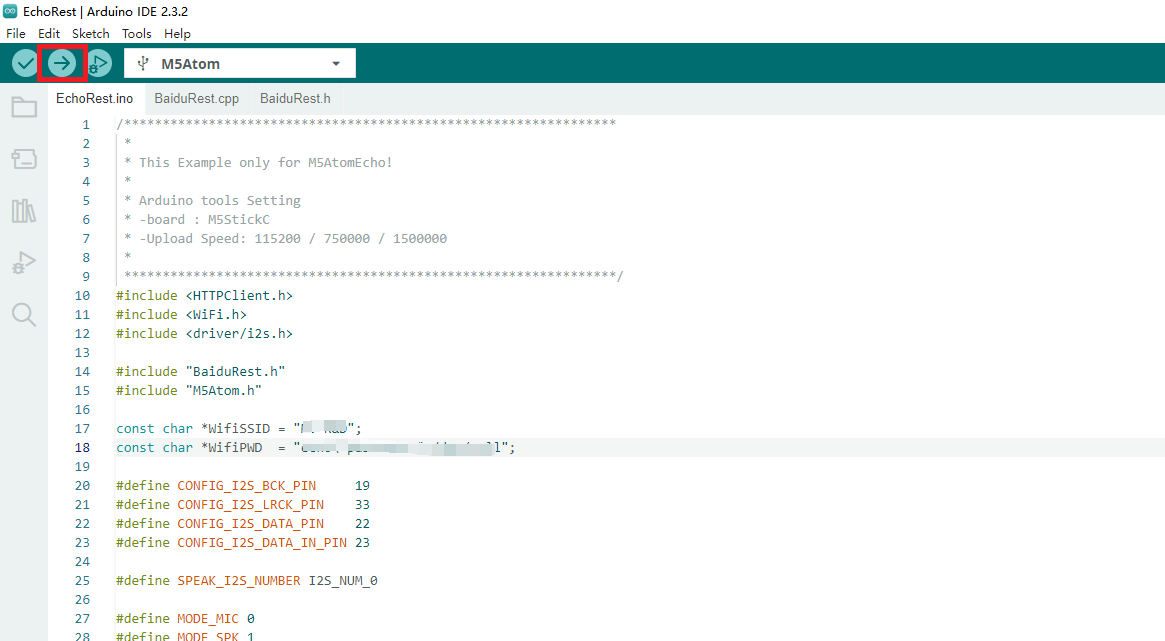
- Click the upload button to automatically compile and upload the program.
5. Program Effects
Indicator light description:
- After powering on, a red status light indicates the network is not connected.
- After powering on, a green status light indicates the network is connected.
- Pressing the button changes the status light to yellow.
- A red status light indicates a recognition result.
- A green status light indicates a successful recognition result.
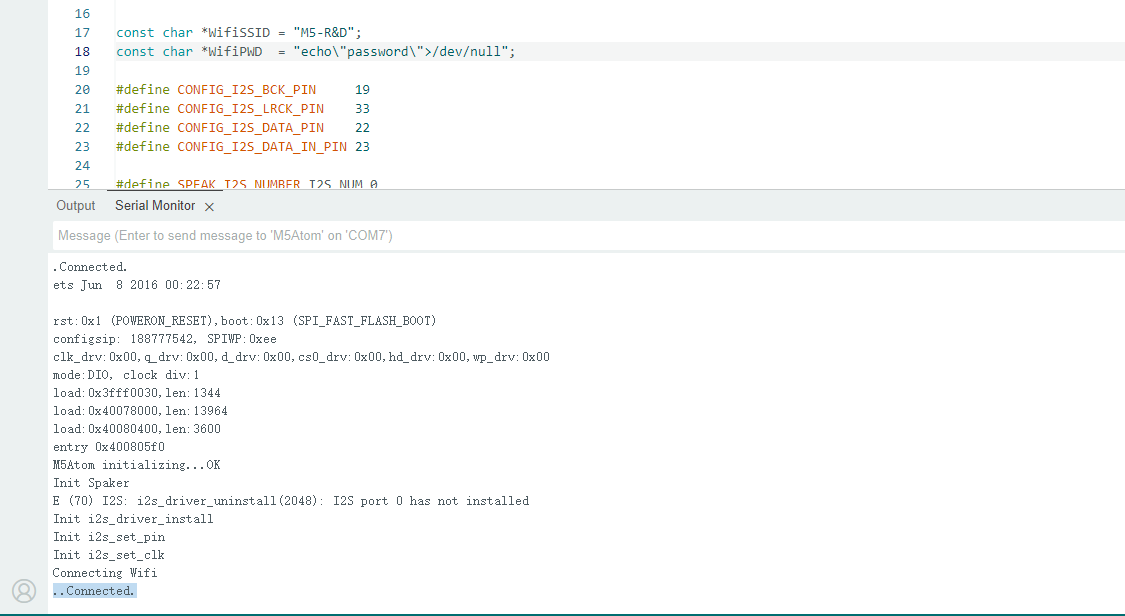
- Open the serial monitor and press the reset button to display that the WiFi is connected.
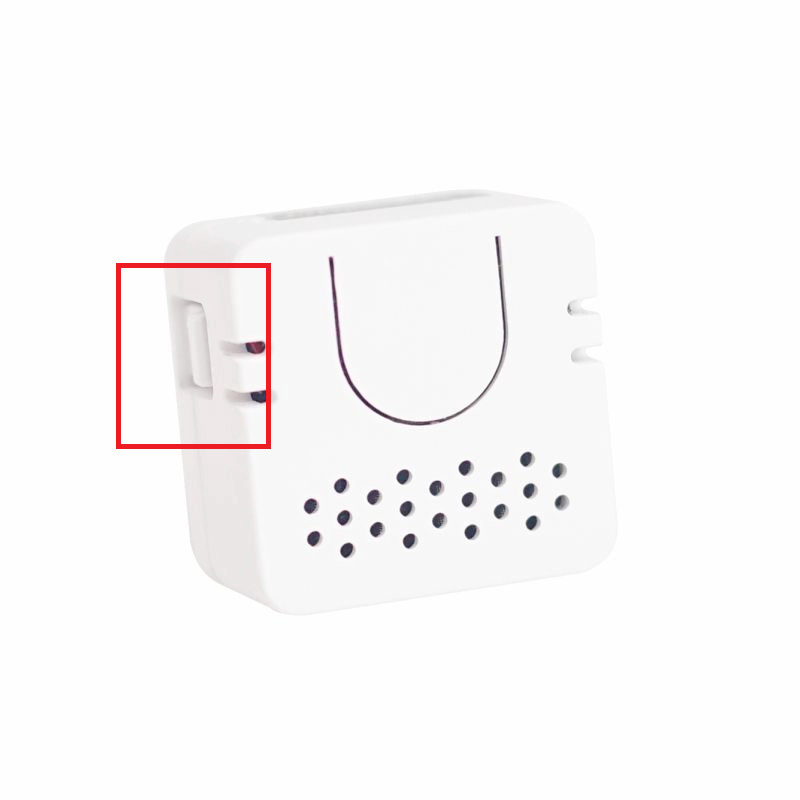
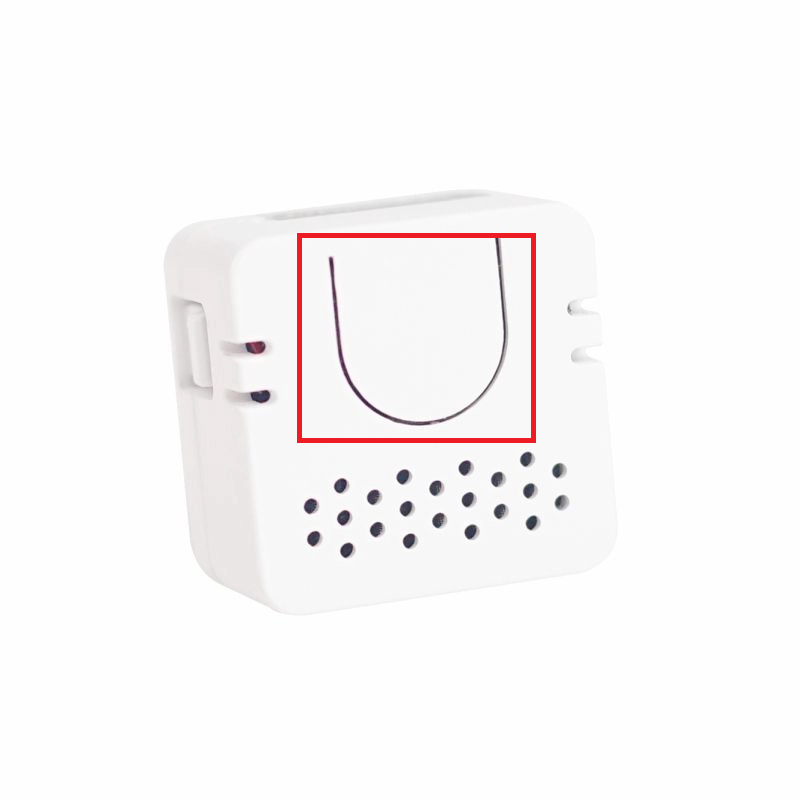
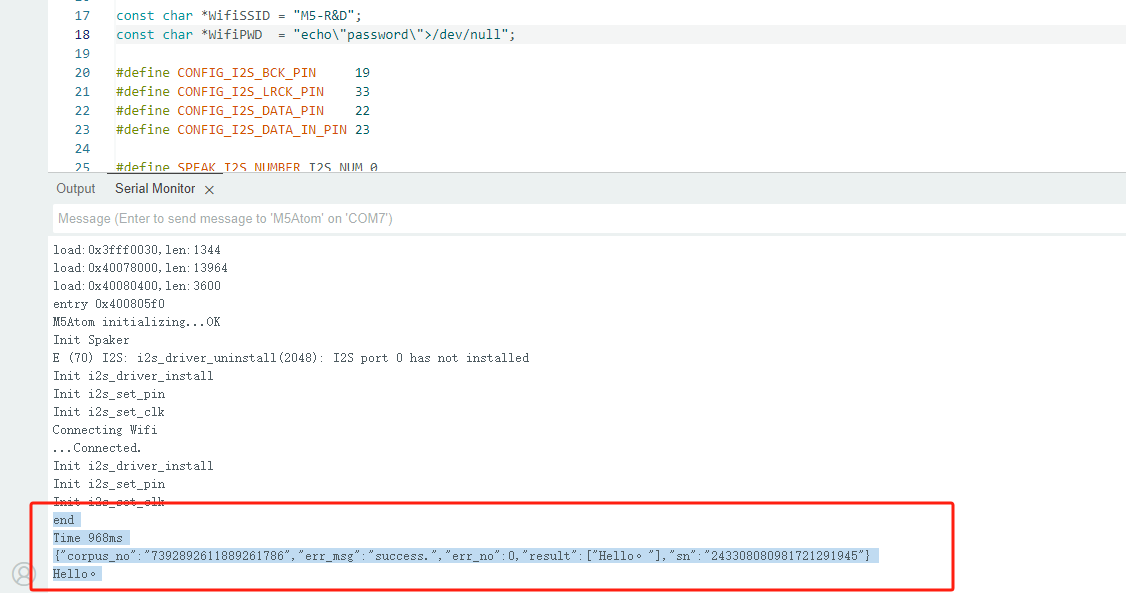
- Hold down the button and start speaking for voice recognition. When finished speaking, it will print “end”. Release the button and wait for the recognition result.
6. Related Resources
Github
Arduino API & Examples
Page Tools