M5Canvas Class
About M5Canvas
M5Canvas is a derived class of LGFX_Sprite, and its usage is basically the same as the Sprite of TFT_eSPI. We call it M5Canvas because it is appropriate to call it "Canvas" in the sense of drawing on memory, not "Sprite" as defined within M5GFX.(However, methods such as pushSprite remain for compatibility with TFT_eSprite.)
For more detailed API information not included below, refer to here.
Benefits of Canvas
It can be drawn in memory in advance and displayed on the panel at once for quick display.
Useful for displaying small characters, etc.
Transparent colors can be used to provide overlap.
When drawing on the display, scaling, rotation, and anti-aliasing can be performed.
Constructor
Syntax:
M5Canvas()
- No arguments
- Note that if the argument is not specified, it must be specified at push or drawing time, or problems will occur.
M5Canvas(M5GFX&)
- Specify M5GFX.
- If M5Canvas is specified as an argument, it will draw to the M5GFX by default.
It is recommended to use the M5Canvas(M5GFX&) constructor to ensure that the correct drawing target is set.
LGFX_Sprite Class
- createSprite
- fillSprite
- pushSprite
- deleteSprite
- createFromBmp
- createFromBmpFile
- setBitmapColor
- setColorDepth
- createPalette
- getPalette
- setPaletteGrayscale
- setPaletteColor
- getPaletteIndex
- deletePalette
- readPixelValue
- setPsram
- setBuffer
- pushRotated
- pushRotatedWithAA
- pushRotateZoom
- pushRotateZoomWithAA
- pushAffine
- pushAffineWithAA
can only achieve the purpose of setting colors by using the color index number of the palette. The obtained color information is the color index number rather than the color value.createSprite
Syntax:
void* createSprite(int32_t w, int32_t h)Description:
- create sprite
Parameters:
- w: sprite width
- h: sprite height
Return:
- null
fillSprite
Syntax:
void fillSprite (const T& color)Description:
- Fill the sprite
Parameters:
- color: fill color
Return:
- null
pushSprite
Syntax1:
void pushSprite(int32_t x, int32_t y, const T& transp)Syntax2:
void pushSprite(LovyanGFX* dst, int32_t x, int32_t y, const T& transp)Syntax3:
void pushSprite(int32_t x, int32_t y)Syntax4:
void pushSprite(LovyanGFX* dst, int32_t x, int32_t y)Description:
- Push the canvas based on the specified coordinates, with the reference point located at the top left corner of the canvas
Parameters:
- dst: target LovyanGFX object
- x: canvas reference point x coordinate
- y: canvas reference point y coordinate
- transp: transparent color
Return:
- null
deleteSprite
Syntax:
void deleteSprite(void)Description:
- delete sprite
Parameters:
- null
Return:
- null
Example
- Simple Usage
#include <M5GFX.h>
#include <M5Unified.h>

static int32_t Disw;
static int32_t Dish;

void setup() {
    M5.begin();
    Disw = M5.Lcd.width();
    Dish = M5.Lcd.height();

    M5.Lcd.fillScreen(TFT_WHITE);

    M5Canvas canvas(&M5.Lcd);
    canvas.createSprite(100, 100);//set sprite size
    canvas.fillSprite(TFT_PINK);//fill sprite with color XXX
    delay(1000);
    canvas.fillSprite(TFT_BLACK);//fill sprite with color XXX
    canvas.println("M5Canvas");
    canvas.pushSprite(&M5.Lcd, Disw / 2 - 50, Dish / 2 - 50, TFT_PINK);//"&M5.Lcd" is not necessary here
    canvas.deleteSprite();
    //In this example, PINK will not be displayed
}

void loop() {
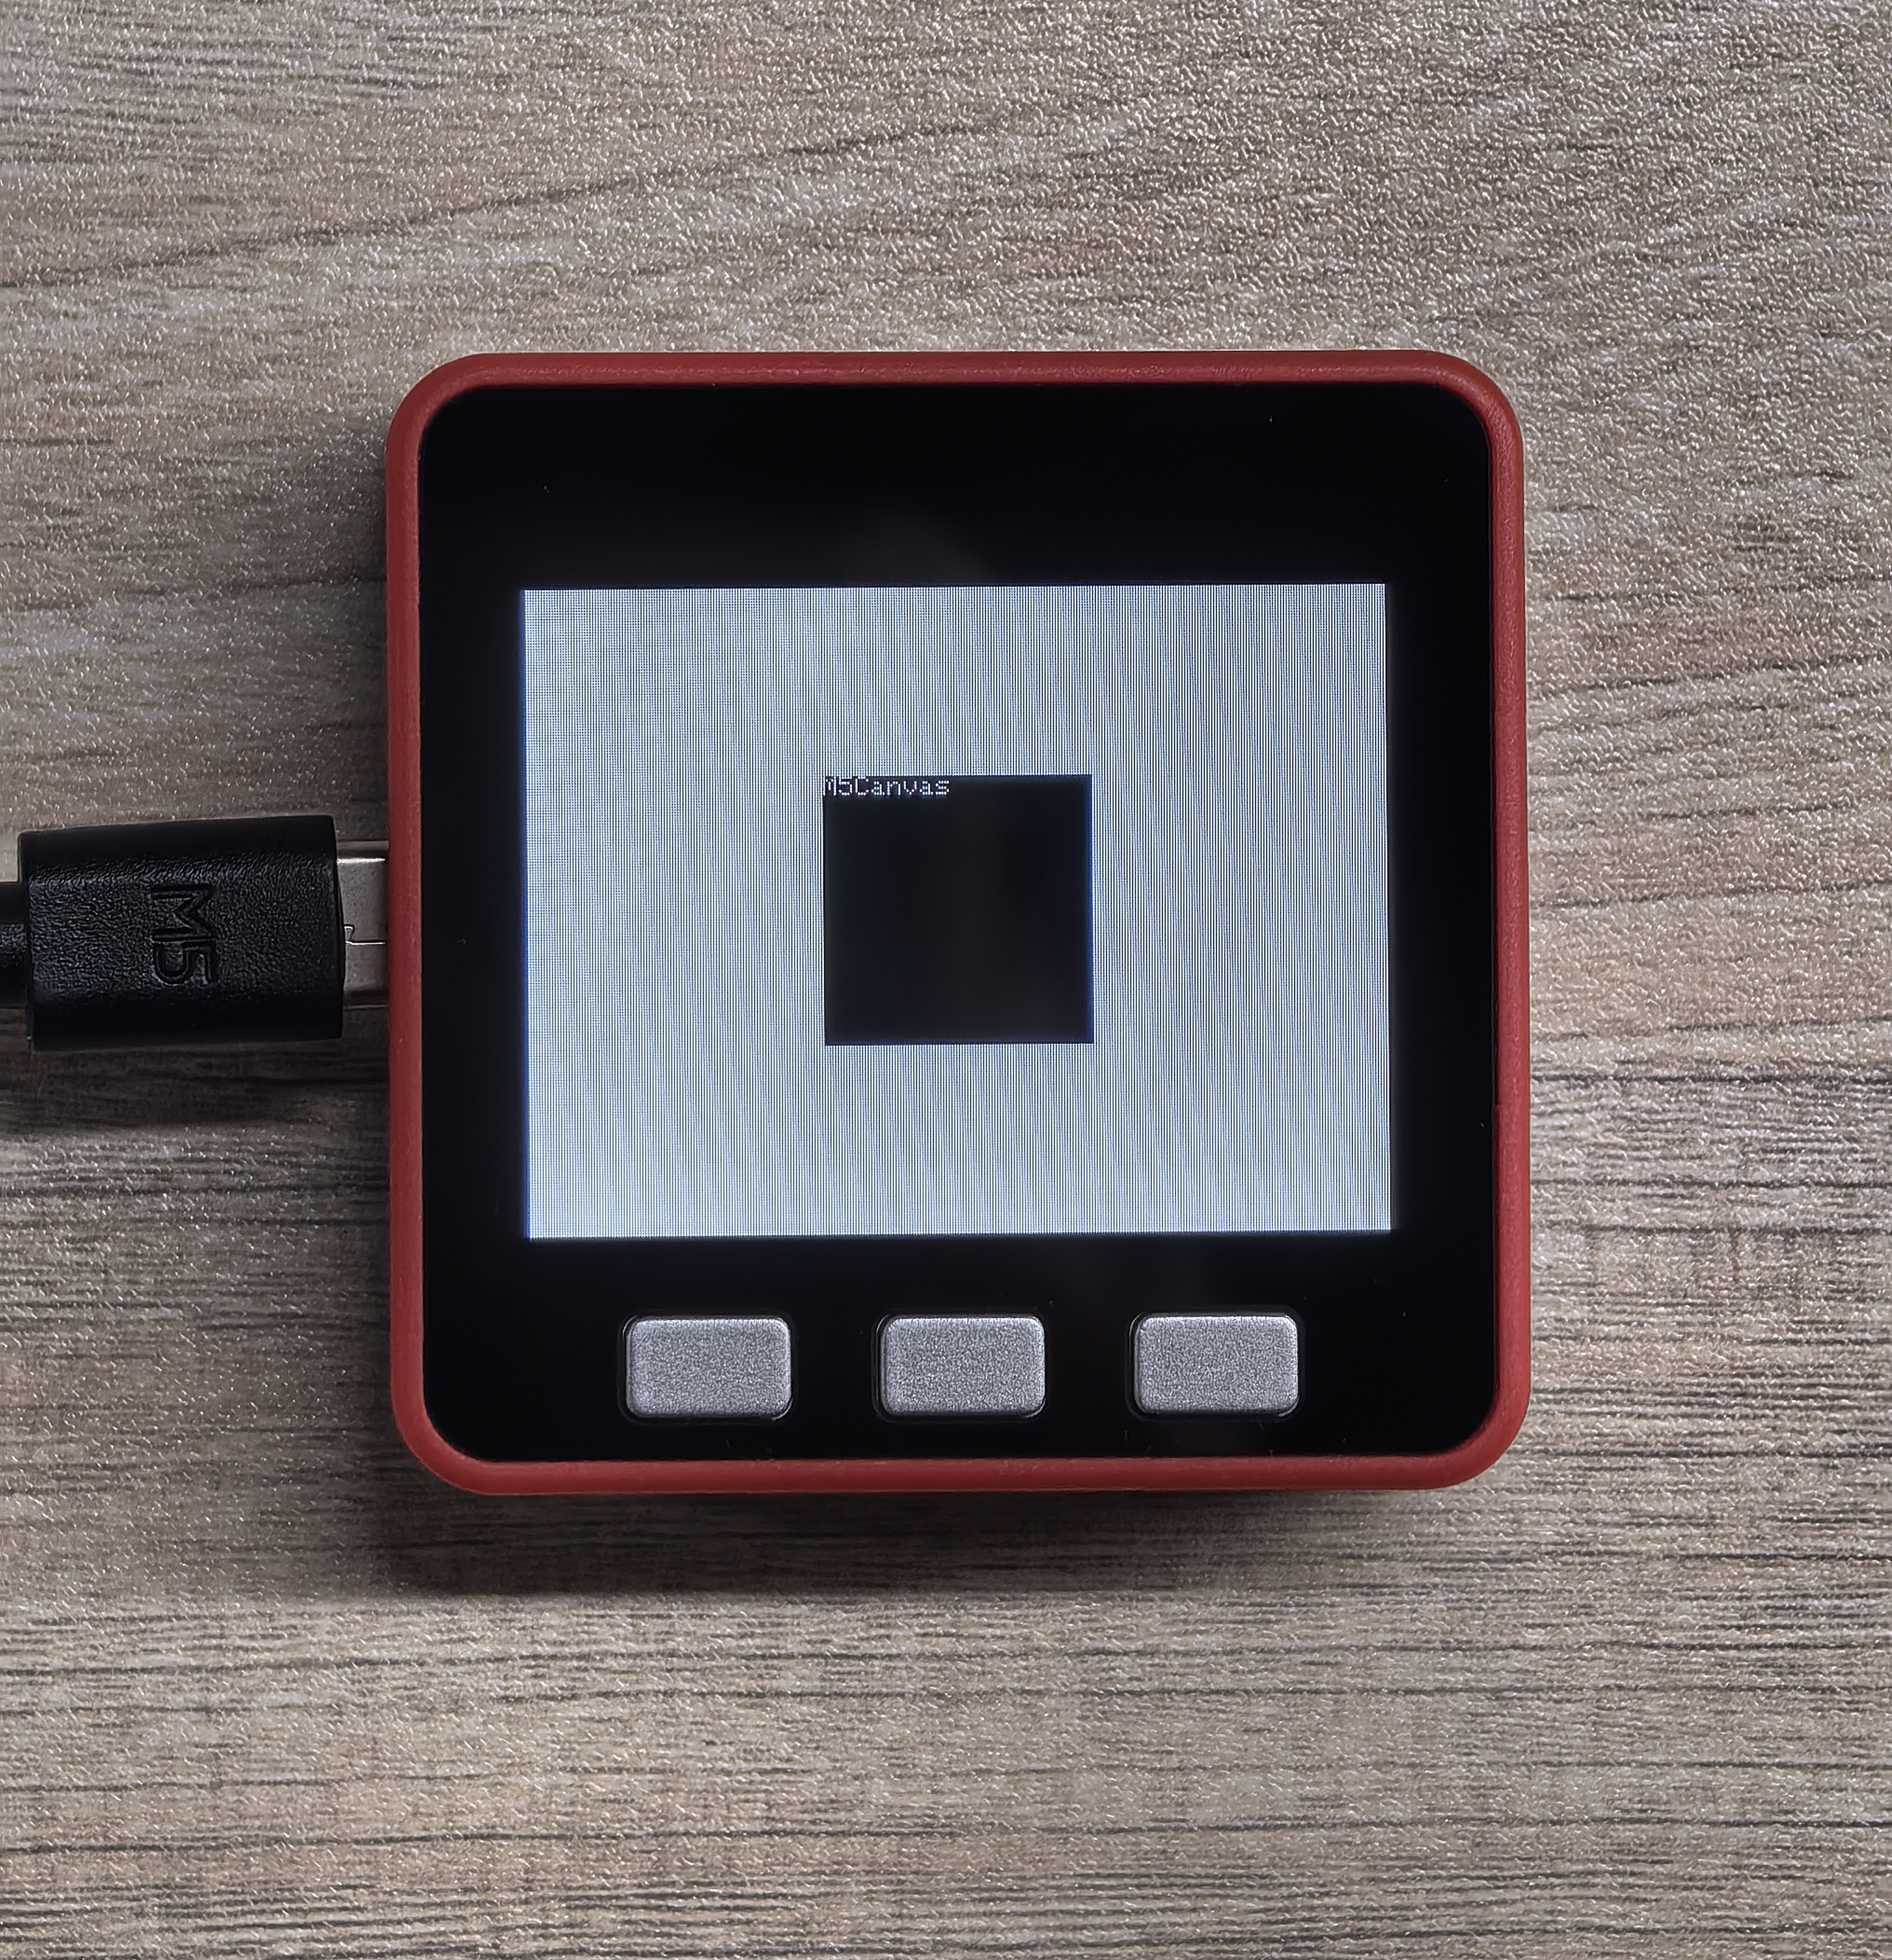
} The example program runs as follows:

- Merge Multiple Canvases for Drawing
#include <M5GFX.h>
#include <M5Unified.h>

static int32_t Disw;
static int32_t Dish;

void setup() {
    M5.begin();
    Disw = M5.Lcd.width();
    Dish = M5.Lcd.height();

    M5.Lcd.fillScreen(TFT_WHITE);

    M5Canvas canvas(&M5.Lcd);
    M5Canvas can1(&M5.Lcd);
    M5Canvas can2(&M5.Lcd);

    canvas.createSprite(100, 100);//set sprite size
    canvas.fillSprite(TFT_PINK);//fill sprite with color XXX
    canvas.println("M5Canvas");

    can1.createSprite(30, 30);
    can1.fillSprite(TFT_BLUE);
    can1.println("Can1");
    can1.fillCircle(15, 15, 5, TFT_YELLOW);

    can2.createSprite(30, 30);
    can2.fillSprite(TFT_GREEN);
    can2.println("Can2");
    can2.fillTriangle(15, 10, 0, 30, 30, 30, TFT_BLUE);

    canvas.pushSprite(Disw / 2 - 50, Dish / 2 - 50);
    can1.pushSprite(Disw / 2 - 30, Dish / 2 - 30);
    can2.pushSprite(Disw / 2, Dish / 2);

    canvas.deleteSprite();
    can1.deleteSprite();
    can2.deleteSprite();
}

void loop() {
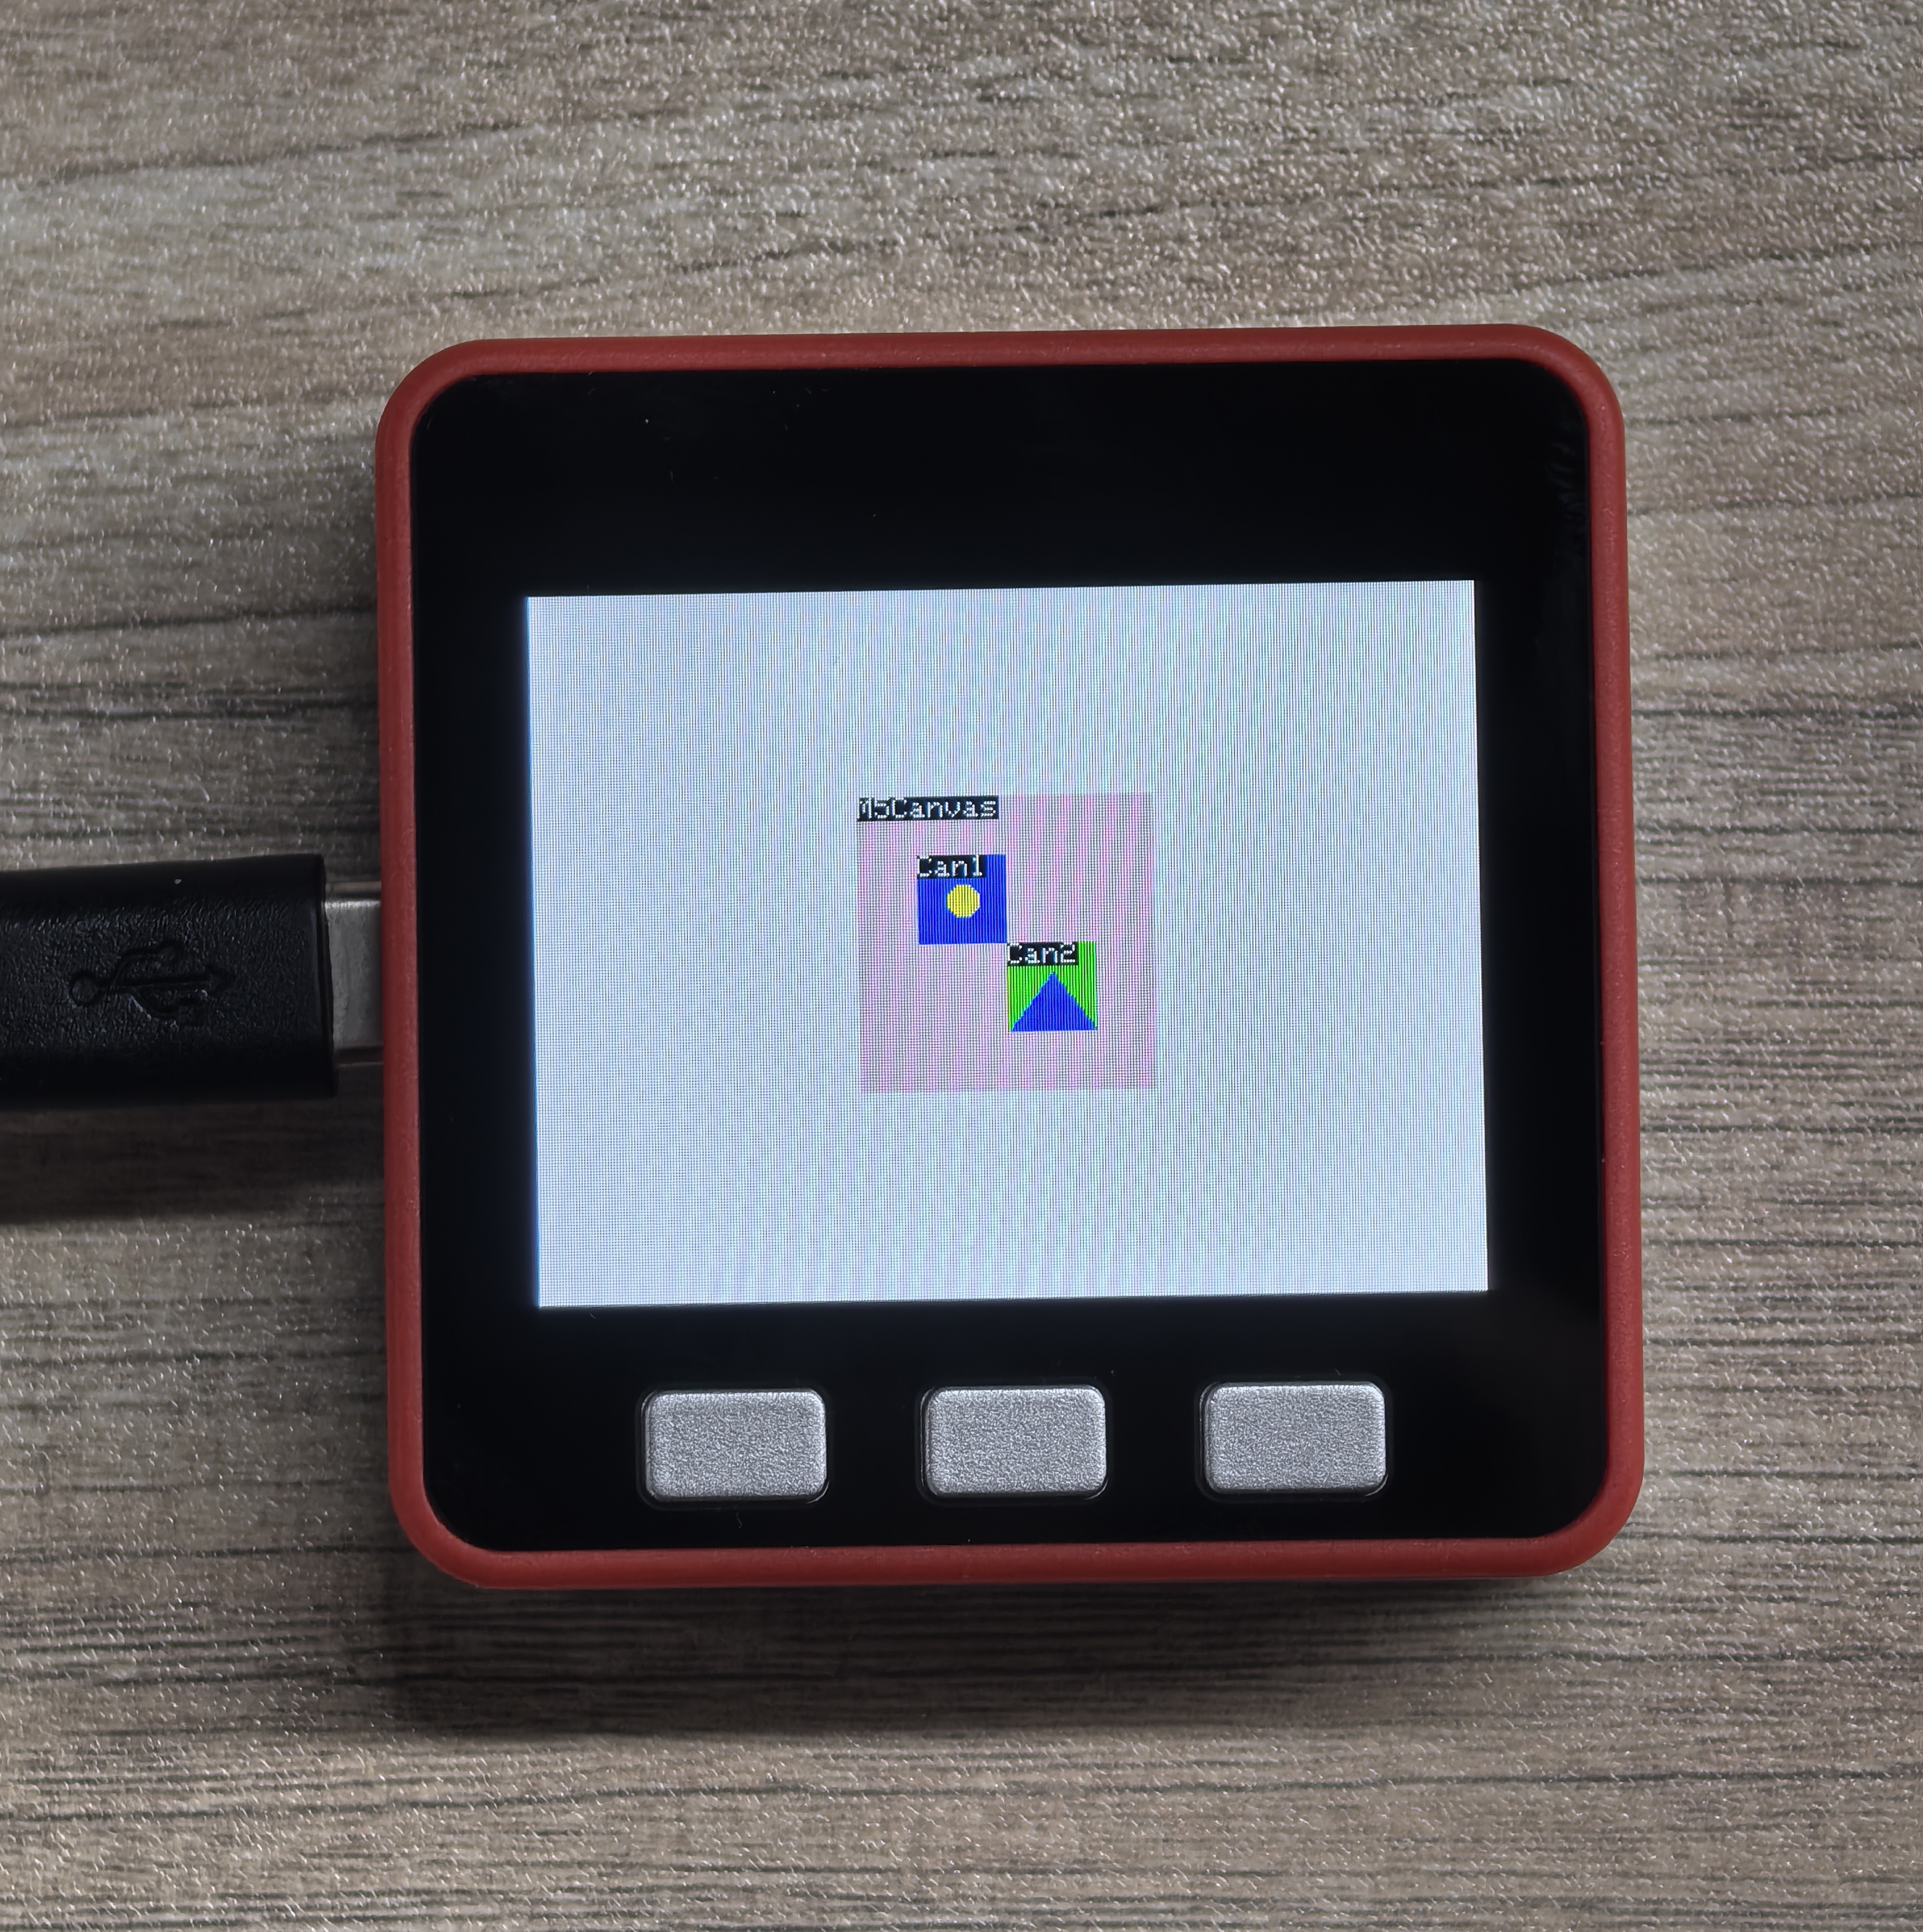
} The example program runs as follows:

createFromBmp
Syntax1:
bool createFromBmp(const uint8_t *bmp_data, uint32_t bmp_len = ~0u)Description:
- Create a canvas from BMP data
Parameters:
- bmp_data: BMP data pointer
- bmp_len: BMP data length (default is ~0u)
Syntax2:
bool createFromBmp(T &fs, const char *path)Description:
- Create a canvas from a BMP file
Parameters:
- fs: file system object
- SPIFFS
- SD
etc - path: BMP file path
Return:
- bool
- true: creation successful
- false: creation failed
createFromBmpFile
Syntax1:
bool createFromBmpFile(const char *path)Syntax2:
bool createFromBmpFile(T &fs, const char *path)Description:
- Create a canvas from a BMP file
Parameters:
- path: BMP file path
- fs: file system object
- SPIFFS
- SD
etc
Return:
- bool
- true: creation successful
- false: creation failed
This example program requires a microSD card formatted with FAT32, with two PNG images placed in the root directory and named LGFX_Canavs_Test01.bmp and LGFX_Canavs_Test02.bmp. The example program targets the M5Fire device, and the images have a resolution of 320*240. You can directly download Example Image 1 and Example Image 2. If the image resolution is not 320*240, the program will decide how to display it based on presets, which may lead to display anomalies.
SD.h must be placed before <M5Unified.h> in the code below, otherwise compilation will fail.Example
#include <Arduino.h>
#include <SD.h>//This header file must before M5Unified.h
#include <SPI.h>
#include <M5GFX.h>
#include <M5Unified.h>

#define SD_SPI_CS_PIN   4
#define SD_SPI_SCK_PIN  18
#define SD_SPI_MOSI_PIN 23
#define SD_SPI_MISO_PIN 19

static int32_t Disw;
static int32_t Dish;

void setup() {
    M5.begin();
    Disw = M5.Lcd.width();
    Dish = M5.Lcd.height();

    M5.Lcd.fillScreen(TFT_BLACK);

    M5.Display.setTextFont(&fonts::Orbitron_Light_24);
    M5.Display.setTextSize(1);
    // SD Card Initialization
    SPI.begin(SD_SPI_SCK_PIN, SD_SPI_MISO_PIN, SD_SPI_MOSI_PIN, SD_SPI_CS_PIN);
    if (!SD.begin(SD_SPI_CS_PIN, SPI, 25000000)) {
        // Print a message if SD card initialization failed or if the SD card does not exist.
        M5.Display.print("\n SD card not detected\n");
        while (1); ;
    } else {
        M5.Display.print("\n SD card detected\n");
    }
    delay(1000);

    M5.Display.print("\n SD card read test...\n");
    if (SD.open("/LGFX_Canavs_Test01.bmp", FILE_READ, false)) {
        M5.Display.print(" BMP file 01 detected\n");
    } else {
        M5.Display.print(" BMP file 01 not detected\n");
    }
    if (SD.open("/LGFX_Canavs_Test02.bmp", FILE_READ, false)) {
        M5.Display.print(" BMP file 01 detected\n");
    } else {
        M5.Display.print(" BMP file 01 not detected\n");
    }
    delay(2000);
}

void loop() {
    M5Canvas canvas(&M5.Lcd);
    if (canvas.createFromBmp(SD, "/LGFX_Canavs_Test01.bmp")) {
        canvas.pushSprite(0, 0);
    } else {
        M5.Display.print("\ncreateFromBmp failed\n");
    }
    delay(1000);
    if (canvas.createFromBmpFile(SD, "/LGFX_Canavs_Test02.bmp")) {
        canvas.pushSprite(0, 0);
    } else {
        M5.Display.print("\ncreateFromBmpFile failed\n");
    }
    delay(1000);
    canvas.deleteSprite();
}The function of the example is to alternate the display of two images. The first image is LGFX_Canavs_Test01.bmp, and the second image is LGFX_Canavs_Test02.bmp.
setBitmapColor
Syntax:
void setBitmapColor(uint16_t fgcolor, uint16_t bgcolor)Description:
- Set the bitmap color, only applicable to 1-bit.
Parameters:
- fgcolor: foreground color
- bgcolor: background color
Return:
- null
setColorDepth
Syntax1:
void setColorDepth(uint8_t bpp)Description:
- Set the color depth
Parameters:
- bpp: bits per pixel
- 1: 1 bit
- 2: 2 bits
- 4: 4 bits
- 8: 8 bits
- 16: 16 bits
- 24: 24 bits
- 32: 32 bits
Syntax2:
void* setColorDepth(color_depth_t depth)Description:
- Set the color depth
Parameters:
- depth: color depth
Return:
- null
bpp or depth can only be 1, 2, 4, or 8 bits.2. Before calling
createPalette, setColorDepth must be called first to set the color depth; otherwise, the creation of the palette will fail.3. If the
setColorDepth is used to set the color depth to 1 bit, then only createPalette() can be used to create the palette, and createPalette(const uint16_t* colors, uint32_t count) or createPalette(const uint32_t* colors, uint32_t count) cannot be used.createPalette
Syntax1:
bool createPalette(void)Syntax2:
bool createPalette(const uint16_t* colors, uint32_t count)Syntax3:
bool createPalette(const uint32_t* colors, uint32_t count)Description:
- Create a color palette
Parameters:
- colors: color array pointer
- uint16_t: RGB565 16-bit color
- uint32_t: RGB888/ARGB8888 24-bit color/32-bit color
- count: number of colors
Return:
- bool
- true: creation successful
- false: creation failed
getPalette
Function Prototype:
RGBColor* getPalette(void)Description:
- Get the current palette information
Parameters:
- null
Return:
- RGBColor*: pointer to the bgr888_t struct, pointing to the first color in the current palette
setPaletteGrayscale
Syntax:
void setPaletteGrayscale(void)Description:
- Set the palette to grayscale
Parameters:
- null
Return:
- null
setPaletteColor
Syntax1:
void setPaletteColor(uint32_t index, uint32_t color)Description:
- Set the palette color
Parameters:
- index: color palette index
- color: color
Syntax2:
void setPaletteColor(size_t index, const bgr888_t& rgb)Description:
- Set the palette color
Parameters:
- index: color palette index
- rgb: RGB color
Syntax3:
void setPaletteColor(size_t index, uint8_t r, uint8_t g, uint8_t b)Description:
- Set the palette color
Parameters:
- index: color palette index
- r: red component
- g: green component
- b: blue component
Return:
- null
getPaletteIndex
Syntax:
int32_t getPaletteIndex(const T& color)Description:
- Obtain the palette index
Parameters:
- color: palette color
Return:
- res: color index
- -1: function execution failed
deletePalette
Syntax:
void deletePalette(void)Description:
- Delete the color palette
Parameters:
- null
Return:
- null
Example
#include <M5Unified.h>
#include <M5GFX.h>

#define ROYAL_BLUE 0X435C
#define LAVENDER_PURPLE 0xE73F
#define SADDLE_BROWN 0x8A22
#define INDIA_RED 0xCAEB
#define FOREST_GREEN 0x2444
#define SALMON_PINK 0xFC0E

static int32_t Disw;
static int32_t Dish;
static uint16_t pale[] = {WHITE, ROYAL_BLUE, LAVENDER_PURPLE, SADDLE_BROWN, BLUE, INDIA_RED,FOREST_GREEN, SALMON_PINK};
// static uint16_t pale[256];

M5Canvas canvas(&M5.Lcd);

void setup() {
    M5.begin();

    Disw = M5.Lcd.width();
    Dish = M5.Lcd.height();

    canvas.createSprite(Disw, Dish);

    canvas.setColorDepth(lgfx::v1::palette_8bit);//This must be cited before createPalette
    canvas.setTextDatum(top_center);
    canvas.drawString("M5Canvas Palette", Disw / 2, 0, &fonts::FreeMonoBold24pt7b);
    canvas.drawString("Palette Color 0", Disw / 2, 100, &fonts::FreeMonoBold24pt7b);
    canvas.drawString("is background color", Disw / 2, 150, &fonts::FreeMonoBold24pt7b);

    canvas.createPalette(pale, 256);

    // If you choose "static uint16_t pale[256];", following code must be used

    // canvas.setPaletteColor(0, WHITE);
    // canvas.setPaletteColor(1, ROYAL_BLUE);
    // canvas.setPaletteColor(2, LAVENDER_PURPLE);
    // canvas.setPaletteColor(3, SADDLE_BROWN);
    // canvas.setPaletteColor(4, INDIA_RED);
    // canvas.setPaletteColor(5, FOREST_GREEN);
    // canvas.setPaletteColor(6, SALMON_PINK);

    canvas.setTextColor(canvas.getPaletteIndex(ROYAL_BLUE));
    canvas.drawString("Palette Color 1", Disw / 2, 300, &fonts::FreeMonoBold24pt7b);
    canvas.setTextColor(canvas.getPaletteIndex(LAVENDER_PURPLE));
    canvas.drawString("Palette Color 2", Disw / 2, 350, &fonts::FreeMonoBold24pt7b);
    canvas.setTextColor(canvas.getPaletteIndex(SADDLE_BROWN));
    canvas.drawString("Palette Color 3", Disw / 2, 400, &fonts::FreeMonoBold24pt7b);
    canvas.setTextColor(canvas.getPaletteIndex(INDIA_RED));
    canvas.drawString("Palette Color 4", Disw / 2, 450, &fonts::FreeMonoBold24pt7b);
    canvas.setTextColor(canvas.getPaletteIndex(FOREST_GREEN));
    canvas.drawString("Palette Color 5", Disw / 2, 500, &fonts::FreeMonoBold24pt7b);
    canvas.setTextColor(canvas.getPaletteIndex(SALMON_PINK));
    canvas.drawString("Palette Color 6", Disw / 2, 550, &fonts::FreeMonoBold24pt7b);

    canvas.pushSprite(0,0);
    canvas.deletePalette();//must behind pushSprite()
    canvas.deleteSprite();
}

void loop() {
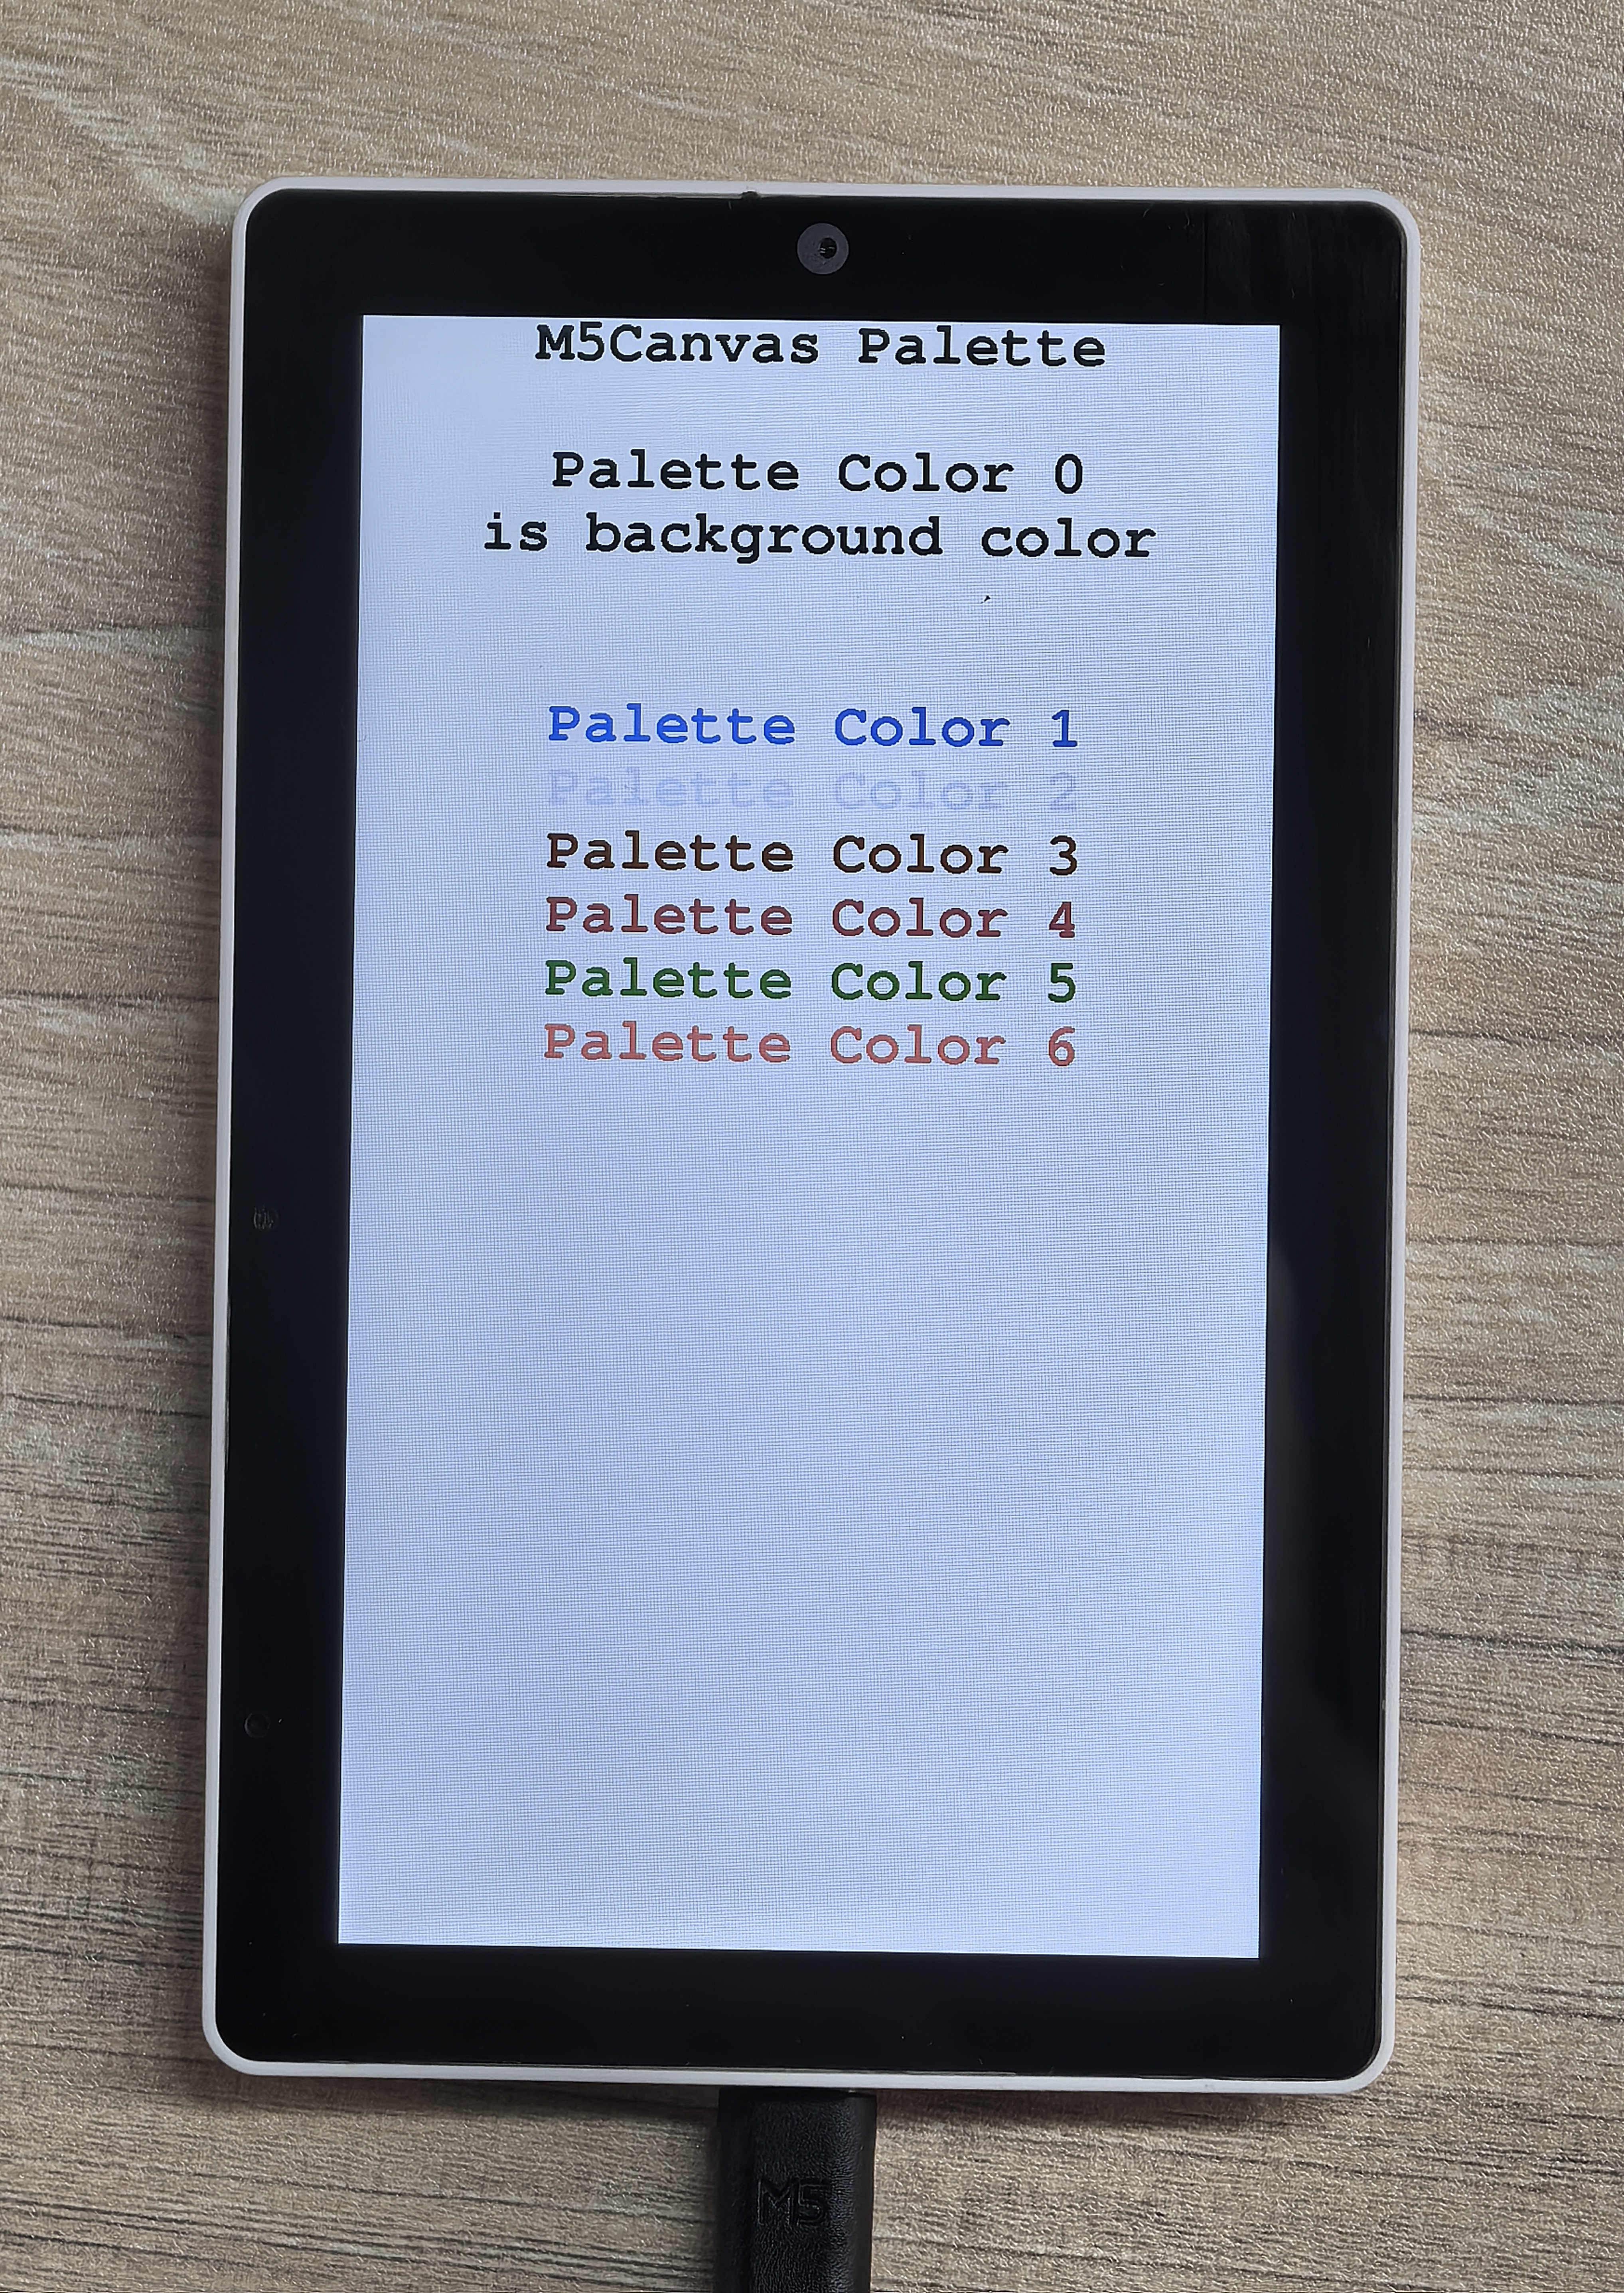
} The example program runs as follows:

readPixelValue
Syntax:
uint32_t readPixelValue(int32_t x, int32_t y)Description:
- Read the pixel value at the specified coordinates
Parameters:
- x: pixel x coordinate
- y: pixel y coordinate
Return:
- uint32_t: pixel value
- 0-1 (1 bpp)
- 0-255 (8 bpp)
- 0-0xFFFF (RGB565-16 bpp)
- 0-0xFFFFFF (RGB888-24 bpp)
setPsram
Syntax:
void setPsram( bool enabled )Description:
- Set whether to use PSRAM.
Parameters:
- enabled: PSRAM usage flag
- true: use PSRAM
- false: do not use PSRAM
Return:
- null
setBuffer
Syntax:
void setBuffer(void* buffer, int32_t w, int32_t h, uint8_t bpp = 0)Description:
- Set the buffer
Parameters:
- buffer: buffer pointer
- w: width
- h: height
- bpp: bits per pixel (default is 0)
- 0: use default
- 1: 1 bit
- 2: 2 bits
- 4: 4 bits
- 8: 8 bits
- 16: 16 bits
Return:
- null
pushRotated
Syntax1:
void pushRotated(float angle, const T& transp)Syntax2:
void pushRotated(LovyanGFX* dst, float angle, const T& transp)Syntax3:
void pushRotated(float angle)Syntax4:
void pushRotated(LovyanGFX* dst, float angle)Description:
- Rotate the canvas by the specified angle
Parameters:
- dst: target LovyanGFX object
- angle: rotation angle
- transp: transparent color
Return:
- null
pushRotatedWithAA
Syntax1:
void pushRotatedWithAA(float angle, const T& transp)Syntax2:
void pushRotatedWithAA(LovyanGFX* dst, float angle, const T& transp)Syntax3:
void pushRotatedWithAA(float angle)Syntax4:
void pushRotatedWithAA(LovyanGFX* dst, float angle)Description:
- Rotate the canvas by the specified angle and use anti-aliasing
Parameters:
- dst: target LovyanGFX object
- angle: rotation angle
- transp: transparent color
Return:
- null
pushRotateZoom
Syntax1:
void pushRotateZoom(float angle, float zoom_x, float zoom_y, const T& transp)Syntax2:
void pushRotateZoom(LovyanGFX* dst, float angle, float zoom_x, float zoom_y, const T& transp)Syntax3:
void pushRotateZoom(float dst_x, float dst_y, float angle, float zoom_x, float zoom_y, const T& transp)Syntax4:
void pushRotateZoom(LovyanGFX* dst, float dst_x, float dst_y, float angle, float zoom_x, float zoom_y, const T& transp)Syntax5:
void pushRotateZoom(float angle, float zoom_x, float zoom_y)Syntax6:
void pushRotateZoom(LovyanGFX* dst, float angle, float zoom_x, float zoom_y)Syntax7:
void pushRotateZoom(float dst_x, float dst_y, float angle, float zoom_x, float zoom_y)Syntax8:
void pushRotateZoom(LovyanGFX* dst, float dst_x, float dst_y, float angle, float zoom_x, float zoom_y)Description:
- Rotate the canvas by the specified angle and zoom factors
Parameters:
- dst: target LovyanGFX object
- dst_x: target x coordinate
- dst_y: target y coordinate
- angle: rotation angle
- zoom_x: x axis zoom factor
- zoom_y: y axis zoom factor
- transp: transparent color
Return:
- null
pushRotateZoomWithAA
Syntax1:
void pushRotateZoomWithAA(float angle, float zoom_x, float zoom_y, const T& transp)Syntax2:
void pushRotateZoomWithAA(LovyanGFX* dst , float angle, float zoom_x, float zoom_y, const T& transp)Syntax3:
void pushRotateZoomWithAA(float dst_x, float dst_y, float angle, float zoom_x, float zoom_y, const T& transp)Syntax4:
void pushRotateZoomWithAA(LovyanGFX* dst, float dst_x, float dst_y, float angle, float zoom_x, float zoom_y, const T& transp)Syntax5:
void pushRotateZoomWithAA(float angle, float zoom_x, float zoom_y)Syntax6:
void pushRotateZoomWithAA(LovyanGFX* dst, float angle, float zoom_x, float zoom_y)Syntax7:
void pushRotateZoomWithAA(float dst_x, float dst_y, float angle, float zoom_x, float zoom_y)Syntax8:
void pushRotateZoomWithAA(LovyanGFX* dst, float dst_x, float dst_y, float angle, float zoom_x, float zoom_y)Description:
- Rotate the canvas by the specified angle and zoom factors, and use anti-aliasing
Parameters:
- dst: target LovyanGFX object
- dst_x: target x coordinate
- dst_y: target y coordinate
- angle: rotation angle
- zoom_x: x axis zoom factor
- zoom_y: y axis zoom factor
- transp: transparent color
Return:
- null
pushAffine
Syntax1:
void pushAffine(const float matrix[6], const T& transp)Syntax2:
void pushAffine(LovyanGFX* dst, const float matrix[6], const T& transp)Syntax3:
void pushAffine(const float matrix[6])Syntax4:
void pushAffine(LovyanGFX* dst, const float matrix[6])Description:
- Perform an affine transformation using the specified matrix
Parameters:
- dst: target LovyanGFX object
- matrix: transformation matrix
- [a, c, e]
- [b, d, f]
- [0, 0, 1]
- transp: transparent color
Return:
- null
pushAffineWithAA
Syntax1:
void pushAffineWithAA(const float matrix[6], const T& transp)Syntax2:
void pushAffineWithAA(LovyanGFX* dst, const float matrix[6], const T& transp)Syntax3:
void pushAffineWithAA(const float matrix[6])Syntax4:
void pushAffineWithAA(LovyanGFX* dst, const float matrix[6])Description:
- Perform an affine transformation using the specified matrix and use anti-aliasing
Parameters:
- dst: target LovyanGFX object
- matrix: transformation matrix
- [a, c, e]
- [b, d, f]
- [0, 0, 1]
- transp: transparent color
Return:
- null
Example
#include <M5GFX.h>
#include <M5Unified.h>

static int32_t Disw;
static int32_t Dish;
static float Affine_mat[9] = {1, 0, 60,
                              0, 1, 20,
                              0, 0, 1  };

void setup() {
    M5.begin();
    Disw = M5.Lcd.width();
    Dish = M5.Lcd.height();

    M5.Lcd.fillScreen(TFT_WHITE);

    M5Canvas canvas(&M5.Lcd);
    canvas.createSprite(100, 100);//set sprite size
    canvas.fillSprite(TFT_BLACK);//fill sprite with color XXX
    canvas.pushSprite(Disw / 2 - 50, Dish / 2 - 50);
    delay(1000);
    canvas.fillSprite(TFT_PINK);

    // Rotate 45°
    canvas.pushRotated(45);
    // canvas.pushRotatedWithAA(45);

    // Rotate 90° Reduce to 80%
    // canvas.pushRotateZoom(90, 0.8, 0.8);
    // canvas.pushRotateZoomWithAA(90, 0.8, 0.8);

    // Shift 10 units from the origin using the affine matrix
    // canvas.pushAffine(Affine_mat);
    // canvas.pushAffineWithAA(Affine_mat);

    canvas.deleteSprite();
}

void loop() {
} The example program runs as follows:
