

Product Guide
Linux PC
CardputerZero
AI アクセラレーターカード
LLM-8850 カード
AI & Agent
リアルタイム音声アシスタント
XiaoZhi ボイスアシスタント
AtomS3R-M12 Volcengine Kit
Industrial Control
IoT Measuring Instruments
Air Quality
PowerHub
Module13.2 PPS
VAMeter
T-Lite
Ethernet Camera
PoECAM
Wi-Fi Camera
Unit CamS3/-5MP
AI Camera
LoRa & LoRaWAN
Motor Control
ファームウェアの初期化
ディップスイッチ&ピン切り替え
OpenAI API
私たちは OpenAI API と互換性のある利用方法を提供しており、StackFlow パッケージをインストールするだけで使用できます。
準備作業
- RaspberryPi & LLM8850 ソフトウェアパッケージ取得チュートリアル を参照し、以下のモデルパッケージとソフトウェアパッケージのインストールを完了してください。
sudo apt install lib-llm llm-sys llm-llm llm-openai-apisudo apt install llm-model-qwen3-1.7b-int8-ctx-axcl注意
新しいモデルをインストールするたびに、sudo systemctl restart llm-openai-api を手動で実行してモデルリストを更新する必要があります。
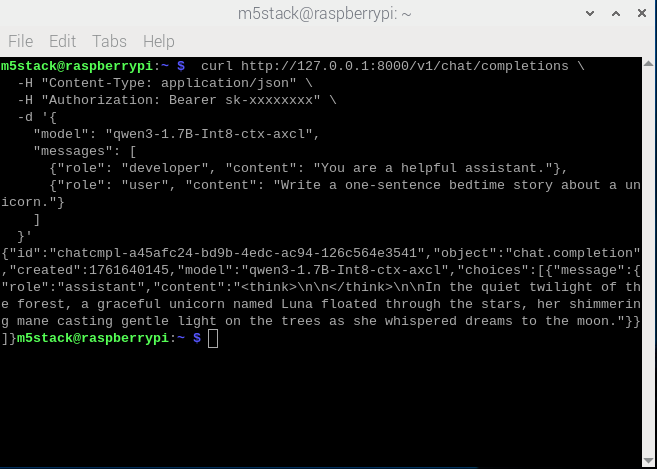
Curl 呼び出し
curl http://127.0.0.1:8000/v1/models \
  -H "Content-Type: application/json"
curl http://127.0.0.1:8000/v1/chat/completions \
-H "Content-Type: application/json" \
-H "Authorization: Bearer sk-xxxxxxxx" \
-d '{
"model": "qwen3-1.7B-Int8-ctx-axcl",
"messages": [
{"role": "developer", "content": "You are a helpful home assistant."},
{"role": "user", "content": "Write a one-sentence bedtime story about a unicorn."}
]
}'
Python 呼び出し
from openai import OpenAI
client = OpenAI(
    api_key="sk-",
    base_url="http://127.0.0.1:8000/v1"
)

client.models.list()
print(client.models.list())
from openai import OpenAI
client = OpenAI(
api_key="sk-",
base_url="http://127.0.0.1:8000/v1"
)
completion = client.chat.completions.create(
model="qwen3-1.7B-Int8-ctx-axcl",
messages=[
{"role": "developer", "content": "You are a helpful home assistant."},
{"role": "user", "content": "Turn on the light!"}
]
)
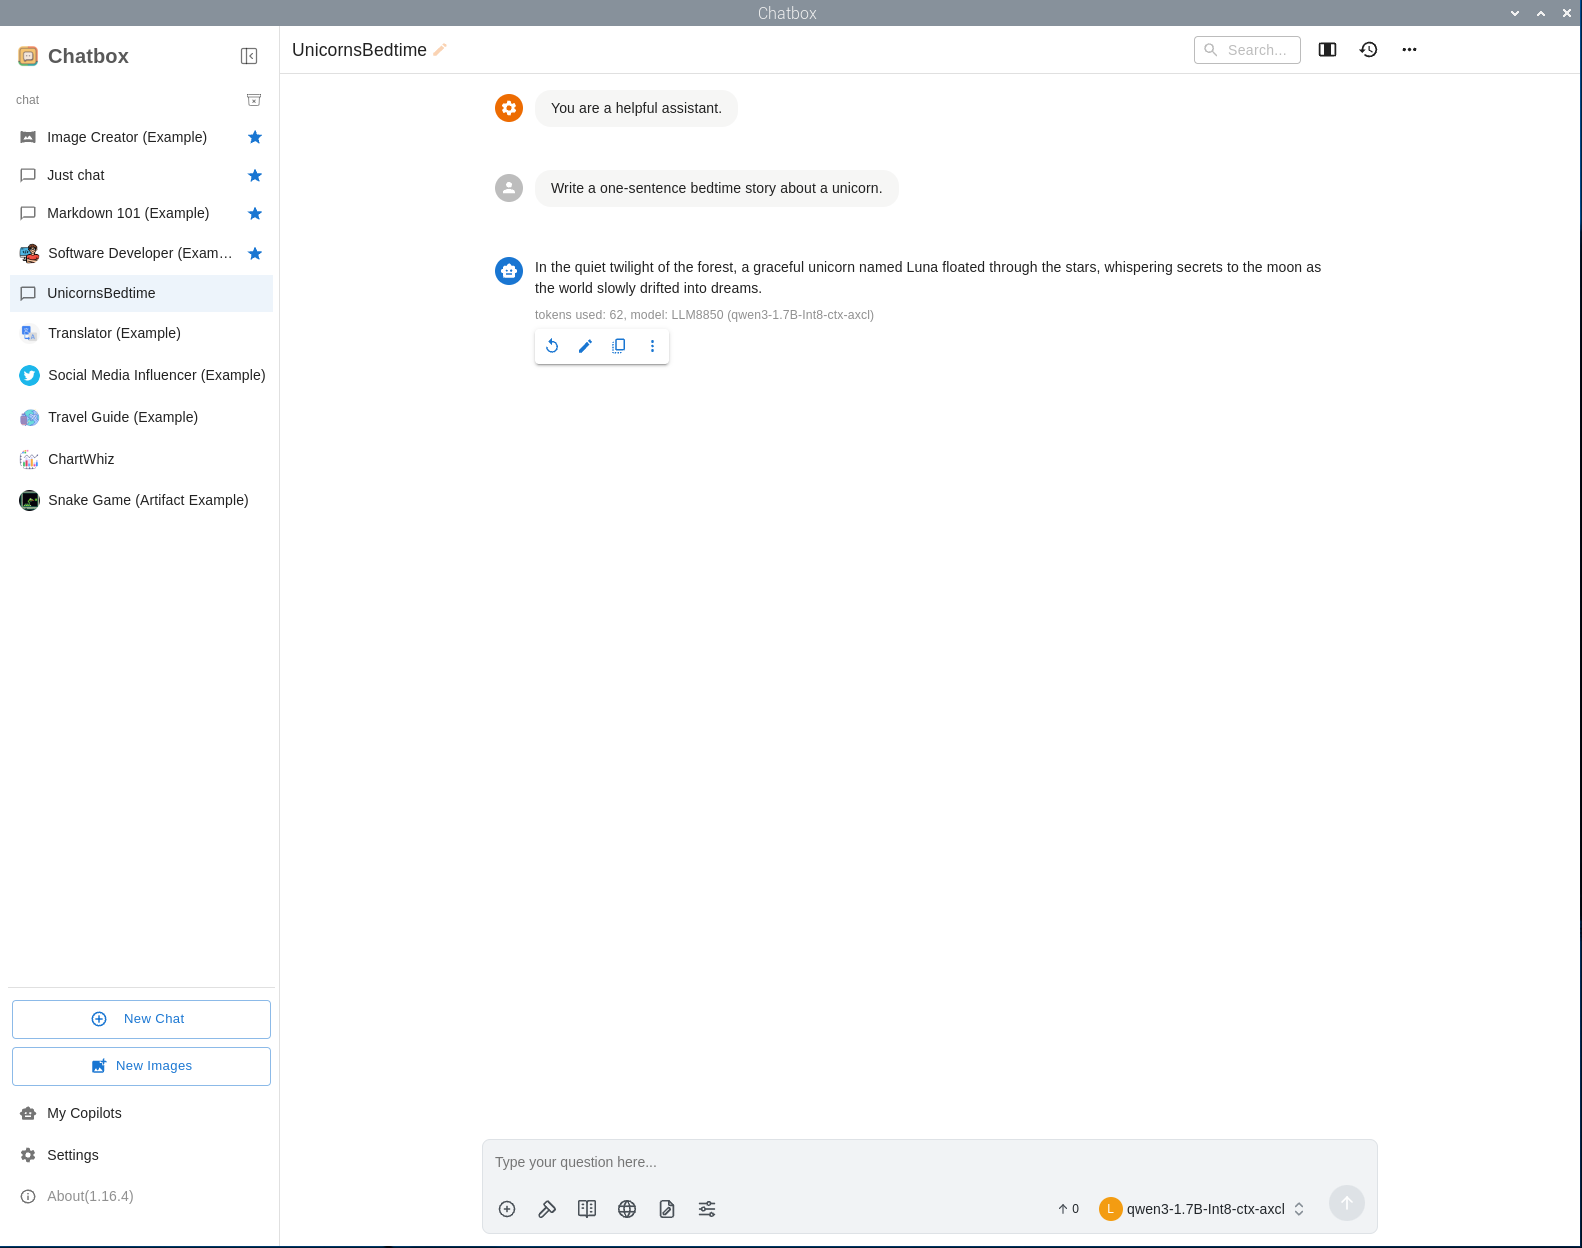
print(completion.choices[0].message)ChatBox 呼び出し
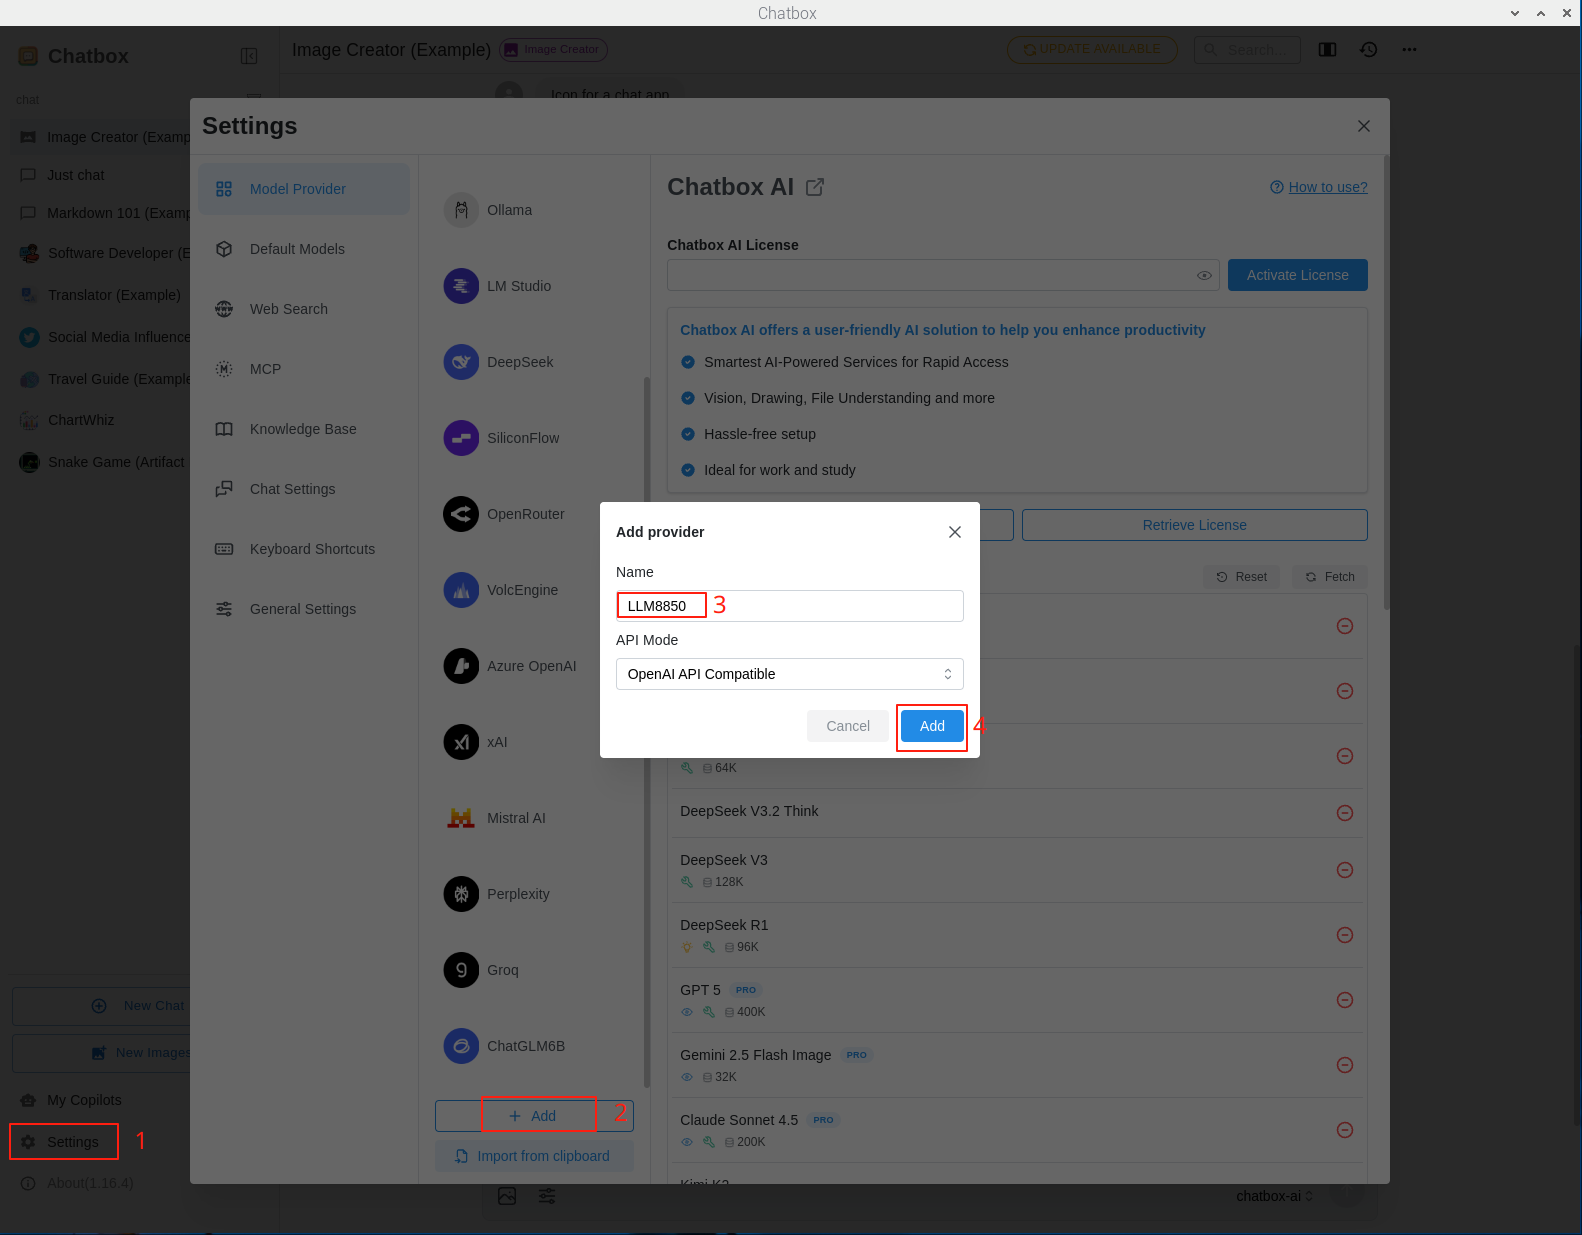
ChatBox を取得
設定をクリックし、モデルの提供元を追加します。
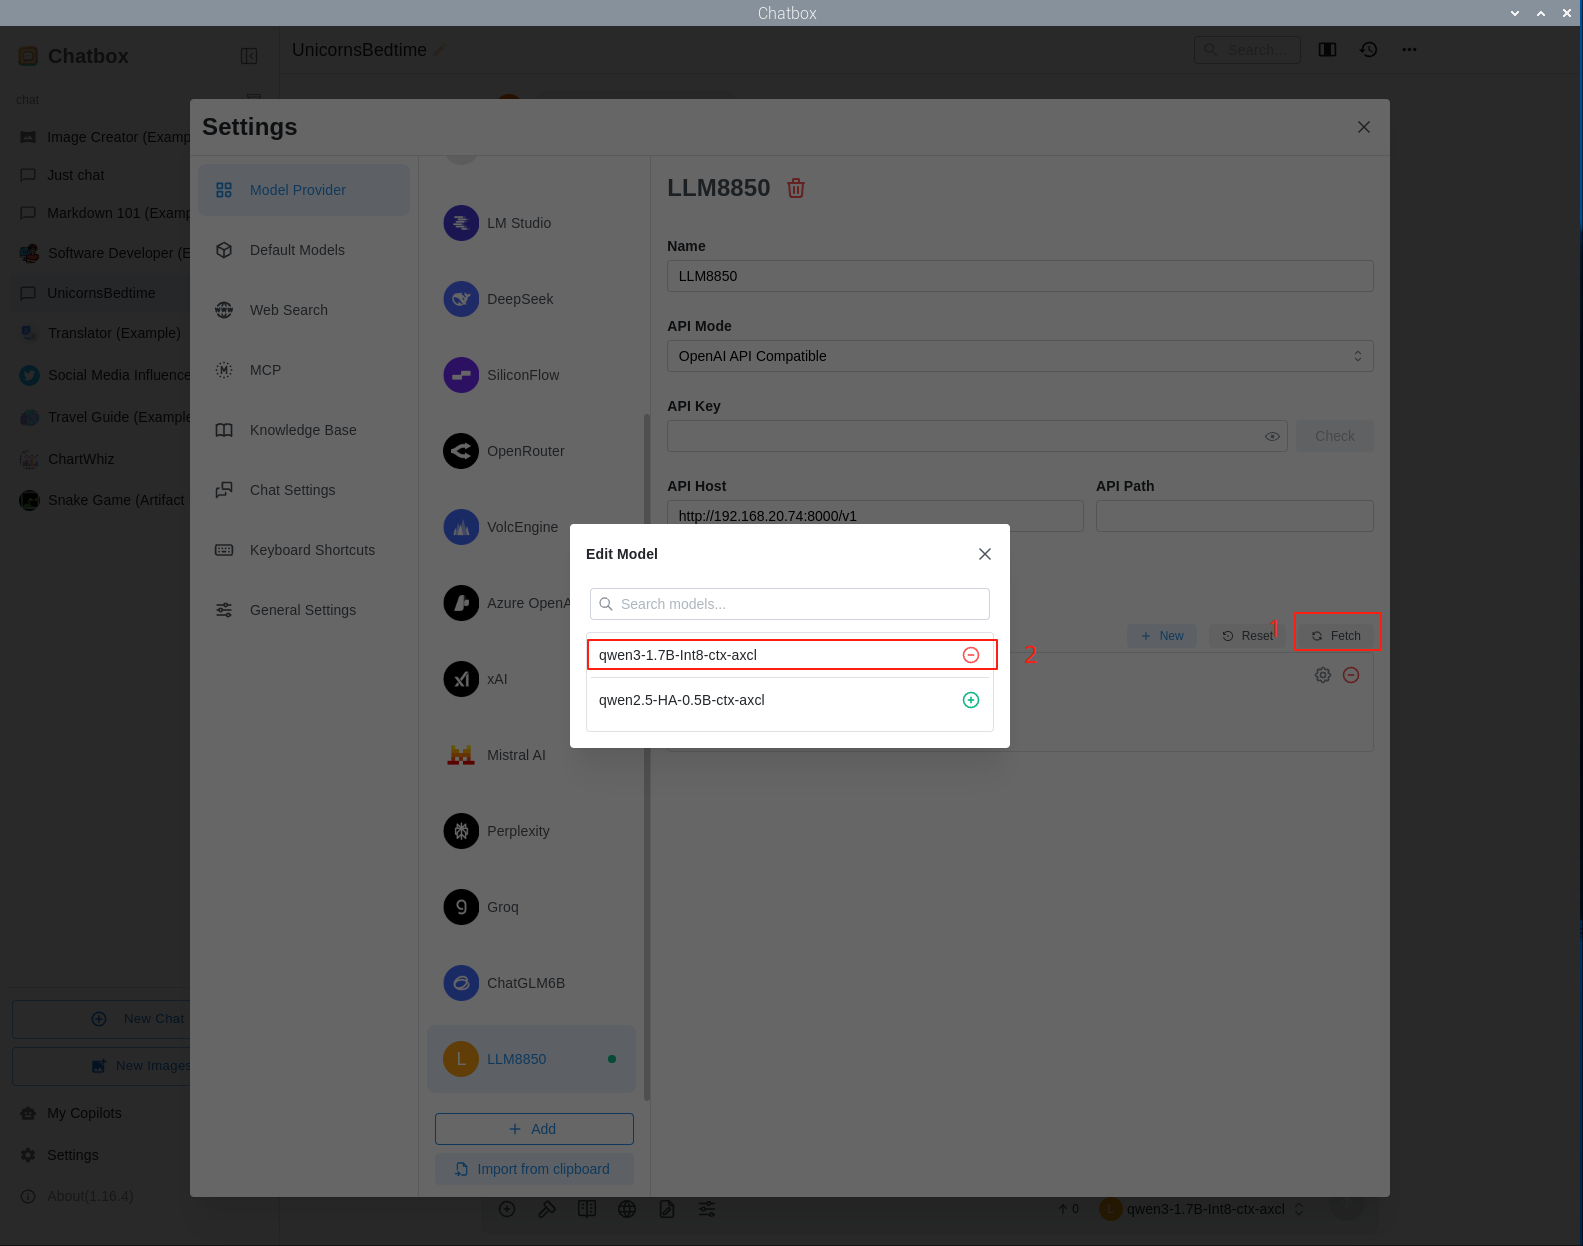
API Host に RaspberryPi の IP と API パスを入力し、インストール済みモデルを取得して追加します。
新しくチャットを作成し、LLM8850 が提供する qwen3-1.7B-Int8-ctx-axcl モデルを選択します。
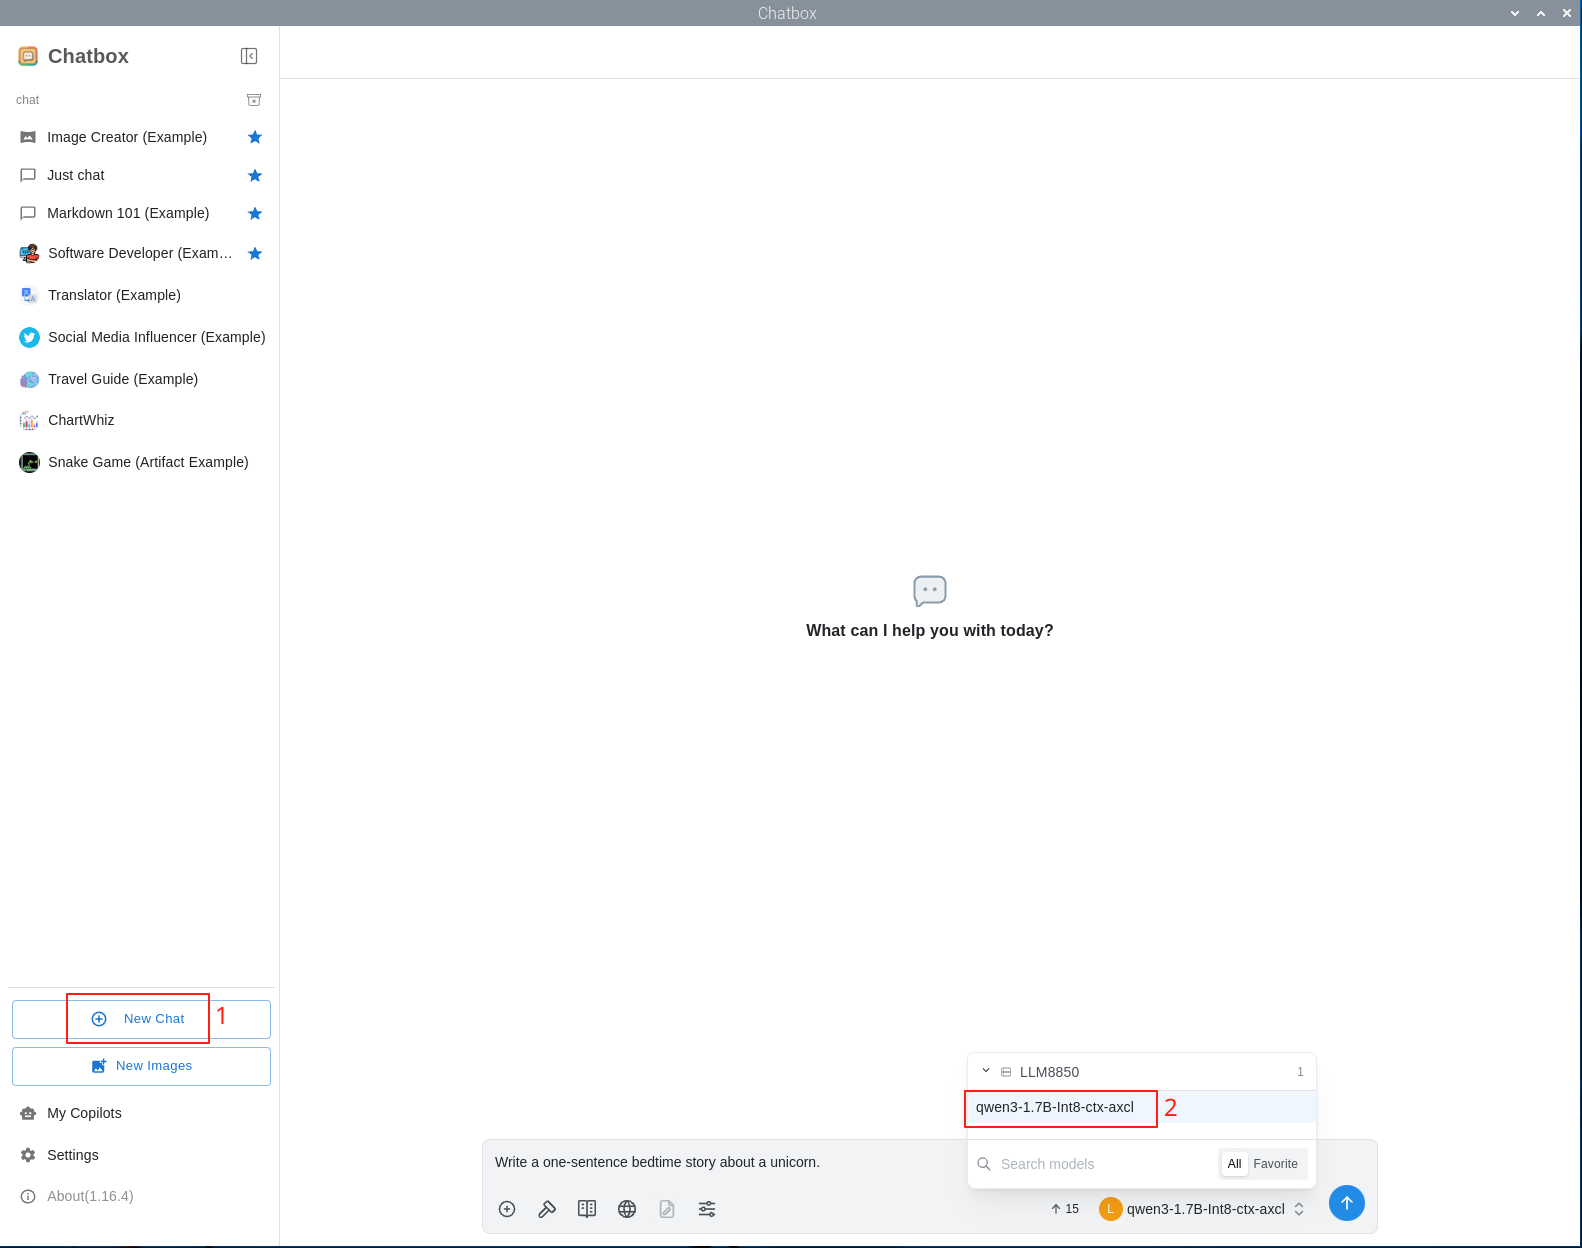
最大コンテキストメッセージ長を 0 に設定します。
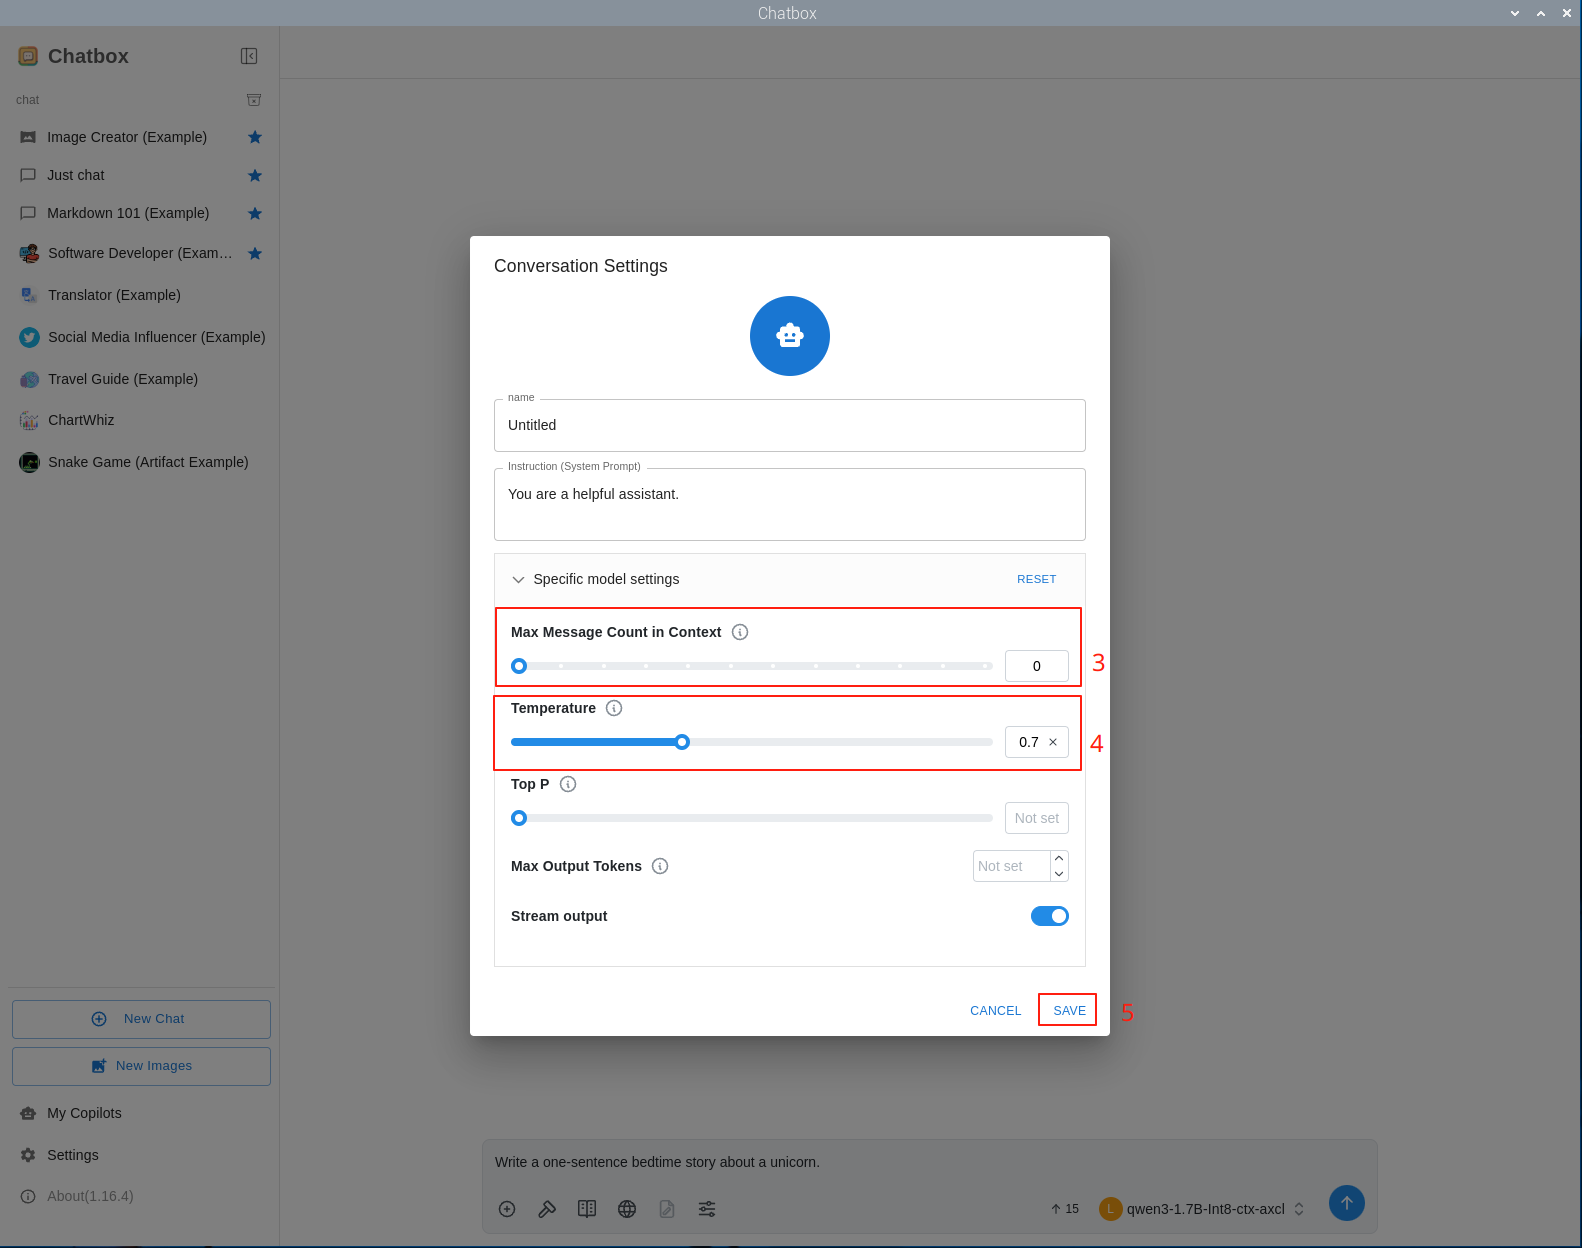
System Prompt の設定をサポートしています。
Page Tools