


Arduino入門
2. デバイス&サンプル
3. M5Unified
4. M5GFX
5. 拡張モジュール&サンプル
Unit
Atomic
Tab5
IoT
アクセサリー
M5Canvas Class
关于 M5Canvas
M5CanvasはLGFX_Spriteの派生クラスで、基本的にはTFT_eSPIのSpriteと同じように使われています。M5GFXで定義された"Sprite"ではなく"Canvas "と呼ぶのが適切ですが、TFT_eSpriteとの互換性のためにpushSpriteなどの手法は残っています。
以下に含まれていないより詳細なAPI情報についてはこちらをご参照ください。
Canvas の 利点
事前にメモリ上に描画し、一度にパネルに表示できるため、迅速な表示が可能です。
小さな文字などの表示に便利です。
透明な色を使用して重ね合わせを提供できます。
ディスプレイ上で描画する際に、スケーリング、回転、アンチエイリアス処理を行うことができます。
コンストラクタ
M5Canvas()
- 引数なし
- 引数が指定されていない場合、プッシュまたは描画時に指定する必要があり、そうしないと問題が発生します。
M5Canvas(M5GFX&)
- 引数に M5GFX を指定します。
- M5GFX が引数として指定された場合、デフォルトで M5GFX に描画されます。
M5Canvas(M5GFX&) コンストラクタを使用して、正しい描画ターゲットが設定されることを確認することをお勧めします。
LGFX_Sprite Class
- createSprite
- fillSprite
- pushSprite
- deleteSprite
- createFromBmp
- createFromBmpFile
- setBitmapColor
- setColorDepth
- createPalette
- getPalette
- setPaletteGrayscale
- setPaletteColor
- getPaletteIndex
- deletePalette
- readPixelValue
- setPsram
- setBuffer
- pushRotated
- pushRotatedWithAA
- pushRotateZoom
- pushRotateZoomWithAA
- pushAffine
- pushAffineWithAA
カラーパレットのカラーインデックスでしか設定色を達成できません。取得した色情報もカラーインデックスであり,色数値ではありません。createSprite
関数プロトタイプ:
void* createSprite(int32_t w, int32_t h)機能説明:
- キャンバスを作ります
引数:
- w: キャンバスの幅
- h: キャンバスの高さ
戻り値:
- null
fillSprite
関数プロトタイプ:
void fillSprite (const T& color)機能説明:
- キャンバスを塗りつぶします
引数:
- color: 塗りつぶす色
戻り値:
- null
pushSprite
関数プロトタイプ 1:
void pushSprite(int32_t x, int32_t y, const T& transp)関数プロトタイプ 2:
void pushSprite(LovyanGFX* dst, int32_t x, int32_t y, const T& transp)関数プロトタイプ 3:
void pushSprite(int32_t x, int32_t y)関数プロトタイプ 4:
void pushSprite(LovyanGFX* dst, int32_t x, int32_t y)機能説明:
- 指定された座標を基準点としてキャンバスの左上にプッシュします。
引数:
- dst: 目標 LovyanGFX オブジェクト
- x: キャンバス基準点 x 座標
- y: キャンバス基準点 y 座標
- transp: 透明色
戻り値:
- null
deleteSprite
関数プロトタイプ:
void deleteSprite(void)機能説明:
- キャンバスを削除します
引数:
- null
戻り値:
- null
サンプルプログラム
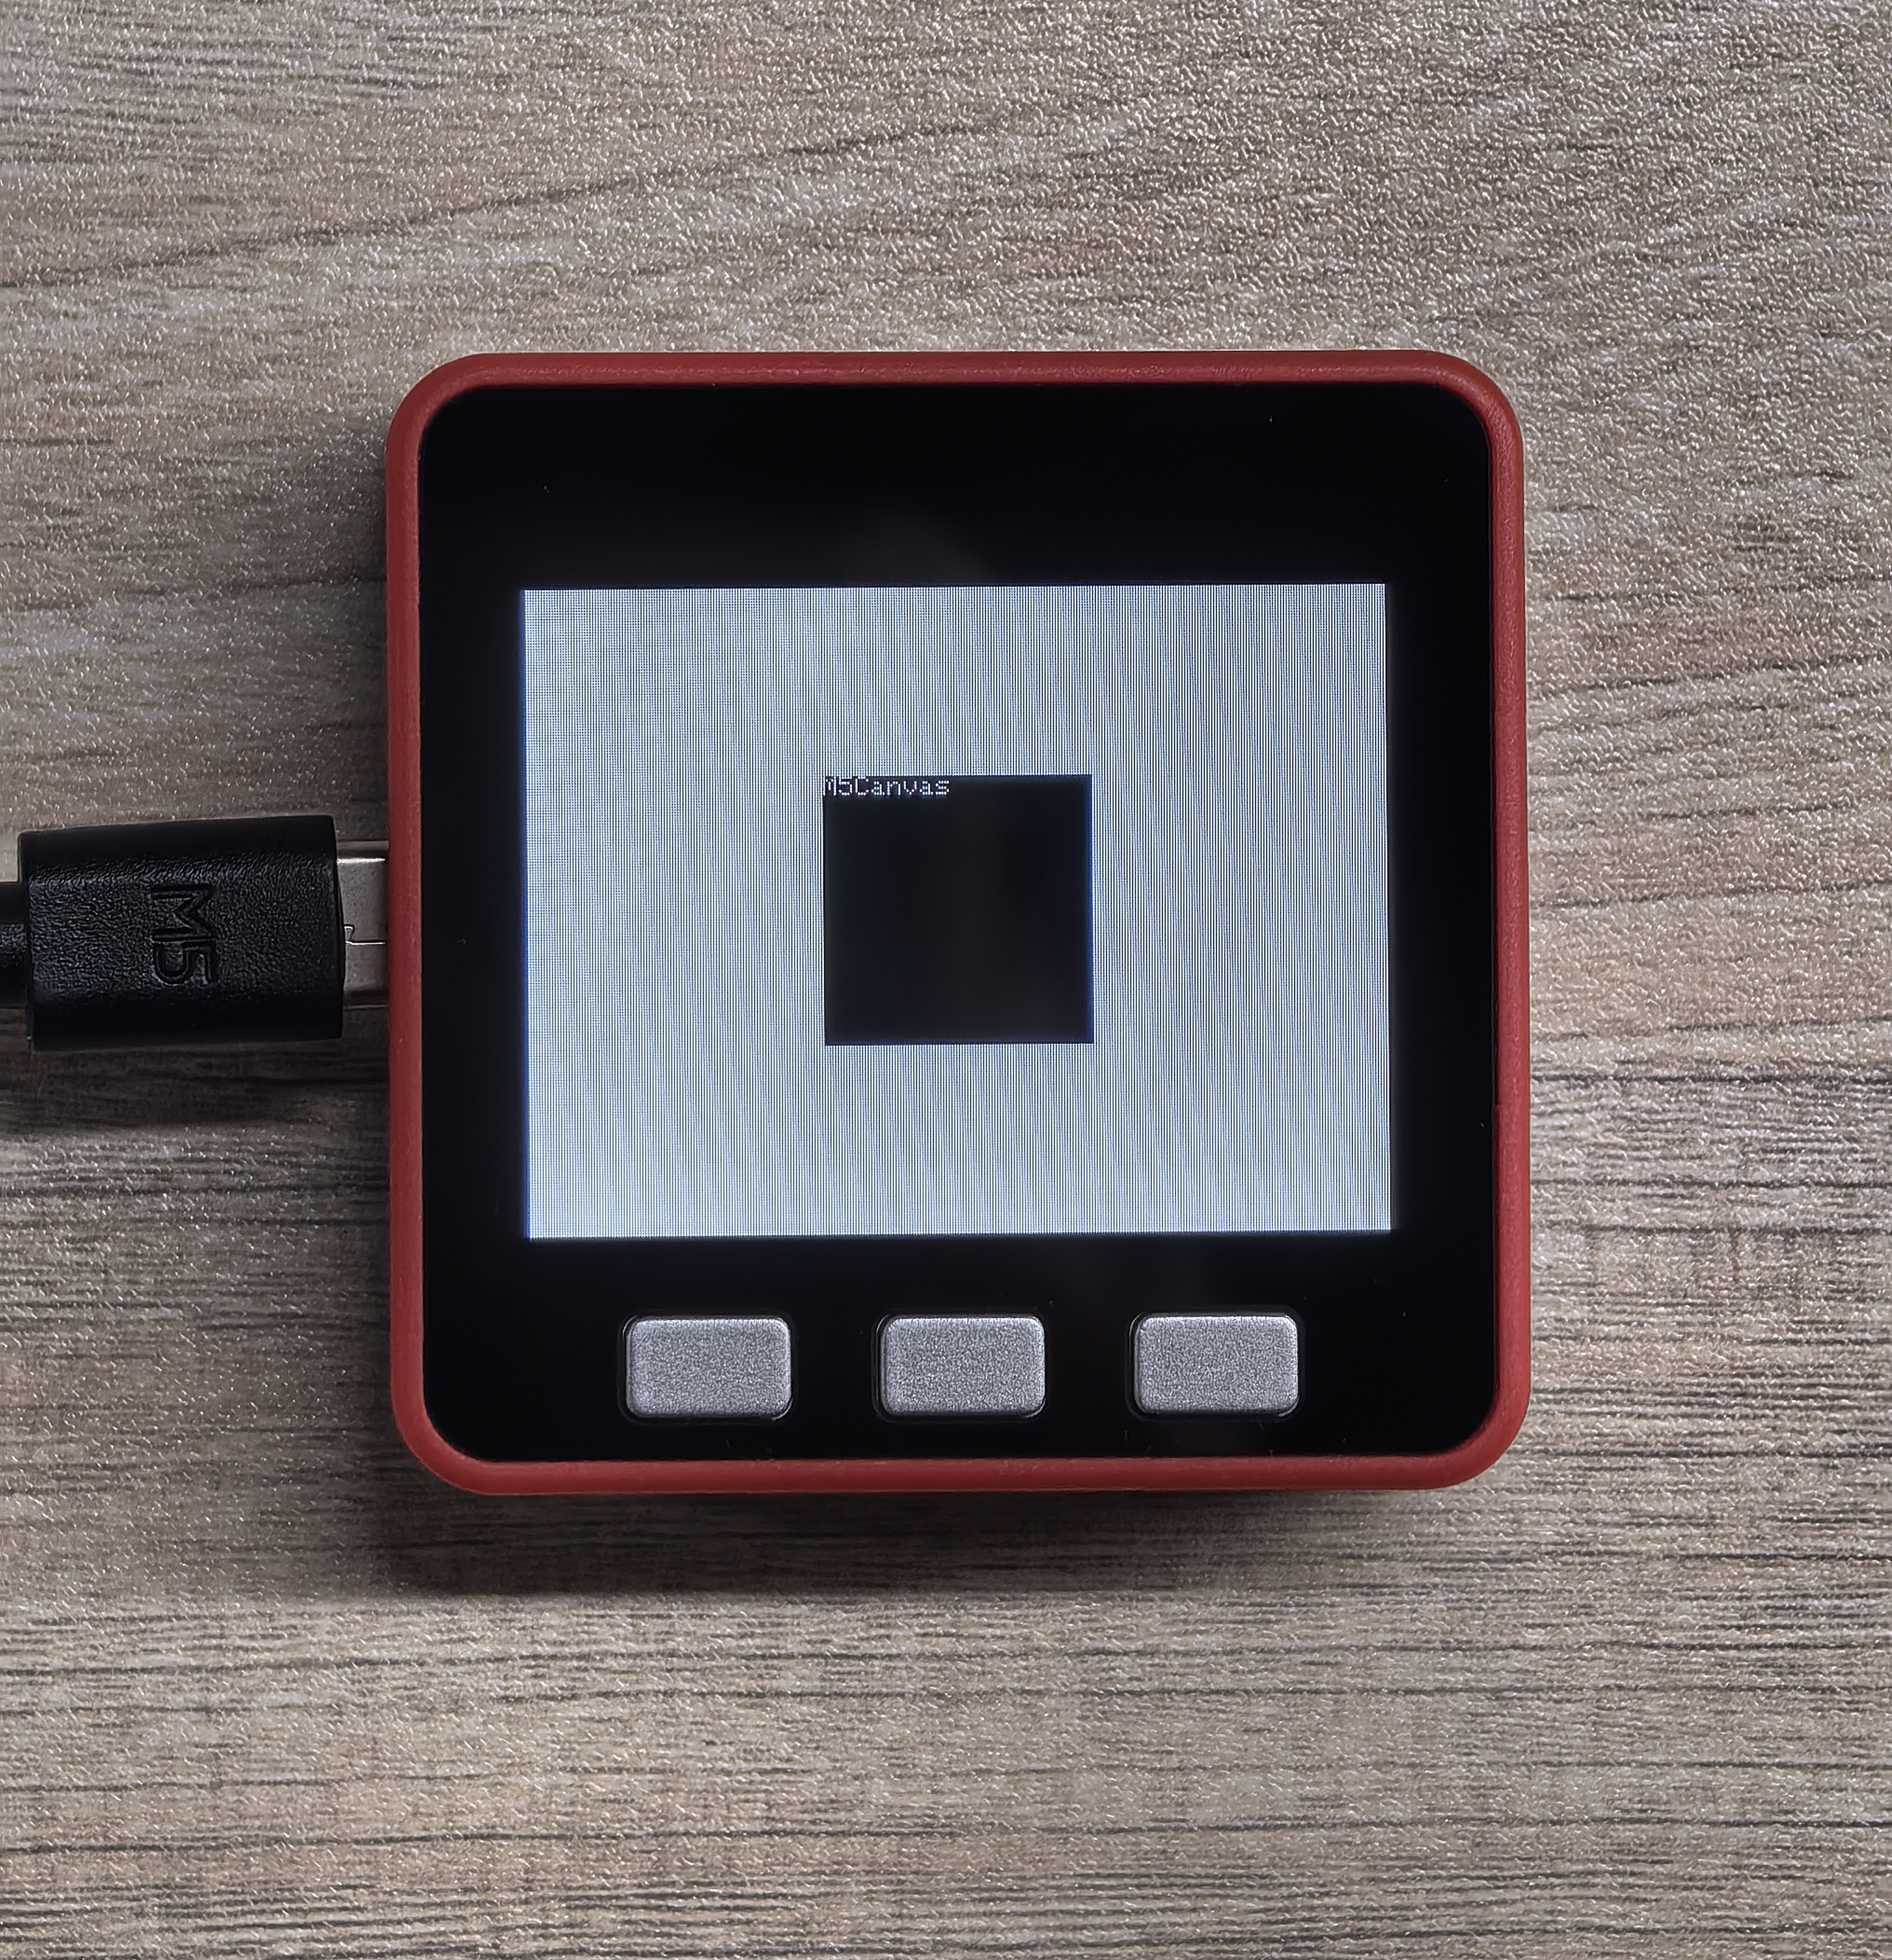
1.簡単な利用サンプル
#include <M5GFX.h>
#include <M5Unified.h>

static int32_t Disw;
static int32_t Dish;

void setup() {
    M5.begin();
    Disw = M5.Lcd.width();
    Dish = M5.Lcd.height();

    M5.Lcd.fillScreen(TFT_WHITE);

    M5Canvas canvas(&M5.Lcd);
    canvas.createSprite(100, 100);//set sprite size
    canvas.fillSprite(TFT_PINK);//fill sprite with color XXX
    delay(1000);
    canvas.fillSprite(TFT_BLACK);//fill sprite with color XXX
    canvas.println("M5Canvas");
    canvas.pushSprite(&M5.Lcd, Disw / 2 - 50, Dish / 2 - 50, TFT_PINK);//"&M5.Lcd" is not necessary here
    canvas.deleteSprite();
    //In this example, PINK will not be displayed
}

void loop() {
} サンプルプログラムの動作例は以下の通りです:
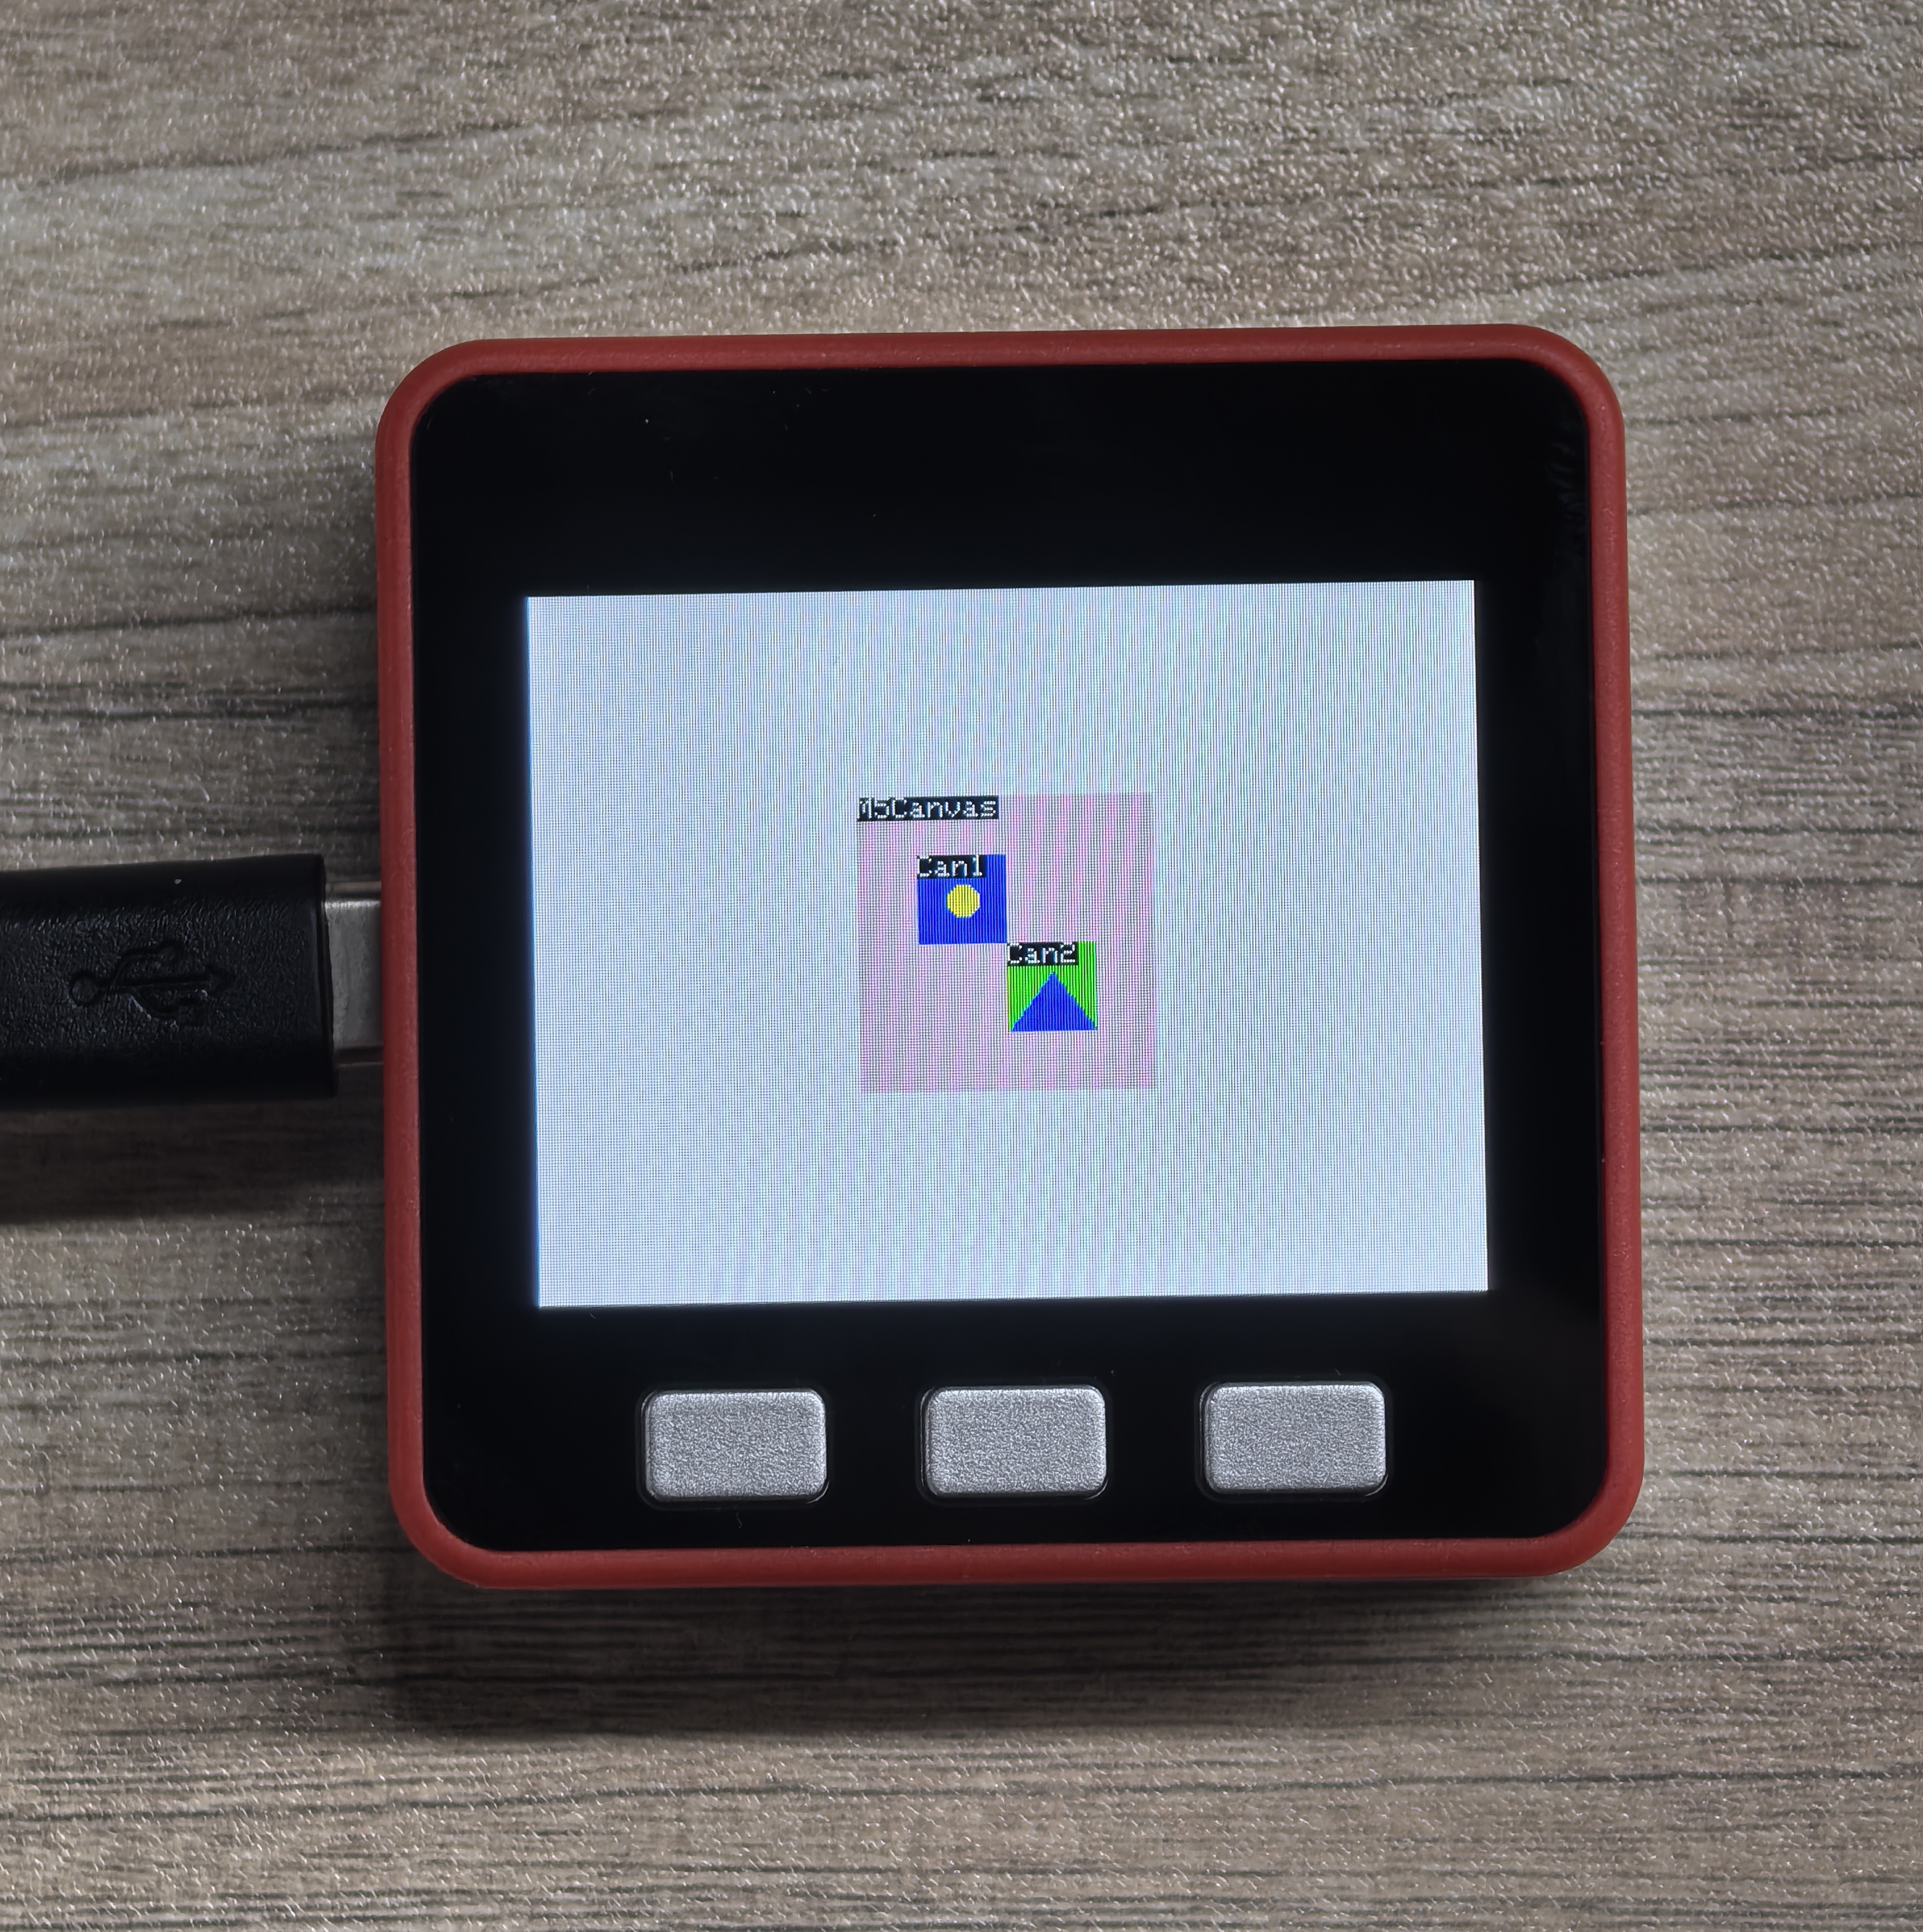
2.複数のキャンバスを統合して描画する
#include <M5GFX.h>
#include <M5Unified.h>

static int32_t Disw;
static int32_t Dish;

void setup() {
    M5.begin();
    Disw = M5.Lcd.width();
    Dish = M5.Lcd.height();

    M5.Lcd.fillScreen(TFT_WHITE);

    M5Canvas canvas(&M5.Lcd);
    M5Canvas can1(&M5.Lcd);
    M5Canvas can2(&M5.Lcd);

    canvas.createSprite(100, 100);//set sprite size
    canvas.fillSprite(TFT_PINK);//fill sprite with color XXX
    canvas.println("M5Canvas");

    can1.createSprite(30, 30);
    can1.fillSprite(TFT_BLUE);
    can1.println("Can1");
    can1.fillCircle(15, 15, 5, TFT_YELLOW);

    can2.createSprite(30, 30);
    can2.fillSprite(TFT_GREEN);
    can2.println("Can2");
    can2.fillTriangle(15, 10, 0, 30, 30, 30, TFT_BLUE);

    canvas.pushSprite(Disw / 2 - 50, Dish / 2 - 50);
    can1.pushSprite(Disw / 2 - 30, Dish / 2 - 30);
    can2.pushSprite(Disw / 2, Dish / 2);

    canvas.deleteSprite();
    can1.deleteSprite();
    can2.deleteSprite();
}

void loop() {
} サンプルプログラムの動作例は以下の通りです:
createFromBmp
関数プロトタイプ 1:
bool createFromBmp(const uint8_t *bmp_data, uint32_t bmp_len = ~0u)機能説明:
- BMP データからキャンバスを作成します
引数:
- bmp_data: BMP データポインタ
- bmp_len: BMP データ長(デフォルトは ~0u)
関数プロトタイプ 2:
bool createFromBmp(T &fs, const char *path)機能説明:
- BMP ファイルからキャンバスを作成します
引数:
- fs: ファイルシステムオブジェクト
- SPIFFS
- SD
etc
- path: BMP ファイルパス
戻り値:
- bool
- true: 作成成功
- false: 作成失敗
createFromBmpFile
関数プロトタイプ 1:
bool createFromBmpFile(const char *path)関数プロトタイプ 2:
bool createFromBmpFile(T &fs, const char *path)機能説明:
- BMPファイルからキャンバスを作成します
引数:
- path: BMP ファイルパス
- fs: ファイルシステムオブジェクト
- SPIFFS
- SD
etc
戻り値:
- bool
- true: 作成成功
- false: 作成失敗
このサンプルプログラムでは、FAT32形式でフォーマットされたMicroSDカードを用意し、ルートディレクトリに2つのPNG画像を配置し、それぞれLGFX_Canavs_Test01.bmp、LGFX_Canavs_Test02.bmpという名前を付ける必要があります。サンプルプログラムはM5Fireデバイスをターゲットとしており、画像の解像度は320*240です。以下のリンクから直接サンプル画像1、サンプル画像2をダウンロードできます。画像の解像度が320*240でない場合、プログラムはプリセットに基づいて表示方法を決定し、表示の異常が発生する可能性があります。
SD.hは<M5Unified.h>の前に配置する必要があります。そうしないと、コンパイルに失敗します。サンプルプログラム
#include <Arduino.h>
#include <SD.h>//This header file must before M5Unified.h
#include <SPI.h>
#include <M5GFX.h>
#include <M5Unified.h>

#define SD_SPI_CS_PIN   4
#define SD_SPI_SCK_PIN  18
#define SD_SPI_MOSI_PIN 23
#define SD_SPI_MISO_PIN 19

static int32_t Disw;
static int32_t Dish;

void setup() {
    M5.begin();
    Disw = M5.Lcd.width();
    Dish = M5.Lcd.height();

    M5.Lcd.fillScreen(TFT_BLACK);

    M5.Display.setTextFont(&fonts::Orbitron_Light_24);
    M5.Display.setTextSize(1);
    // SD Card Initialization
    SPI.begin(SD_SPI_SCK_PIN, SD_SPI_MISO_PIN, SD_SPI_MOSI_PIN, SD_SPI_CS_PIN);
    if (!SD.begin(SD_SPI_CS_PIN, SPI, 25000000)) {
        // Print a message if SD card initialization failed or if the SD card does not exist.
        M5.Display.print("\n SD card not detected\n");
        while (1); ;
    } else {
        M5.Display.print("\n SD card detected\n");
    }
    delay(1000);

    M5.Display.print("\n SD card read test...\n");
    if (SD.open("/LGFX_Canavs_Test01.bmp", FILE_READ, false)) {
        M5.Display.print(" BMP file 01 detected\n");
    } else {
        M5.Display.print(" BMP file 01 not detected\n");
    }
    if (SD.open("/LGFX_Canavs_Test02.bmp", FILE_READ, false)) {
        M5.Display.print(" BMP file 01 detected\n");
    } else {
        M5.Display.print(" BMP file 01 not detected\n");
    }
    delay(2000);
}

void loop() {
    M5Canvas canvas(&M5.Lcd);
    if (canvas.createFromBmp(SD, "/LGFX_Canavs_Test01.bmp")) {
        canvas.pushSprite(0, 0);
    } else {
        M5.Display.print("\ncreateFromBmp failed\n");
    }
    delay(1000);
    if (canvas.createFromBmpFile(SD, "/LGFX_Canavs_Test02.bmp")) {
        canvas.pushSprite(0, 0);
    } else {
        M5.Display.print("\ncreateFromBmpFile failed\n");
    }
    delay(1000);
    canvas.deleteSprite();
}例プログラム効果は、2枚のピクチャを交互に表示するもので、1枚目が LGFX_Canavs_Test01.bmp 、2枚目が LGFX_Canavs_Test02.bmp となります。
setBitmapColor
関数プロトタイプ:
void setBitmapColor(uint16_t fgcolor, uint16_t bgcolor)機能説明:
- ビットマップの色を設定します。1ビットのみに適用されます。
引数:
- fgcolor: 前景色
- bgcolor: 背景色
戻り値:
- null
setColorDepth
関数プロトタイプ 1:
void setColorDepth(uint8_t bpp)機能説明:
- 色の深さを設定します
引数:
- bpp: 各ピクセルのビット数
- 1: 1 ビット
- 2: 2 ビット
- 4: 4 ビット
- 8: 8 ビット
- 16: 16 ビット
- 24: 24 ビット
- 32: 32 ビット
関数プロトタイプ 2:
void* setColorDepth(color_depth_t depth)機能説明:
- 色の深さを設定します
引数:
- depth: 色深度
bpp、depth は1、2、4、8ビットのみとなります。2.
createPaletteを呼び出す前にsetColorDepthを呼び出して色深度を設定する必要があります。そうしないとパレットの作成に失敗します。3.
setColorDepth でカラーデプスを 1 ビットに設定した場合、createPalette() でパレットを作成するしかできず、createPalette(const uint16_t* colors, uint32_t count) または createPalette(const uint32_t* colors, uint32_t count) を使用することはできません。戻り値:
- null
createPalette
関数プロトタイプ 1:
bool createPalette(void)関数プロトタイプ 2:
bool createPalette(const uint16_t* colors, uint32_t count)関数プロトタイプ 3:
bool createPalette(const uint32_t* colors, uint32_t count)機能説明:
- パレットを作成します
引数:
- colors: カラー配列ポインタです
- uint16_t: RGB565 16 ビットカラー
- uint32_t: RGB888/ARGB8888 24 ビットカラー/32 ビットカラー
- count: カラー数
戻り値:
- bool
- true: 作成成功
- false: 作成失敗
getPalette
関数プロトタイプ:
RGBColor* getPalette(void)機能説明:
- 現在のパレット情報を取得します
引数:
- null
戻り値:
- RGBColor*:bgr888_t構造体へのポインタ、現在のパレットの最初の色を指します
setPaletteGrayscale
関数プロトタイプ:
void setPaletteGrayscale(void)機能説明:
- パレットをグレースケールに設定します
引数:
- null
戻り値:
- null
setPaletteColor
関数プロトタイプ 1:
void setPaletteColor(uint32_t index, uint32_t color)機能説明:
- パレットの色を設定します
引数:
- index: パレットインデックス
- color: 色
関数プロトタイプ 2:
void setPaletteColor(size_t index, const bgr888_t& rgb)機能説明:
- パレットの色を設定します
引数:
- index: パレットインデックス
- rgb: RGB 颜色
関数プロトタイプ 3:
void setPaletteColor(size_t index, uint8_t r, uint8_t g, uint8_t b)機能説明:
- パレットカラーを設定します。
引数:
- index: パレットインデックス
- r: 赤色成分
- g: 緑色成分
- b: 青色成分
戻り値:
- null
getPaletteIndex
関数プロトタイプ:
int32_t getPaletteIndex(const T& color)機能説明:
- パレットインデックスを取得します
引数:
- color: 色
戻り値:
- res: 色インデックス
- -1: 関数実行失敗
deletePalette
関数プロトタイプ:
void deletePalette(void)機能説明:
- パレットを削除します
引数:
- null
戻り値:
- null
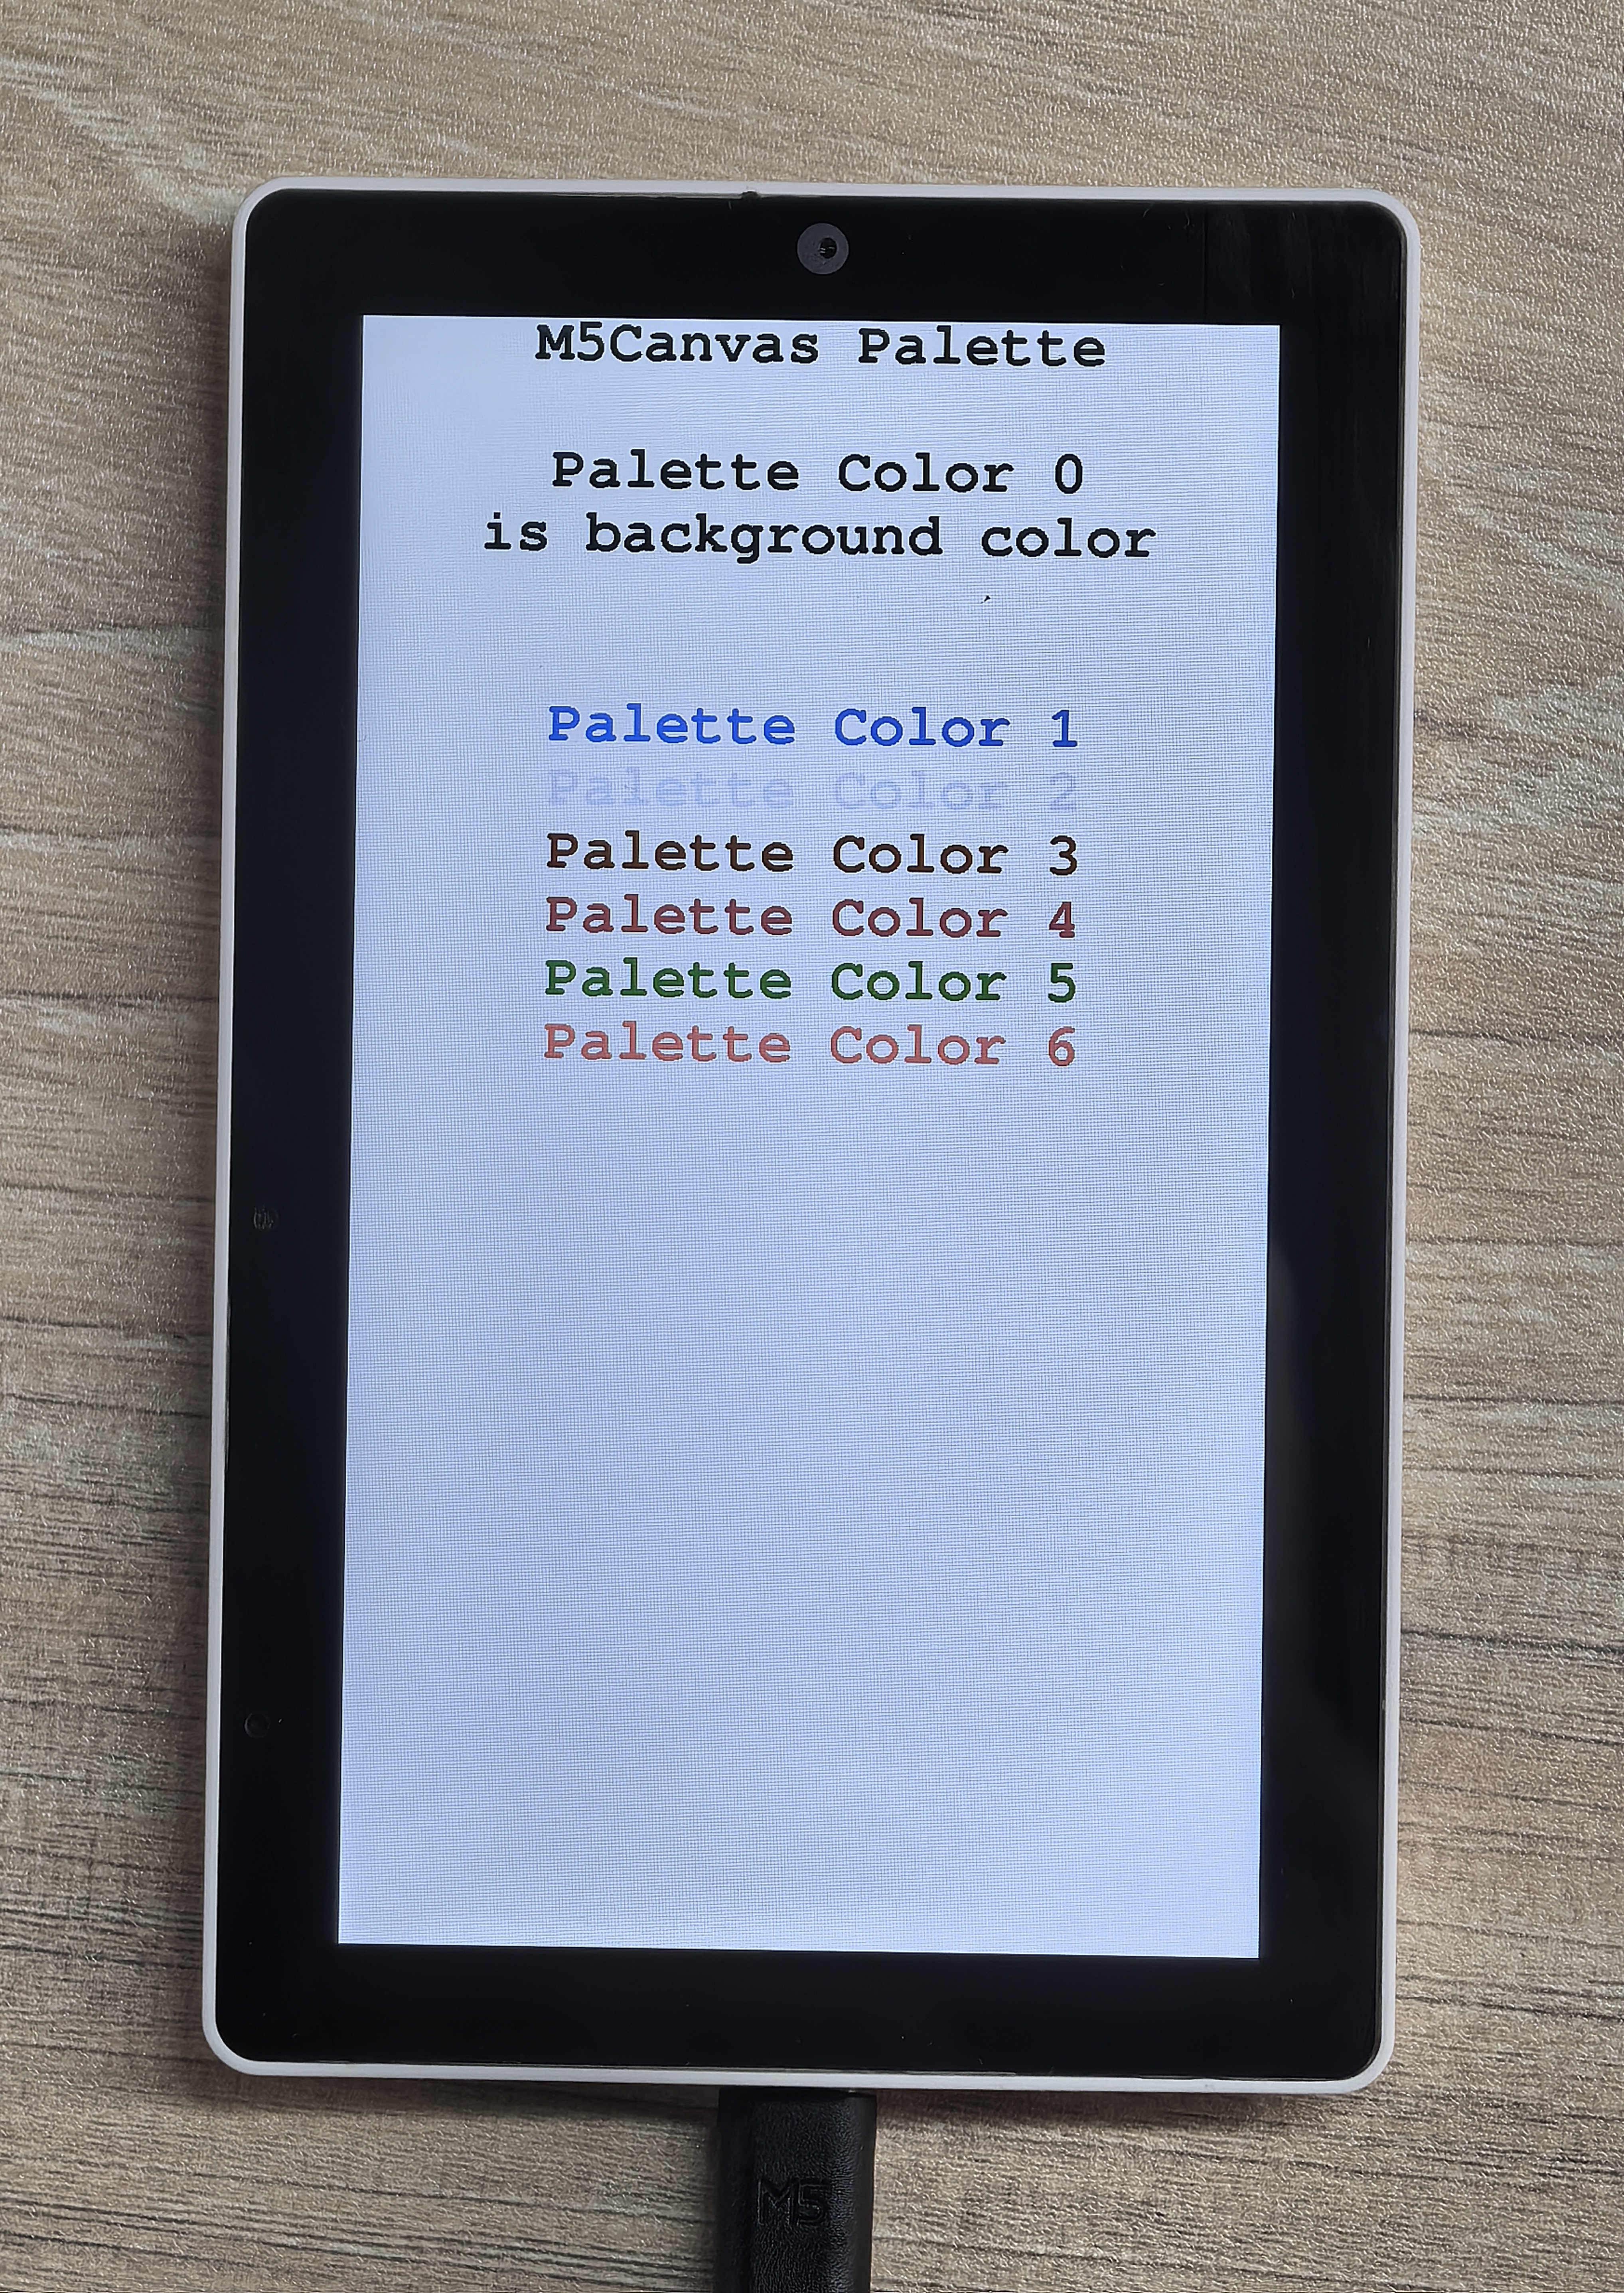
サンプルプログラム
#include <M5Unified.h>
#include <M5GFX.h>

#define ROYAL_BLUE 0X435C
#define LAVENDER_PURPLE 0xE73F
#define SADDLE_BROWN 0x8A22
#define INDIA_RED 0xCAEB
#define FOREST_GREEN 0x2444
#define SALMON_PINK 0xFC0E

static int32_t Disw;
static int32_t Dish;
static uint16_t pale[] = {WHITE, ROYAL_BLUE, LAVENDER_PURPLE, SADDLE_BROWN, BLUE, INDIA_RED,FOREST_GREEN, SALMON_PINK};
// static uint16_t pale[256];

M5Canvas canvas(&M5.Lcd);

void setup() {
    M5.begin();

    Disw = M5.Lcd.width();
    Dish = M5.Lcd.height();

    canvas.createSprite(Disw, Dish);

    canvas.setColorDepth(lgfx::v1::palette_8bit);//This must be cited before createPalette
    canvas.setTextDatum(top_center);
    canvas.drawString("M5Canvas Palette", Disw / 2, 0, &fonts::FreeMonoBold24pt7b);
    canvas.drawString("Palette Color 0", Disw / 2, 100, &fonts::FreeMonoBold24pt7b);
    canvas.drawString("is background color", Disw / 2, 150, &fonts::FreeMonoBold24pt7b);

    canvas.createPalette(pale, 256);

    // If you choose "static uint16_t pale[256];", following code must be used

    // canvas.setPaletteColor(0, WHITE);
    // canvas.setPaletteColor(1, ROYAL_BLUE);
    // canvas.setPaletteColor(2, LAVENDER_PURPLE);
    // canvas.setPaletteColor(3, SADDLE_BROWN);
    // canvas.setPaletteColor(4, INDIA_RED);
    // canvas.setPaletteColor(5, FOREST_GREEN);
    // canvas.setPaletteColor(6, SALMON_PINK);

    canvas.setTextColor(canvas.getPaletteIndex(ROYAL_BLUE));
    canvas.drawString("Palette Color 1", Disw / 2, 300, &fonts::FreeMonoBold24pt7b);
    canvas.setTextColor(canvas.getPaletteIndex(LAVENDER_PURPLE));
    canvas.drawString("Palette Color 2", Disw / 2, 350, &fonts::FreeMonoBold24pt7b);
    canvas.setTextColor(canvas.getPaletteIndex(SADDLE_BROWN));
    canvas.drawString("Palette Color 3", Disw / 2, 400, &fonts::FreeMonoBold24pt7b);
    canvas.setTextColor(canvas.getPaletteIndex(INDIA_RED));
    canvas.drawString("Palette Color 4", Disw / 2, 450, &fonts::FreeMonoBold24pt7b);
    canvas.setTextColor(canvas.getPaletteIndex(FOREST_GREEN));
    canvas.drawString("Palette Color 5", Disw / 2, 500, &fonts::FreeMonoBold24pt7b);
    canvas.setTextColor(canvas.getPaletteIndex(SALMON_PINK));
    canvas.drawString("Palette Color 6", Disw / 2, 550, &fonts::FreeMonoBold24pt7b);

    canvas.pushSprite(0,0);
    canvas.deletePalette();//must behind pushSprite()
    canvas.deleteSprite();
}

void loop() {
} サンプルプログラムの動作例は以下の通りです:
readPixelValue
関数プロトタイプ:
uint32_t readPixelValue(int32_t x, int32_t y)機能説明:
- 指定した座標のピクセル値を読み取ります。
引数:
- x: ピクセル x 座標
- y: ピクセル y 座標
戻り値:
- uint32_t: ピクセル値
- 0-1 (1 bpp)
- 0-255 (8 bpp)
- 0-0xFFFF (RGB565-16 bpp)
- 0-0xFFFFFF (RGB888-24 bpp)
setPsram
関数プロトタイプ:
void setPsram( bool enabled )機能説明:
- PSRAMの使用を設定します。
引数:
- enabled: PSRAM使用フラグ
- true: PSRAMを使用
- false: PSRAMを使用しない
戻り値:
- null
setBuffer
関数プロトタイプ:
void setBuffer(void* buffer, int32_t w, int32_t h, uint8_t bpp = 0)機能説明:
- バッファを設定します。
引数:
- buffer: バッファポインタ
- w: 幅
- h: 高さ
- bpp: 各ピクセルのビット数(デフォルトは 0)
- 0: デフォルト値を使用
- 1: 1 ビット
- 2: 2 ビット
- 4: 4 ビット
- 8: 8 ビット
- 16: 16 ビット
戻り値:
- null
pushRotated
関数プロトタイプ 1:
void pushRotated(float angle, const T& transp)関数プロトタイプ 2:
void pushRotated(LovyanGFX* dst, float angle, const T& transp)関数プロトタイプ 3:
void pushRotated(float angle)関数プロトタイプ 4:
void pushRotated(LovyanGFX* dst, float angle)機能説明:
- キャンバスを指定の角度で回転させます
引数:
- dst: 目標 LovyanGFX オブジェクト
- angle: 回転角度
- transp: 透明色
戻り値:
- null
pushRotatedWithAA
関数プロトタイプ 1:
void pushRotatedWithAA(float angle, const T& transp)関数プロトタイプ 2:
void pushRotatedWithAA(LovyanGFX* dst, float angle, const T& transp)関数プロトタイプ 3:
void pushRotatedWithAA(float angle)関数プロトタイプ 4:
void pushRotatedWithAA(LovyanGFX* dst, float angle)機能説明:
- キャンバスを指定の角度で回転させます
引数:
- dst: 目標 LovyanGFX オブジェクト
- angle: 回転角度
- transp: 透明色
戻り値:
- null
pushRotateZoom
関数プロトタイプ 1:
void pushRotateZoom(float angle, float zoom_x, float zoom_y, const T& transp)関数プロトタイプ 2:
void pushRotateZoom(LovyanGFX* dst, float angle, float zoom_x, float zoom_y, const T& transp)関数プロトタイプ 3:
void pushRotateZoom(float dst_x, float dst_y, float angle, float zoom_x, float zoom_y, const T& transp)関数プロトタイプ 4:
void pushRotateZoom(LovyanGFX* dst, float dst_x, float dst_y, float angle, float zoom_x, float zoom_y, const T& transp)関数プロトタイプ 5:
void pushRotateZoom(float angle, float zoom_x, float zoom_y)関数プロトタイプ 6:
void pushRotateZoom(LovyanGFX* dst, float angle, float zoom_x, float zoom_y)関数プロトタイプ 7:
void pushRotateZoom(float dst_x, float dst_y, float angle, float zoom_x, float zoom_y)関数プロトタイプ 8:
void pushRotateZoom(LovyanGFX* dst, float dst_x, float dst_y, float angle, float zoom_x, float zoom_y)機能説明:
- キャンバスを指定の角度とスケールで回転させます
引数:
- dst: 目標 LovyanGFX オブジェクト
- dst_x: 目標 x 座標
- dst_y: 目標 y 座標
- angle: 回転角度
- zoom_x: x 軸スケール
- zoom_y: y 軸スケール
- transp: 透明色
戻り値:
- null
pushRotateZoomWithAA
関数プロトタイプ 1:
void pushRotateZoomWithAA(float angle, float zoom_x, float zoom_y, const T& transp)関数プロトタイプ 2:
void pushRotateZoomWithAA(LovyanGFX* dst , float angle, float zoom_x, float zoom_y, const T& transp)関数プロトタイプ 3:
void pushRotateZoomWithAA(float dst_x, float dst_y, float angle, float zoom_x, float zoom_y, const T& transp)関数プロトタイプ 4:
void pushRotateZoomWithAA(LovyanGFX* dst, float dst_x, float dst_y, float angle, float zoom_x, float zoom_y, const T& transp)関数プロトタイプ 5:
void pushRotateZoomWithAA(float angle, float zoom_x, float zoom_y)関数プロトタイプ 6:
void pushRotateZoomWithAA(LovyanGFX* dst, float angle, float zoom_x, float zoom_y)関数プロトタイプ 7:
void pushRotateZoomWithAA(float dst_x, float dst_y, float angle, float zoom_x, float zoom_y)関数プロトタイプ 8:
void pushRotateZoomWithAA(LovyanGFX* dst, float dst_x, float dst_y, float angle, float zoom_x, float zoom_y)機能説明:
- 指定された角度とスケールでキャンバスを回転させます
引数:
- dst: 目標 LovyanGFX オブジェクト
- dst_x: 目標 x 座標
- dst_y: 目標 y 座標
- angle: 回転角度
- zoom_x: x 軸スケール
- zoom_y: y 軸スケール
- transp: 透明色
戻り値:
- null
pushAffine
関数プロトタイプ 1:
void pushAffine(const float matrix[6], const T& transp)関数プロトタイプ 2:
void pushAffine(LovyanGFX* dst, const float matrix[6], const T& transp)関数プロトタイプ 3:
void pushAffine(const float matrix[6])関数プロトタイプ 4:
void pushAffine(LovyanGFX* dst, const float matrix[6])機能説明:
- 指定された行列でアフィン変換を行います
引数:
- dst: 目標 LovyanGFX オブジェクト
- matrix: 変換行列
- [a, c, e]
- [b, d, f]
- [0, 0, 1]
- transp: 透明色
戻り値:
- null
pushAffineWithAA
関数プロトタイプ 1:
void pushAffineWithAA(const float matrix[6], const T& transp)関数プロトタイプ 2:
void pushAffineWithAA(LovyanGFX* dst, const float matrix[6], const T& transp)関数プロトタイプ 3:
void pushAffineWithAA(const float matrix[6])関数プロトタイプ 4:
void pushAffineWithAA(LovyanGFX* dst, const float matrix[6])機能説明:
- 指定された行列をアフィン変換しアンチエイリアスを使います
引数:
- dst: 目標 LovyanGFX オブジェクト
- matrix: 変換行列
- [a, c, e]
- [b, d, f]
- [0, 0, 1]
- transp: 透明色
戻り値:
- null
サンプルプログラム
#include <M5GFX.h>
#include <M5Unified.h>

static int32_t Disw;
static int32_t Dish;
static float Affine_mat[9] = {1, 0, 60,
                              0, 1, 20,
                              0, 0, 1  };

void setup() {
    M5.begin();
    Disw = M5.Lcd.width();
    Dish = M5.Lcd.height();

    M5.Lcd.fillScreen(TFT_WHITE);

    M5Canvas canvas(&M5.Lcd);
    canvas.createSprite(100, 100);//set sprite size
    canvas.fillSprite(TFT_BLACK);//fill sprite with color XXX
    canvas.pushSprite(Disw / 2 - 50, Dish / 2 - 50);
    delay(1000);
    canvas.fillSprite(TFT_PINK);

    // Rotate 45°
    canvas.pushRotated(45);
    // canvas.pushRotatedWithAA(45);

    // Rotate 90° Reduce to 80%
    // canvas.pushRotateZoom(90, 0.8, 0.8);
    // canvas.pushRotateZoomWithAA(90, 0.8, 0.8);

    // Shift 10 units from the origin using the affine matrix
    // canvas.pushAffine(Affine_mat);
    // canvas.pushAffineWithAA(Affine_mat);

    canvas.deleteSprite();
}

void loop() {
} サンプルプログラムの動作例は以下の通りです: