

Arduino入門
2. デバイス&サンプル
3. M5Unified
4. M5GFX
5. 拡張モジュール&サンプル
Unit
Module
Atomic
Tab5
IoT
アクセサリー
M5Unified クイックスタート
概要
M5Unified は M5Stack メインコントローラ向けのデバイスドライバライブラリです。このライブラリは、LCD、Touch、ボタン、スピーカー、マイクなど、ほとんどの M5Stack メインコントローラに内蔵されているハードウェアのドライバに対応しています。M5Unified は統一された API を提供しており、同じプログラムをさまざまな M5Stack デバイス上で簡単に実行できます。M5Unified は Arduino または ESP-IDF 開発プラットフォームで使用でき、開発効率を効果的に向上させます。
準備
- Arduino IDE のインストール:Arduino IDE インストールガイドを参照し、IDE をインストールします。
- ボードマネージャのインストール:基本環境構築ガイドを参照し、M5Stack ボードマネージャをインストールして、使用する開発ボードを選択します。
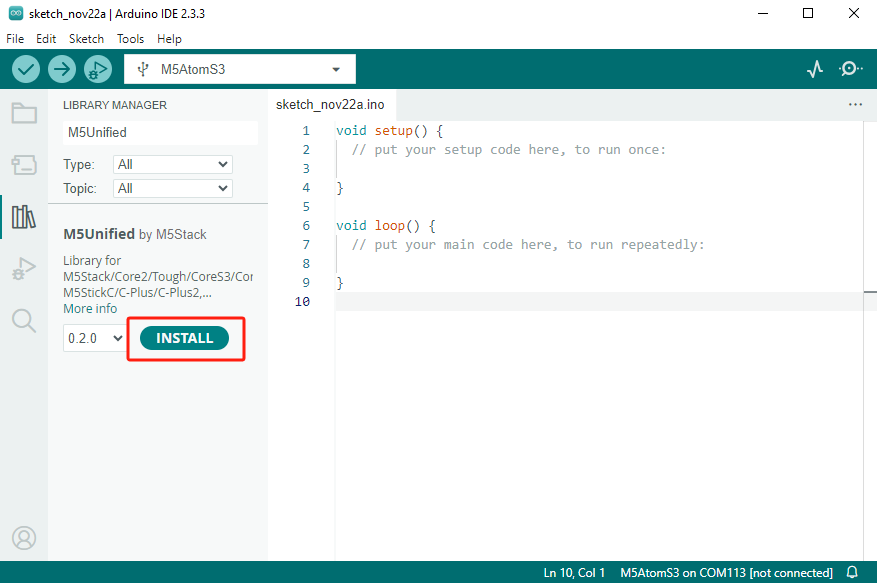
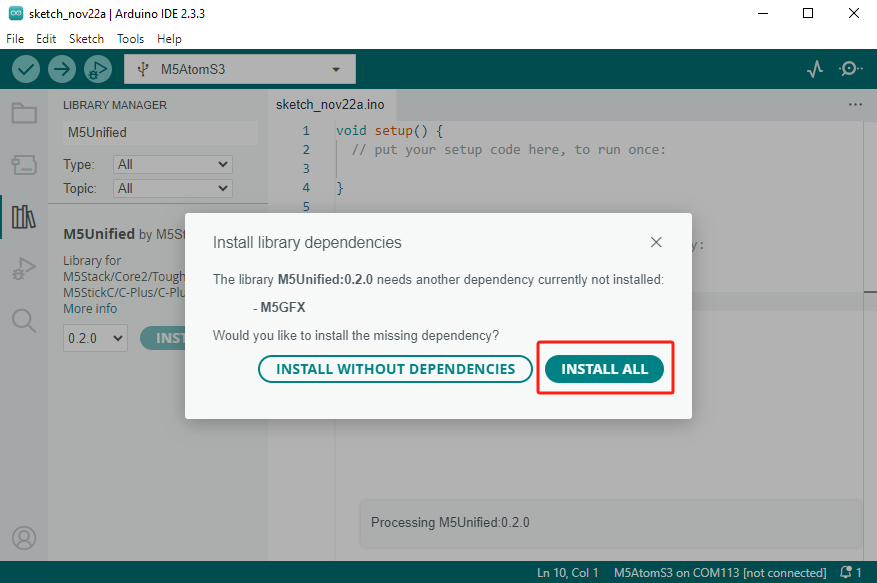
- 依存ライブラリのインストール:ライブラリマネージャのインストールガイドを参照し、
M5Unifiedドライバライブラリをインストールします。(画面の指示に従って依存ライブラリM5GFXもインストールしてください)
- 依存ライブラリのインストール:ライブラリマネージャのインストールガイドを参照し、
Hello World
Arduino IDE で新しいプログラムを作成し、以下の Hello World サンプルコードを貼り付けて、コンパイル後にデバイスへ書き込みます。ディスプレイとシリアルモニタに「HelloWorld!」が表示され、1 秒ごとにカウントされます。
cpp
1 2 3 4 5 6 7 8 9 10 11 12 13 14 15 16 17 18 19 20 21 22 23 24 25 26 27 28 29 30 31 32
#include <M5Unified.h>  // Make the M5Unified library available to your program.

// global variables (define variables to be used throughout the program)
uint32_t count;

// setup function is executed only once at startup.
// This function mainly describes the initialization process.
void setup()
{
    auto cfg = M5.config();  // Assign a structure for initializing M5Stack
    // If config is to be set, set it here
    // Example.
    // cfg.external_spk = true;

    M5.begin(cfg);  // initialize M5 device

    M5.Display.setTextSize(3);           // change text size
    M5.Display.print("Hello World!!!");  // display Hello World! and one line is displayed on the screen
    Serial.println("Hello World!!!");    // display Hello World! and one line on the serial monitor
    count = 0;                           // initialize count
}

// loop function is executed repeatedly for as long as it is running.
// loop function acquires values from sensors, rewrites the screen, etc.
void loop()
{
    M5.Display.setCursor(0, 20);              // set character drawing coordinates (cursor position)
    M5.Display.printf("COUNT: %d\n", count);  // display count on screen
    Serial.printf("COUNT: %d\n", count);      // display count serially
    count++;                                  // increase count by 1
    delay(1000);                              // wait 1 second(1,000msec)
}サンプルプログラム
M5Unified ドライバライブラリには一連のサンプルプログラムが用意されており、さまざまなハードウェアペリフェラル API の使用方法を確認できます。
M5Unified API
移行について
以下のガイドを参照し、他の M5Stack メインコントローラ用ドライバライブラリから M5Unified へ移行する方法を確認してください。
Page Tools