

Arduino 上手教程
2. 设备开发 & 案例程序
3. M5Unified
4. M5GFX
5. 拓展模块
Unit
Atomic
Tab5
IoT
M5Unified PlatformIO使用指南
本文将详细介绍如何通过Visual Studio Code 及其扩展PlatformIO来构建基于M5Unified的开发环境。
1. 环境准备
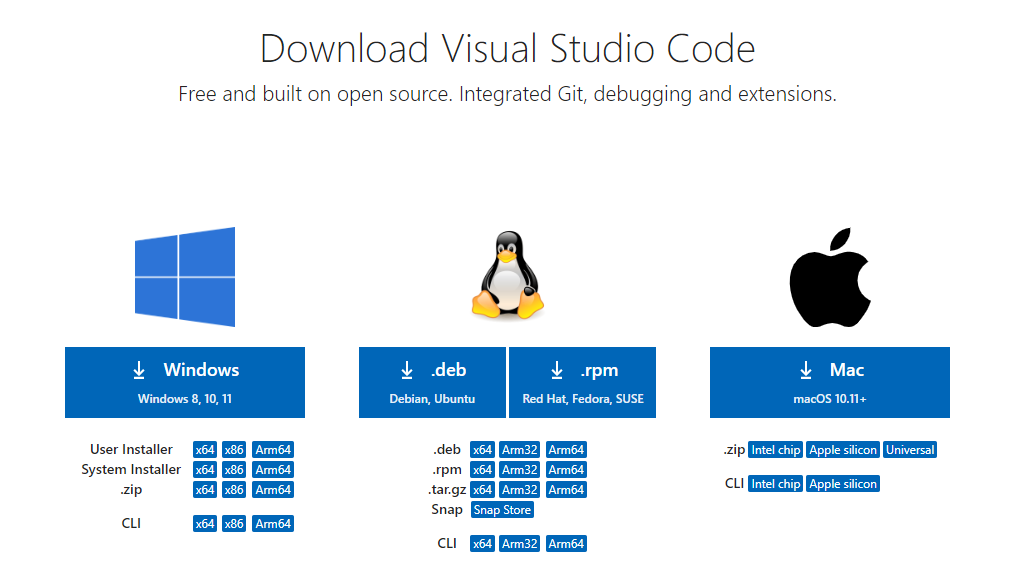
下载安装VSCode
访问VSCode官网下载页面, 并选择对应操作系统的安装包进行下载和安装。
安装PlatformIO插件
启动VSCode并安装嵌入式开发环境插件PlatformIO
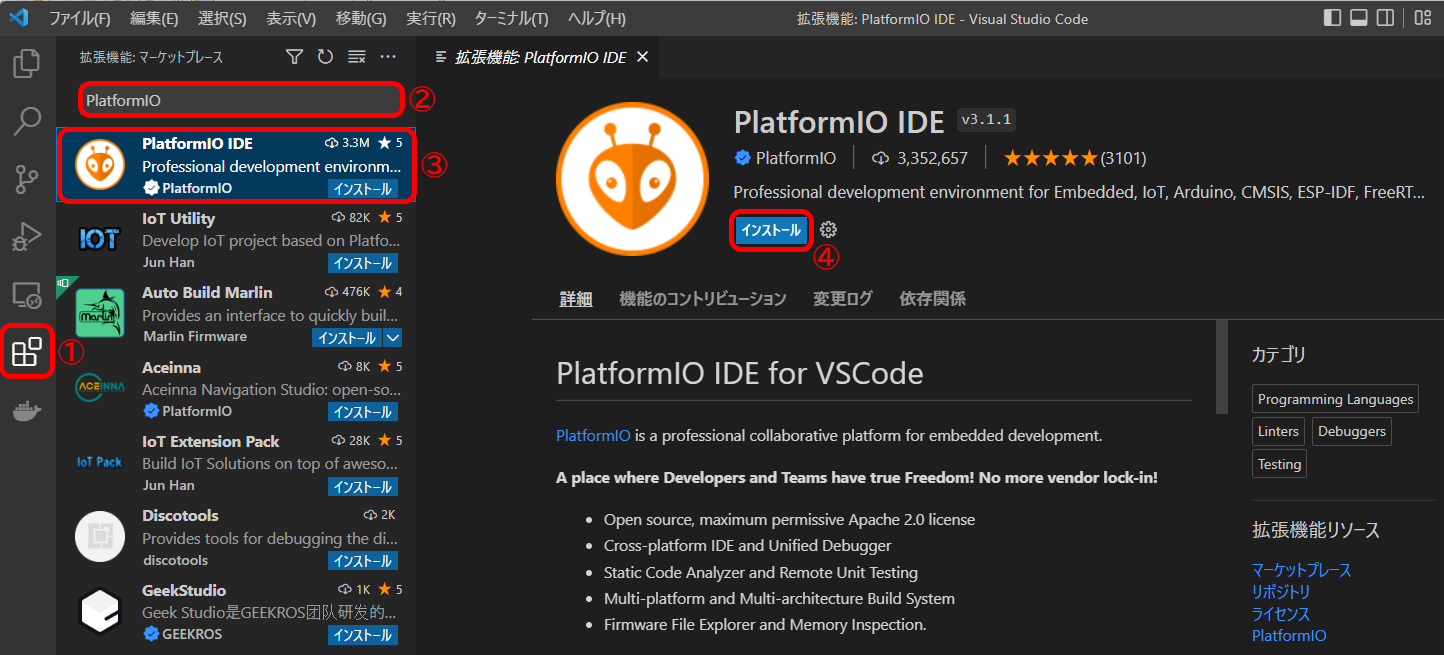
操作步骤:
- 点击左侧活动栏的"Extensions"图标
- 搜索框中输入"PlatformIO"
- 在搜索结果中选择"PlatformIO IDE"
- 点击安装按钮
2. 项目创建与配置
创建新项目
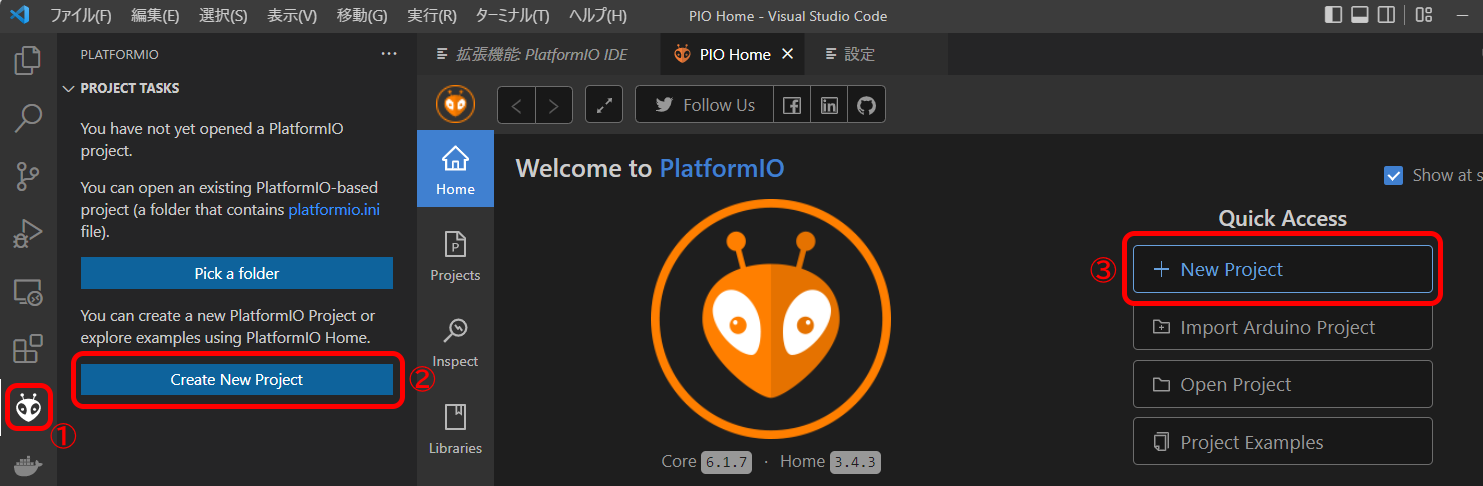
操作步骤:
- 点击左侧活动栏的"PlatformIO"图标
- 选择"Create New Project"
- 在PIOHome选项卡中点击"New Project"
项目配置向导
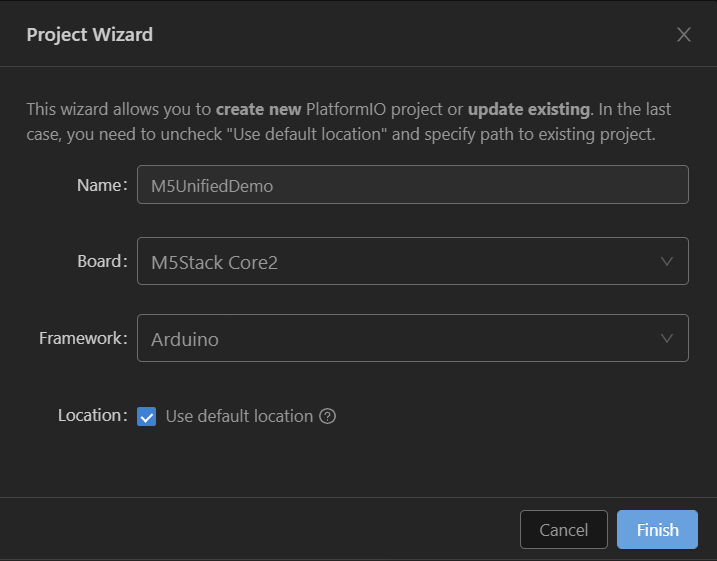
配置项说明:
- Name:输入项目名称
- Board:选择目标开发板(如M5Stack Core2、M5Stack AtomS3等)
- Framework:选择Arduino框架
完成配置后点击"Finish"
3. 添加M5Unified库
添加库到项目
操作步骤:
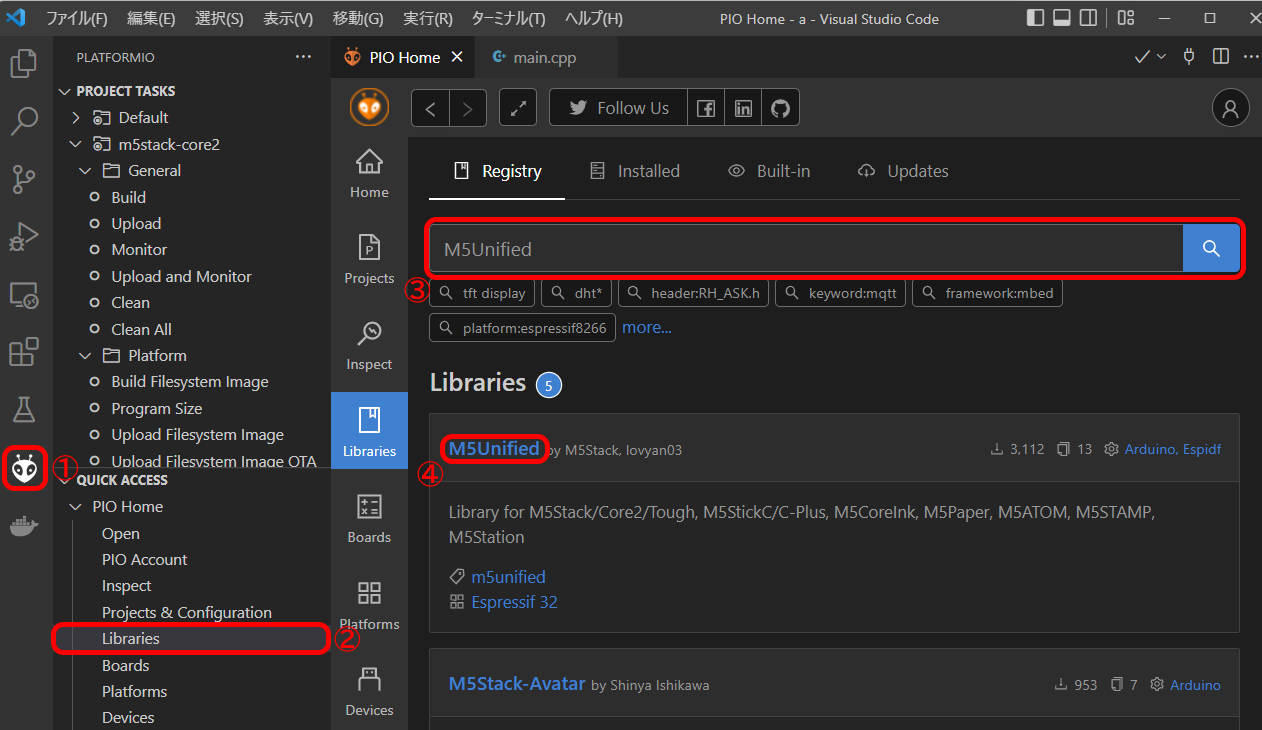
- 点击左侧活动栏的"PlatformIO"图标
- 选择"Libraries"
- 搜索框中输入"M5Unified"
- 在搜索结果中选择"M5Unified"
- 找到M5Stack官方提供的M5Unified库(作者lovyan03)
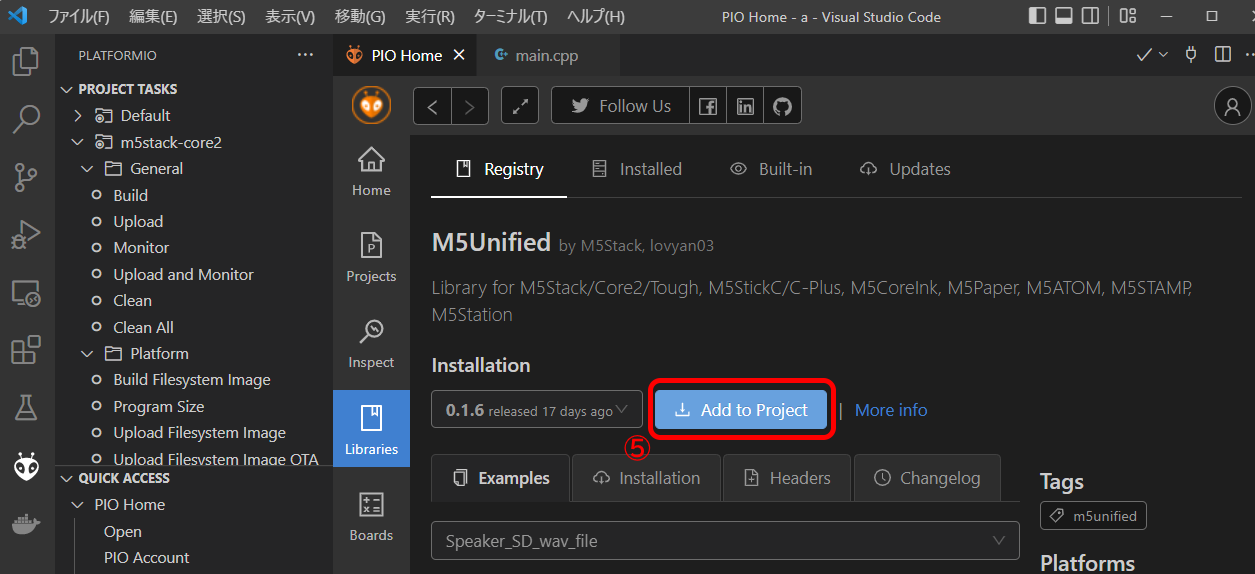
- 点击"Add to Project"
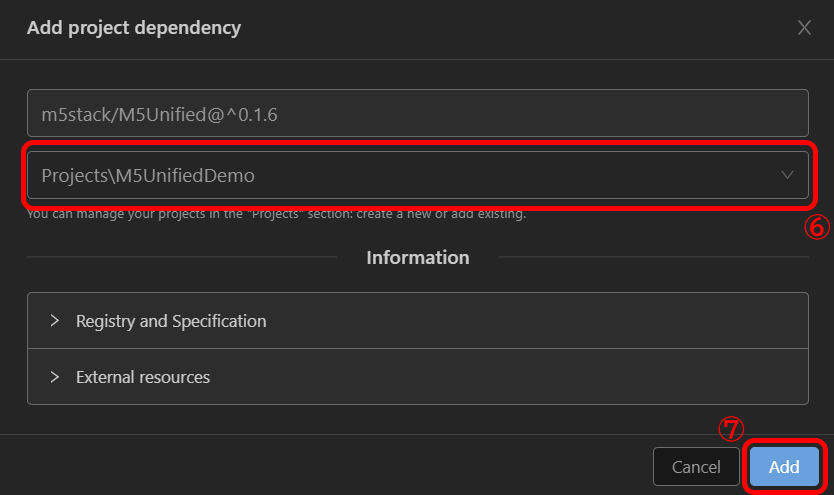
- 选择之前创建的项目
- 点击"Add"按钮
安装成功后会出现"Congrats"提示对话框,表示库已成功添加到项目中。
4. 程序编译与烧录
编译烧录程序
操作步骤:
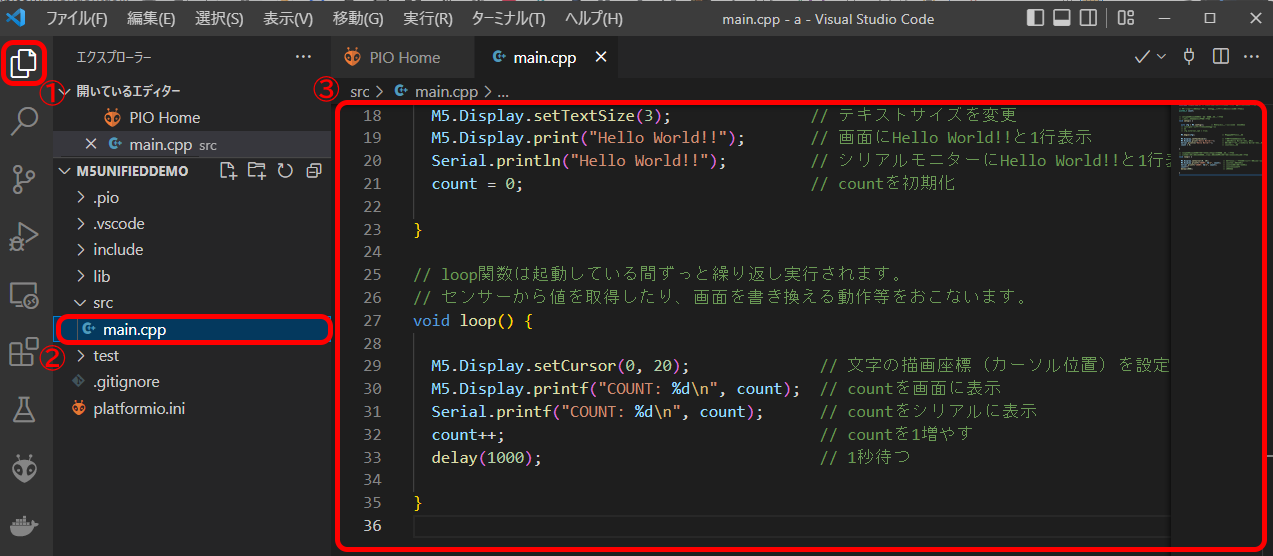
- 点击左侧活动栏的"Explorer"图标
- 打开"src/main.cpp"文件,并粘贴下方案例程序
cpp
1 2 3 4 5 6 7 8 9 10 11 12 13 14 15 16 17 18 19 20 21 22 23 24 25 26 27 28 29 30 31 32 33 34 35
#include <M5Unified.h> // Make the M5Unified library available to your program.

// global variables (define variables to be used throughout the program)
uint32_t count;


// setup function is executed only once at startup.
// This function mainly describes the initialization process.
void setup() {

  auto cfg = M5.config(); // Assign a structure for initializing M5Stack
  // If config is to be set, set it here
  // Example.
  // cfg.external_spk = true;

  M5.begin(cfg);                        // initialize M5 device

  M5.Display.setTextSize(3);            // change text size
  M5.Display.print("Hello World!!!") ;  // display Hello World! and one line is displayed on the screen
  Serial.println("Hello World!!!") ;    // display Hello World! and one line on the serial monitor
  count = 0;                            // initialize count

}

// loop function is executed repeatedly for as long as it is running.
// loop function acquires values from sensors, rewrites the screen, etc.
void loop() {

  M5.Display.setCursor(0, 20);             // set character drawing coordinates (cursor position)
  M5.Display.printf("COUNT: %d\n", count); // display count on screen
  Serial.printf("COUNT: %d\n", count);  // display count serially
  count++;                              // increase count by 1
  delay(1000);                          // wait 1 second(1,000msec)

}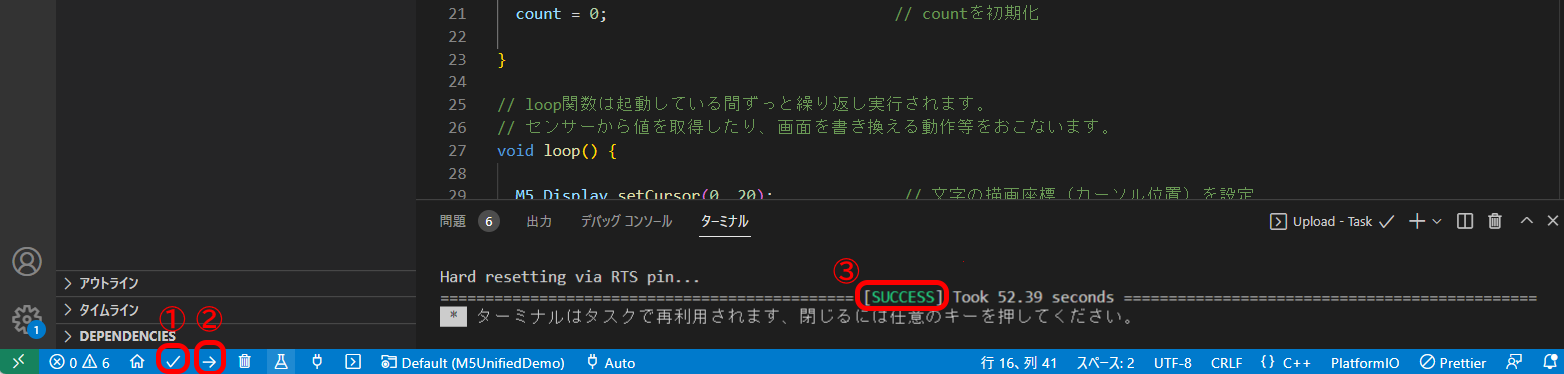
编译烧录:
- 点击(1)仅编译
- 点击(2)编译并烧录到设备
- 成功时终端会显示(3)"Success"提示
Page Tools