


Arduino Quick Start
2. Devices & Examples
3. M5Unified
4. M5GFX
5. Extensions
Unit
Atomic
Base
Tab5
IoT
Accessories
AtomS3R Button
APIs and example programs related to AtomS3R button input.
Note:
Make sure to include the
M5.update() function in the main loop to refresh the status, and minimize blocking operations as much as possible. Otherwise, button state changes may not be detected in time.Example Program
Compilation Requirements
- M5Stack board manager version >= 3.2.2
- Development board option = M5AtomS3R
- M5Unified library version >= 0.2.17
- M5GFX library version >= 0.2.22
cpp
1 2 3 4 5 6 7 8 9 10 11 12 13 14 15 16
#include "M5Unified.h"

void setup() {
    M5.begin();
    Serial.begin(115200);
}

void loop() {
    M5.update();
    if (M5.BtnA.wasPressed()) {
        Serial.println("Pressed");
    }
    if (M5.BtnA.wasReleased()) {
        Serial.println("Released");
    }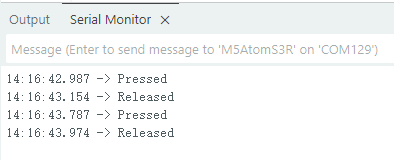
}After uploading the above program to AtomS3R, open the serial monitor. When the button (screen) is pressed, it will output "Pressed", and when the button (screen) is released, it will output "Released".
API
The AtomS3R button feature uses Button_Class from the M5Unified library. For more button-related APIs, refer to the documentation below: