

Arduino Quick Start
2. Devices & Examples
3. M5Unified
4. M5GFX
5. Extensions
Unit
Atomic
Tab5
IoT
Accessories
Unit Scales Arduino Tutorial
1. Preparation
- Environment Setup: Follow the Arduino IDE Getting Started Tutorial to install the IDE, then install the board manager package and required driver libraries for the development board you are using.
- Required Driver Libraries:
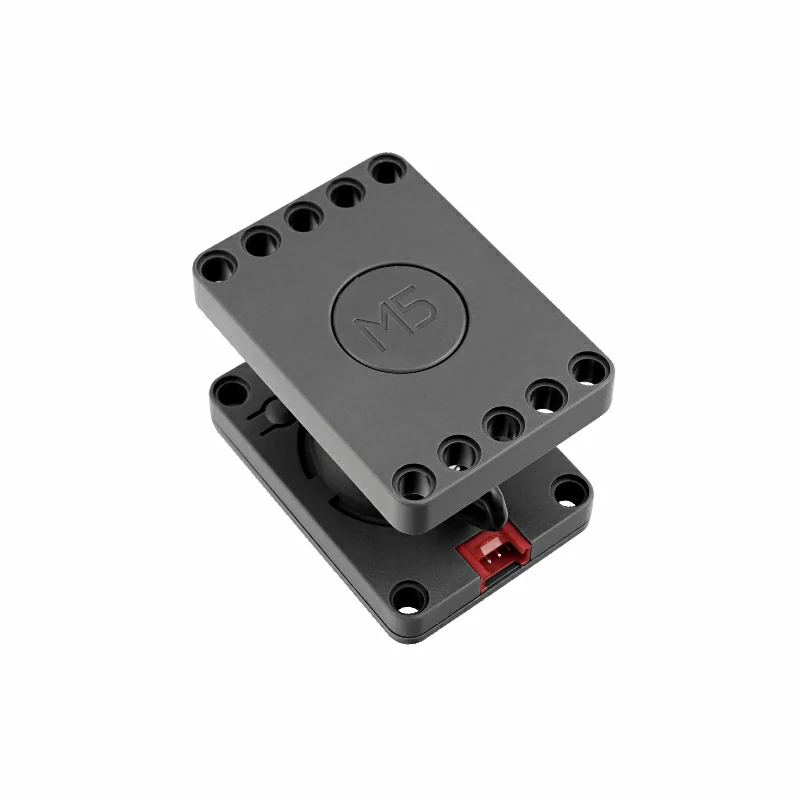
- Required Hardware:

2. Notes
Pin Compatibility
Pin configurations vary between host devices. M5Stack provides an official pin compatibility table for reference. Modify the example program according to the actual pin connections.
3. Example Program
- This tutorial uses CoreS3 with Unit Scales. Unit Scales communicates via I2C. Once connected, the corresponding pins are
G2 (SDA)andG1 (SCL).
Caution
The maximum weighing capacity of Unit Scales is
20kg. To avoid damaging the sensor, do not exceed the rated capacity. Before the first measurement, perform zero calibration with the weighing platform unloaded.cpp
1 2 3 4 5 6 7 8 9 10 11 12 13 14 15 16 17 18 19 20 21 22 23 24 25 26 27 28 29 30 31 32 33 34 35 36 37 38 39 40 41 42 43 44 45 46 47 48 49 50 51 52 53 54 55 56 57 58 59 60 61 62 63 64 65 66 67 68 69 70 71 72 73 74 75 76 77 78 79 80 81 82 83 84 85 86 87 88 89 90 91 92 93 94 95 96 97 98 99 100 101 102 103 104 105 106 107 108 109 110 111 112 113 114 115 116 117 118 119 120 121 122 123 124 125 126 127 128 129 130 131 132 133 134 135 136 137 138 139 140 141 142 143 144 145 146 147 148 149 150 151 152 153 154 155 156 157 158 159 160 161 162 163 164 165 166 167 168 169 170 171 172 173 174 175 176 177 178 179 180 181 182 183 184 185 186 187 188 189 190 191 192 193 194 195 196 197 198 199 200 201 202 203 204 205 206 207 208 209
#include <M5GFX.h>
#include <M5Unified.h>
#include <M5_Scales.h>

M5Canvas canvas(&M5.Display);
M5_Scales scales;

// LED color presets selected by the COLOR button.
constexpr uint8_t COLOR_COUNT = 3;
const uint32_t colorList[COLOR_COUNT] = {0xFF0000, 0x00FF00, 0x0000FF};
const char *const colorNames[COLOR_COUNT] = {"RED", "GREEN", "BLUE"};
const uint16_t colorBorders[COLOR_COUNT] = {TFT_RED, TFT_GREEN, TFT_BLUE};

// Bottom touch-button layout and screen refresh rate.
constexpr int16_t BUTTON_MARGIN = 4;
constexpr int16_t BUTTON_GAP = 4;
constexpr int16_t BUTTON_HEIGHT = 46;
constexpr uint32_t SCREEN_UPDATE_INTERVAL_MS = 100;

int16_t buttonWidth = 0;
int16_t buttonY = 0;
bool ledSync = false;
uint8_t colorIndex = 2;
uint32_t lastScreenUpdate = 0;
bool forceScreenUpdate = true;

// Calculate the left edge of a touch button.
int16_t getButtonX(uint8_t index) {
  return BUTTON_MARGIN + index * (buttonWidth + BUTTON_GAP);
}

// Return the touched button index, or -1 when outside all buttons.
int8_t getTouchedButton(int16_t x, int16_t y) {
  if (y < buttonY || y >= buttonY + BUTTON_HEIGHT)
    return -1;

  for (uint8_t i = 0; i < 3; ++i) {
    const int16_t buttonX = getButtonX(i);
    if (x >= buttonX && x < buttonX + buttonWidth)
      return i;
  }
  return -1;
}

// Draw one two-line touch button.
void drawButton(uint8_t index, const char *title, const char *value,
                uint16_t fillColor, uint16_t borderColor) {
  const int16_t x = getButtonX(index);

  canvas.fillRoundRect(x, buttonY, buttonWidth, BUTTON_HEIGHT, 4, fillColor);
  canvas.drawRoundRect(x, buttonY, buttonWidth, BUTTON_HEIGHT, 4, borderColor);
  canvas.drawRoundRect(x + 1, buttonY + 1, buttonWidth - 2, BUTTON_HEIGHT - 2,
                       3, borderColor);

  canvas.setFont(&fonts::Font2);
  canvas.setTextSize(1);
  canvas.setTextDatum(textdatum_t::middle_center);
  canvas.setTextColor(TFT_WHITE);
  canvas.drawString(title, x + buttonWidth / 2, buttonY + 13);
  canvas.drawString(value, x + buttonWidth / 2, buttonY + 33);
}

void drawScreen() {
  canvas.fillSprite(TFT_BLACK);
  canvas.setFont(&fonts::FreeMonoBold9pt7b);
  canvas.setTextSize(1);
  canvas.setTextDatum(textdatum_t::top_left);
  canvas.setTextColor(TFT_WHITE);

  // Read the latest Unit Scales status before drawing the frame.
  const int weight = scales.getWeight();
  const uint32_t adc = scales.getRawADC();
  const bool unitButtonPressed = scales.getBtnStatus();
  const uint8_t buttonCount = scales.getBtnPressedCount();
  const uint8_t longPressCount = scales.getBtnLongPressedCount();
  const uint32_t ledColor = scales.getLEDColor();

  canvas.drawCenterString("Unit Scales Status", 160, 5);
  canvas.drawString("WEIGHT: " + String(weight) + " g", 8, 28);
  canvas.drawString("RAW ADC: " + String(adc), 8, 50);
  canvas.drawString("UNIT BUTTON: " +
                        String(unitButtonPressed ? "PRESSED" : "RELEASED"),
                    8, 72);
  canvas.drawString("BUTTON COUNT: " + String(buttonCount), 8, 94);
  canvas.drawString("LONG PRESS: " + String(longPressCount), 8, 116);
  canvas.drawString("LED COLOR: 0x" + String(ledColor, HEX), 8, 138);
  canvas.drawString("LED SYNC: " + String(ledSync ? "ON" : "OFF"), 8, 160);

  drawButton(0, "LED SYNC", ledSync ? "ON" : "OFF",
             ledSync ? TFT_DARKGREEN : TFT_DARKGREY,
             ledSync ? TFT_GREEN : TFT_LIGHTGREY);
  drawButton(1, "SET", "OFFSET", TFT_DARKCYAN, TFT_CYAN);
  drawButton(2, "COLOR", colorNames[colorIndex], TFT_DARKGREY,
             colorBorders[colorIndex]);

  canvas.pushSprite(0, 0);
}

void handleTouch() {
  const auto touch = M5.Touch.getDetail();
  // Trigger an action only after a complete tap is released.
  if (!touch.wasClicked())
    return;

  switch (getTouchedButton(touch.x, touch.y)) {
  case 0: {
    // Toggle weight-based LED synchronization.
    const bool newLedSync = !ledSync;
    if (scales.setLEDSyncWeight(newLedSync)) {
      ledSync = newLedSync;
      if (!ledSync) {
        scales.setLEDColor(colorList[colorIndex]);
      }
      Serial.printf("LED Sync: %s\n", ledSync ? "ON" : "OFF");
    } else {
      Serial.println("Failed to change LED Sync");
    }
    break;
  }

  case 1:
    // Use the current ADC value as the zero offset.
    if (scales.setOffset()) {
      Serial.println("Offset set to current ADC value");
    } else {
      Serial.println("Failed to set offset");
    }
    break;

  case 2: {
    // Cycle through the predefined LED colors.
    const uint8_t newColorIndex = (colorIndex + 1) % COLOR_COUNT;
    if (scales.setLEDColor(colorList[newColorIndex])) {
      colorIndex = newColorIndex;
      Serial.printf("LED color: %s\n", colorNames[colorIndex]);
    } else {
      Serial.println("Failed to change LED color");
    }
    break;
  }

  default:
    return;
  }

  // Refresh the screen immediately after a successful touch action.
  forceScreenUpdate = true;
}

// Show a blocking startup error on the display.
void showConnectionError(const char *message) {
  canvas.fillSprite(TFT_BLACK);
  canvas.setFont(&fonts::FreeMonoBold9pt7b);
  canvas.setTextDatum(textdatum_t::middle_center);
  canvas.setTextColor(TFT_RED);
  canvas.drawString(message, canvas.width() / 2, canvas.height() / 2);
  canvas.pushSprite(0, 0);
}

void setup() {
  // Initialize CoreS3 display, touch, power, and internal peripherals.
  auto config = M5.config();
  config.clear_display = true;
  M5.begin(config);

  Serial.begin(115200);
  M5.Display.setRotation(1);

  // Render the complete UI in a 16-bit sprite to reduce flicker.
  canvas.setColorDepth(16);
  canvas.createSprite(M5.Display.width(), M5.Display.height());

  buttonWidth = (M5.Display.width() - BUTTON_MARGIN * 2 - BUTTON_GAP * 2) / 3;
  buttonY = M5.Display.height() - BUTTON_MARGIN - BUTTON_HEIGHT;

  Wire.end();
  while (!scales.begin(&Wire, EX_SDA, EX_SCL, M5_SCALES_DEFAULT_ADDR)) {
    showConnectionError("UNIT SCALES CONNECT ERROR");
    Serial.println("Unit Scales connect error");
    delay(1000);
  }

  // Apply the initial LED and onboard-button settings.
  bool initialized = true;
  initialized &= scales.setLEDSyncWeight(ledSync);
  initialized &= scales.setBtnOffsetControl(false);
  initialized &= scales.setLEDColor(colorList[colorIndex]);

  Serial.println(initialized ? "Unit Scales initialized"
                             : "Unit Scales initialization error");
  drawScreen();
}

void loop() {
  // Refresh touch state before checking screen input.
  M5.update();
  handleTouch();

  // Limit display and Unit Scales polling to the configured interval.
  const uint32_t now = millis();
  if (forceScreenUpdate ||
      now - lastScreenUpdate >= SCREEN_UPDATE_INTERVAL_MS) {
    drawScreen();
    lastScreenUpdate = now;
    forceScreenUpdate = false;
  }

  delay(10);
}4. Compile and Upload
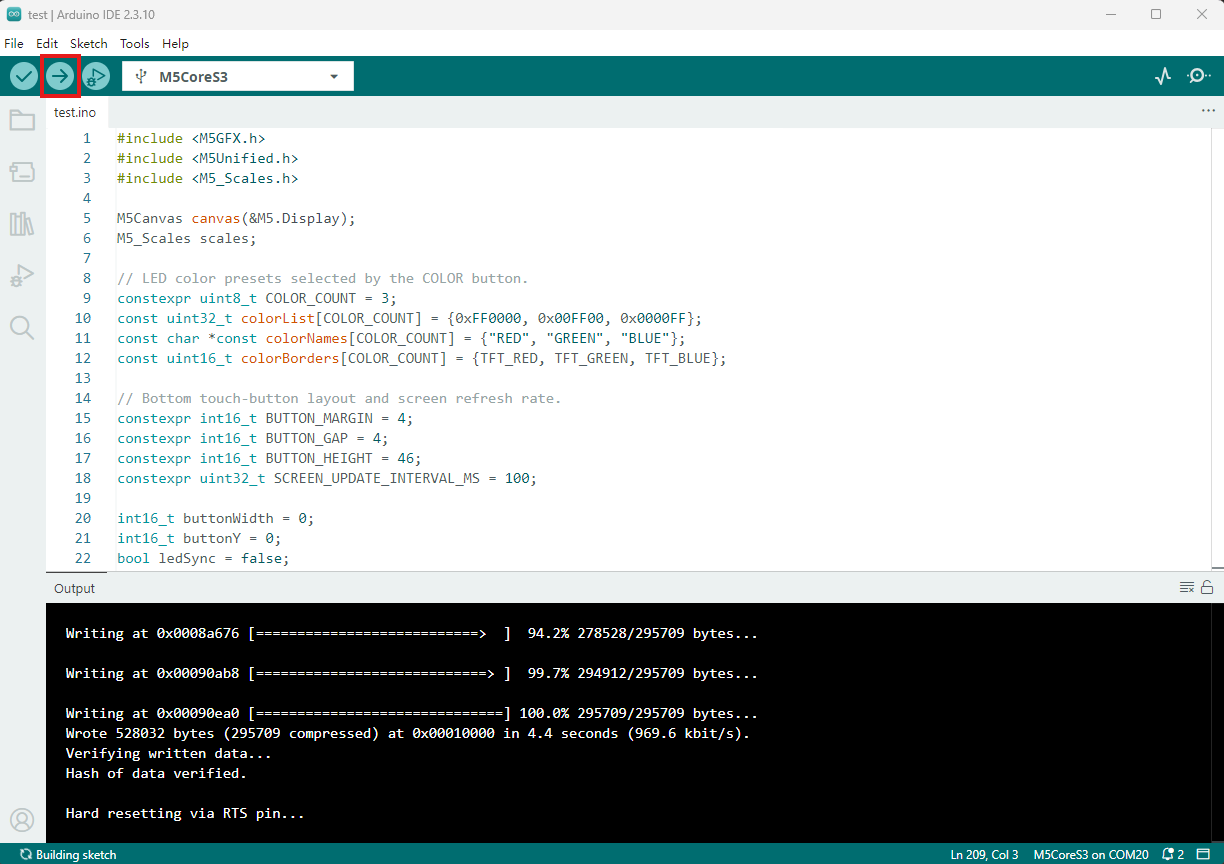
- Copy and paste the example code above into the project code area and select the device port. For details, see Program Compilation and Flashing. Click the compile and upload button in the upper-left corner of Arduino IDE, then wait for the program to compile and upload to the device.
5. Weighing and Touch Controls
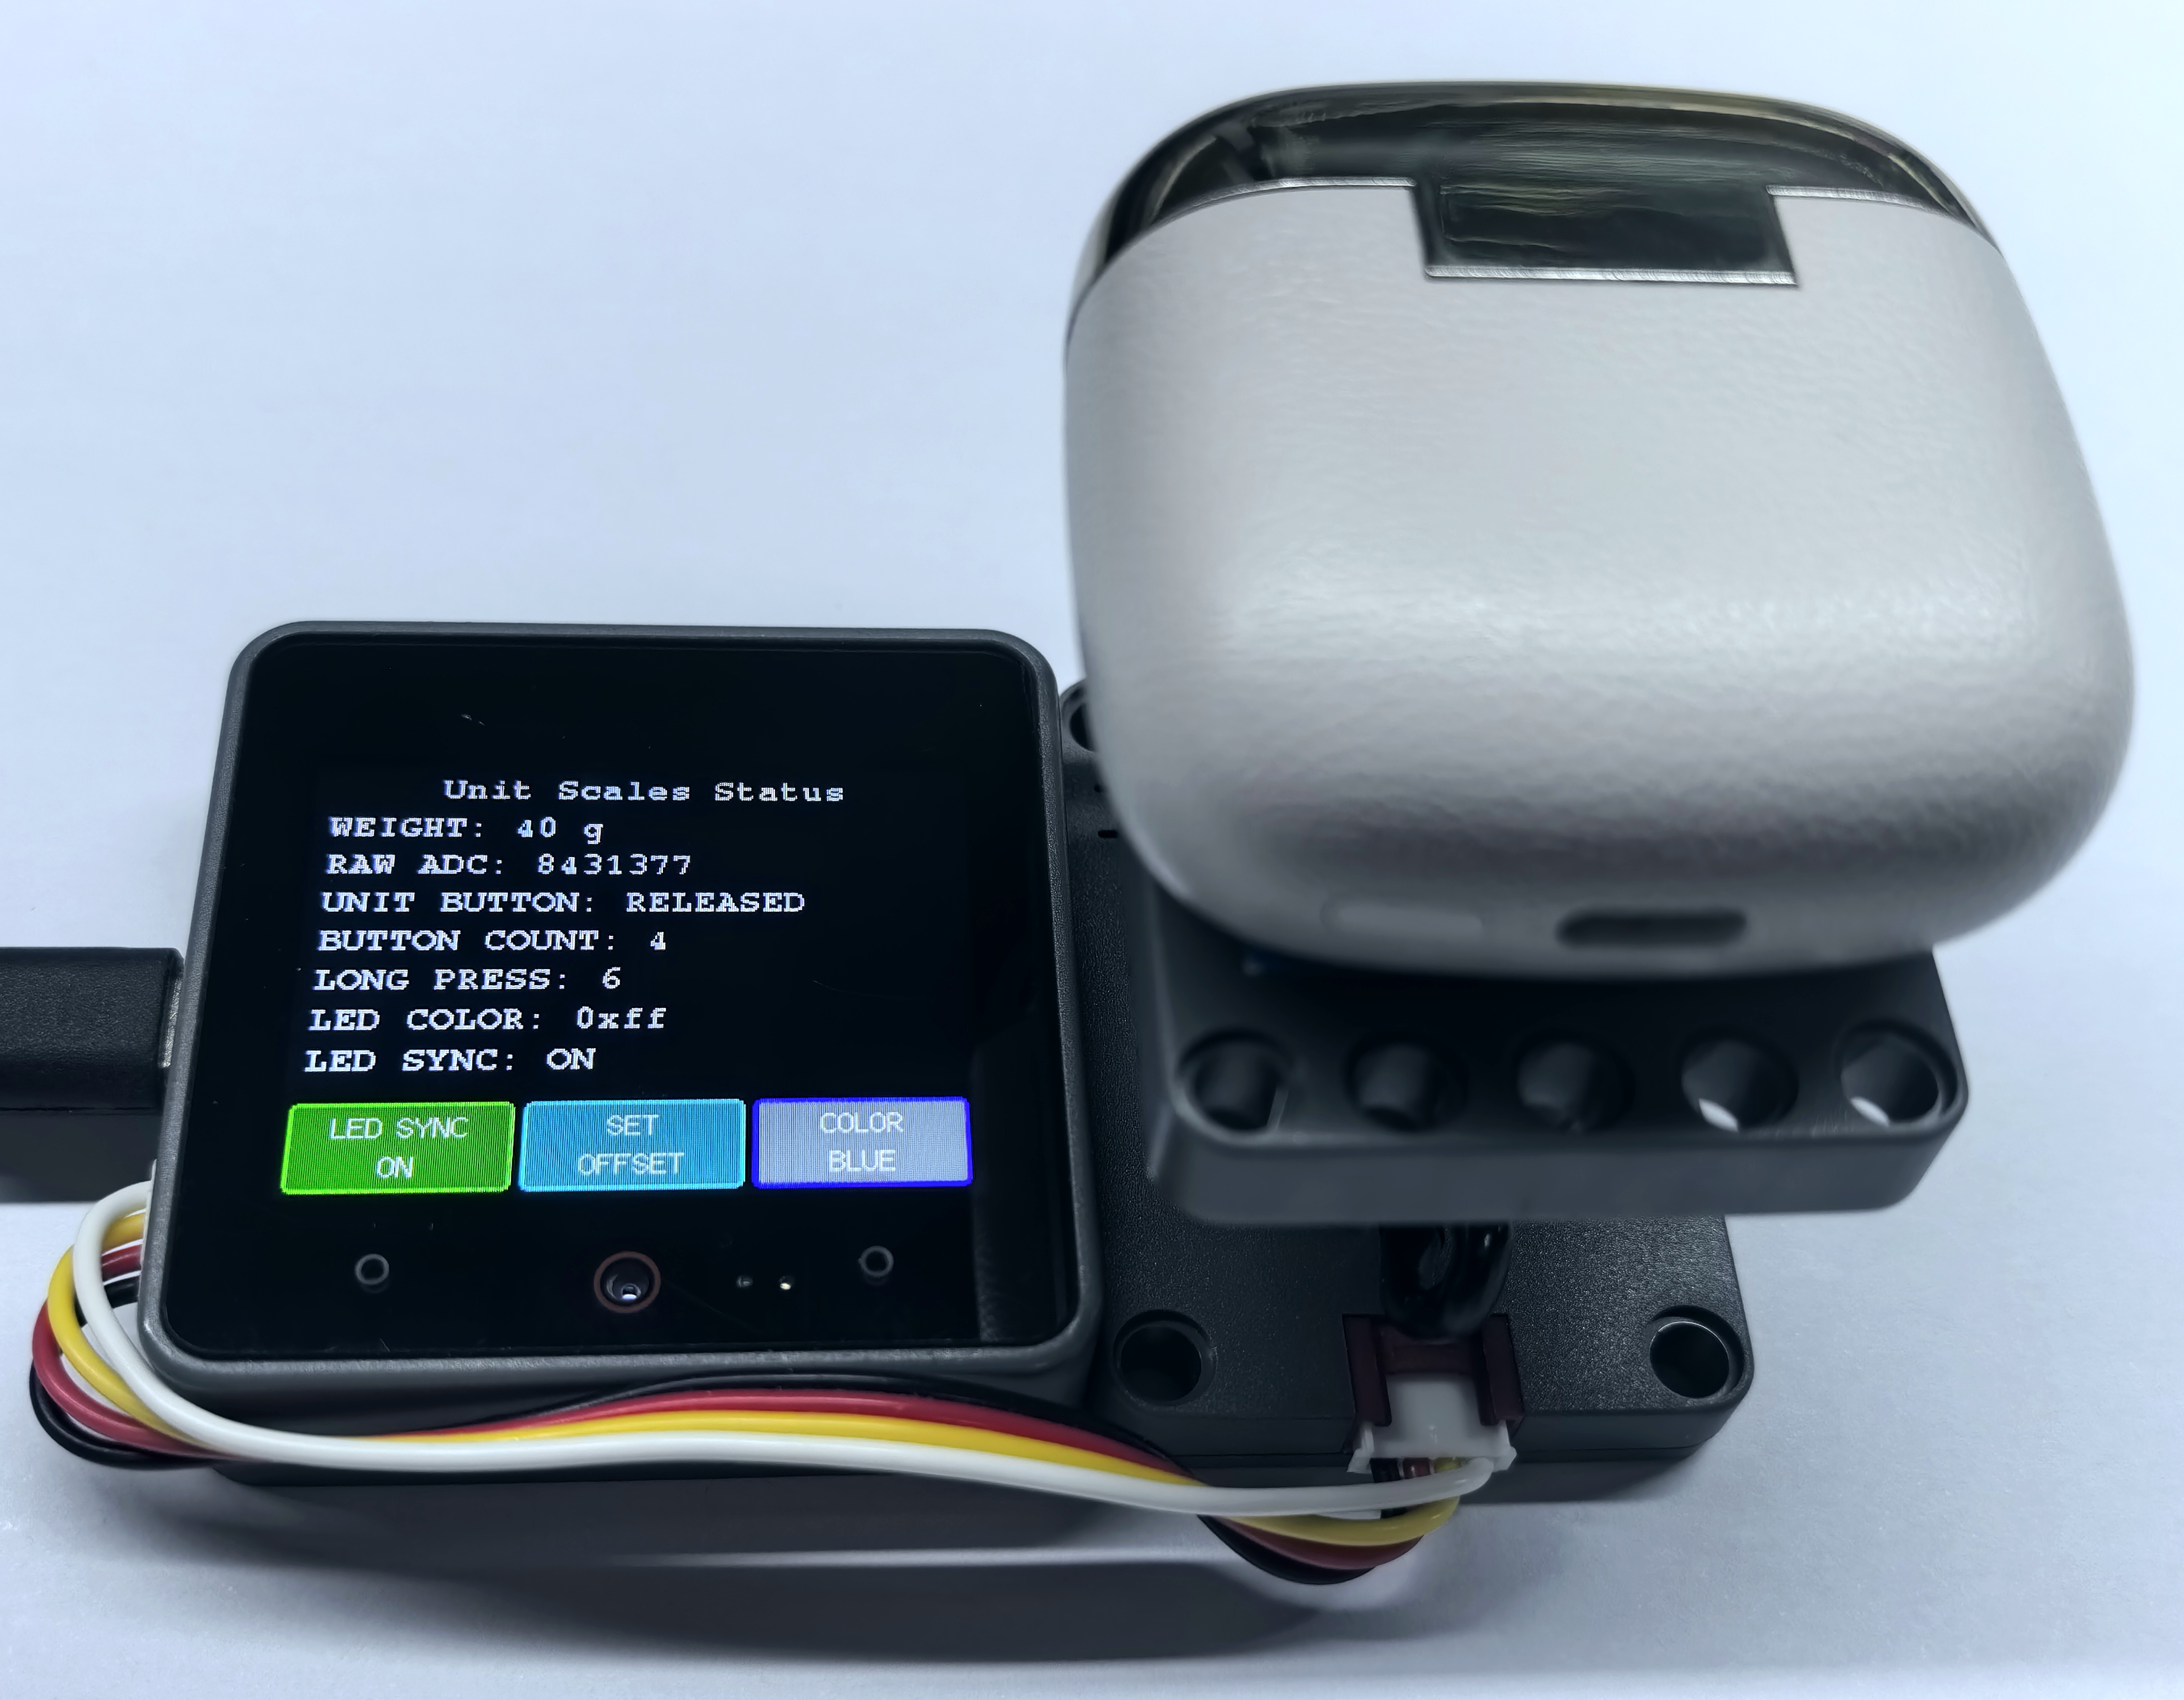
- After the program starts, the CoreS3 screen displays the weight, raw ADC value, Unit Scales button state, button count, LED color, and LED synchronization state, updating every
100ms. TapLED SYNCat the bottom of the screen to toggle LED-to-weight synchronization, tapSET OFFSETto set the current ADC value as zero, and tapCOLORto cycle through red, green, and blue LED colors.
Page Tools