

Product Guide
Linux PC
AI アクセラレーターカード
LLM-8850 カード
AI & Agent
リアルタイム音声アシスタント
XiaoZhi ボイスアシスタント
AtomS3R-M12 Volcengine Kit
Industrial Control
IoT Measuring Instruments
Air Quality
PowerHub
Module13.2 PPS
VAMeter
T-Lite
Ethernet Camera
PoECAM
Wi-Fi Camera
Unit CamS3/-5MP
AI Camera
LoRa & LoRaWAN
Motor Control
ファームウェアの初期化
ディップスイッチ&ピン切り替え
Atom Printer Guide
This tutorial demonstrates how to flash firmware for the Atom Printer and perform web printing and MQTT remote printing operations.
1. Preparations
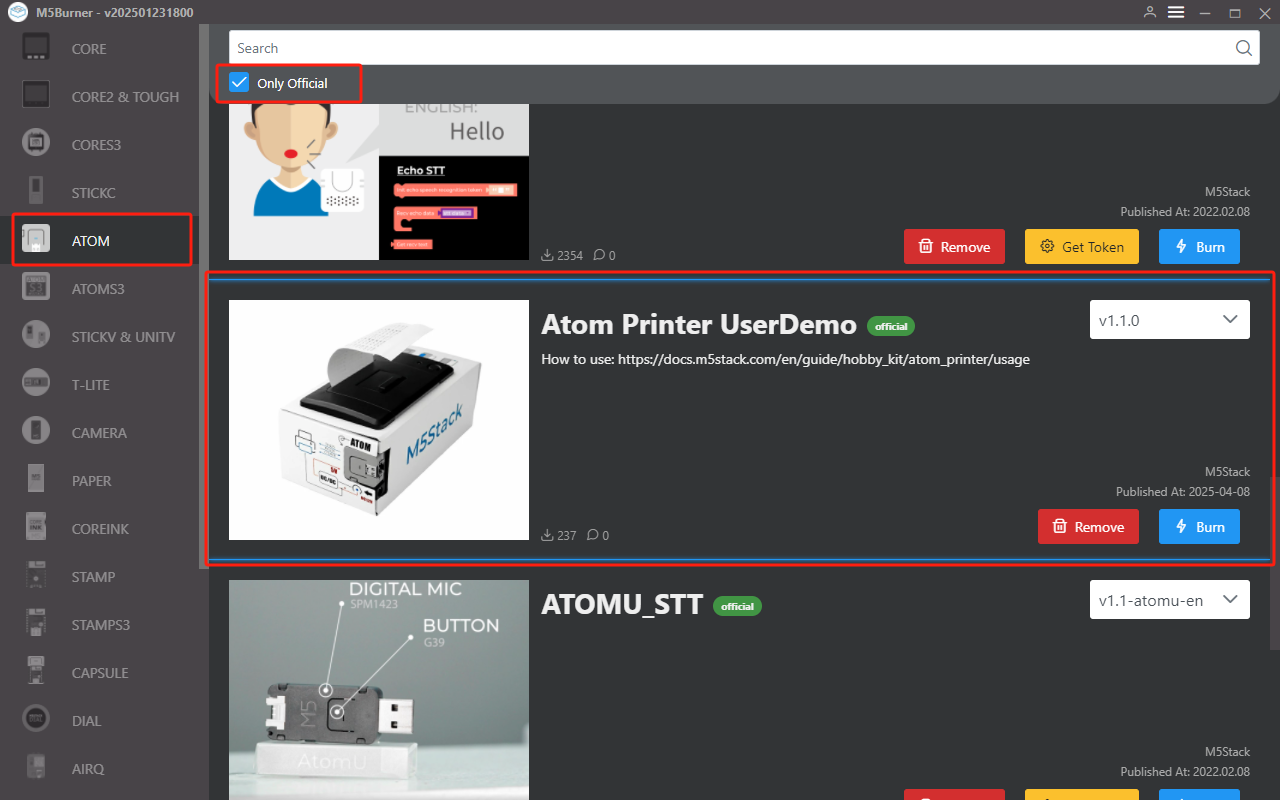
- Refer to the M5Burner tutorial to download the flashing tool, and download the corresponding firmware as shown in the image below.
2. USB Driver Installation
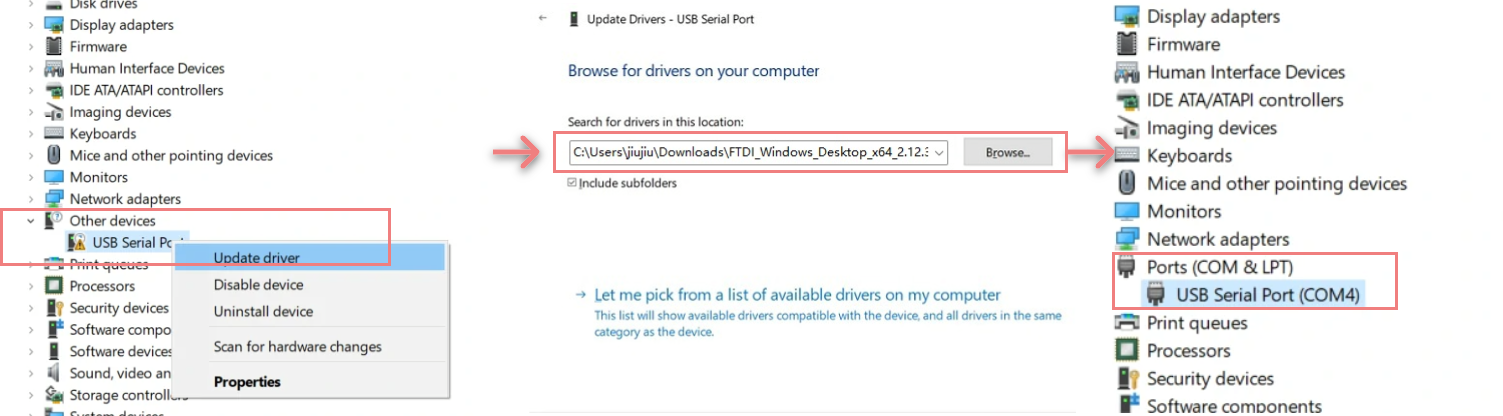
下記の一覧からお使いの OS に対応するドライバファイルを選択し、ダウンロードして展開してください。FTDI Chip 公式サイトでは、その他のバージョンの FTDI ドライバも入手できます。その後、デバイスを PC に接続し、デバイスマネージャーを開いて FTDI ドライバをインストールします(下図は Windows 10 の例です)。(注意:一部の環境では、ドライバを 2 回インストールしないと有効にならない場合があります。未認識のデバイス名は通常 M5Stack または USB Serial です。)
| ドライバ名 | ダウンロードリンク |
|---|---|
| Windows_Desktop_x64 | Download |
| Windows_Desktop_x86_32 | Download |
| Windows_Desktop_ARM | Download |
| MacOS_Intel | Download |
| MacOS_ARM64 | Download |
System Preferences > Security & Privacy > General > Allow apps downloaded from > App Store and identified developers is selected.3. Firmware Flashing
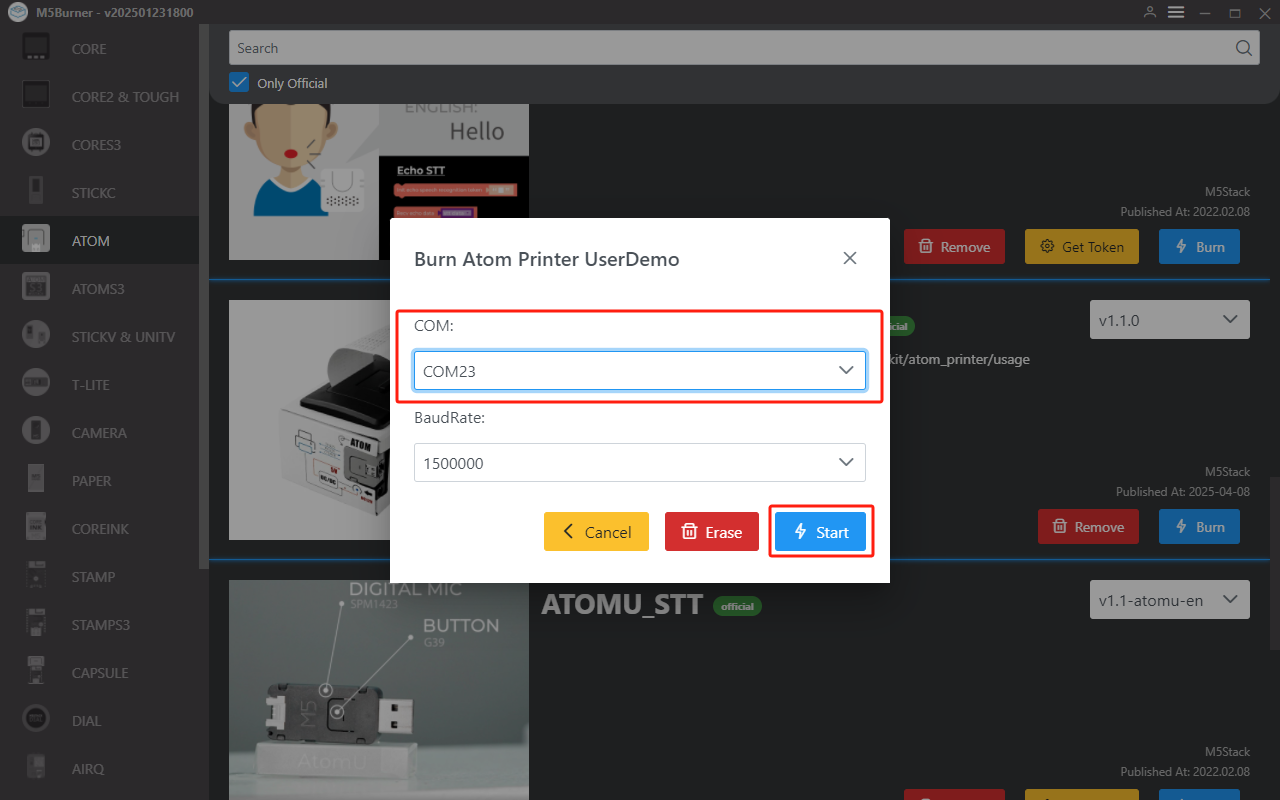
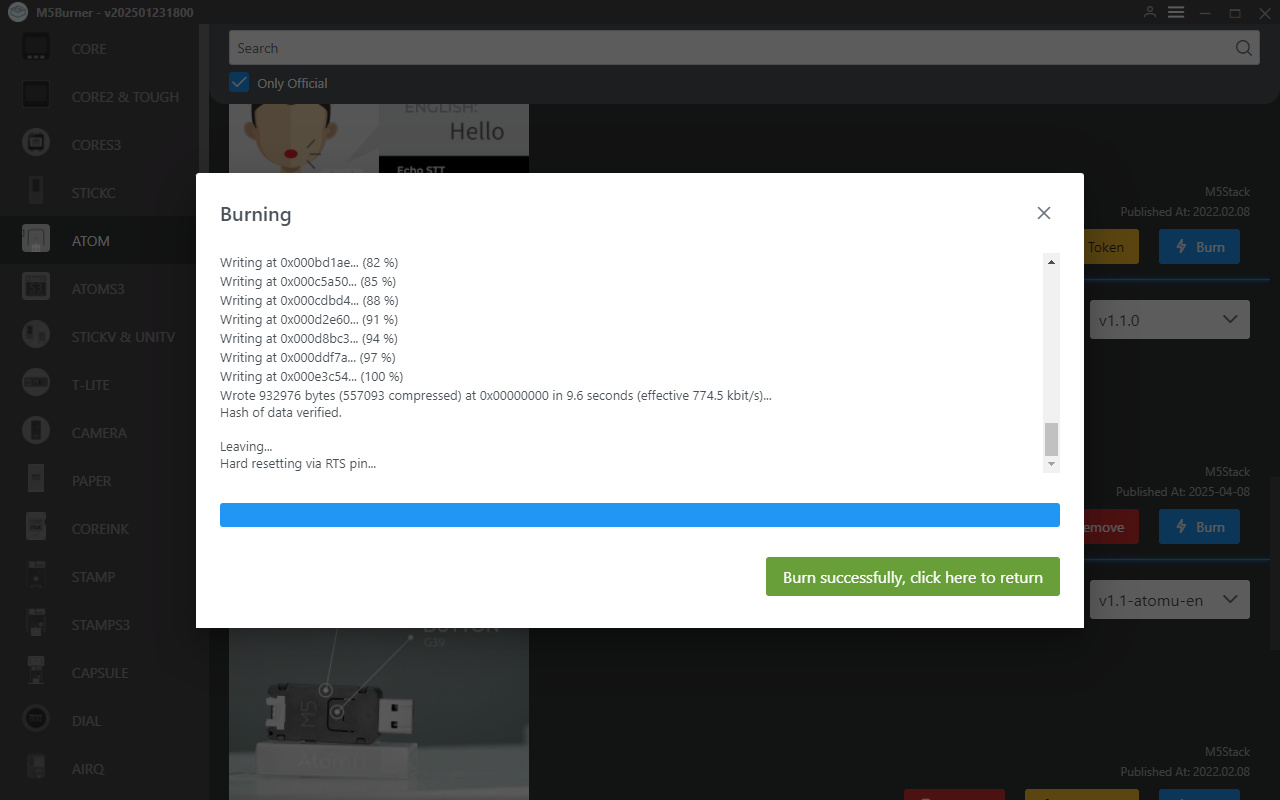
Connect the device to your computer via USB, click the Burn button, and select the corresponding port for flashing.
4. How to use?
AP Printing
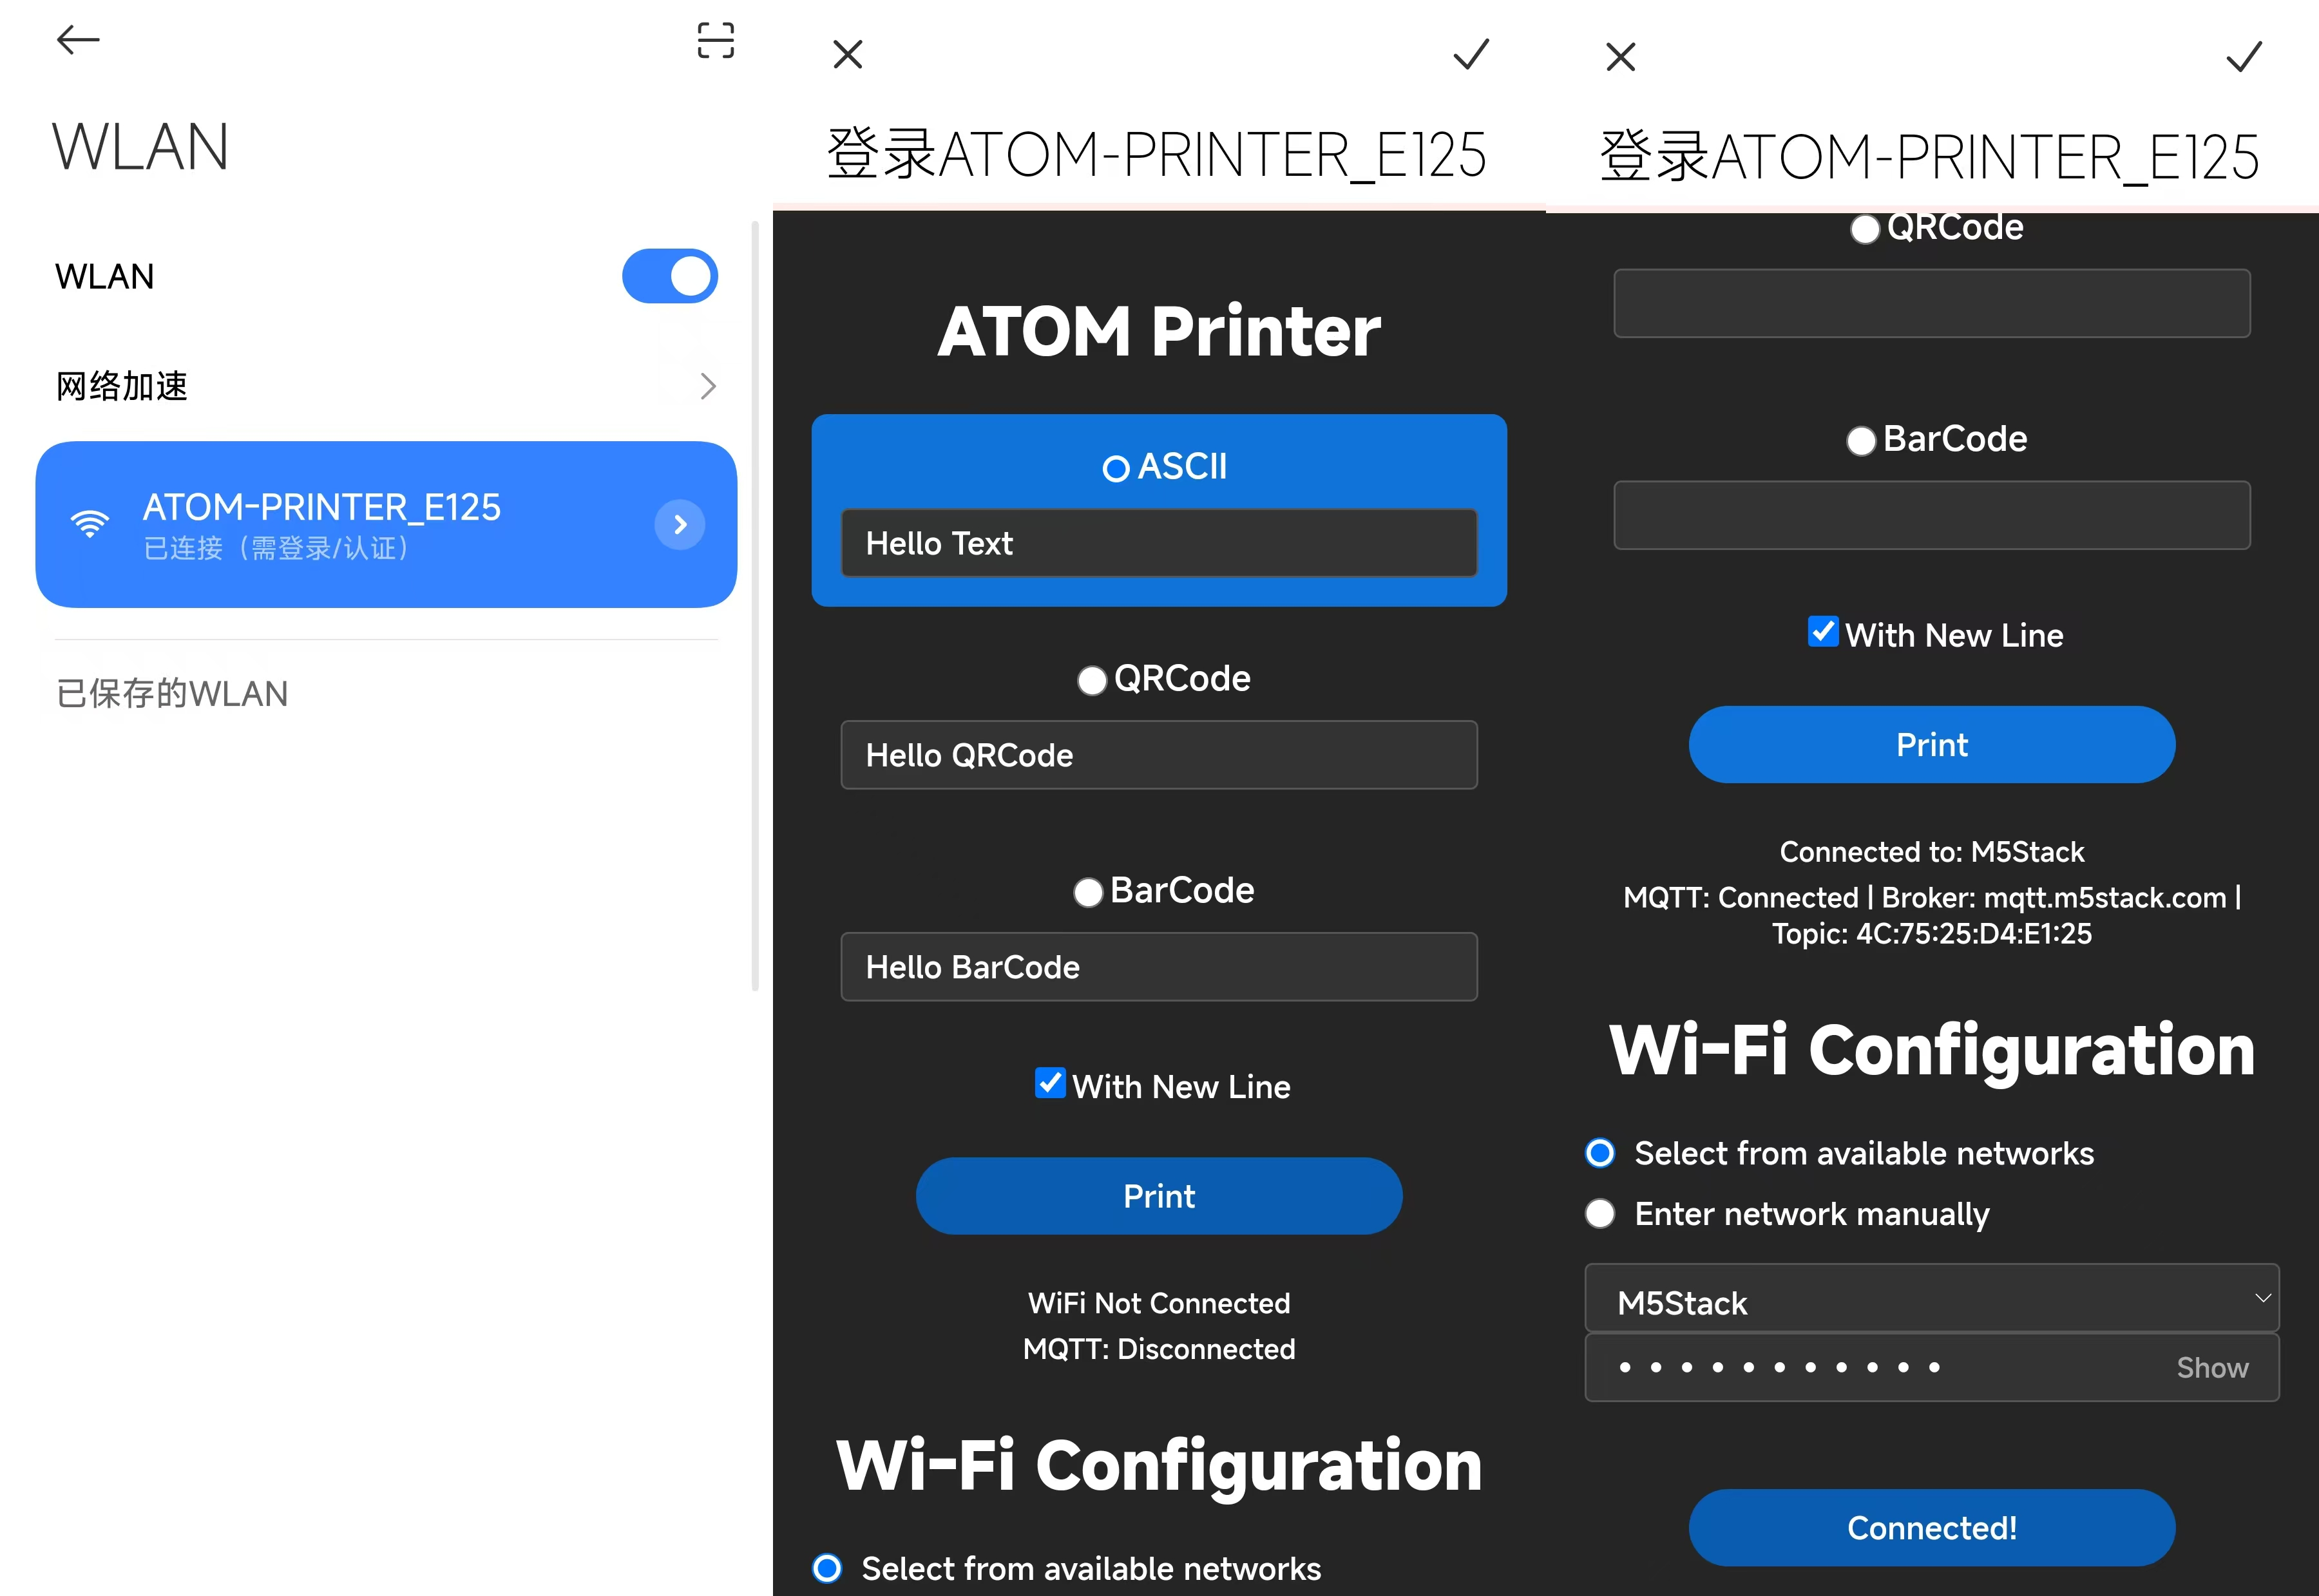
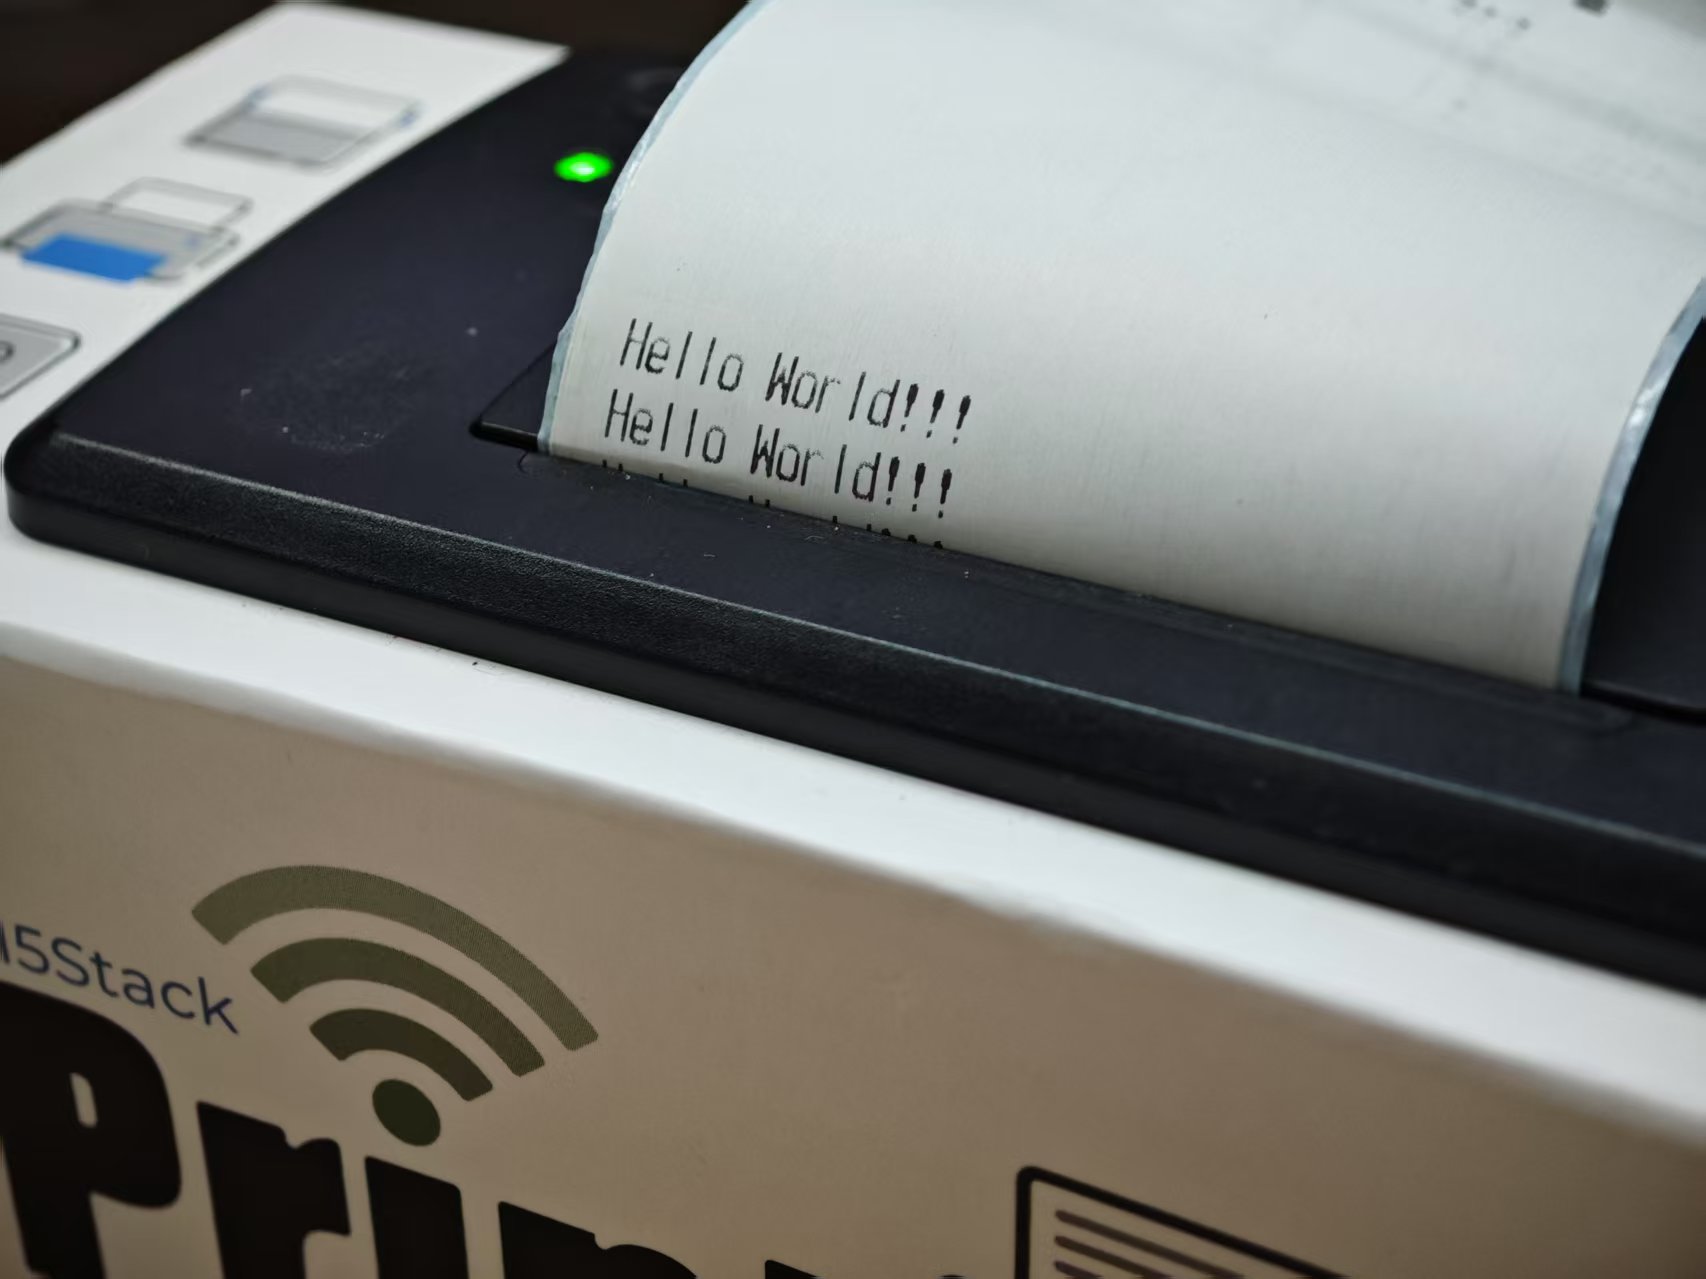
After booting, the device will default to enabling an AP hotspot (ATOM_PRINTER-xxxx). Connect your phone to the AP hotspot and use a browser (Chrome recommended) to access 192.168.4.1 to navigate to the printing page (connecting to the AP usually redirects to this page by default). The page offers multiple printing options: text, QR code, and barcode. Enter characters in the corresponding input field and click the Print button to print.
MQTT Remote Printing
The bottom of the AP printing page provides Wi-Fi configuration options. By configuring Wi-Fi, the device will automatically connect to the M5Stack MQTT server (Server: mqtt.m5stack.com, Port: 1883). Once connected, the device uses its MAC address as the subscription topic, enabling remote printing control via other MQTT clients.
- Example: Use the MQTT debugging tool for remote printing control.
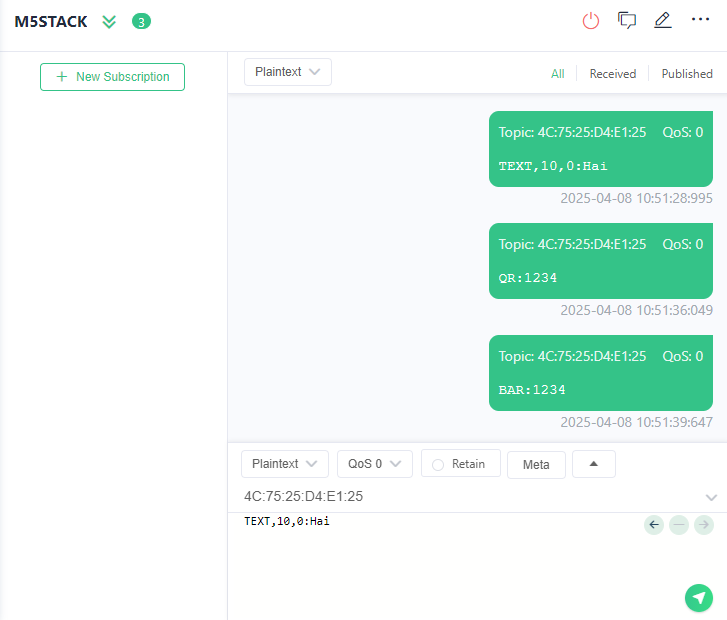
- Text printing command:
TEXT,10,0:Hai - QR code printing command:
QR:1234 - Barcode printing command:
BAR:1234 5. Notes
Status LED Indicators
- Green blinking: Initialization complete
- Green solid: Wi-Fi connected
- Blue solid: MQTT connected
- Blue blinking: MQTT disconnected
Button Operations
- Long-press the middle button on the Atom to restart and clear Wi-Fi information.