


Product Guide
Linux PC
CardputerZero
AI Accelerator Card
LLM-8850 Card
Large Language Models
AI & Agent
Real-Time AI Voice Assistant
XiaoZhi Voice Assistant
AtomS3R-M12 Volcengine Kit
Offline Voice Recognition
Industrial Control
IoT Measuring Instruments
Air Quality
PowerHub
Module13.2 PPS
VAMeter
T-Lite
Input & Output Devices
Ethernet Camera
PoECAM
Wi-Fi Camera
Unit CamS3/-5MP
AI Camera
LoRa & LoRaWAN
Motor Control
Restore Factory Firmware
DIP Switch Usage Guide
PaperColor Factory Firmware Usage Guide
1. Introduction
The PaperColor factory firmware provides convenient image management and display functionality, supporting the push of custom images to the device via an AP Web page or the Ezdata cloud platform. The firmware supports image slideshow and low-power mode, enabling stable long-term operation in battery-powered scenarios.
2. Configuration Page
Press the power button on the left side of the device to turn it on.
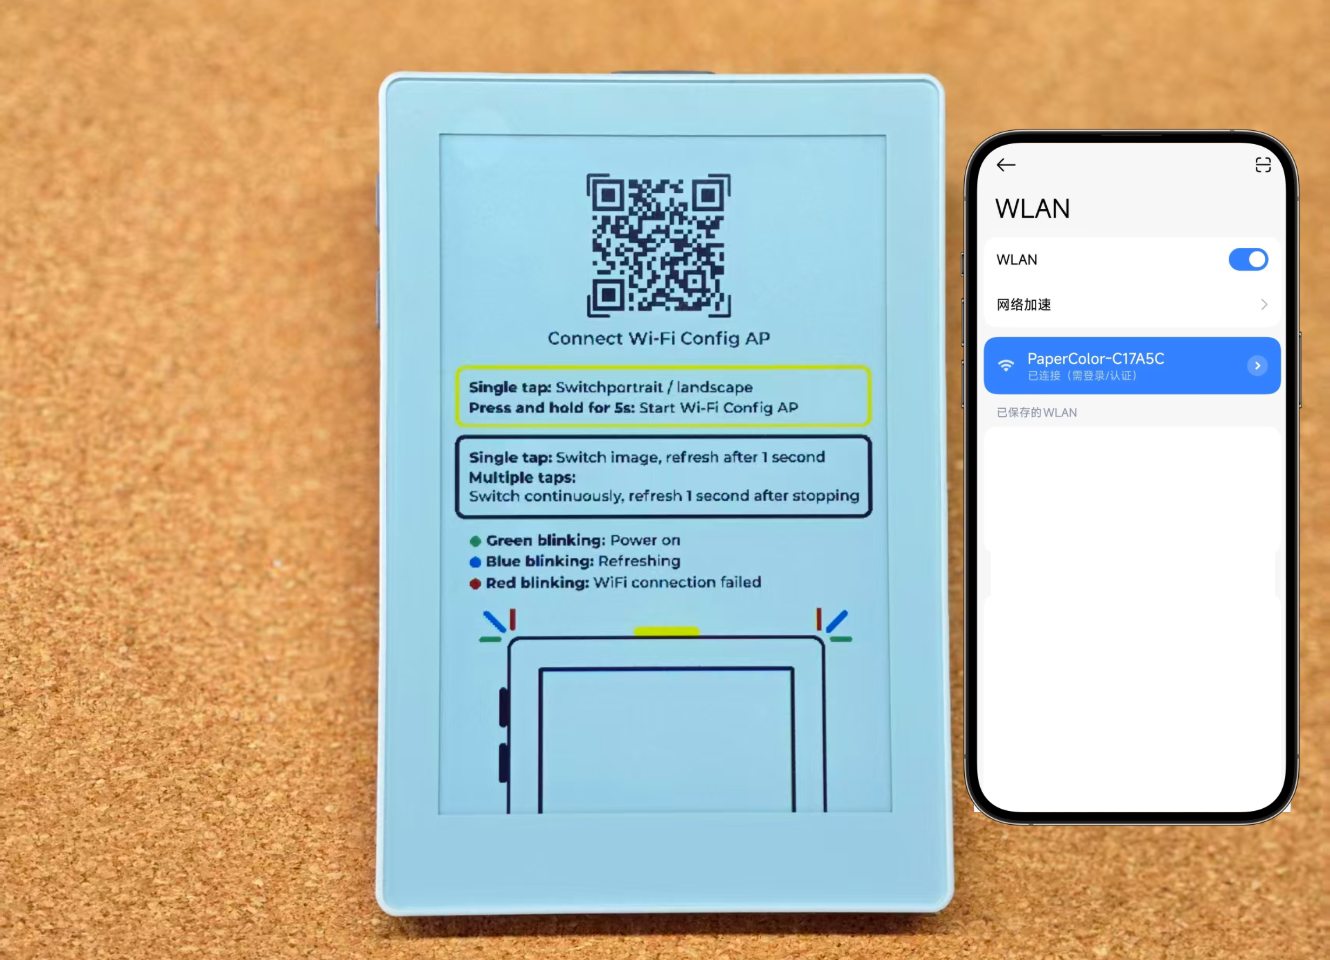
After powering on, the device will automatically create an AP hotspot named PaperColor-XXXXXX. Connect your phone to the hotspot, then open a browser and navigate to 192.168.4.1 to access the Web configuration page.
Note: The page that automatically pops up on Android devices may not support image uploads correctly. It is recommended to open the configuration page by manually navigating to 192.168.4.1 in a browser.
Click the Mode button at the bottom of the page to switch between modes. Descriptions of each mode are provided below.
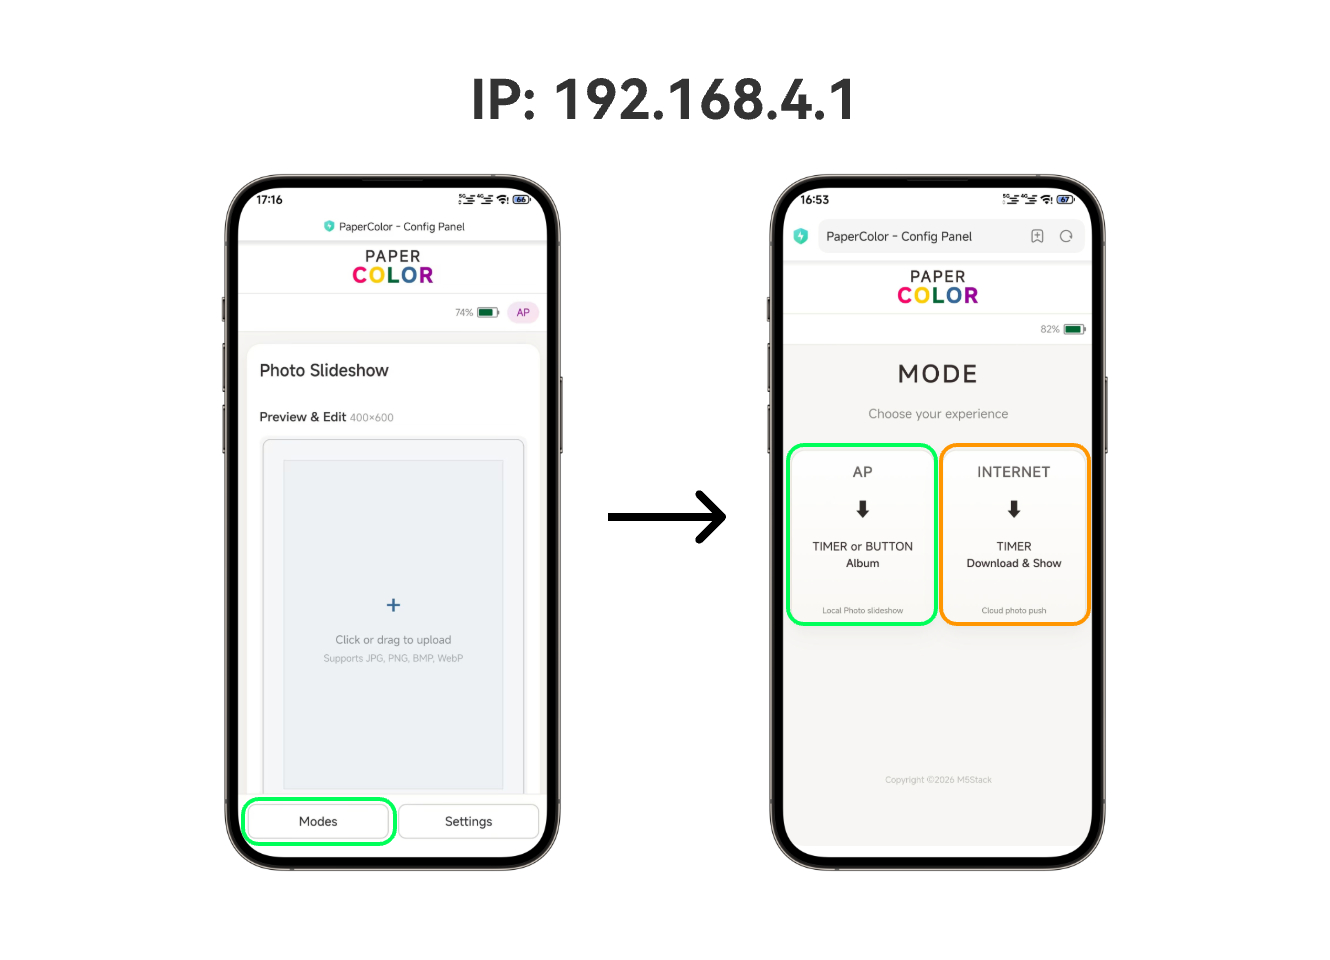
3. Local Mode (AP)
Basic Usage
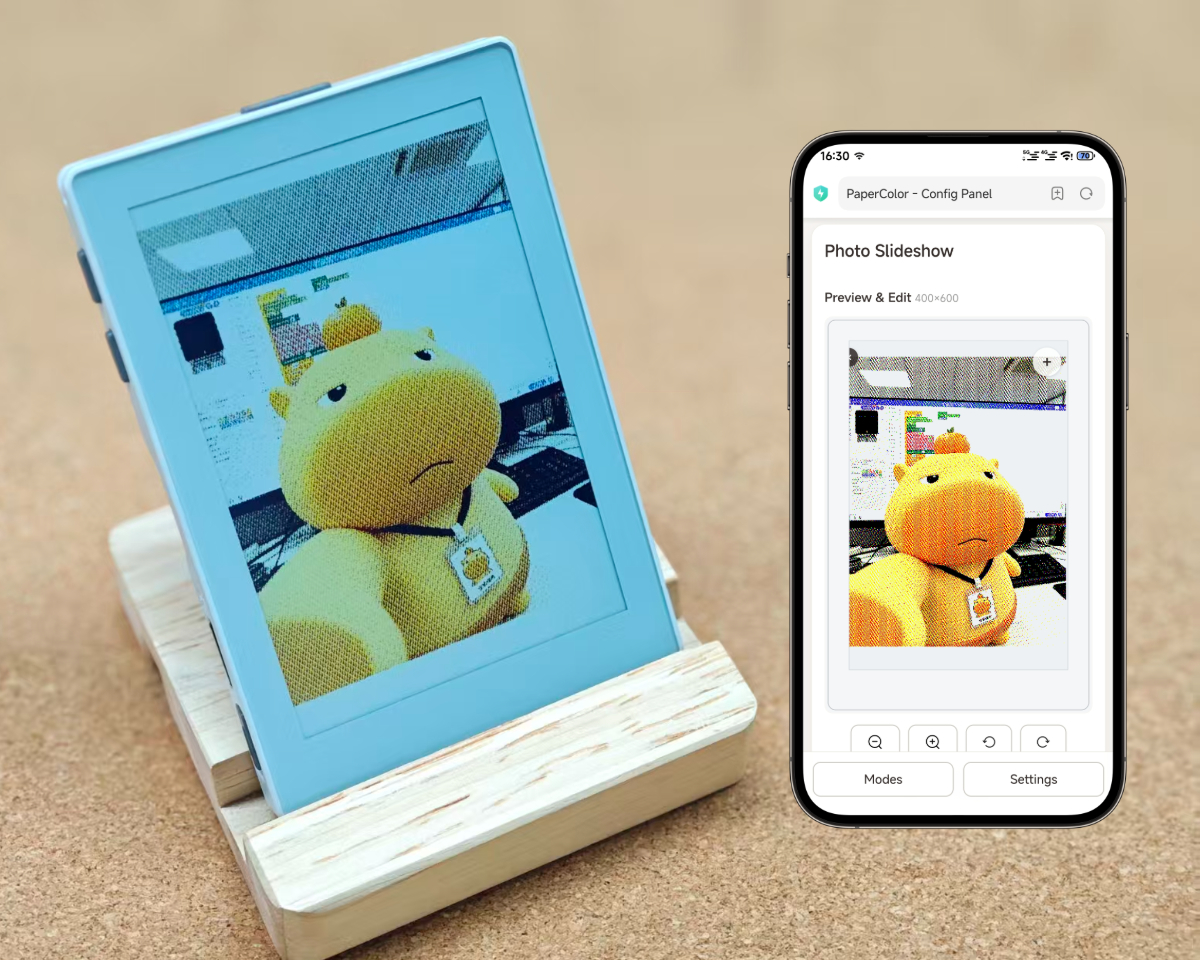
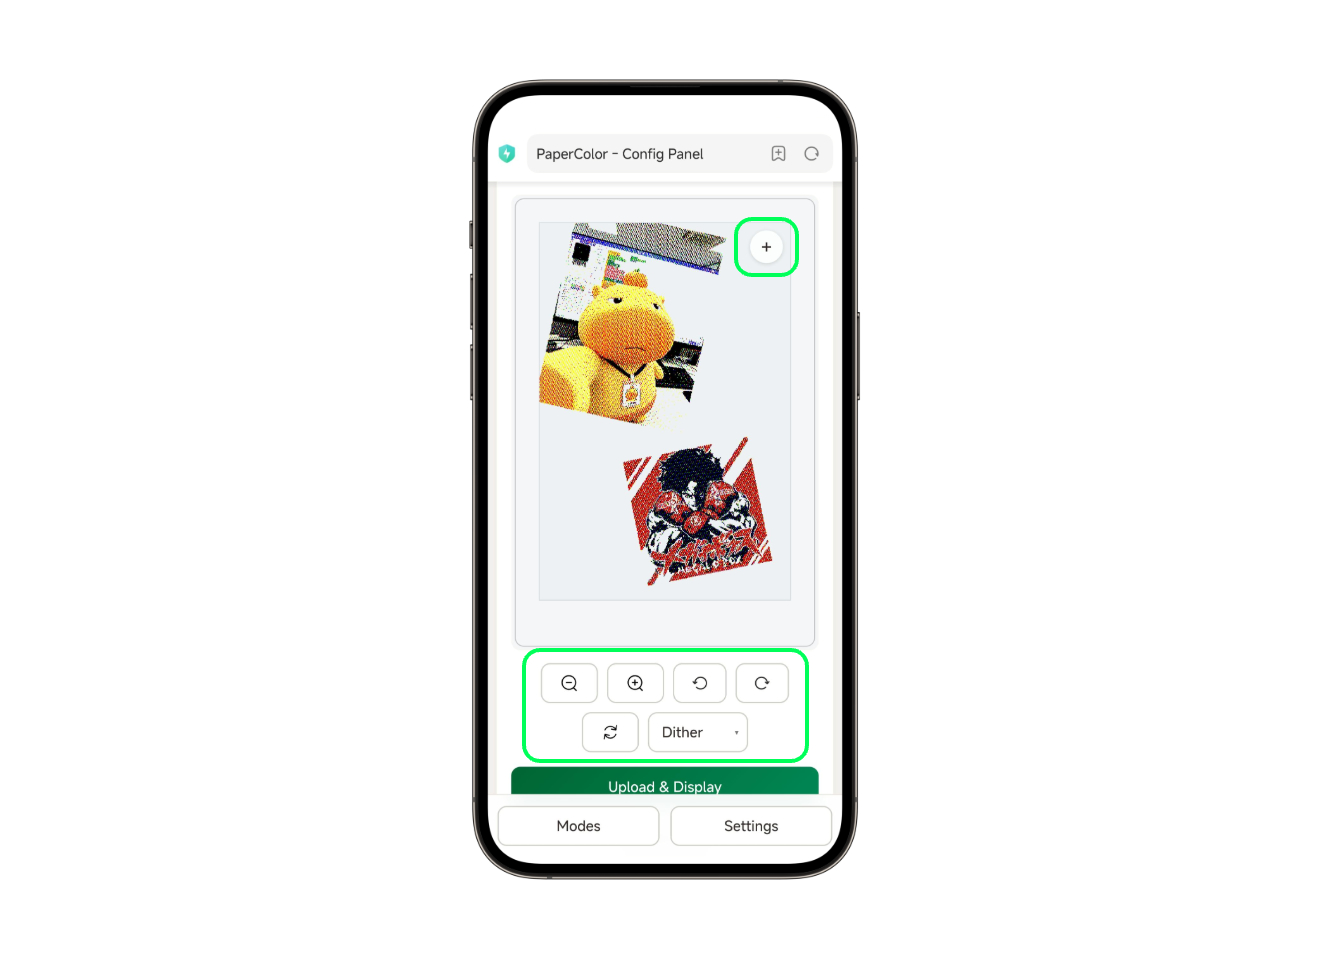
Connect to the device AP and navigate to the Local Mode (AP) page. Click the image upload area on the page, select the appropriate refresh mode based on the image content, then click Upload & Display to upload and display the image.
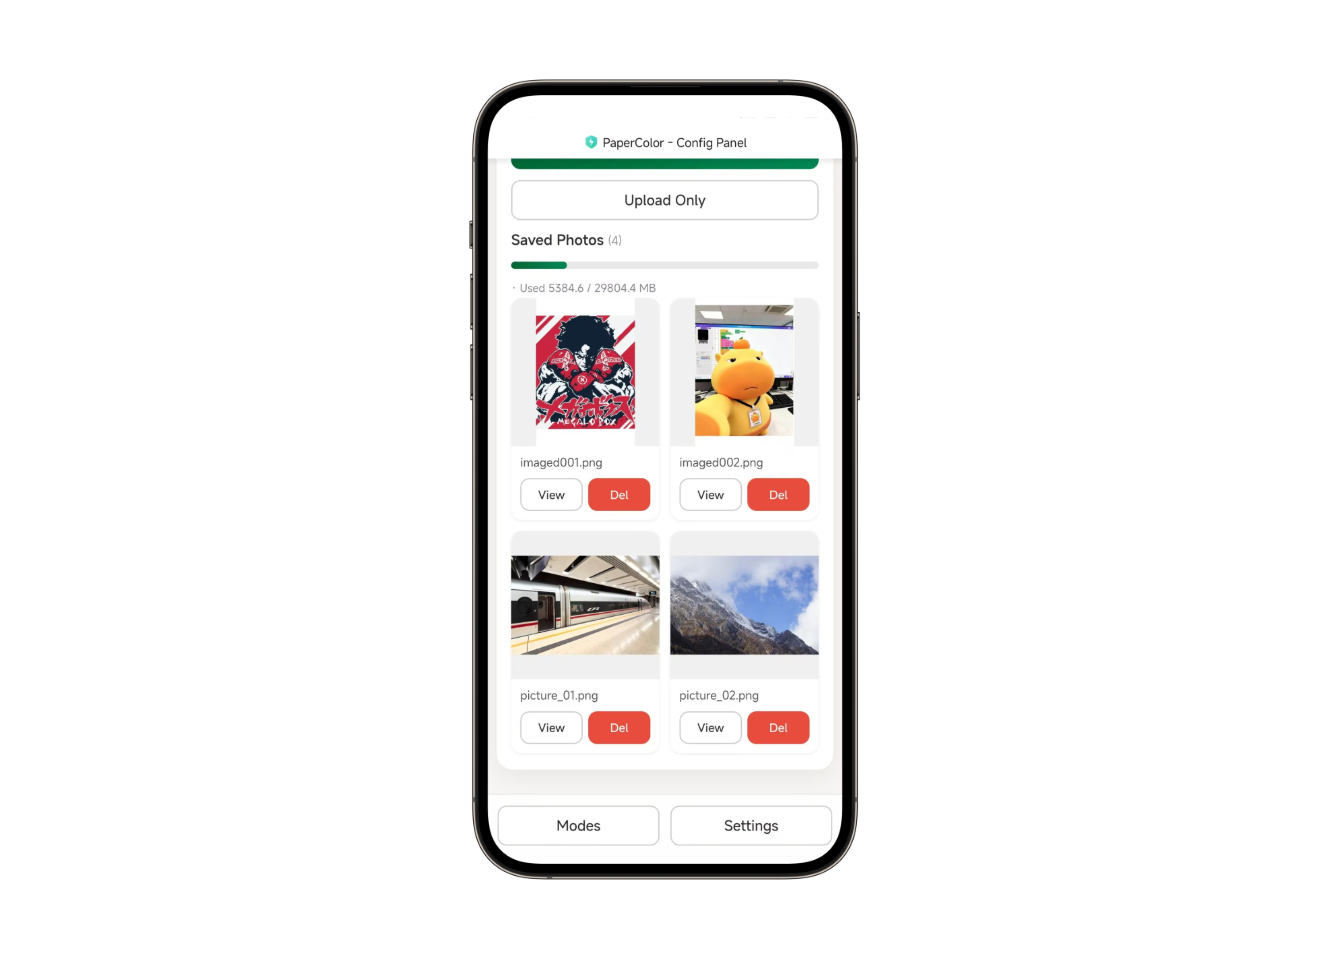
- Upload & Display: Upload and display the image
- Upload Only: Upload the image to the device only
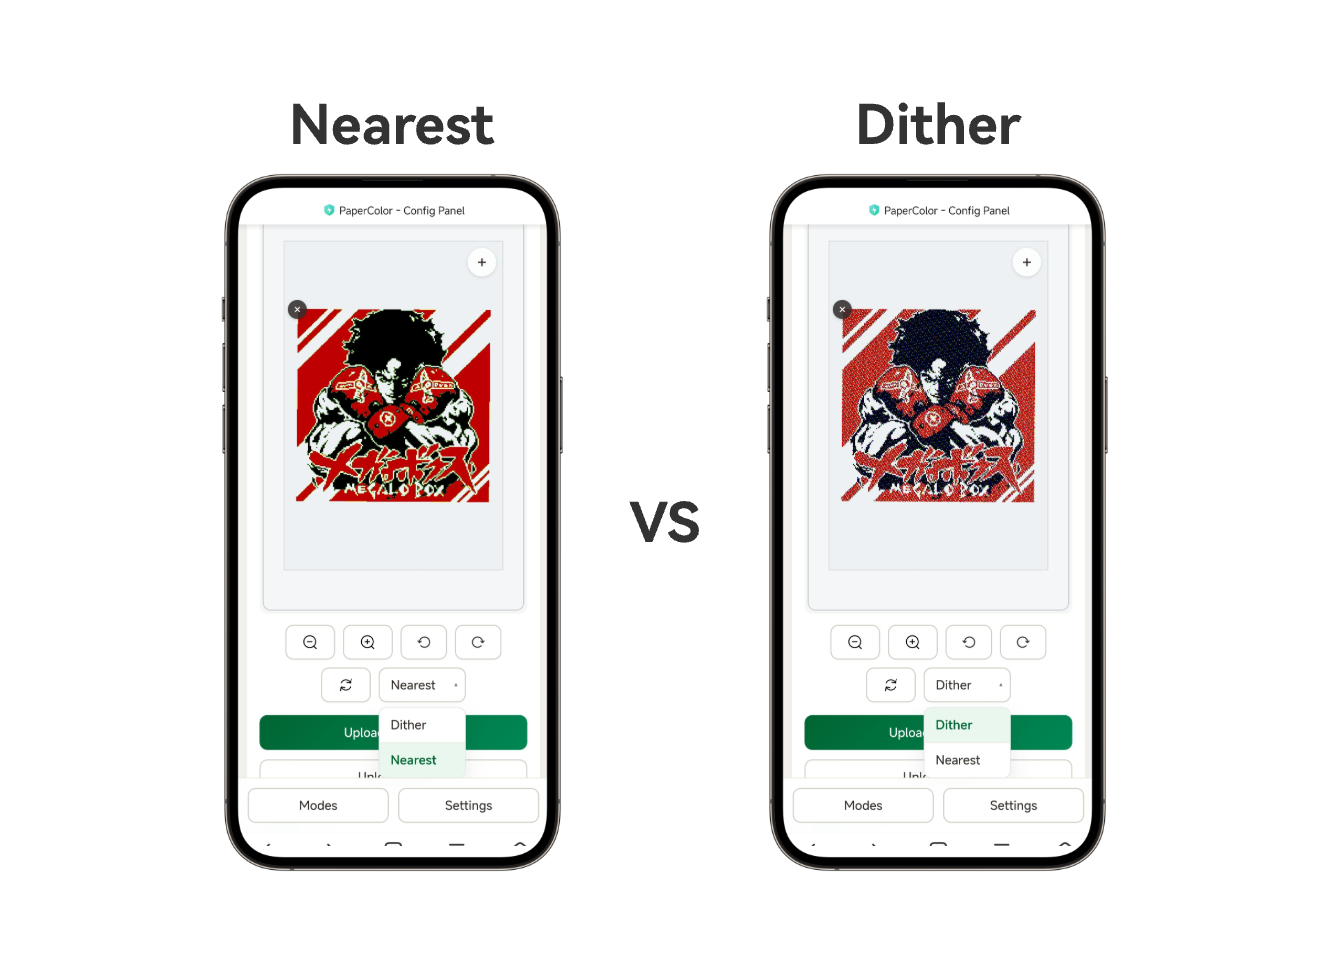
Refresh Mode
Two refresh modes are available:
- Nearest: The image undergoes color reduction processing, converting it to the standard colors of the device screen. The result is sharper but with some loss of detail.
- Dither: Uses a dithering refresh method for better detail reproduction, though some noise may be visible.
Multiple images can be loaded simultaneously and can be freely scaled and repositioned.
Local Storage
- Images are automatically saved to local storage when uploaded to the device.
- If a microSD card is inserted, it will be used preferentially for image storage.
- If no microSD card is inserted, the built-in file system (approximately 6 MB of storage space) will be used.
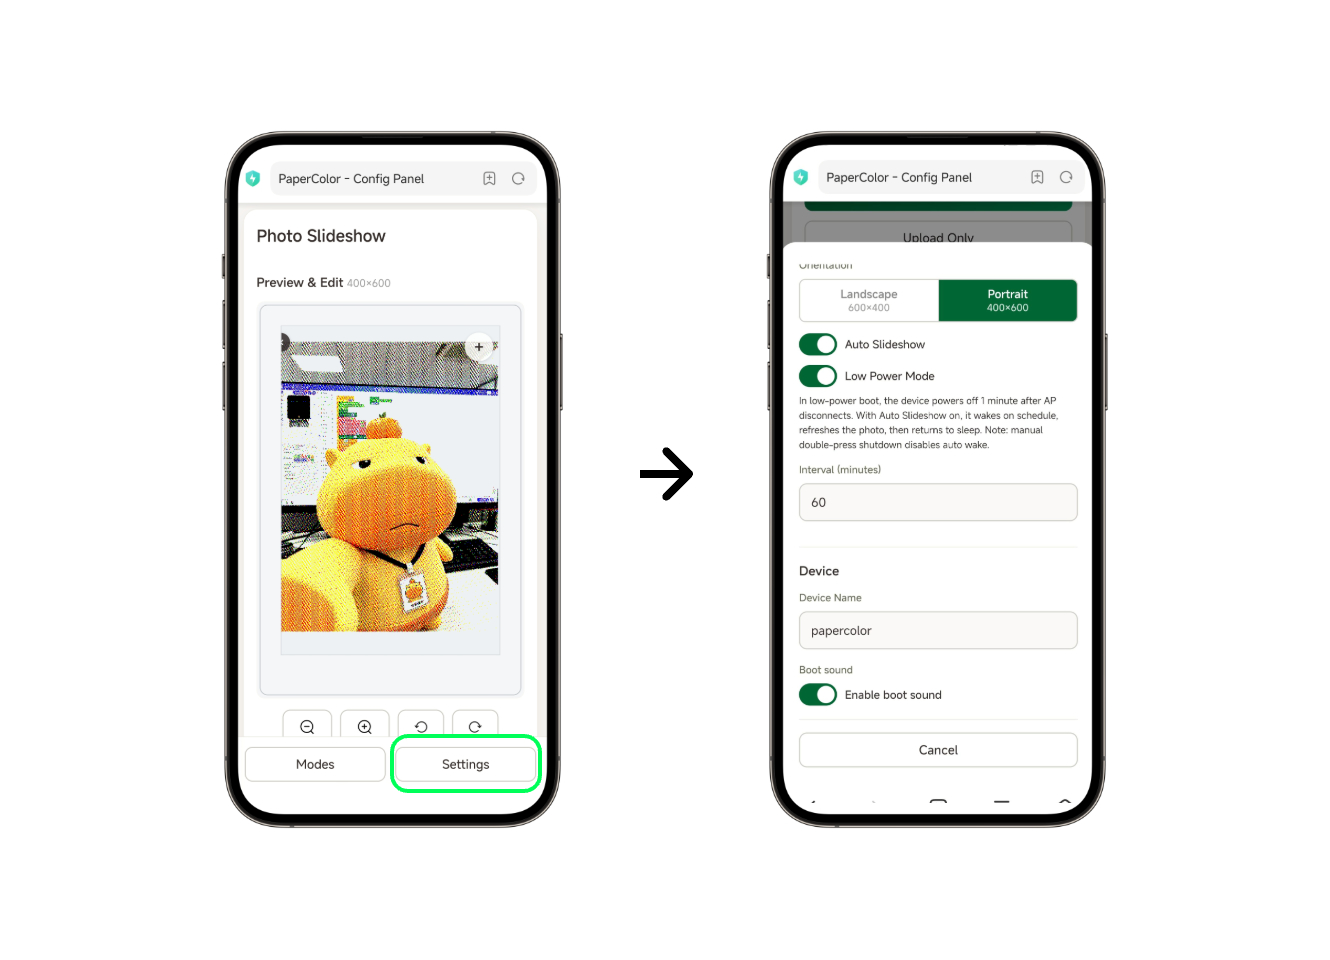
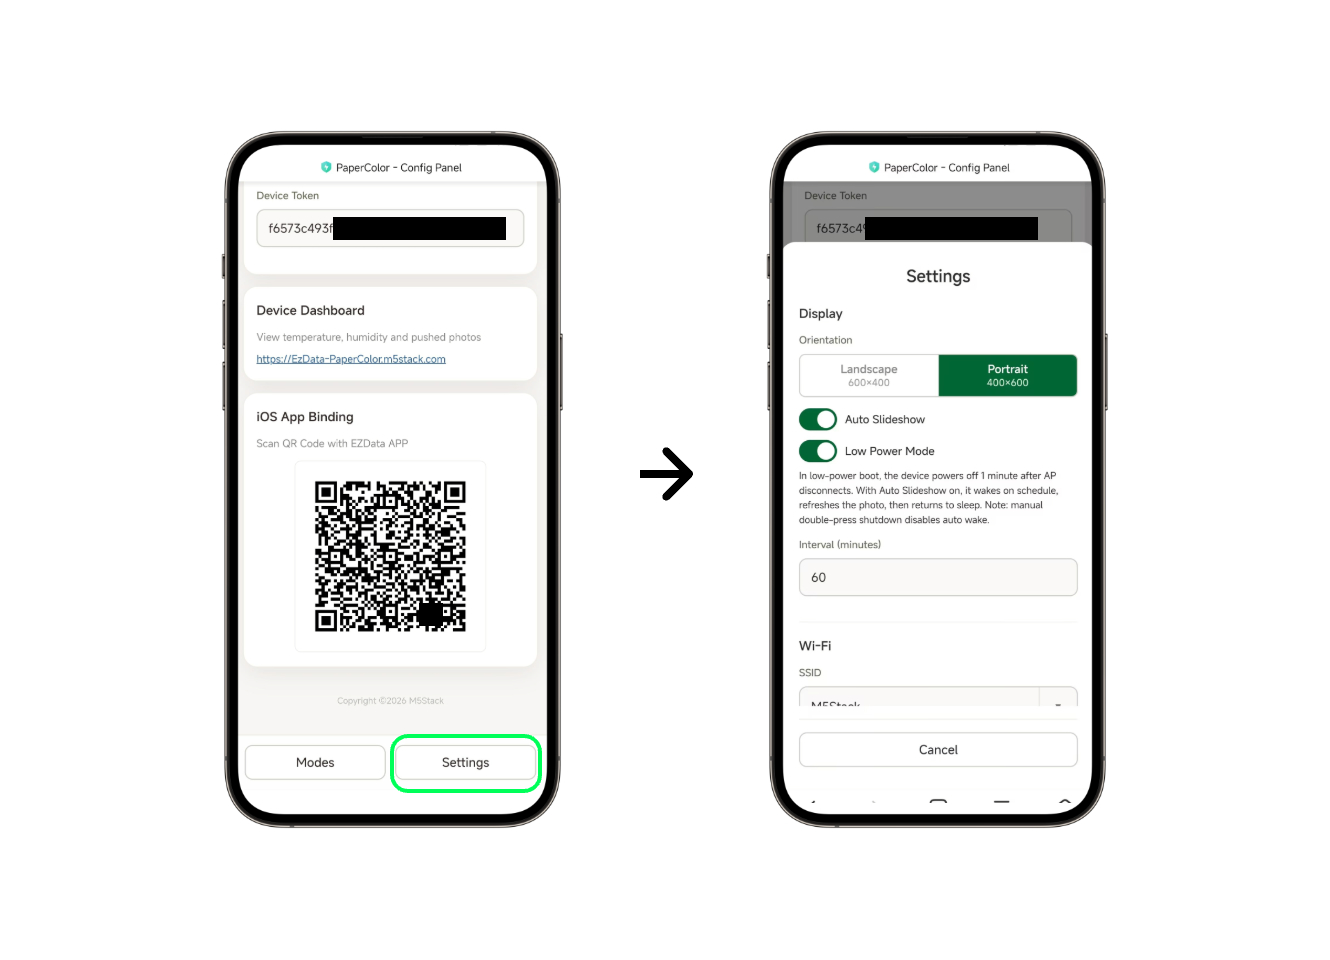
Additional Settings
- Auto Slideshow: Enables slideshow mode. When enabled, the device will automatically cycle through and refresh images at the configured interval.
- Low Power Mode: Enables low-power mode. When enabled, the device enters deep sleep after each image refresh to extend battery life.
- Interval: Sets the interval at which the device cycles through and refreshes images.
- Boot sound: Controls whether the device plays a startup sound when powered on.
- Reset machine: Restores factory settings, clearing all user configurations and reverting to factory defaults.
Button Operations
Press buttons A or B to manually switch between images. A single press of the top button C rotates the image display. Long-pressing the top button C reopens the AP configuration guide page.
4. Ezdata Mode (INTERNET)
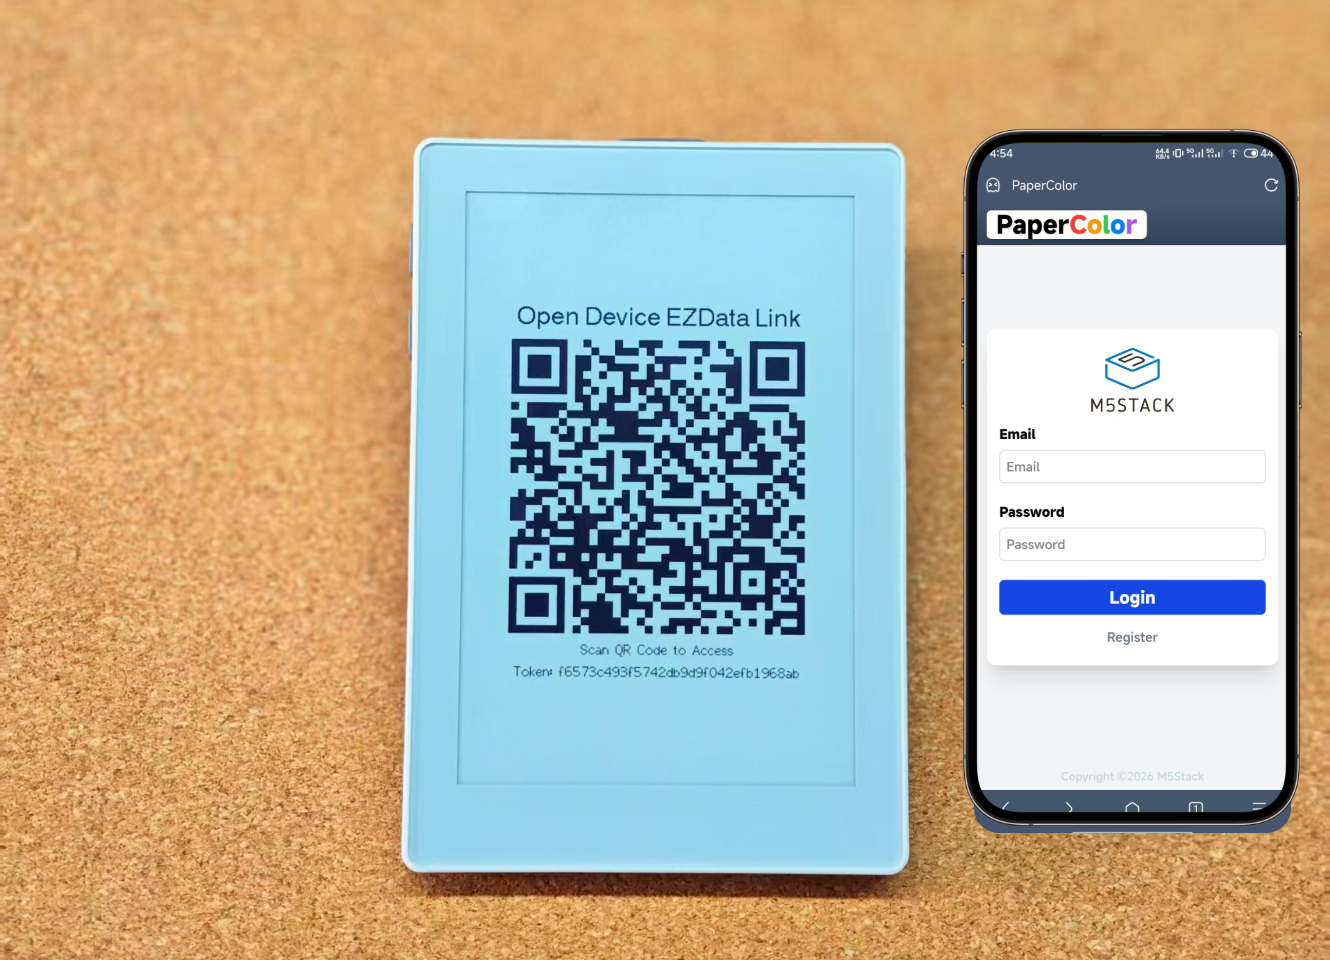
Connect to the device AP and navigate to the Ezdata Mode (INTERNET) page. Configure the Wi-Fi network for the device and wait for the device Token and remote page QR code to be generated.
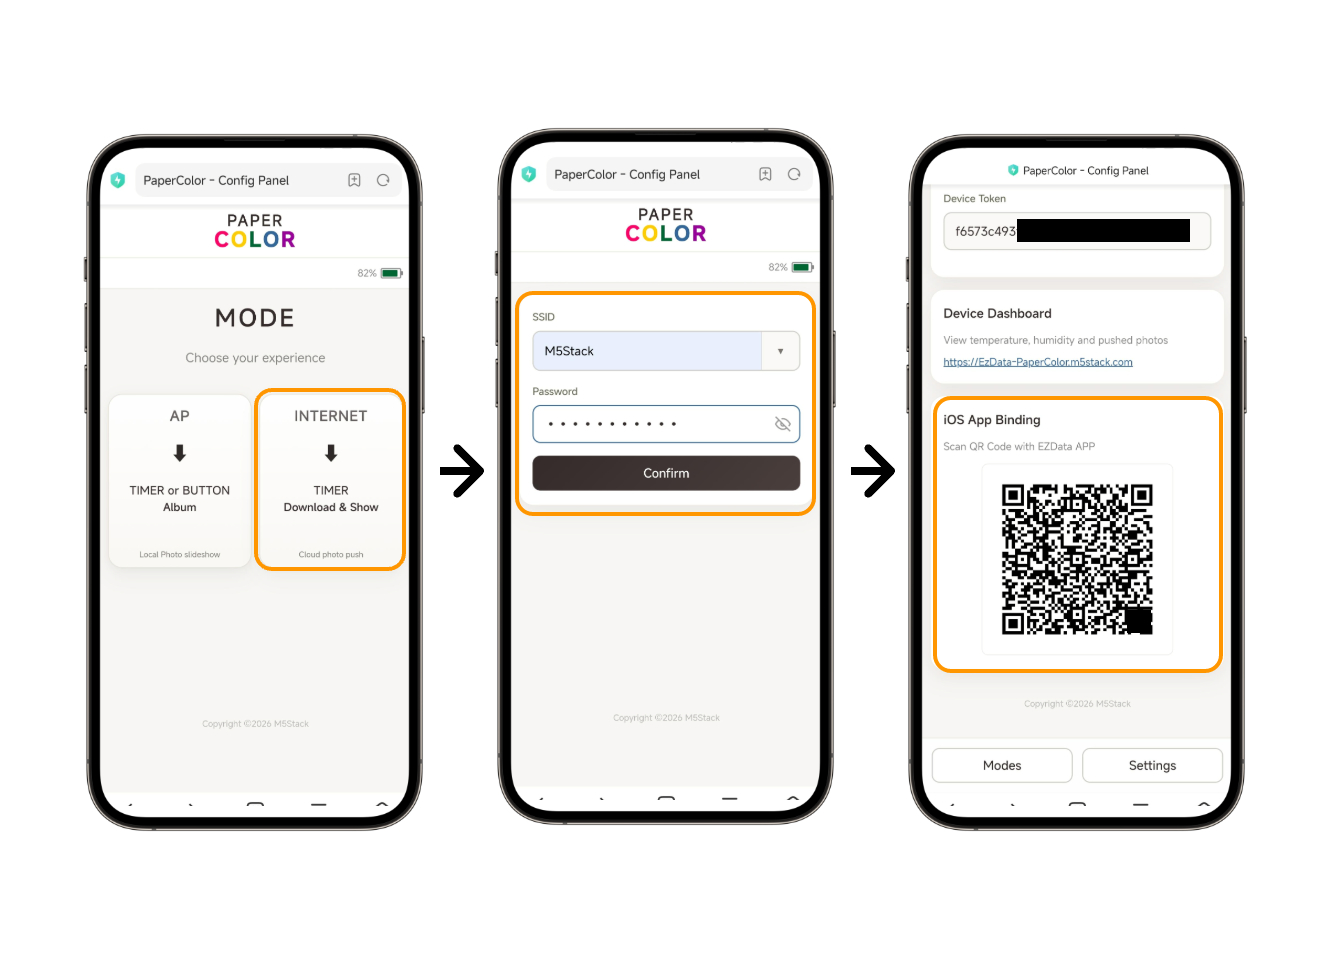
Scan the QR code on the screen to access the remote page and log in with your M5Stack account. Before accessing the remote image upload page, make sure to disconnect from the PaperColor-XXXX AP first.
The remote page displays data from the device's built-in SHT40 temperature and humidity sensor, along with the same image upload area as in AP mode.
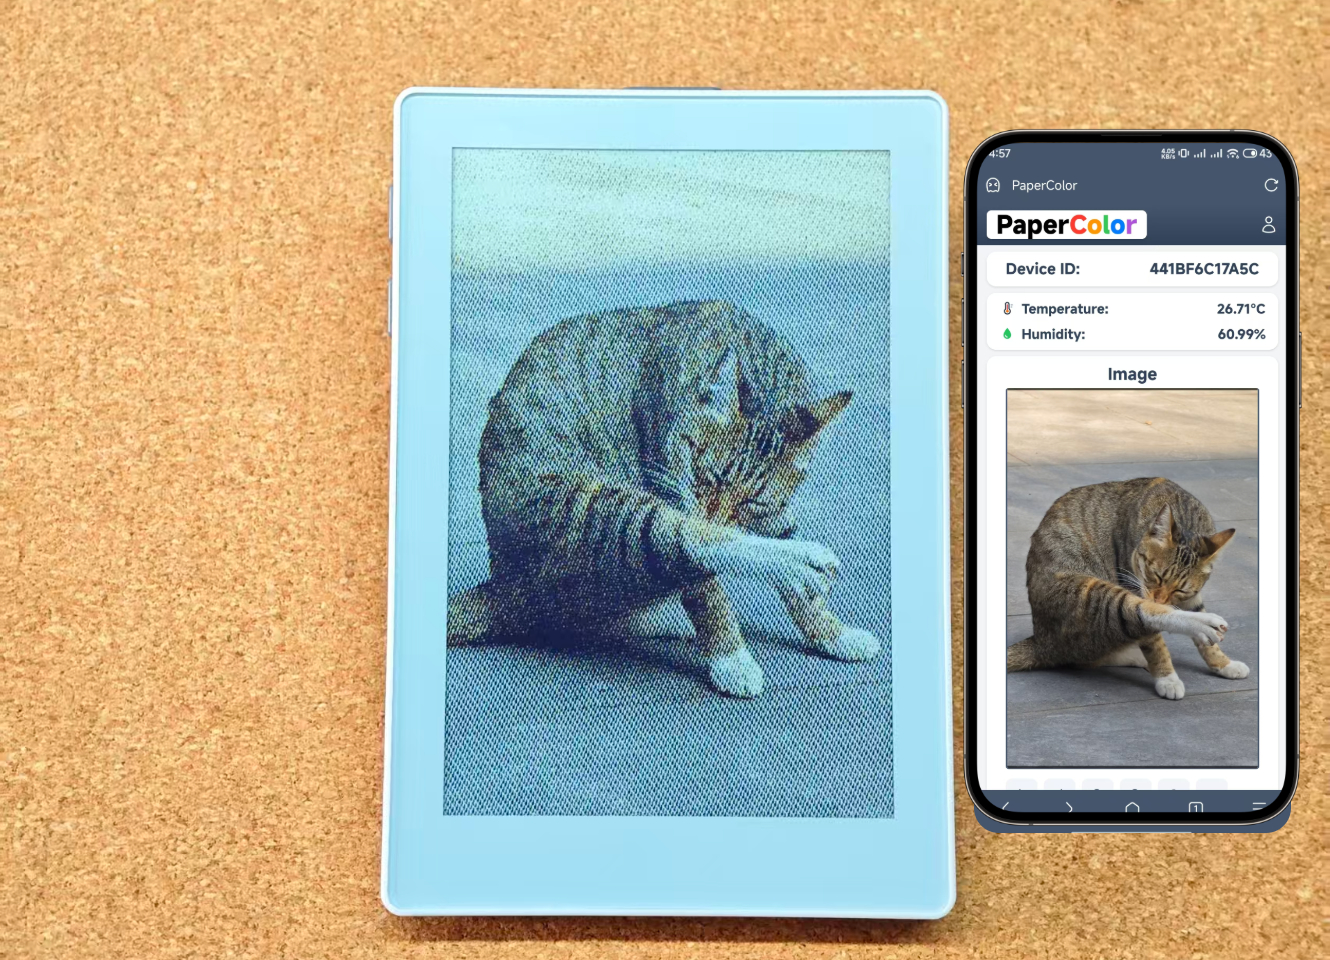
Ezdata mode supports remote image pushing via the M5Stack Ezdata cloud platform. Users can push images to the device for display without being on the same local network, making it suitable for remote update scenarios. Note: Images uploaded via Ezdata are not saved to local storage.
Additional Settings
- Low Power Mode: Enables low-power mode. When enabled, the device enters deep sleep after each image refresh to extend battery life.
- Interval: Configures how frequently the device polls Ezdata for new images. Each poll checks the image update timestamp and will automatically fetch and display any newly available image.
Button Operations
Long-press the top button C to display the remote QR code screen again.