

Arduino Quick Start
2. Devices & Examples
3. M5Unified
4. M5GFX
5. Extensions
Unit
Atomic
Tab5
IoT
Accessories
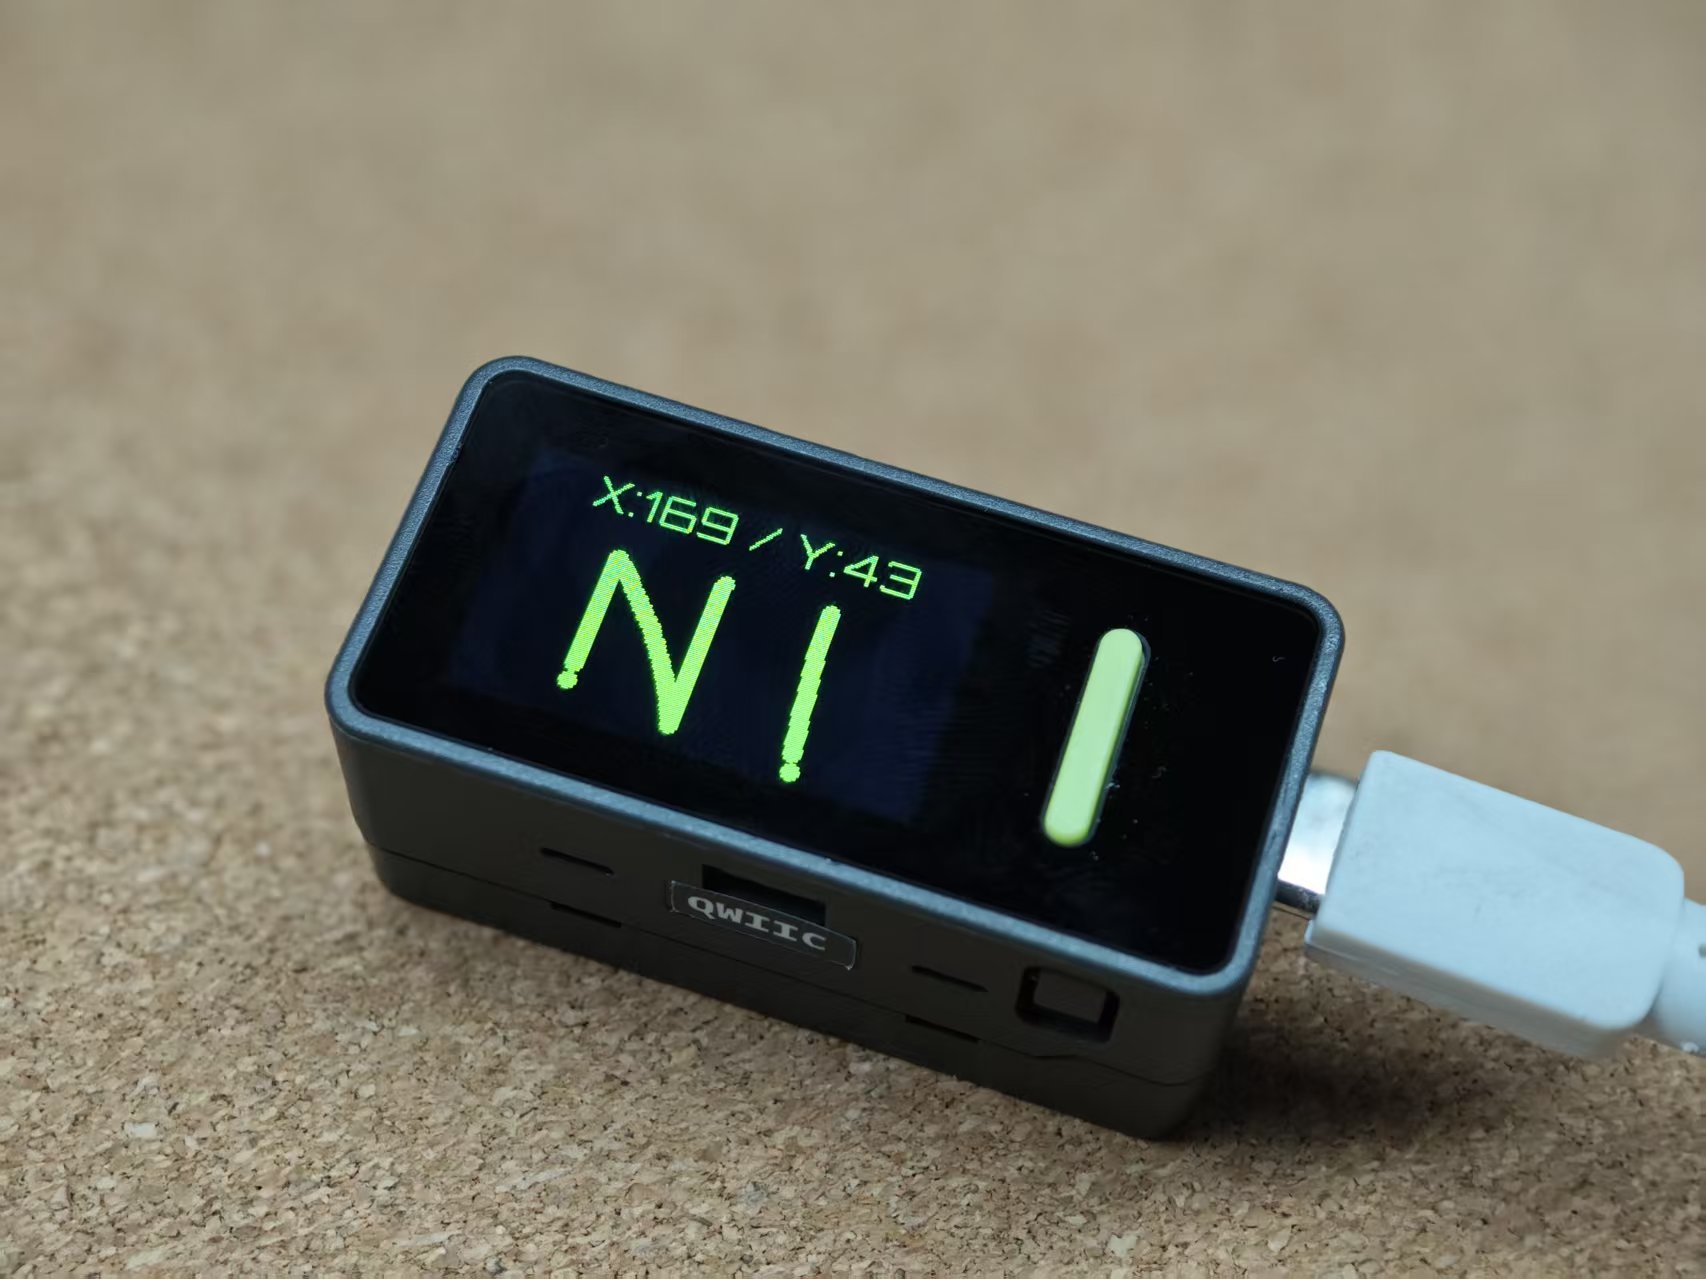
Arduino Nesso N1 Touch
Arduino Nesso N1 touchscreen-related API and example program.
Example Program
Compilation Requirements
- M5Stack board manager version >= 3.2.5
- Board option = ArduinoNessoN1
- M5GFX library version >= 0.2.17
- M5Unified library version >= 0.2.11
cpp
1 2 3 4 5 6 7 8 9 10 11 12 13 14 15 16 17 18 19 20 21 22 23 24 25 26 27 28 29 30 31 32 33 34 35 36 37 38 39 40 41 42 43 44 45 46 47 48 49 50
#include <M5Unified.h>

void setup(void) {
  auto cfg = M5.config();
  M5.begin(cfg);

  M5.Display.setTextColor(GREEN);
  M5.Display.setTextDatum(top_center);
  M5.Display.setFont(&fonts::Orbitron_Light_24);
  M5.Display.setTextSize(1);
  M5.Display.setRotation(1);
  M5.Display.drawString("Touch Test", M5.Display.width() / 2,
                        40);
}

int prev_x = -1;
int prev_y = -1;

static m5::touch_state_t prev_state;

void loop(void) {
  M5.update();
  auto t = M5.Touch.getDetail();

  if (prev_state != t.state) {
    prev_state = t.state;
    static constexpr const char* state_name[16] = {
      "none", "touch", "touch_end", "touch_begin",
      "___", "hold", "hold_end", "hold_begin",
      "___", "flick", "flick_end", "flick_begin",
      "___", "drag", "drag_end", "drag_begin"
    };
    M5_LOGI("%s", state_name[t.state]);
  }

  if (prev_x != t.x || prev_y != t.y) {
    M5.Display.fillRect(0, 0, M5.Display.width(), 35, BLACK);
    M5.Display.drawString(
      "X:" + String(t.x) + " / " + "Y:" + String(t.y),
      M5.Display.width() / 2, 0);
    prev_x = t.x;
    prev_y = t.y;
    M5.Display.fillCircle(prev_x, prev_y, 4, GREEN);
  }


  if (t.wasClicked()) {
    M5.Display.fillRect(0, 35, M5.Display.width(), 100, BLACK);
  }
}
API
The touchscreen driver of Arduino Nesso N1 uses the Touch_Class in the M5Unified library. For more related APIs, please refer to the following document:
Page Tools