

Arduino入門
2. デバイス&サンプル
3. M5Unified
4. M5GFX
5. 拡張モジュール&サンプル
Unit
Atomic
Tab5
IoT
アクセサリー
Paper Button ロータリーボタン
Paper のロータリーボタンに関連するAPIとサンプルプログラム。
サンプルプログラム
コンパイル要件
- M5Stack ボードマネージャーバージョン >= 2.1.4
- ボードの選択 = M5Paper
- M5Unified ライブラリバージョン >= 0.2.5
- M5GFX ライブラリバージョン >= 0.2.7
cpp
1 2 3 4 5 6 7 8 9 10 11 12 13 14 15 16 17 18 19 20 21 22 23 24 25 26 27 28 29 30 31 32 33 34 35 36 37 38
#include <M5Unified.h>
#include <M5GFX.h>
void setup() {
M5.begin();
M5.Display.setRotation(0);
M5.Display.setFont(&fonts::FreeMonoBold24pt7b);
M5.Display.setEpdMode(epd_fast); // epd_quality, epd_text, epd_fast, epd_fastest
Serial.begin(115200);
M5.Display.clear();
M5.Display.setCursor(20, 100);
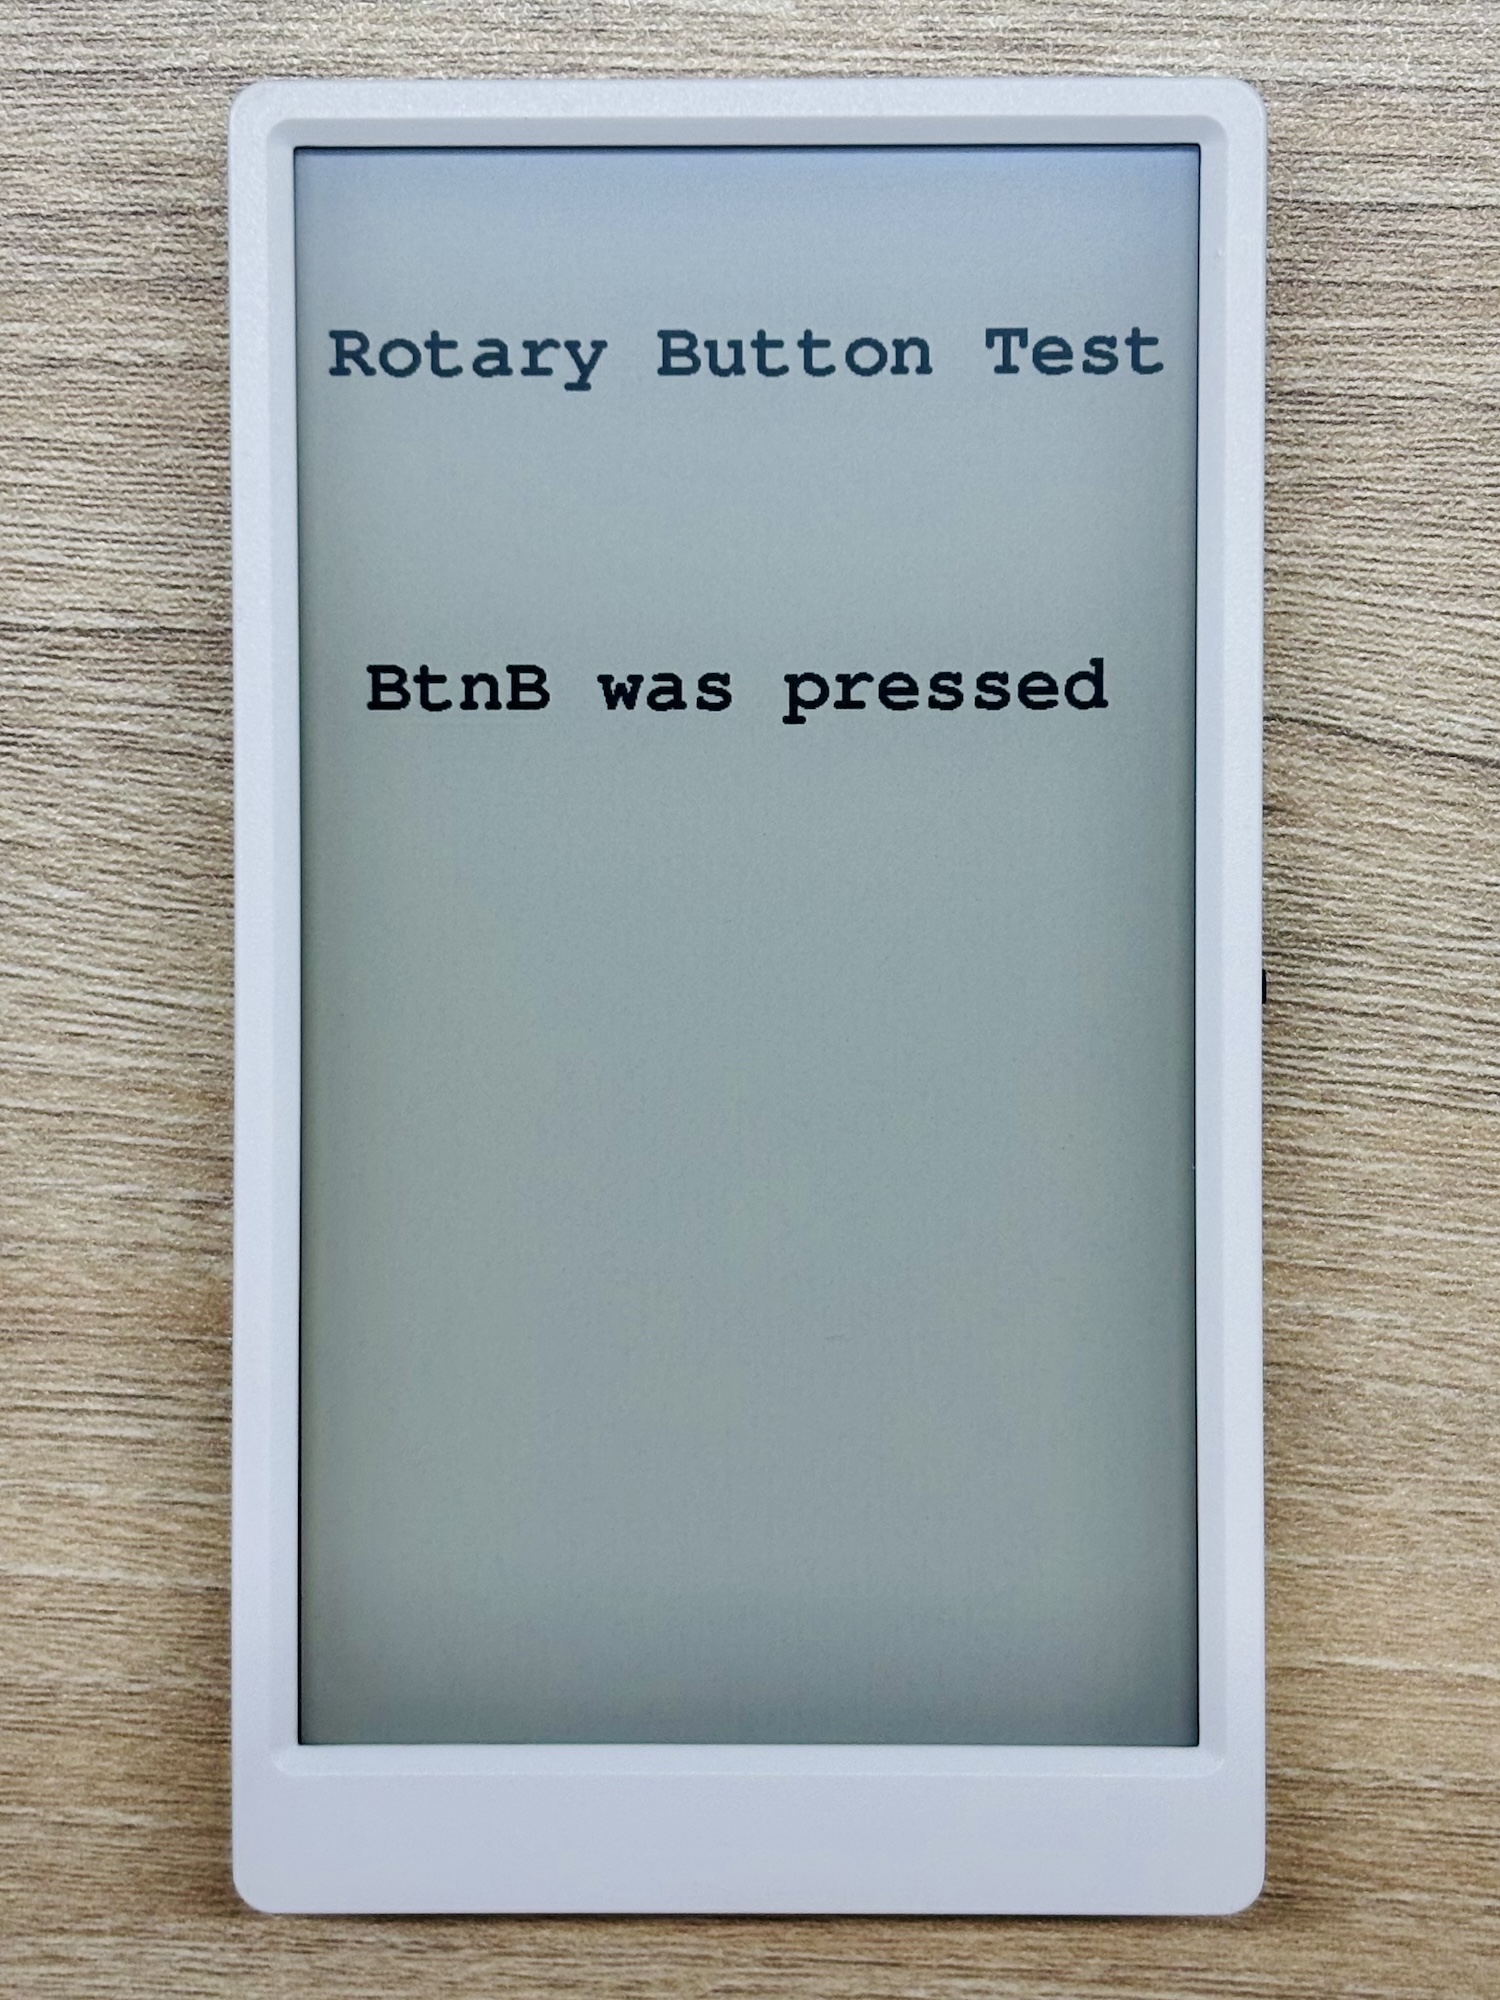
M5.Display.print("Rotary Button Test");
Serial.println("Rotary Button Test");
M5.Display.setCursor(40, 300);
M5.Display.print("____ was pressed");
}
void loop() {
M5.update();
if (M5.BtnA.wasPressed()) {
M5.Display.setCursor(40, 300);
M5.Display.print("BtnA was pressed");
Serial.println("BtnA was pressed");
}
if (M5.BtnB.wasPressed()) {
M5.Display.setCursor(40, 300);
M5.Display.print("BtnB was pressed");
Serial.println("BtnB was pressed");
}
if (M5.BtnC.wasPressed()) {
M5.Display.setCursor(40, 300);
M5.Display.print("BtnC was pressed");
Serial.println("BtnC was pressed");
}
}このプログラムは、画面上にボタンの状態を表示します。BtnA はホイール上回転(G37)、BtnB はホイール押し込み(G38)、BtnC はホイール下回転(G39)に対応しています。
API
Paper のボタン部分では、M5Unified ライブラリの Button_Class が使用されています。関連するAPIの詳細は以下のドキュメントをご参照ください:
Page Tools