Arduino入門
2. デバイス&サンプル
3. M5Unified
4. M5GFX
5. 拡張モジュール&サンプル
Unit
Atomic
Tab5
IoT
アクセサリー
Atomic Motion Base Arduino チュートリアル
1. 準備
- 環境設定: Arduino IDE 入門ガイド を参考にIDEをインストールし、使用する開発ボードに対応したボードマネージャと必要なドライバライブラリをインストールしてください。
- 使用するドライバライブラリ:
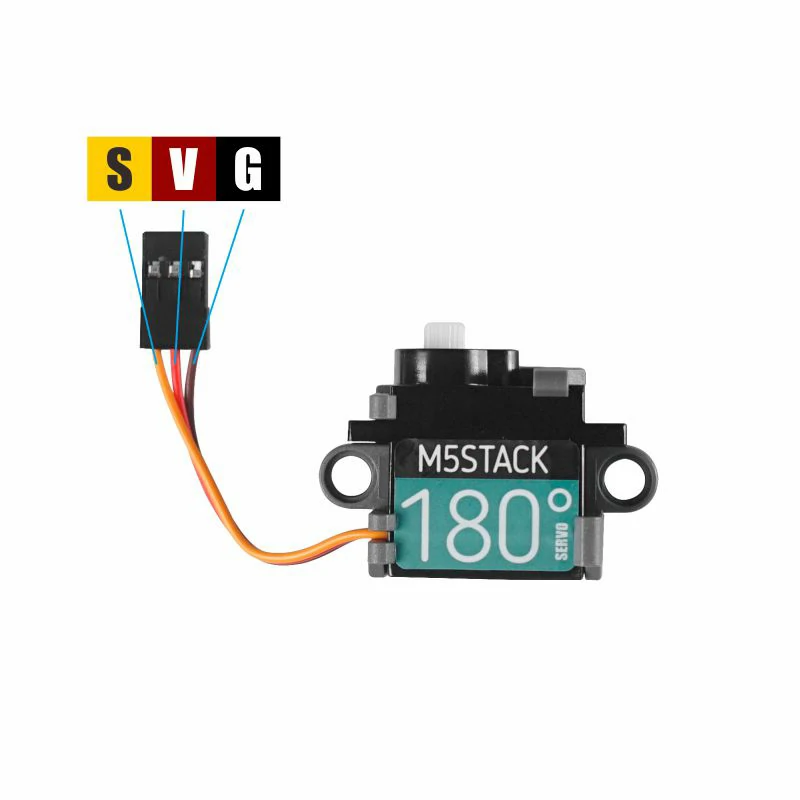
- 使用するハードウェア製品:

2. サンプルプログラム
サンプル説明
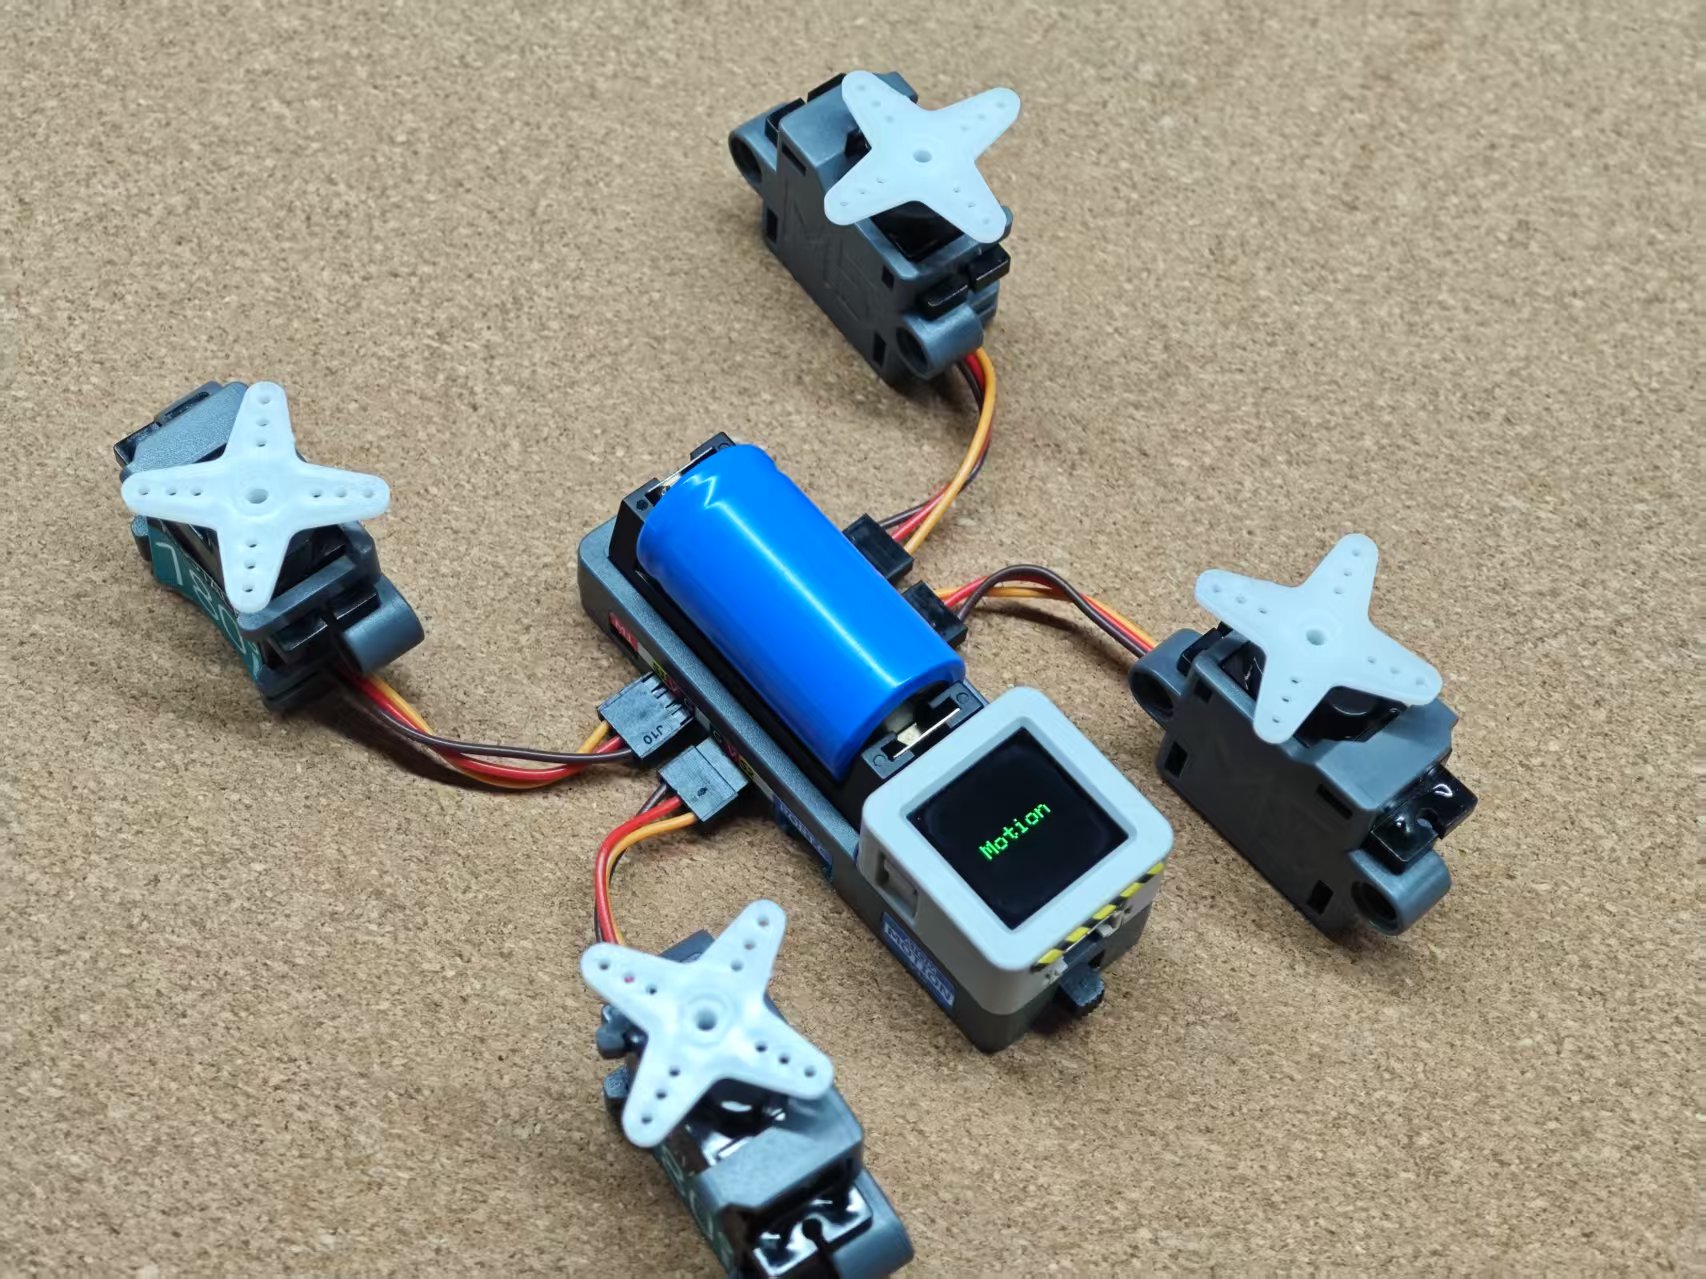
Atomic Motion Base は、Atom シリーズのコントローラと連携して動作するサーボ + DC モーター駆動ベースです。このサンプルでは、Atomic Motion Base を使用して、4 チャネルのサーボ制御と 2 チャネルの DC モーター制御を実装します。
DC モーターとサーボ駆動
cpp
1 2 3 4 5 6 7 8 9 10 11 12 13 14 15 16 17 18 19 20 21 22 23 24 25 26 27 28 29 30 31 32 33 34 35 36 37 38 39 40 41 42 43 44 45 46 47 48 49 50 51 52 53 54 55 56 57 58 59 60 61 62 63 64 65 66 67 68 69 70 71 72
#include "M5Unified.h"
#include "M5GFX.h"
#include "M5AtomicMotion.h"

M5AtomicMotion AtomicMotion;

void setup()
{
    auto cfg = M5.config();
    M5.begin(cfg);

    M5.Display.setTextColor(GREEN);
    M5.Display.setTextDatum(middle_center);
    M5.Display.setTextSize(2);
    M5.Display.drawString("Atomic Init", M5.Display.width() / 2, M5.Display.height() / 2);

    m5::board_t board = M5.getBoard();

    uint8_t sda = 0, scl = 0;

    if (board == m5::board_t::board_M5AtomLite || board == m5::board_t::board_M5AtomMatrix ||
        board == m5::board_t::board_M5AtomEcho) {
        sda = 25;
        scl = 21;
    } else if (board == m5::board_t::board_M5AtomS3 || board == m5::board_t::board_M5AtomS3R ||
               board == m5::board_t::board_M5AtomS3Lite || board == m5::board_t::board_M5AtomS3RExt ||
               board == m5::board_t::board_M5AtomS3RCam) {
        sda = 38;
        scl = 39;
    }

    while (!AtomicMotion.begin(&Wire, M5_ATOMIC_MOTION_I2C_ADDR, sda, scl, 100000)) {
        M5.Display.clear();
        M5.Display.drawString("Init Fail", M5.Display.width() / 2, M5.Display.height() / 2);
        Serial.println("Atomic Motion begin failed");
        delay(1000);
    }

    M5.Display.clear();
    M5.Display.drawString("Motion", M5.Display.width() / 2, M5.Display.height() / 2);

    Serial.println("Atomic Motion Test");
}

void loop()
{
    for (int ch = 0; ch < 2; ch++) {
        AtomicMotion.setMotorSpeed(ch, 127);
        Serial.printf("Motor Channel %d: %d \n", ch, AtomicMotion.getMotorSpeed(ch));
    }
    delay(1000);
    for (int ch = 0; ch < 2; ch++) {
        AtomicMotion.setMotorSpeed(ch, -127);
        Serial.printf("Motor Channel %d: %d \n", ch, AtomicMotion.getMotorSpeed(ch));
    }
    delay(1000);
    for (int ch = 0; ch < 2; ch++) {
        AtomicMotion.setMotorSpeed(ch, 0);
        Serial.printf("Motor Channel %d: %d \n", ch, AtomicMotion.getMotorSpeed(ch));
    }
    delay(1000);
    for (int ch = 0; ch < 4; ch++) {
        AtomicMotion.setServoAngle(ch, 180);
        Serial.printf("Servo Channel %d: %d \n", ch, AtomicMotion.getServoAngle(ch));
    }
    delay(1000);
    for (int ch = 0; ch < 4; ch++) {
        AtomicMotion.setServoAngle(ch, 0);
        Serial.printf("Servo Channel %d: %d \n", ch, AtomicMotion.getServoAngle(ch));
    }
    delay(1000);
}電力消費状態の読み取り
サンプル説明
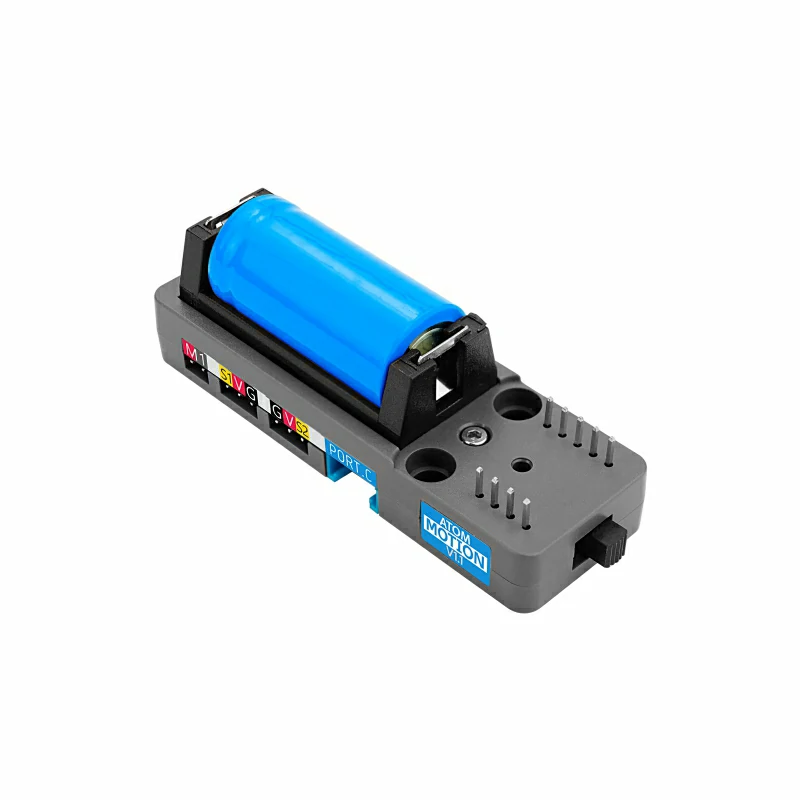
Atomic Motion Base v1.1 バージョンを使用している場合、現在のバッテリー電圧や動作電流値を読み取ることもできます。cpp
1 2 3 4 5 6 7 8 9 10 11 12 13 14 15 16 17 18 19 20 21 22 23 24 25 26 27 28 29 30 31 32 33 34 35 36 37 38 39 40 41 42 43
#include <M5Unified.h>
#include <M5GFX.h>
#include <M5AtomicMotion.h>

M5AtomicMotion AtomicMotion;

void setup()
{
    auto cfg = M5.config();
    M5.begin(cfg);

    m5::board_t board = M5.getBoard();
    uint8_t sda = 0, scl = 0;

    if (board == m5::board_t::board_M5AtomLite || board == m5::board_t::board_M5AtomMatrix ||
        board == m5::board_t::board_M5AtomEcho) {
        sda = 25;
        scl = 21;
    } else if (board == m5::board_t::board_M5AtomS3 || board == m5::board_t::board_M5AtomS3R ||
               board == m5::board_t::board_M5AtomS3Lite || board == m5::board_t::board_M5AtomS3RExt ||
               board == m5::board_t::board_M5AtomS3RCam) {
        sda = 38;
        scl = 39;
    }

    while (!AtomicMotion.begin(&Wire, M5_ATOMIC_MOTION_I2C_ADDR, sda, scl, 100000)) {
        printf("Atomic Motion begin failed\n");
        delay(1000);
    }

    printf("Atomic Motion INA226 Test\n");
}

void loop()
{
    float voltage = AtomicMotion.ina226.readBusVoltage();
    float current = AtomicMotion.ina226.readShuntCurrent();

    printf("voltage: %.2f V\n", voltage);
    printf("current: %.2f A\n", current);

    delay(1000);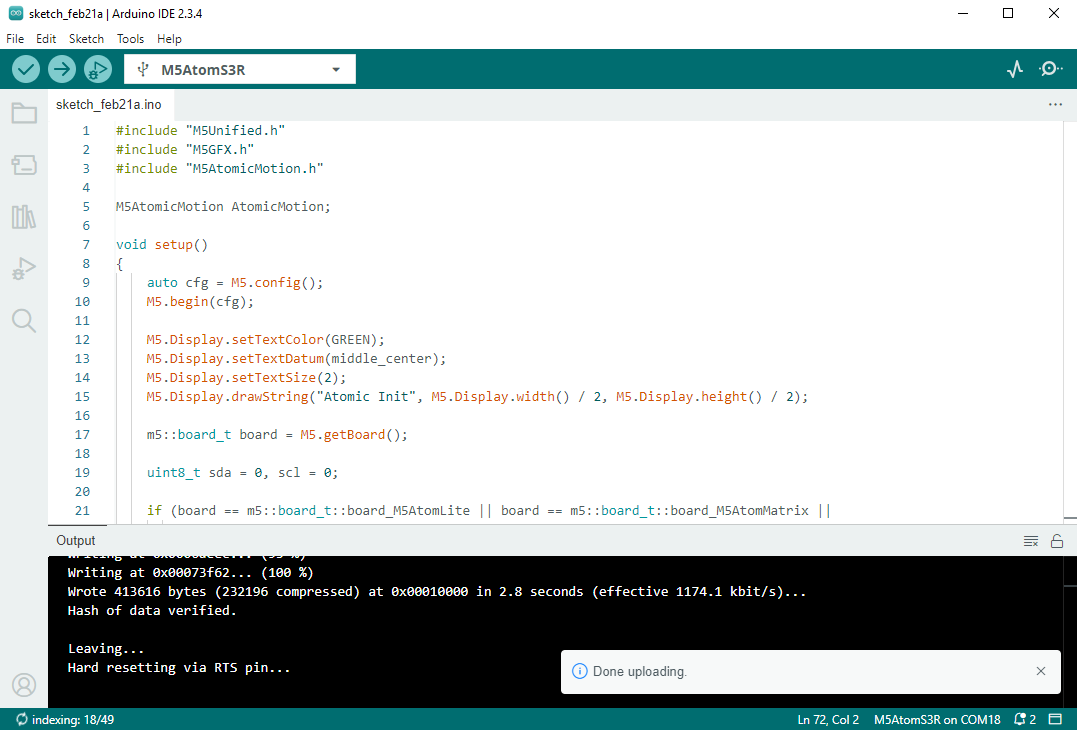
}3. コンパイルとアップロード
- ダウンロードモード: 異なるデバイスでプログラムをフラッシュする前に、デバイスをダウンロードモードにする必要があります。プロセスはコントローラによって異なる場合があります。詳細は Arduino IDE 入門ガイド ページ下部のデバイスプログラムダウンロードガイドリストを参考にしてください。
AtomS3Rのリセットボタンを長押し(約2秒)すると、内部の緑色LEDが点灯し、ボタンを放すことができます。これでデバイスがダウンロードモードに入り、プログラムを待機します。

- デバイスポートを選択し、Arduino IDE の左上隅のコンパイルとアップロードボタンをクリックして、プログラムがコンパイルされ、デバイスにアップロードされるのを待ちます。
4. 実行開始
Atomic Motion Base v1.1 の電源スイッチを ON にすると、サーボ/DC モーターの駆動が開始されます。