Arduino入門
2. デバイス&サンプル
3. M5Unified
4. M5GFX
5. 拡張モジュール&サンプル
Unit
Atomic
Tab5
IoT
アクセサリー
UnitV/StickV Arduino 使用チュートリアル
1. 準備作業
- 環境構築: Arduino IDE クイックスタート を参考に IDE をインストールし、実際に使用する開発ボードに応じたボードマネージャと必要なドライバライブラリをインストールしてください。
- 使用するドライバライブラリ:
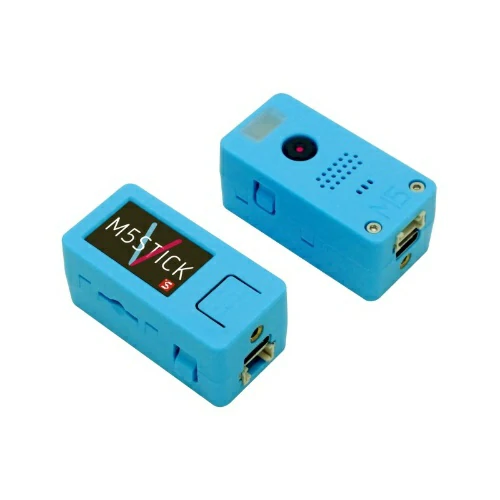
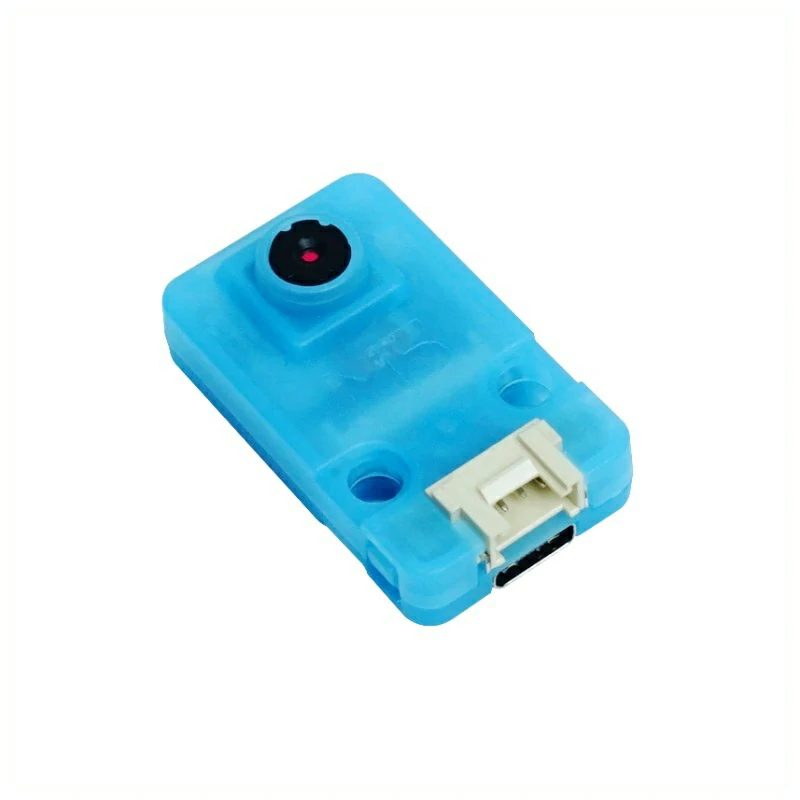
- 使用するハードウェア製品:
2. 注意事項
3. コンパイルとアップロード
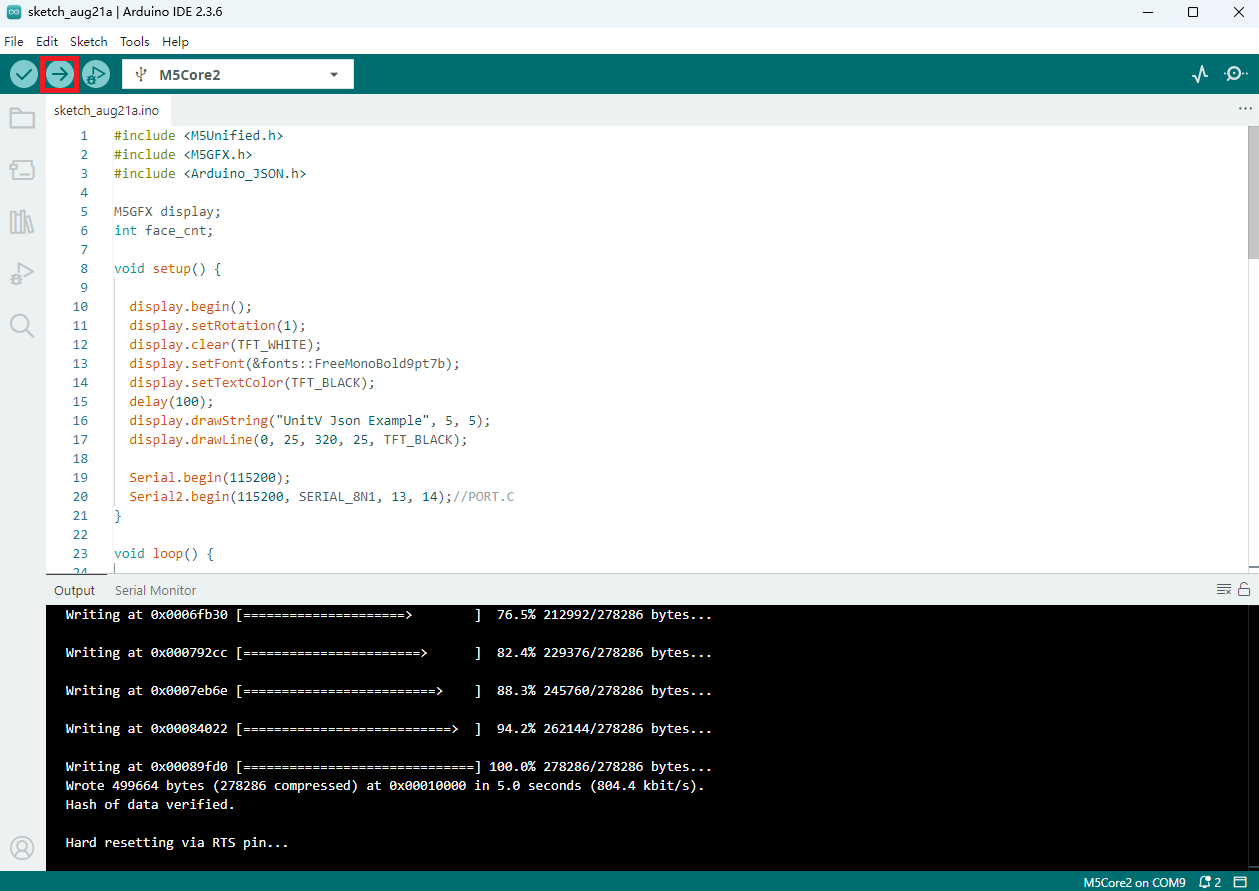
- 必要に応じて以下のサンプルコードをコピーしてプロジェクトのコード領域に貼り付け、デバイスのポートを選択します(詳細は プログラムのコンパイルと書き込み を参照)。Arduino IDE 左上のコンパイル&アップロードボタンをクリックし、プログラムがコンパイルされデバイスへアップロードされるまで待ちます。
4. サンプルプログラム
2.UnitV/StickV は USB Type-C インターフェース経由で給電する必要があり、USB Type-C インターフェースを抜き差しすると本ユニットは再起動します。
3.M5Burner 内のファームウェアはすべての機能においてデフォルトパラメータが設定されているわけではありません。また、本ユニットで設定したパラメータは電源を切ると失われます。そのため、電源を切って再起動した後は再度設定を行う必要があります。
以下のすべてのサンプル機能は、ホストが UnitV/StickV の JSON データを設定および解析 するものであり、UnitV/StickV の機能切り替えを行うものではありません。機能を切り替える場合は、M5Burner の STICKV & UNITV 画面で対応する機能ファームウェアを選択して UnitV/StickV に焼き込んでください。
4.1 動体検出
この機能ファームウェアは以下の通りです:
動体検出機能は、静的検出モード(COMPUTE_MODE_STATIC)と動的検出モード(COMPUTE_MODE_DYNAMIC)の2 種類を設定可能です。M5Burner のファームウェアではデフォルトで動的検出モードになっています。
動体検出機能の JSON データ形式についてはこちらをご参照ください。
#include <M5Unified.h>
#include <M5GFX.h>
#include <Arduino_JSON.h>

M5GFX display;
int motion_cnt = 0;

void setup() {

    display.begin();
    display.setRotation(1);
    display.clear(TFT_WHITE);
    display.setFont(&fonts::FreeMonoBold9pt7b);
    display.setTextColor(TFT_BLACK);
    delay(100);
    display.drawString("UnitV Json Example", 5, 5);
    display.drawLine(0, 25, 320, 25, TFT_BLACK);

    Serial.begin(115200);
    Serial2.begin(115200, SERIAL_8N1, 13, 14);//PORT.C

    //Setting JSON
    JSONVar obj;
    obj["MOTION DETECT"] = 1.0;                     // Not optional
    obj["mode"] = "COMPUTE_MODE_DYNAMIC";           // "COMPUTE_MODE_STATIC" or "COMPUTE_MODE_DYNAMIC"
    obj["thr_w"] = 20;                              // optional
    obj["thr_h"] = 20;                              // optional
    obj["stepx"] = 1;                               // optional
    obj["stepy"] = 2;                               // optional
    obj["delta"] = 20;                              // optional
    obj["merge"] = 10;                              // optional
    String jsonString = JSON.stringify(obj);
    Serial2.println(jsonString);
    Serial2.flush();
}

void loop() {

    if (Serial2.available() > 0) {
      String line = Serial2.readStringUntil('\r');
      while (line.length() && line[0] != '{') {// clear '\0'
          line.remove(0, 1);
      }
      Serial2.flush();

      JSONVar motion_detect_obj = JSON.parse(line);

      // JSON.typeof(jsonVar) can be used to get the type of the var
      if (!(JSON.typeof(motion_detect_obj) == "undefined")){
        display.fillRect(0, 35, 320, 205, TFT_WHITE);
        Serial.println(">>>>>>>>>>>>>>>>>>>>>>>>>>>>>>>>>>");
        Serial.println("M5Stack Motion Detect V-Func example");
        if (motion_detect_obj.hasOwnProperty("FUNC")) {
          Serial.print("V-Function = ");
          Serial.println((const char*) motion_detect_obj["FUNC"]);
          display.setCursor(0, 35);
          display.printf(" V-Fun: %s\n", (const char*) motion_detect_obj["FUNC"]);
        }
        if (motion_detect_obj.hasOwnProperty("DIFF TOTAL")) {
          Serial.print("Diff TOTAL = ");
          Serial.println((int)motion_detect_obj["DIFF TOTAL"]);
          display.printf(" Diff TOTAL: %d\n", (int)motion_detect_obj["DIFF TOTAL"]);
        }
        if (motion_detect_obj.hasOwnProperty("DIFF MAX")) {
          Serial.print("Diff MAX = ");
          Serial.println((int)motion_detect_obj["DIFF MAX"]);
          display.printf(" Diff MAX: %d\n", (int)motion_detect_obj["DIFF MAX"]);
        }

        if (motion_detect_obj.hasOwnProperty("TOTAL")) {
          motion_cnt = (int)motion_detect_obj["TOTAL"];
          Serial.printf("Motion number = %d\n", motion_cnt);
          display.printf(" Motion number: %d\n", motion_cnt);
        }
        for (int i = 0; i < motion_cnt; i++) {
          display.setCursor(0, 120);
          display.fillRect(0, 120, 320, 130, TFT_WHITE);
          Serial.print("Motion ");
          Serial.print(i);
          display.printf("Motion %d:", i);
          Serial.print(":\r\n\tX:");
          Serial.println((int) motion_detect_obj[String(i)]["x"]);
          display.printf("\r\n\t X: %d", (int) motion_detect_obj[String(i)]["x"]);
          Serial.print("\tY:");
          Serial.println((int) motion_detect_obj[String(i)]["y"]);
          display.printf("\r\n\t Y: %d", (int) motion_detect_obj[String(i)]["y"]);
          Serial.print("\tWidth:");
          Serial.println((int) motion_detect_obj[String(i)]["w"]);
          display.printf("\r\n\t Width: %d", (int) motion_detect_obj[String(i)]["w"]);
          Serial.print("\tHeight:");
          Serial.println((int) motion_detect_obj[String(i)]["h"]);
          display.printf("\r\n\t Height: %d", (int) motion_detect_obj[String(i)]["h"]);
          Serial.print("\tArea:");
          Serial.println((int) motion_detect_obj[String(i)]["area"]);
          display.printf("\r\n\t Area: %d", (int) motion_detect_obj[String(i)]["area"]);
          delay(500);
        }
        Serial.println("<<<<<<<<<<<<<<<<<<<<<<<<<<<<<<<<<<");
      } else {
        return;
      }
    }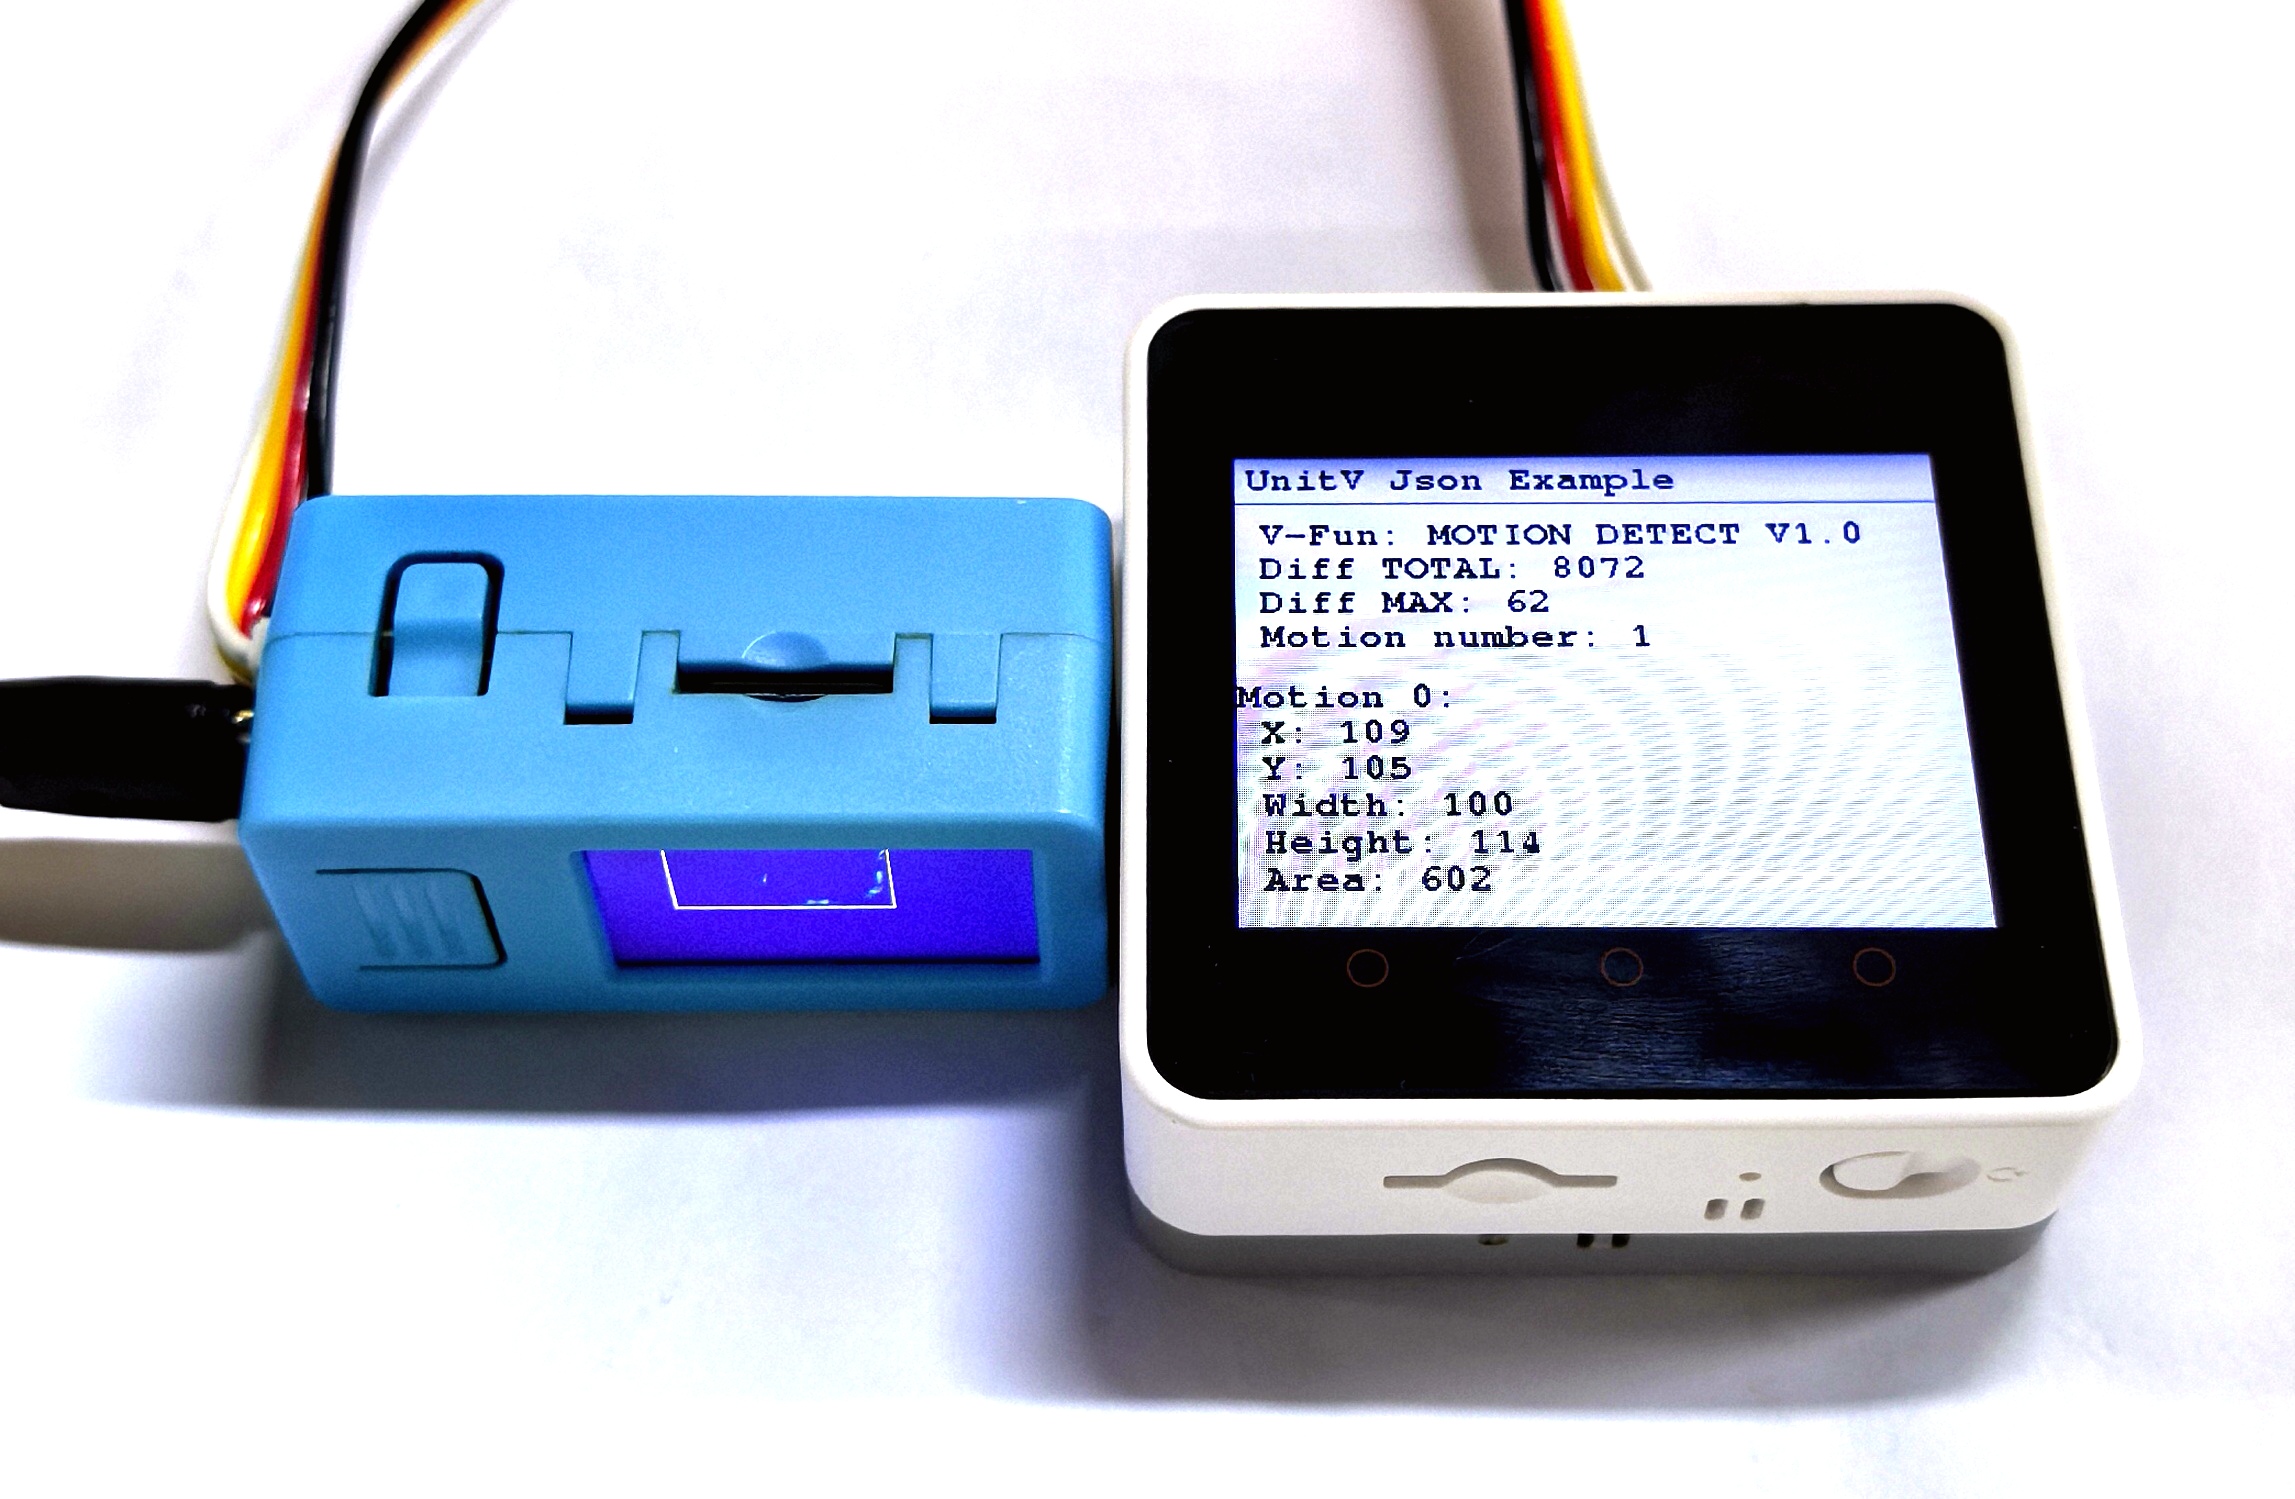
}上記のサンプルでは動的検出モードを使用し、StickV/UnitV が物体の動きを検出すると、物体の位置などのデータをリアルタイムで返します。検出結果は下図の通りです。
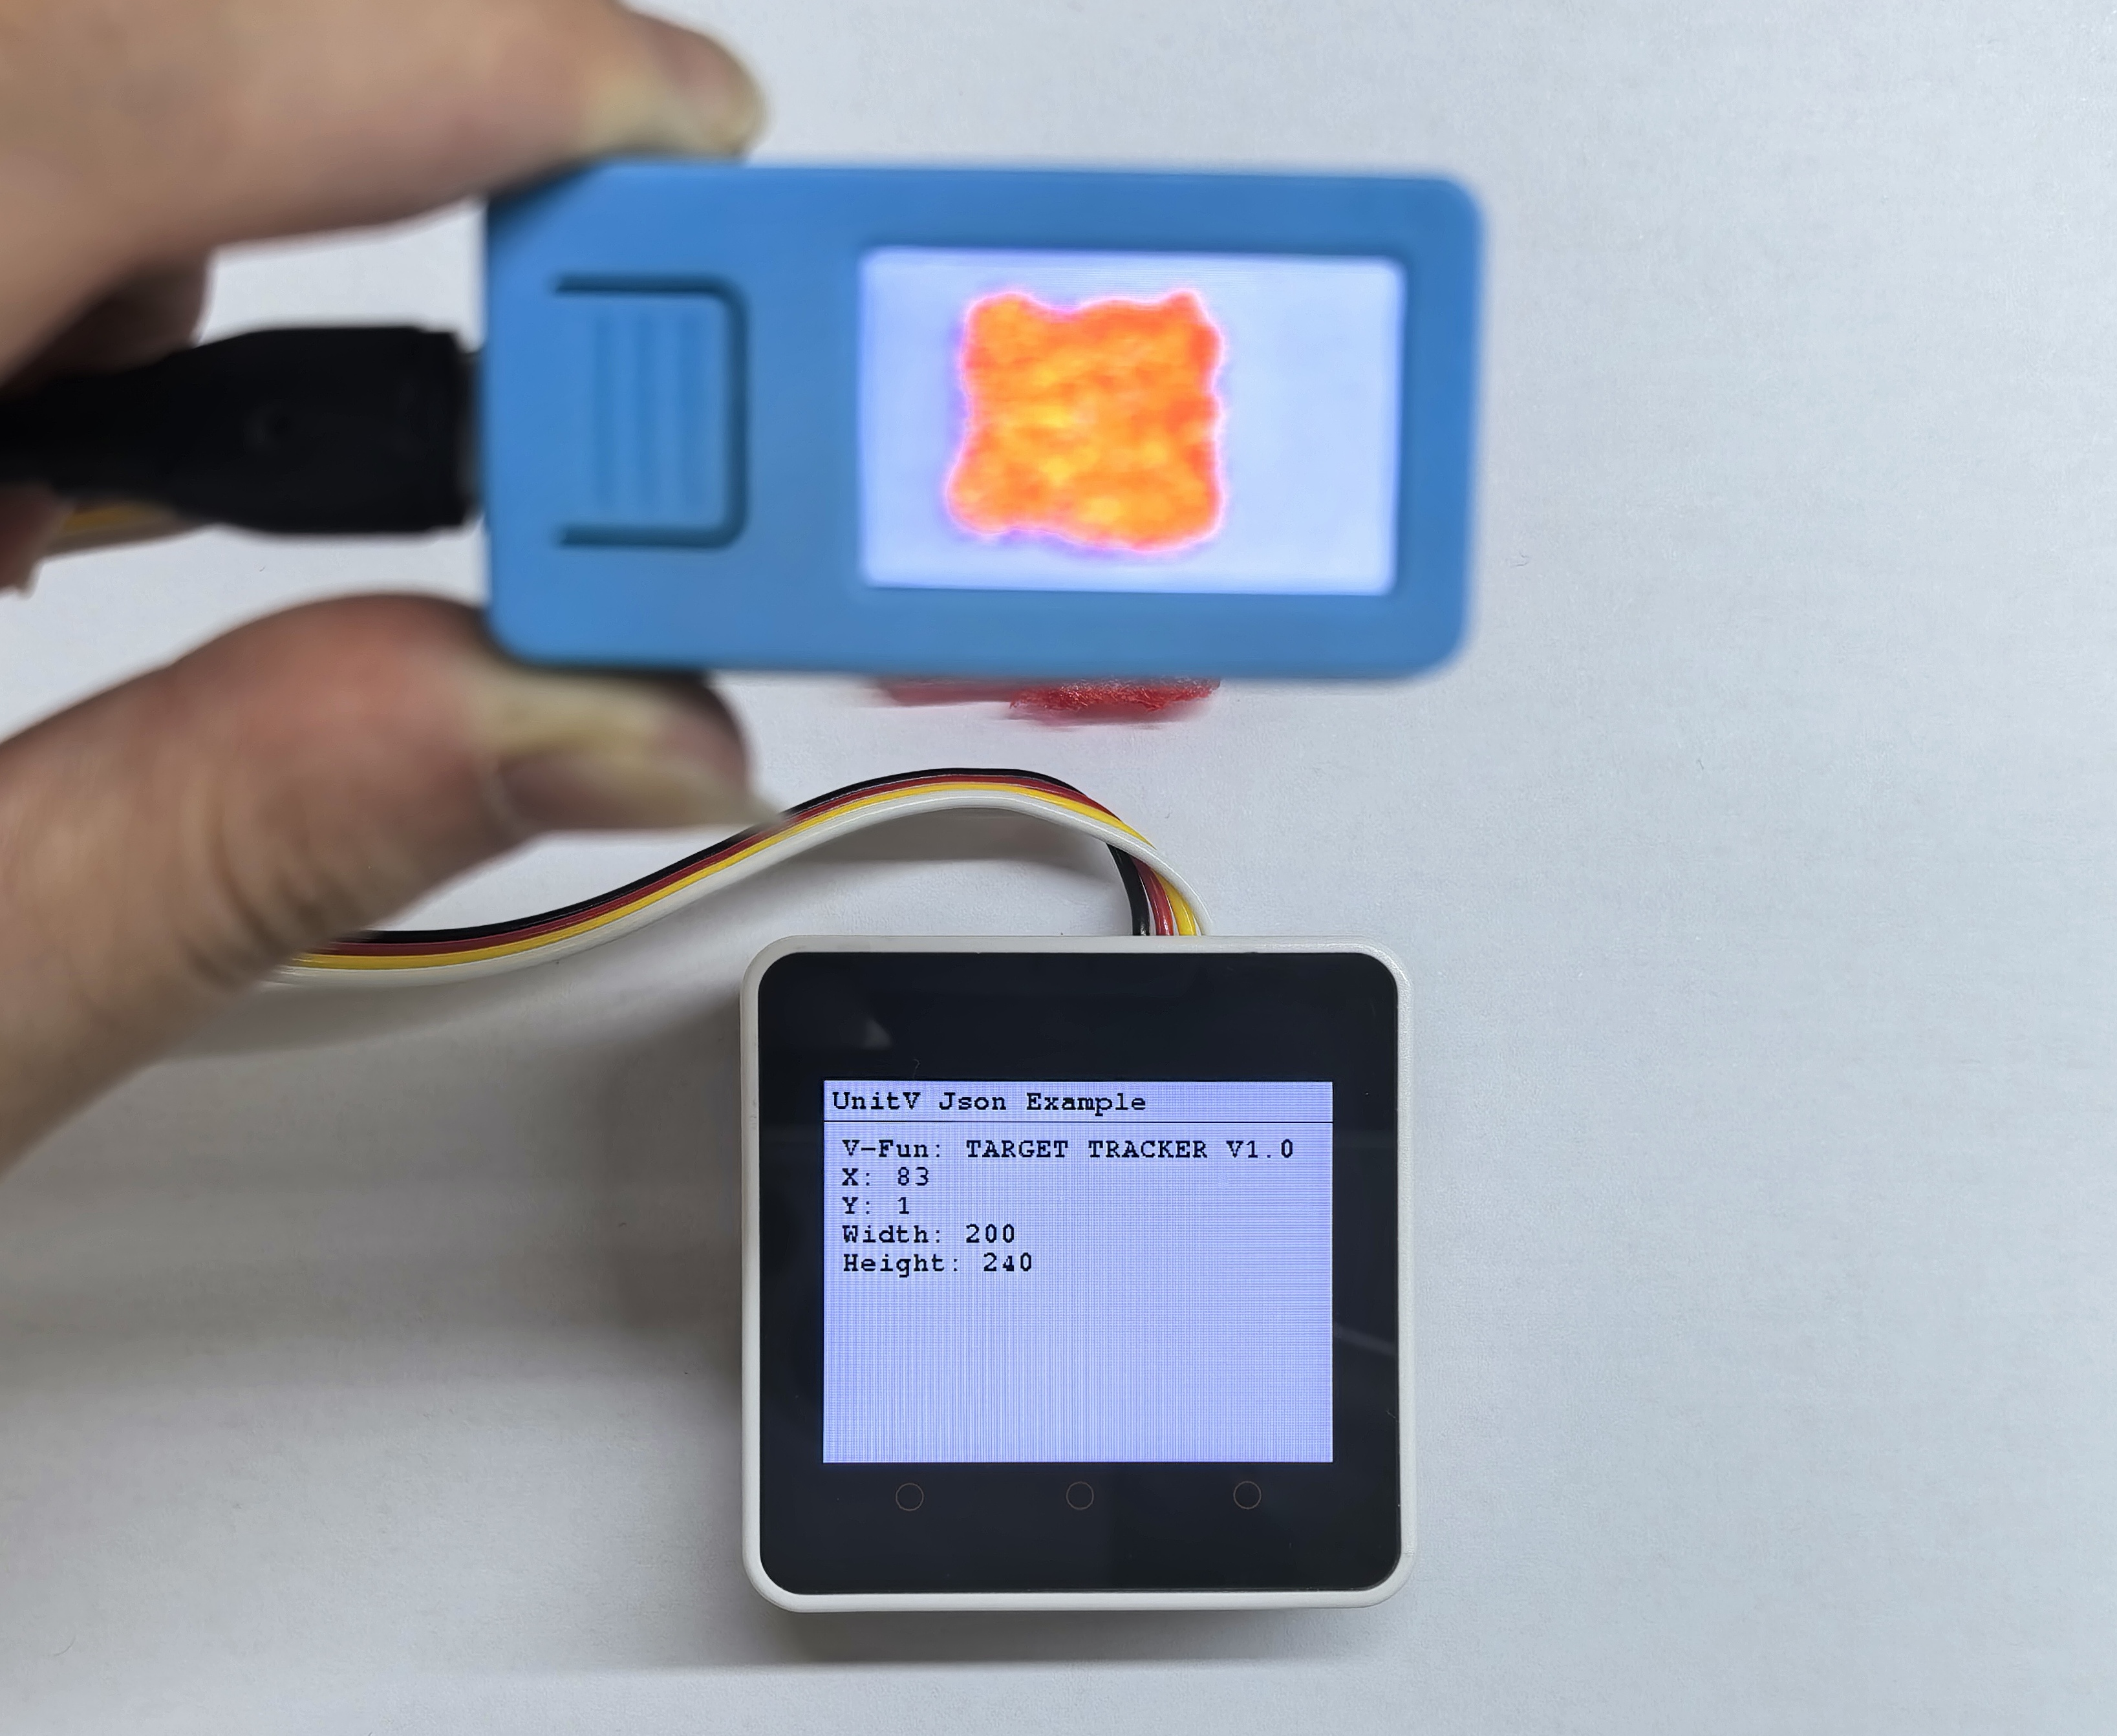
4.2 ターゲット追跡
この機能ファームウェアは以下の通りです:
ターゲット追跡機能は、UnitV/StickV の電源投入後にカメラ映像に写っている対象物の情報を取得して初めて正常に動作します。取得開始点および幅・高さパラメータ設定コードは以下の通りで、取得位置をカスタマイズする場合はここを修正してください。
    obj["x"] = 80;  //start point x-coordinate
    obj["y"] = 0;   //start point y-coordinate
    obj["w"] = 100; //width
obj["h"] = 100; //heightターゲット追跡機能の JSON データ形式についてはこちらをご参照ください。
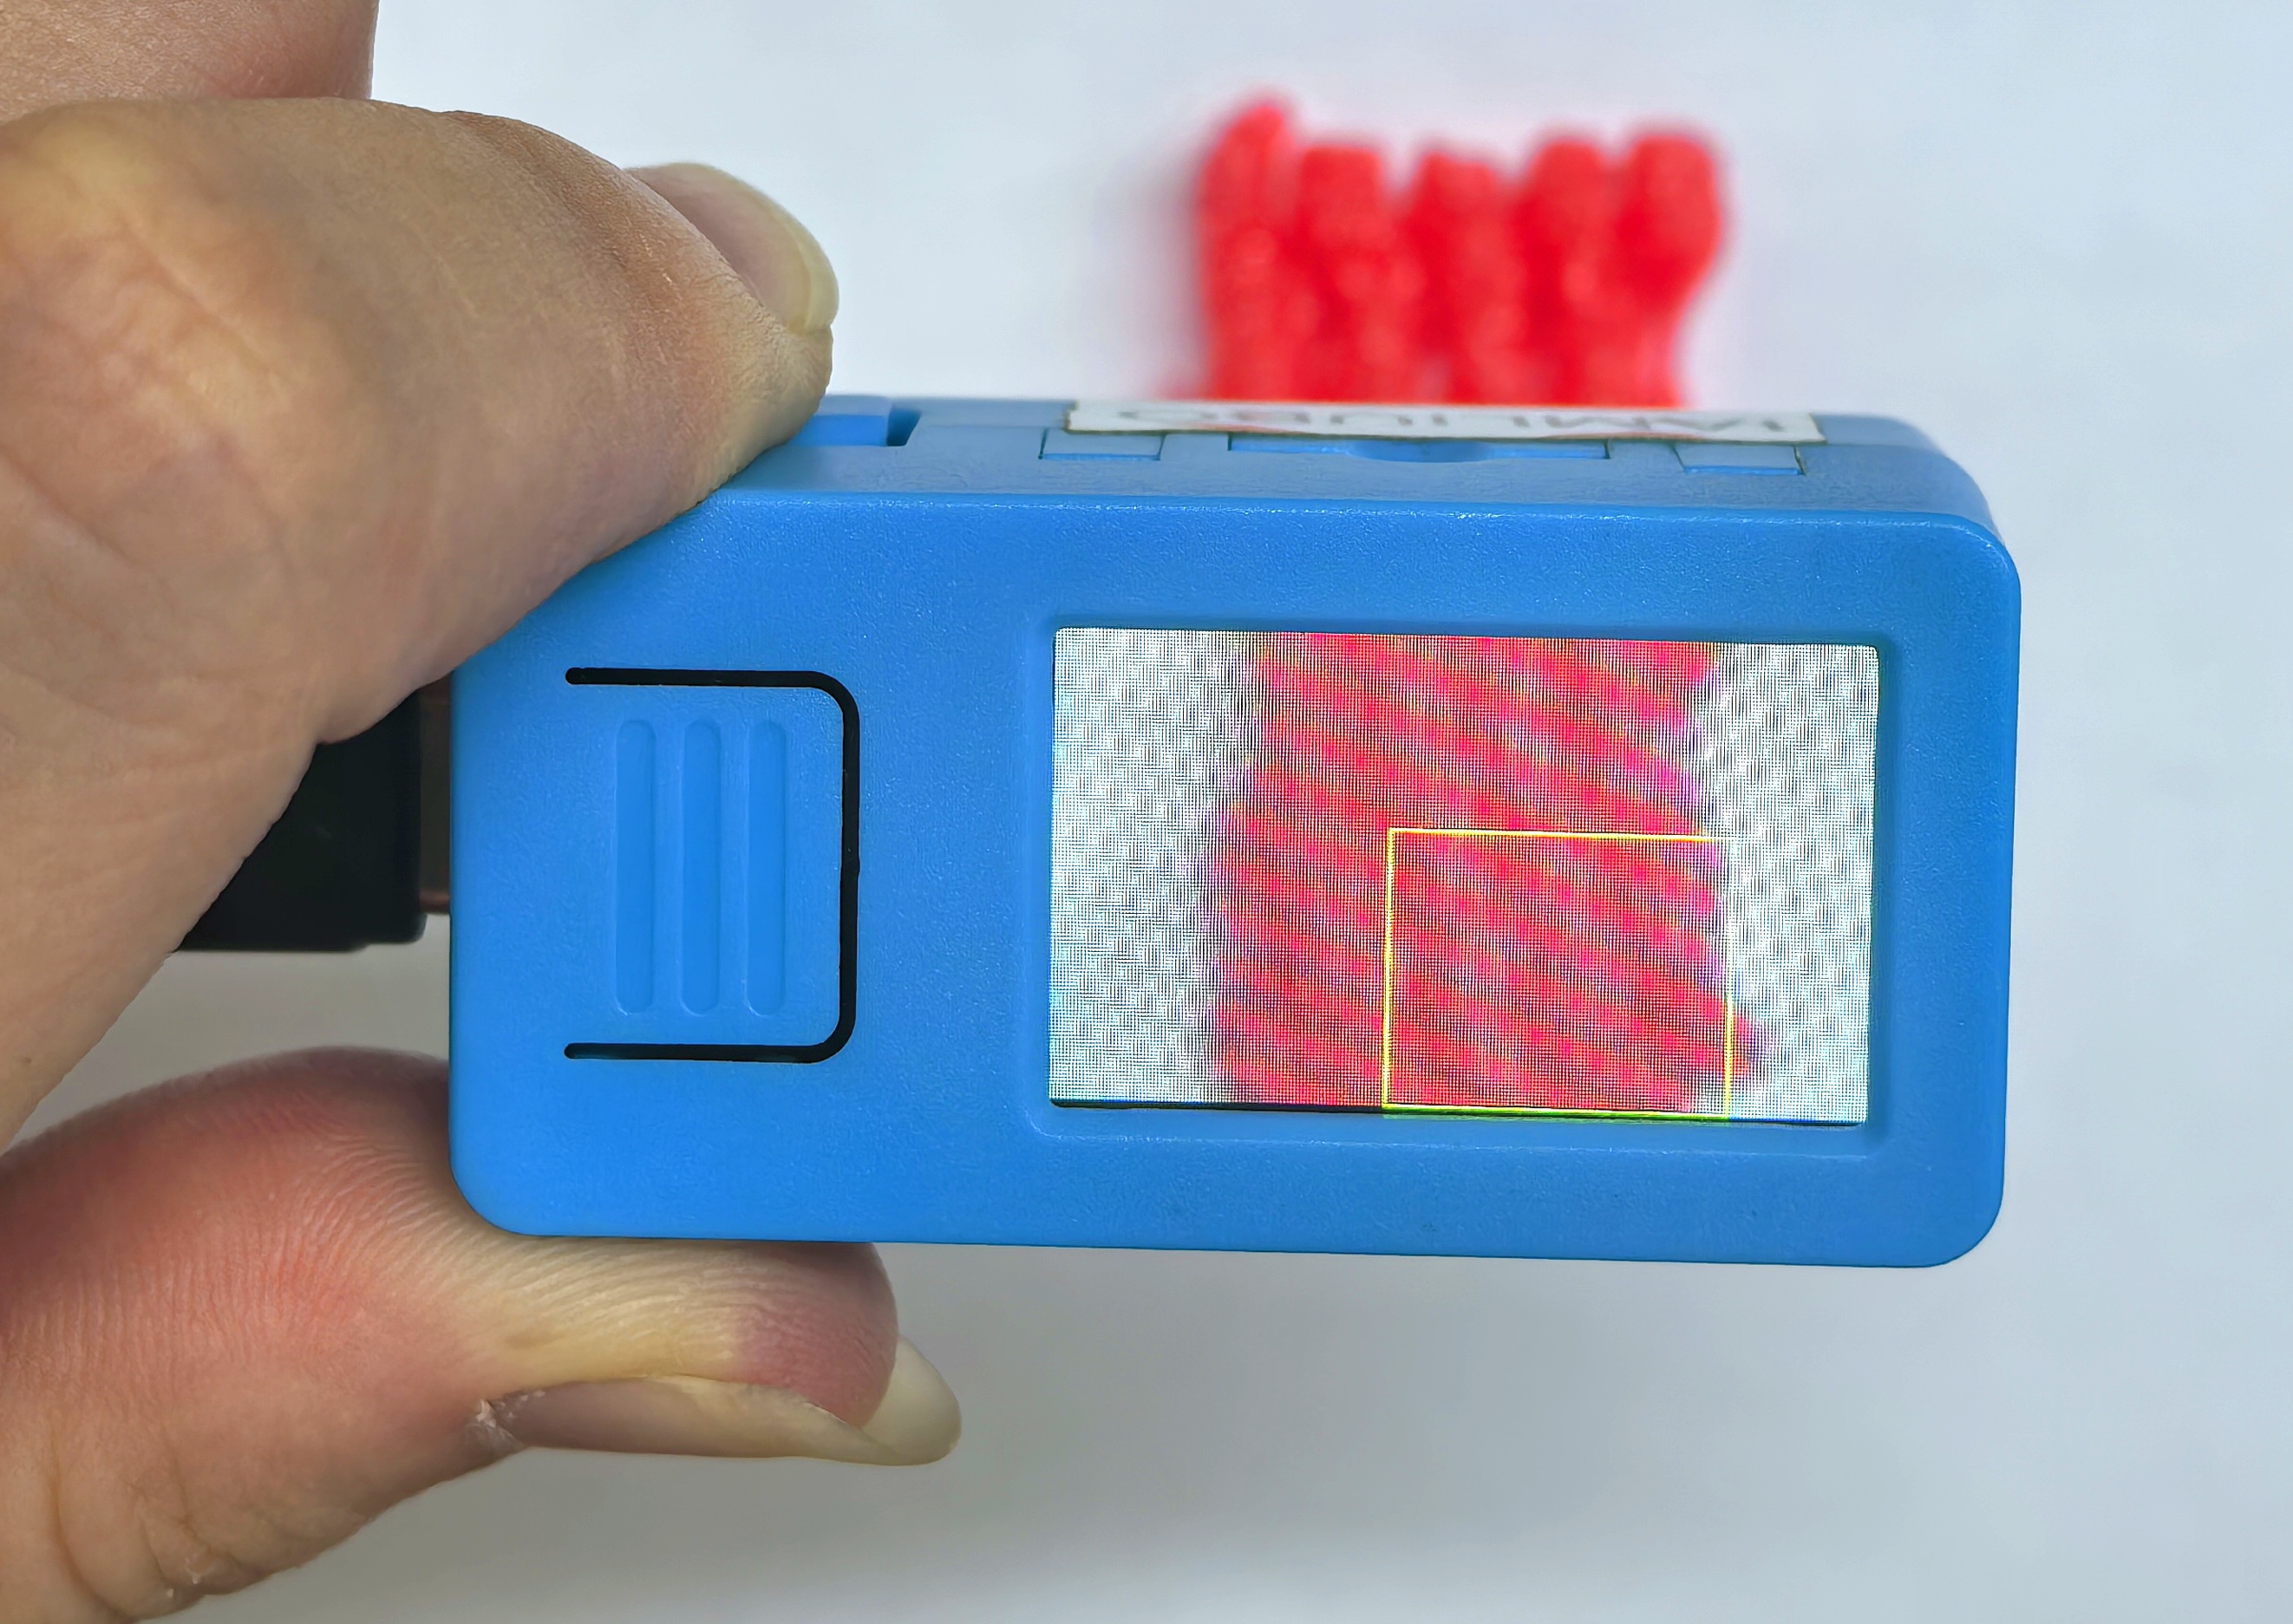
以下のサンプルでは、ホスト起動時に1 回だけパラメータ送信を行います。このとき StickV の画面は下図の通りです。追跡対象が黄色の取得枠内にあることを確認してください。
#include <M5Unified.h>
#include <M5GFX.h>
#include <Arduino_JSON.h>

M5GFX display;

void setup() {

    display.begin();
    display.setRotation(1);
    display.clear(TFT_WHITE);
    display.setFont(&fonts::FreeMonoBold9pt7b);
    display.setTextColor(TFT_BLACK);
    delay(100);
    display.drawString("UnitV Json Example", 5, 5);
    display.drawLine(0, 25, 320, 25, TFT_BLACK);

    Serial.begin(115200);
    Serial2.begin(115200, SERIAL_8N1, 13, 14);//PORT.C

    //Setting JSON
    JSONVar obj;
    obj["TARGET TRACKER"] = " V1.0";
    obj["x"] = 80;
    obj["y"] = 0;
    obj["w"] = 100;
    obj["h"] = 100;
    String jsonString = JSON.stringify(obj);
    Serial2.println(jsonString);
    Serial2.flush();
}

void loop() {

    if (Serial2.available() > 0) {
      String line = Serial2.readStringUntil('\r');
      while (line.length() && line[0] != '{') {  // clear '\0'
        line.remove(0, 1);
      }
      Serial2.flush();

      JSONVar object = JSON.parse(line);

      // JSON.typeof(jsonVar) can be used to get the type of the var
      if (!(JSON.typeof(object) == "undefined")){
        display.fillRect(0, 35, 320, 205, TFT_WHITE);
        Serial.println(">>>>>>>>>>>>>>>>>>>>>>>>>>>>>>>>>>");
        Serial.println("M5Stack Target Tracker V-Func example");
        if (object.hasOwnProperty("FUNC")) {
          Serial.print("V-Function = ");
          Serial.println((const char*) object["FUNC"]);
          display.setCursor(0, 35);
          display.printf(" V-Fun: %s\n", (const char*) object["FUNC"]);
        }
        if (object.hasOwnProperty("x")) {
          Serial.print("X: ");
          Serial.println((int) object["x"]);
          display.printf(" X: %d\n", (int) object["x"]);
        }
        if (object.hasOwnProperty("y")) {
          Serial.print("Y: ");
          Serial.println((int) object["y"]);
          display.printf(" Y: %d\n", (int) object["y"]);
        }
        if (object.hasOwnProperty("w")) {
          Serial.print("Width: ");
          Serial.println((int) object["w"]);
          display.printf(" Width: %d\n", (int) object["w"]);
        }
        if (object.hasOwnProperty("h")) {
          Serial.print("Height: ");
          Serial.println((int) object["h"]);
          display.printf(" Height: %d\n", (int) object["h"]);
        }
        display.waitDisplay();
        Serial.println("<<<<<<<<<<<<<<<<<<<<<<<<<<<<<<<<<<");
      } else {
        return;
      }
    }
}成功すると対象位置データがリアルタイム表示され、結果は下図の通りです。
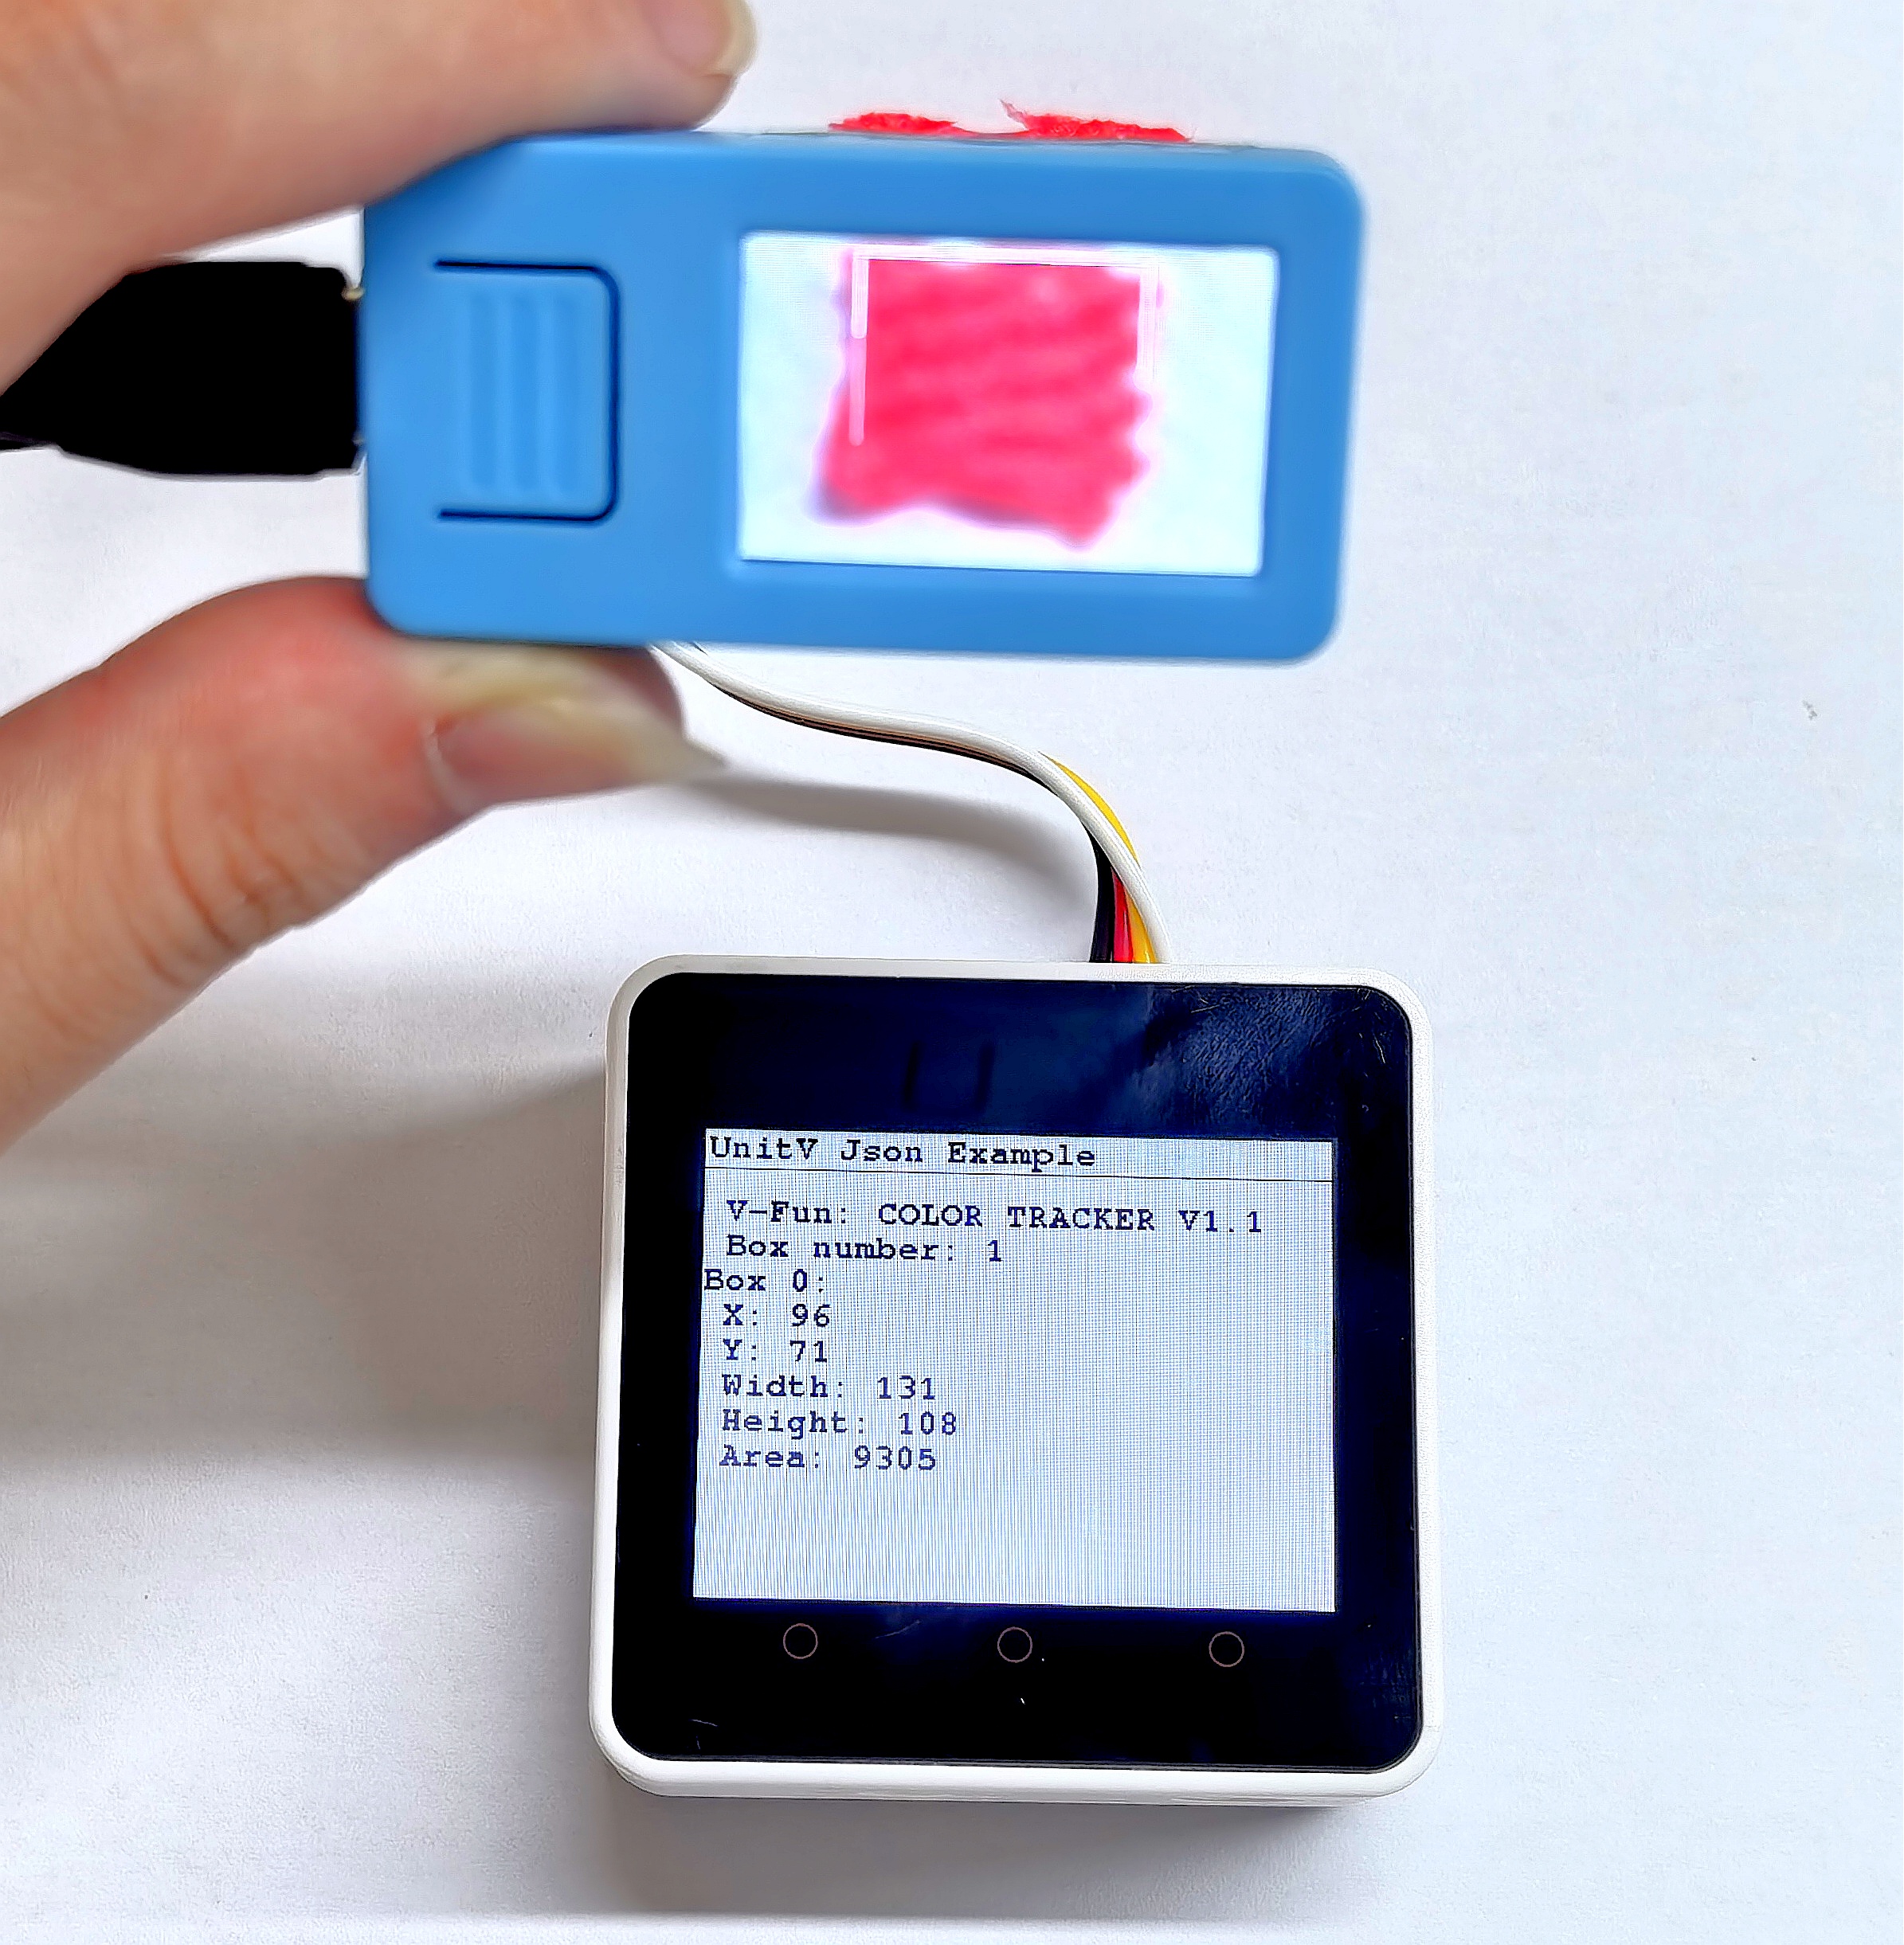
4.3 カラー追跡
この機能ファームウェアは以下の通りです:
カラー追跡機能は、UnitV/StickV の電源投入後に追跡カラーのパラメータを設定する必要があります。色パラメータは LAB カラー抽出ツール を使用して取得します。
取得・設定手順は以下の通りです:
- ツールを開き、
openをクリックしてサンプル画像(本例では サンプル画像)を開きます。追跡対象の位置をクリックし、白い領域(サンプル位置)で最終カラー値を決定します。 - 上図の
LAB colorを 左から右 の順で下記コードに対応して入力します(上から下)。
    obj["Lmin"] = 0;
    obj["Lmax"] = 100;
    obj["Amin"] = 51;
    obj["Amax"] = 61;
    obj["Bmin"] = 34;
obj["Bmax"] = 44;カラー追跡機能の JSON データ形式についてはこちらをご参照ください。
#include <M5Unified.h>
#include <M5GFX.h>
#include <Arduino_JSON.h>
M5GFX display;
void setup() {
display.begin();
display.setRotation(1);
display.clear(TFT_WHITE);
display.setFont(&fonts::FreeMonoBold9pt7b);
display.setTextColor(TFT_BLACK);
delay(100);
display.drawString("UnitV Json Example", 2, 2);
display.drawLine(0, 20, 320, 20, TFT_BLACK);
Serial.begin(115200);
Serial2.begin(115200, SERIAL_8N1, 13, 14);//PORT.C
//Setting JSON
JSONVar obj;
obj["COLOR TRACKER"] = 1.0;
obj["thr_w"] = 20;
obj["thr_h"] = 20;
obj["stepx"] = 2;
obj["stepy"] = 2;
obj["merge"] = 10;
//Please fill in the below six parameters with the values extracted from the LAB color selection tool.
    obj["Lmin"] = 0;
    obj["Lmax"] = 100;
    obj["Amin"] = 51;
    obj["Amax"] = 61;
    obj["Bmin"] = 34;
    obj["Bmax"] = 44;
String jsonString = JSON.stringify(obj);
Serial2.println(jsonString);
Serial2.flush();
}
void loop() {
if (Serial2.available() > 0) {
String line = Serial2.readStringUntil('\r');
while (line.length() && line[0] != '{') { // clear '\0'
line.remove(0, 1);
}
Serial2.flush();
JSONVar color_obj = JSON.parse(line);
// JSON.typeof(jsonVar) can be used to get the type of the var
if (!(JSON.typeof(color_obj) == "undefined")) {
display.fillRect(0, 35, 320, 205, TFT_WHITE);
Serial.println(">>>>>>>>>>>>>>>>>>>>>>>>>>>>>>>>>>");
Serial.println("M5Stack Color Tracker V-Func example");
if (color_obj.hasOwnProperty("FUNC")) {
Serial.print("V-Function = ");
Serial.println((const char*) color_obj["FUNC"]);
display.setCursor(0, 35);
display.printf(" V-Fun: %s\n", (const char*) color_obj["FUNC"]);
}
int box_cnt = 0;
if (color_obj.hasOwnProperty("TOTAL")) {
box_cnt = (int)color_obj["TOTAL"];
Serial.printf("Box number = %d\n", box_cnt);
display.printf(" Box number: %d\n", box_cnt);
}
for (int i = 0; i < box_cnt; i++) {
Serial.print("Box ");
Serial.print(i);
display.printf("Box %d:", i);
Serial.print(":\r\n\tX:");
Serial.println((int) color_obj[String(i)]["x"]);
display.printf("\r\n\t X: %d", (int) color_obj[String(i)]["x"]);
Serial.print("\tY:");
Serial.println((int) color_obj[String(i)]["y"]);
display.printf("\r\n\t Y: %d", (int) color_obj[String(i)]["y"]);
Serial.print("\tWidth:");
Serial.println((int) color_obj[String(i)]["w"]);
display.printf("\r\n\t Width: %d", (int) color_obj[String(i)]["w"]);
Serial.print("\tHeight:");
Serial.println((int) color_obj[String(i)]["h"]);
display.printf("\r\n\t Height: %d", (int) color_obj[String(i)]["h"]);
Serial.print("\tArea:");
Serial.println((int) color_obj[String(i)]["area"]);
display.printf("\r\n\t Area: %d\r\n\t", (int) color_obj[String(i)]["area"]);
}
Serial.println("<<<<<<<<<<<<<<<<<<<<<<<<<<<<<<<<<<");
}
delay(50);
}
} 成功すれば追跡カラー塊の位置やサイズ、数などのデータがリアルタイムで表示されます。複数存在する場合はシリアルで確認することを推奨します。結果例は下図の通りです。
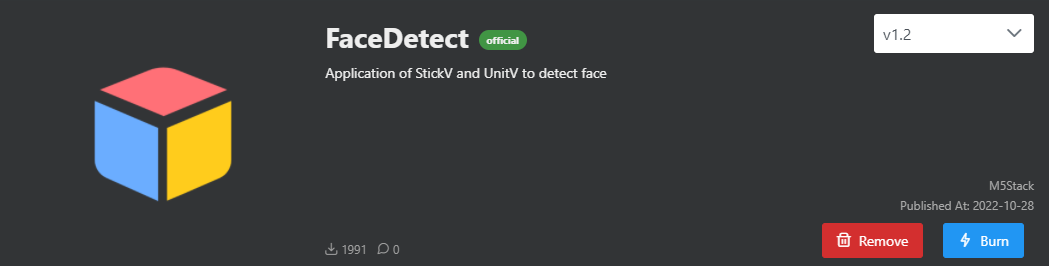
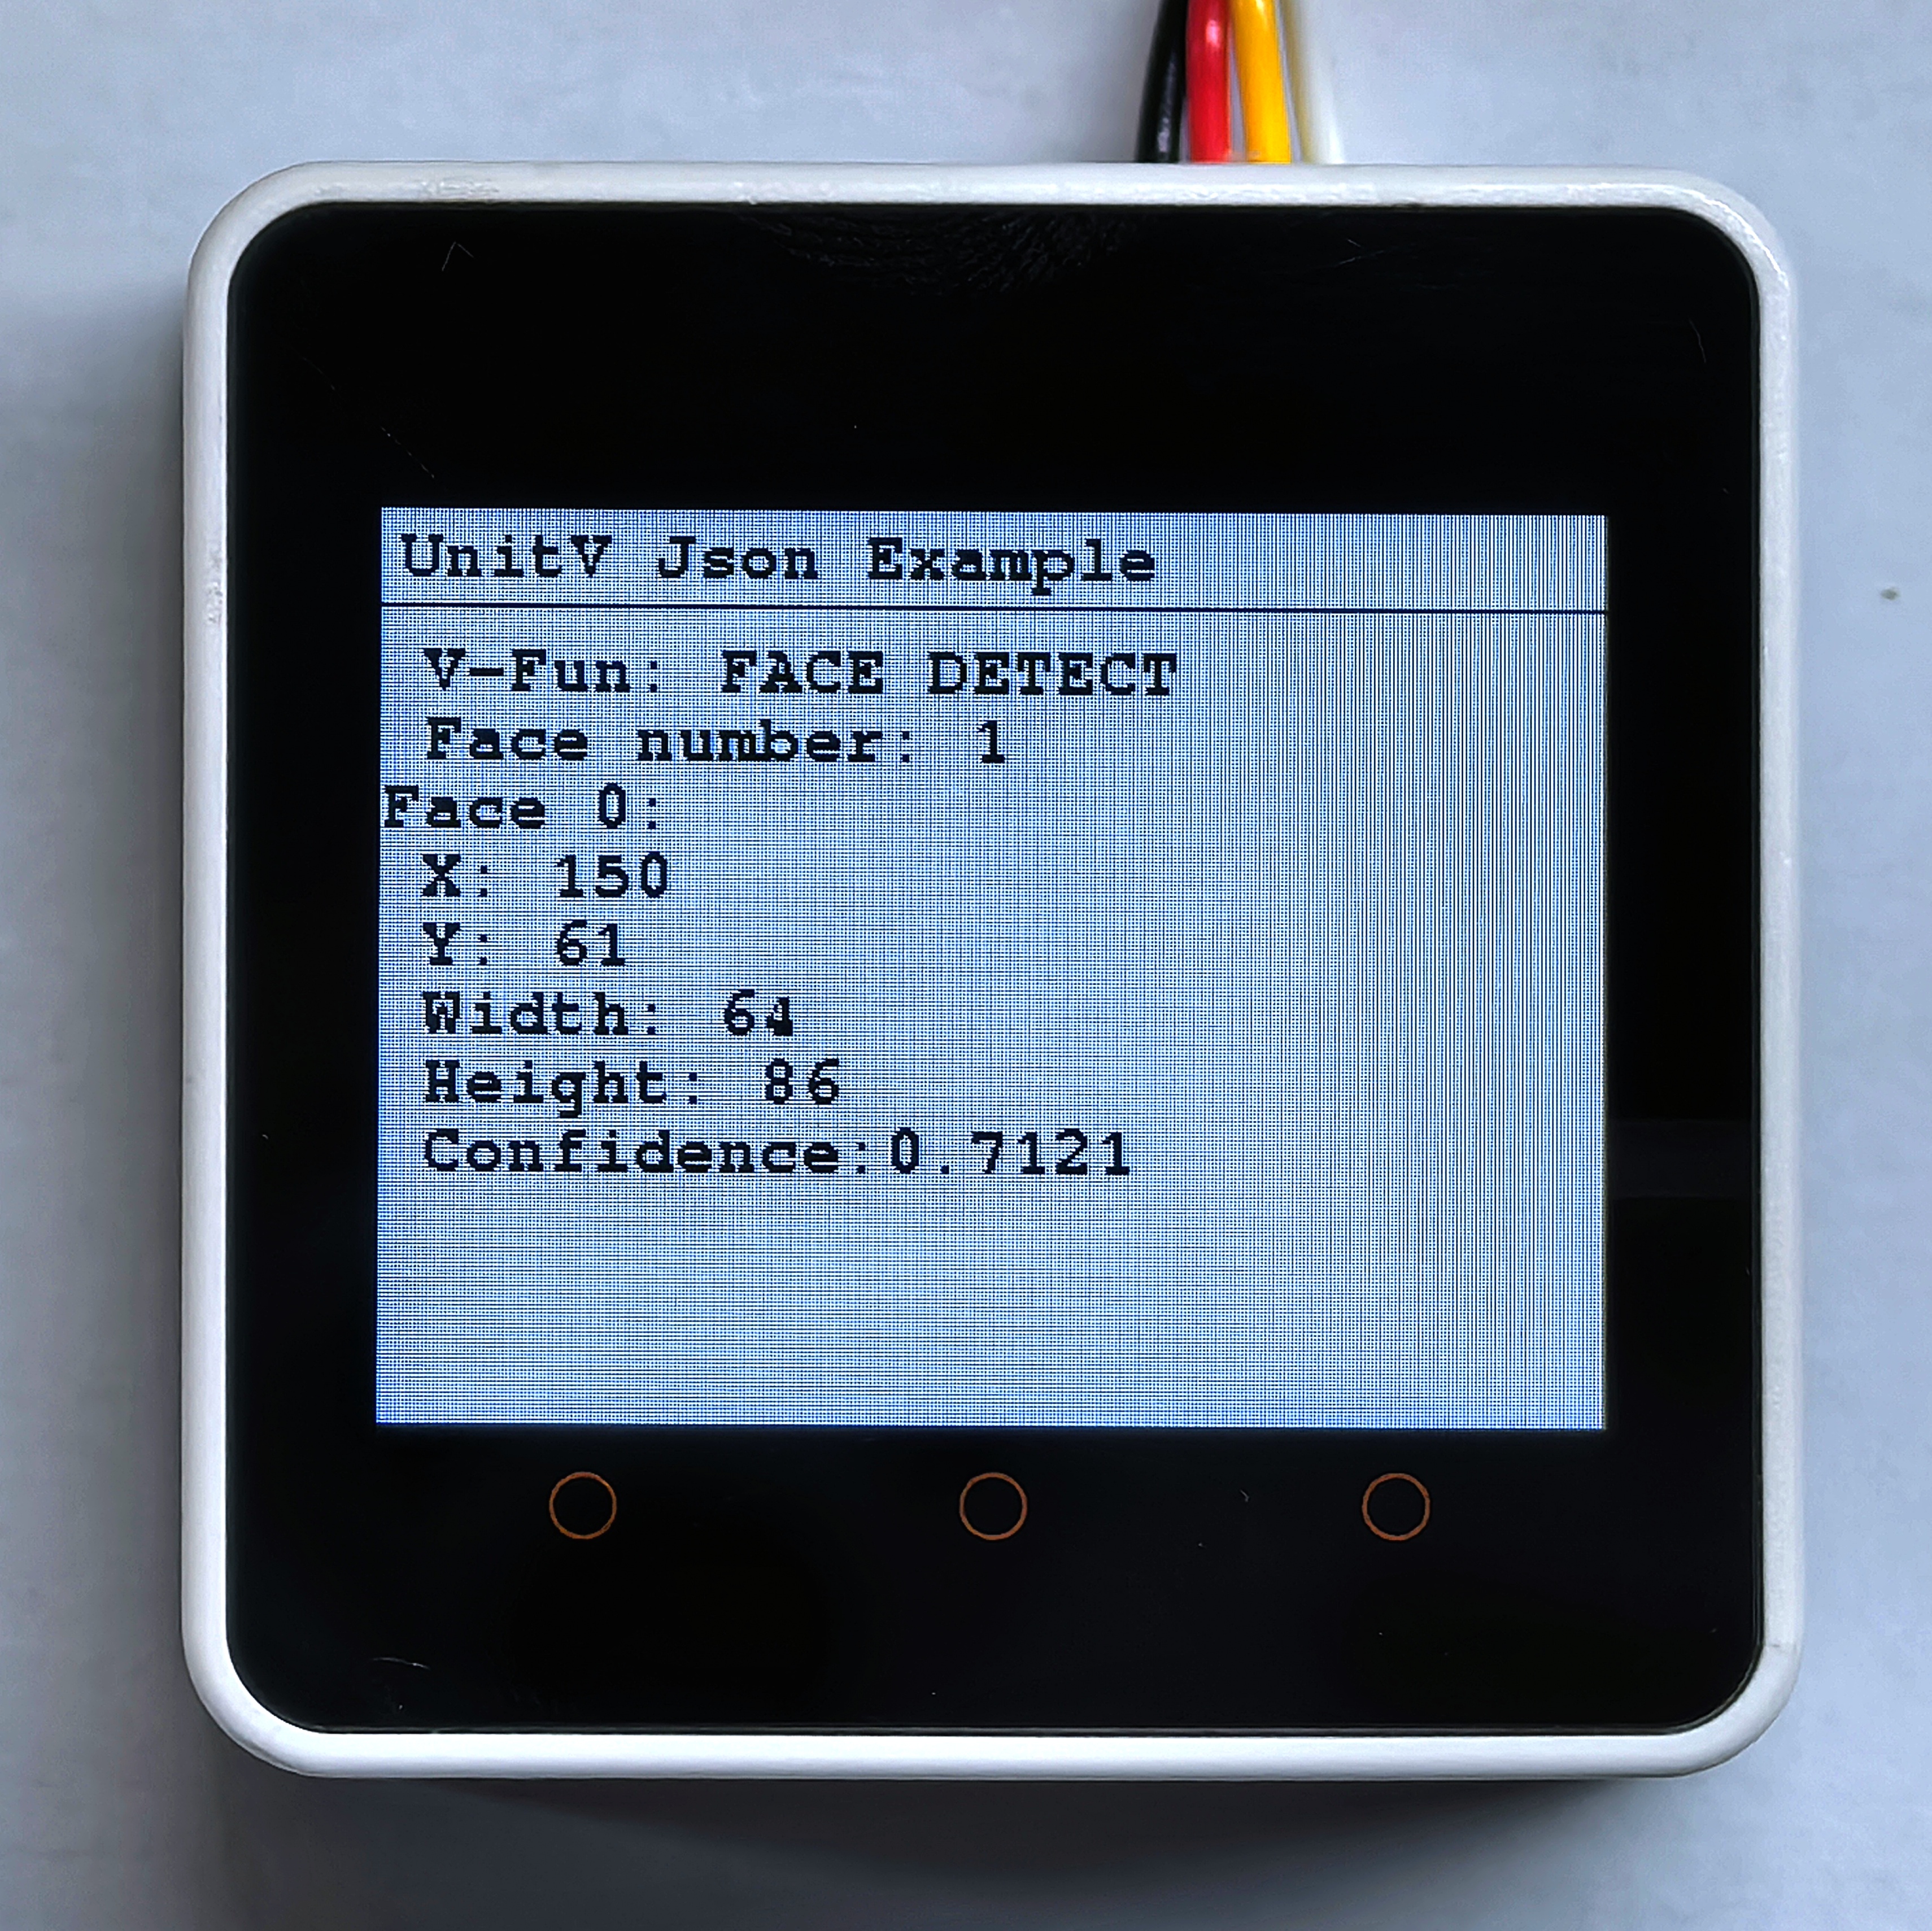
4.4 顔検出
この機能ファームウェアは以下の通りです:
顔検出機能の JSON データ形式についてはこちらをご参照ください。
#include <M5Unified.h>
#include <M5GFX.h>
#include <Arduino_JSON.h>

M5GFX display;
int face_cnt;

void setup() {

  display.begin();
  display.setRotation(1);
  display.clear(TFT_WHITE);
  display.setFont(&fonts::FreeMonoBold9pt7b);
  display.setTextColor(TFT_BLACK);
  delay(100);
  display.drawString("UnitV Json Example", 5, 5);
  display.drawLine(0, 25, 320, 25, TFT_BLACK);

  Serial.begin(115200);
  Serial2.begin(115200, SERIAL_8N1, 13, 14);//PORT.C
}

void loop() {

  if (Serial2.available() > 0) {
    String line = Serial2.readStringUntil('\r');
    while (line.length() && line[0] != '{') {  // clear '\0'
      line.remove(0, 1);
    }
    Serial2.flush();

    JSONVar face_detect_obj = JSON.parse(line);

    // JSON.typeof(jsonVar) can be used to get the type of the var
    if (!(JSON.typeof(face_detect_obj) == "undefined")) {
      display.fillRect(0, 35, 320, 205, TFT_WHITE);
      // display.drawString("Parsing Json succeed!", 5, 30);
      Serial.println(">>>>>>>>>>>>>>>>>>>>>>>>>>>>>>>>>>");
      Serial.println("M5Stack Face Detect V-Func example");
      if (face_detect_obj.hasOwnProperty("FUNC")) {
        Serial.print("V-Function = ");
        Serial.println((const char*)face_detect_obj["FUNC"]);
        display.setCursor(0, 35);
        display.printf(" V-Fun: %s\n", (const char*)face_detect_obj["FUNC"]);
      }

      if (face_detect_obj.hasOwnProperty("count")) {
        face_cnt = (int)face_detect_obj["count"];
        Serial.printf("Face number = %d\n", face_cnt);
        display.printf(" Face number: %d\n", face_cnt);
      }

      for (int i = 0; i < face_cnt; i++) {
        Serial.print("Face ");
        Serial.print(i + 1);
        display.printf("Face %d:", i);
        Serial.print(":\r\n\tX:");
        Serial.println((int)face_detect_obj[String(i)]["x"]);
        display.printf("\r\n\t X: %d", (int)face_detect_obj[String(i)]["x"]);
        Serial.print("\tY:");
        Serial.println((int)face_detect_obj[String(i)]["y"]);
        display.printf("\r\n\t Y: %d", (int)face_detect_obj[String(i)]["y"]);
        Serial.print("\tWidth:");
        Serial.println((int)face_detect_obj[String(i)]["w"]);
        display.printf("\r\n\t Width: %d", (int)face_detect_obj[String(i)]["w"]);
        Serial.print("\tHeight:");
        Serial.println((int)face_detect_obj[String(i)]["h"]);
        display.printf("\r\n\t Height: %d", (int)face_detect_obj[String(i)]["h"]);
        Serial.print("\tConfidence:");
        Serial.println(face_detect_obj[String(i)]["value"]);
        display.printf("\r\n\t Confidence:");
        display.println(face_detect_obj[String(i)]["value"]);
      }
      Serial.println("<<<<<<<<<<<<<<<<<<<<<<<<<<<<<<<<<<");
    } else {
      return;
    }
  }
} 左図の顔をスキャンした場合の検出結果は右図の通りです。

4.5 QRコード認識
コードスキャン機能のファームウェアは以下の通りです:
QRコード認識機能の JSON データ形式についてはこちらをご参照ください。
#include <M5Unified.h>
#include <M5GFX.h>
#include <Arduino_JSON.h>

M5GFX display;

void setup() {

    display.begin();
    display.setRotation(1);
    display.clear(TFT_WHITE);
    display.setFont(&fonts::FreeMonoBold9pt7b);
    display.setTextColor(TFT_BLACK);
    delay(100);
    display.drawString("UnitV Json Example", 5, 5);
    display.drawLine(0, 25, 320, 25, TFT_BLACK);

    Serial.begin(115200);
    Serial2.begin(115200, SERIAL_8N1, 13, 14);//PORT.C

    //Setting JSON
    JSONVar obj;
    obj["FIND CODE"] = 1.0;
    obj["mode"] = "QRCODE";      // Recognition mode, optional: QRCODE, APRILTAG, DATAMATRIX, BARCODE
    String jsonString = JSON.stringify(obj);
    Serial2.println(jsonString);
    Serial2.flush();
}

void loop() {

    if (Serial2.available() > 0) {
      String line = Serial2.readStringUntil('\r');
      while (line.length() && line[0] != '{') {  // clear '\0'
        line.remove(0, 1);
      }
      Serial2.flush();

      JSONVar code_obj = JSON.parse(line);

      // JSON.typeof(jsonVar) can be used to get the type of the var
      if (!(JSON.typeof(code_obj) == "undefined")){
        display.fillRect(0, 35, 320, 205, TFT_WHITE);
        Serial.println(">>>>>>>>>>>>>>>>>>>>>>>>>>>>>>>>>>");
        Serial.println("M5Stack QRCode Detect V-Func example");
        if (code_obj.hasOwnProperty("FUNC")) {
          Serial.print("V-Function = ");
          Serial.println((const char*) code_obj["FUNC"]);
          display.setCursor(0, 35);
          display.printf(" V-Fun: %s\n", (const char*) code_obj["FUNC"]);
        }
        int qrcode_cnt = 0;
        if (code_obj.hasOwnProperty("count")) {
          qrcode_cnt = (int)code_obj["count"];
          Serial.printf("QR Code number = %d\n", qrcode_cnt);
          display.printf(" QR Code number: %d\n", qrcode_cnt);
        }
        for (int i = 0; i < qrcode_cnt; i++) {
          Serial.print("QRCode ");
          Serial.print(i);
          display.printf("QRCode %d:", i);
          Serial.print(":\r\n\tX:");
          Serial.println((int) code_obj[String(i)]["x"]);
          display.printf("\r\n\t X: %d", (int) code_obj[String(i)]["x"]);
          Serial.print("\tY:");
          Serial.println((int) code_obj[String(i)]["y"]);
          display.printf("        Y: %d", (int) code_obj[String(i)]["y"]);
          Serial.print("\tWidth:");
          Serial.println((int) code_obj[String(i)]["w"]);
          display.printf("\r\n\t Width: %d", (int) code_obj[String(i)]["w"]);
          Serial.print("\tHeight:");
          Serial.println((int) code_obj[String(i)]["h"]);
          display.printf("    Height: %d", (int) code_obj[String(i)]["h"]);
          Serial.print("\tPayload:");
          Serial.println((const char*) code_obj[String(i)]["payload"]);
          display.printf("\r\n\t Payload: %s", (const char*) code_obj[String(i)]["payload"]);
          Serial.print("\tVersion:");
          Serial.println((int) code_obj[String(i)]["version"]);
          display.printf("\r\n\t Version: %d", (int) code_obj[String(i)]["version"]);
          Serial.print("\tECC Level:");
          Serial.println((int) code_obj[String(i)]["ecc_level"]);
          display.printf("\r\n\t ECC Level: %d", (int) code_obj[String(i)]["ecc_level"]);
          Serial.print("\tMask:");
          Serial.println((int) code_obj[String(i)]["mask"]);
          display.printf("\r\n\t Mask: %d", (int) code_obj[String(i)]["mask"]);
          Serial.print("\tData Type:");
          Serial.println((int) code_obj[String(i)]["data_type"]);
          display.printf("\r\n\t Data Type: %d", (int) code_obj[String(i)]["data_type"]);
          Serial.print("\tECI:");
          Serial.println((int) code_obj[String(i)]["eci"]);
          display.printf("\r\n\t ECI: %d", (int) code_obj[String(i)]["eci"]);
        }
        Serial.println("<<<<<<<<<<<<<<<<<<<<<<<<<<<<<<<<<<");
      }
      delay(50);
    }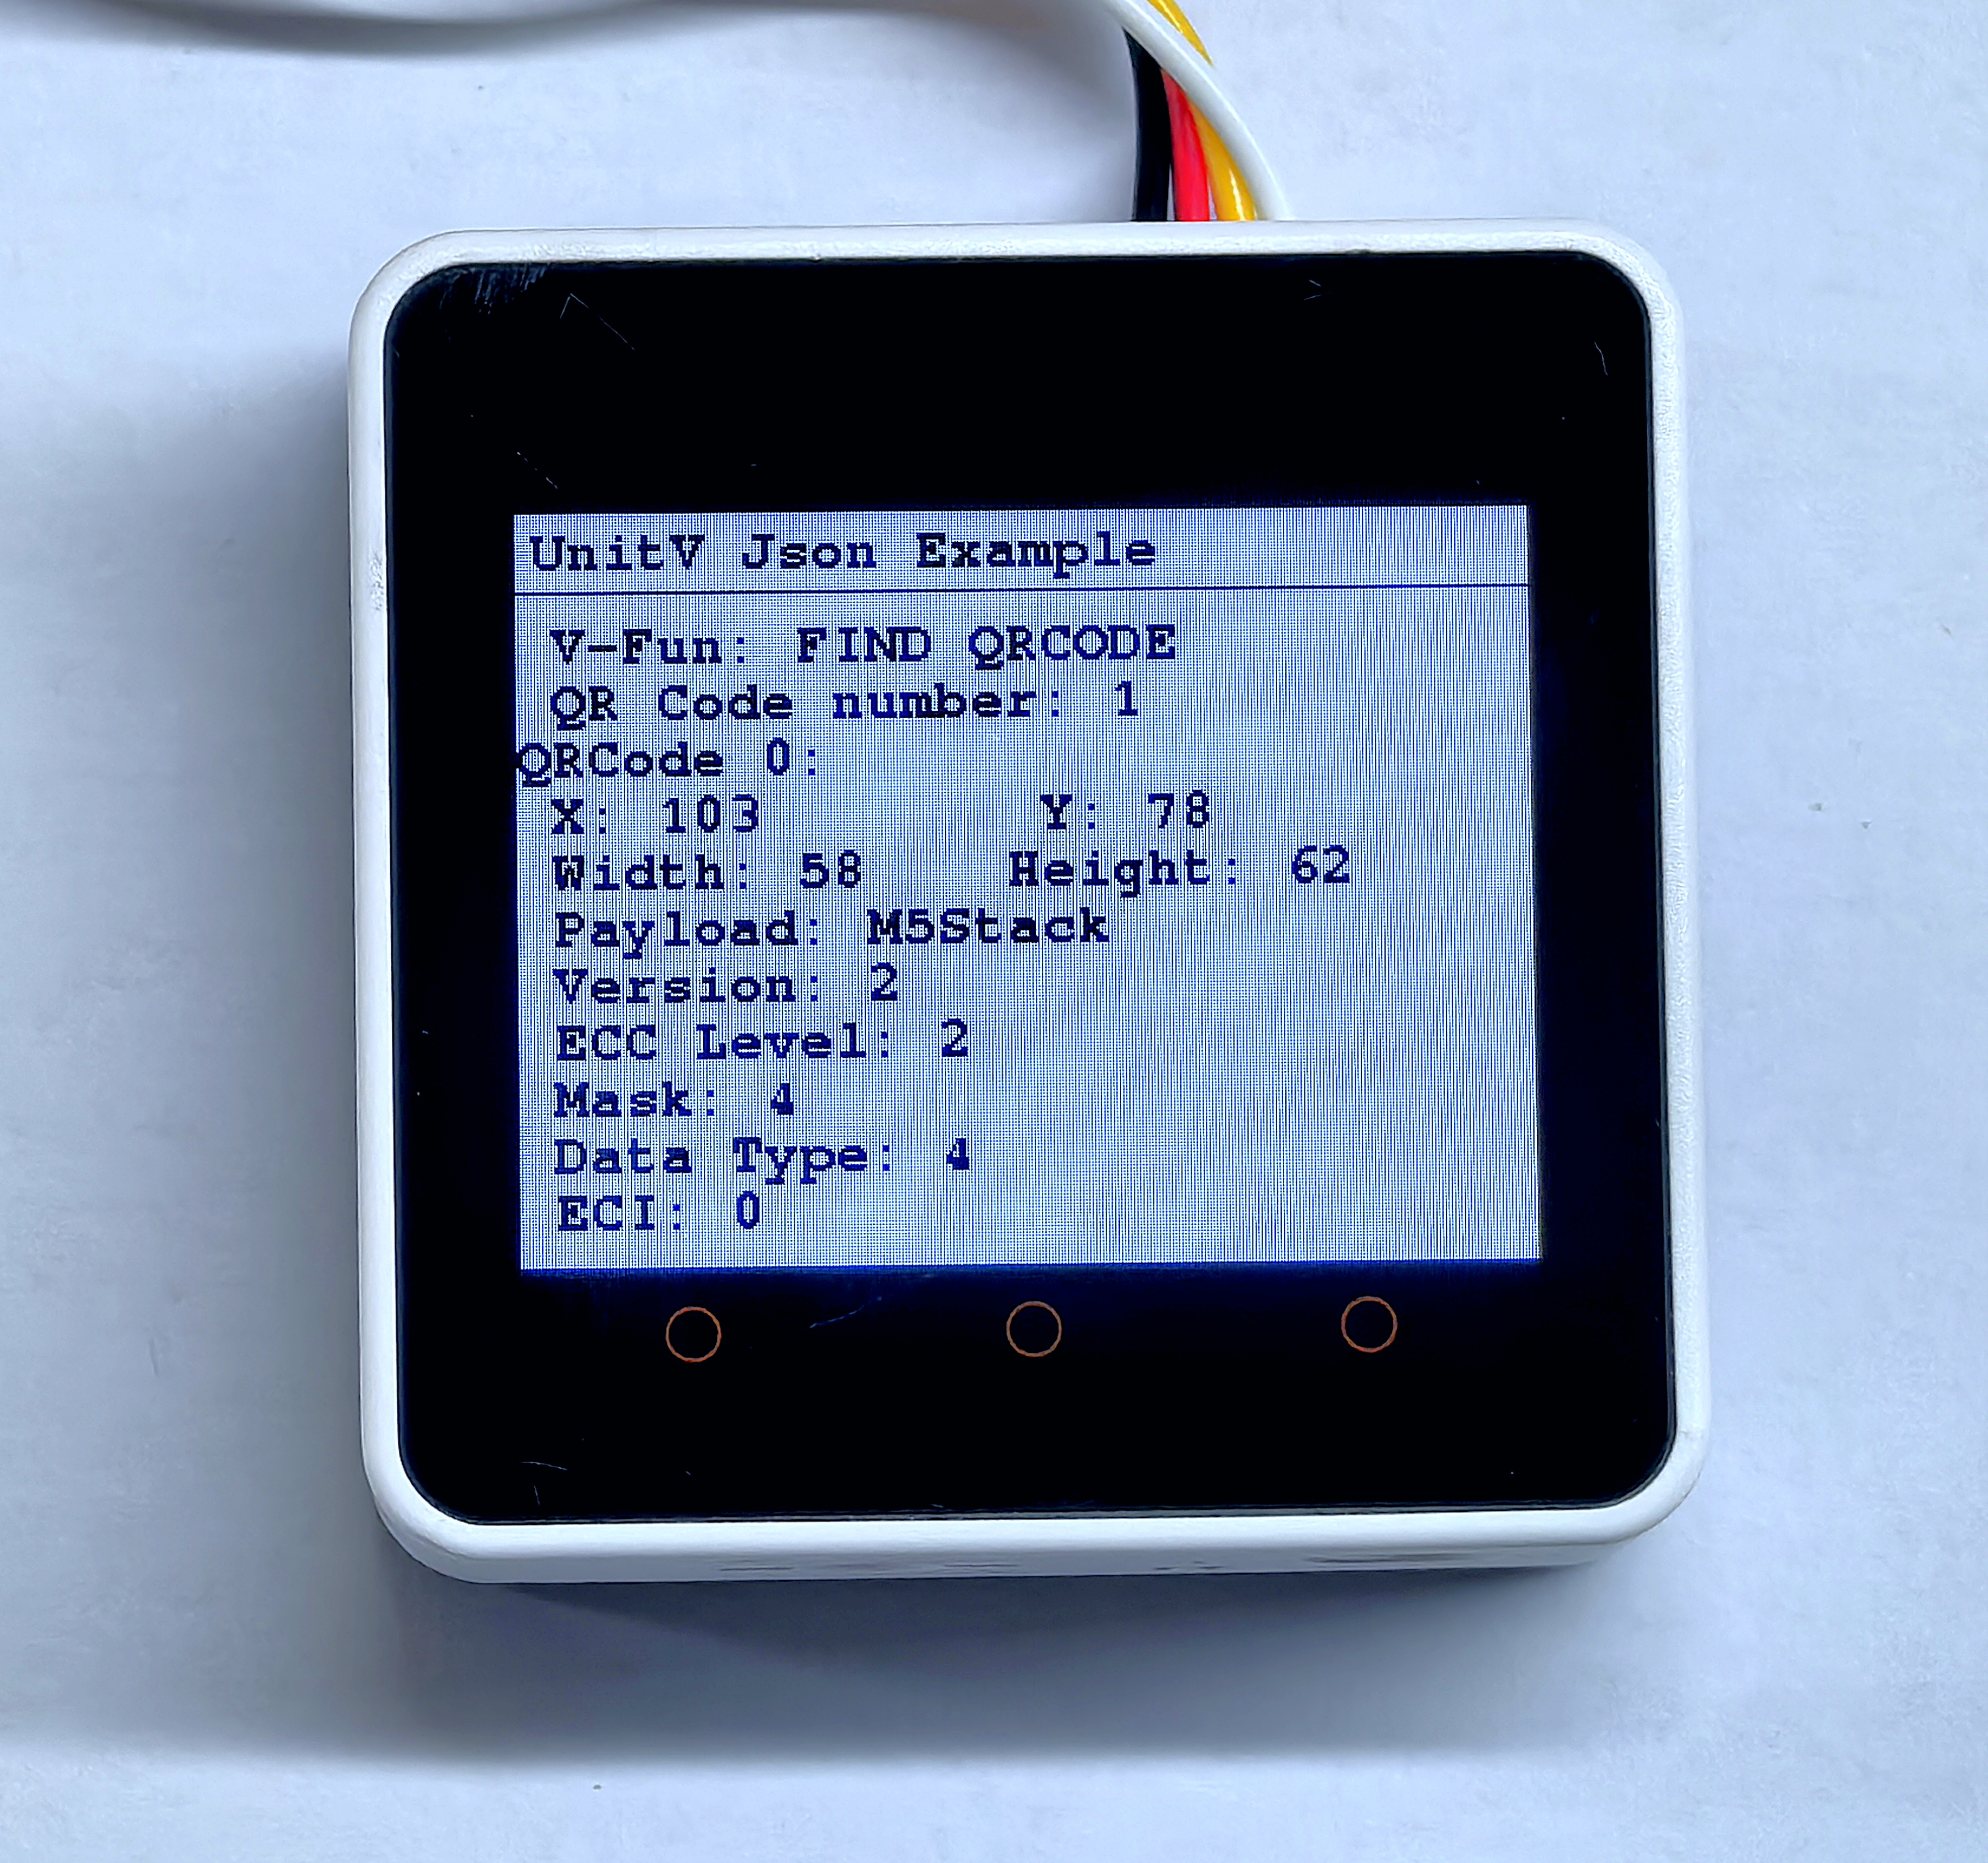
}左図のQRコードをスキャンすると右図のように認識されます。

4.6 バーコード認識
バーコード認識機能の JSON データ形式についてはこちらをご参照ください。
#include <M5Unified.h>
#include <M5GFX.h>
#include <Arduino_JSON.h>
M5GFX display;
void setup() {
display.begin();
display.setRotation(1);
display.clear(TFT_WHITE);
display.setFont(&fonts::FreeMonoBold9pt7b);
display.setTextColor(TFT_BLACK);
delay(100);
display.drawString("UnitV Json Example", 5, 5);
display.drawLine(0, 25, 320, 25, TFT_BLACK);
Serial.begin(115200);
Serial2.begin(115200, SERIAL_8N1, 13, 14);//PORT.C
JSONVar obj;
obj["FIND CODE"] = 1.0;
obj["mode"] = "BARCODE"; // Recognition mode, optional: QRCODE, APRILTAG, DATAMATRIX, BARCODE
String jsonString = JSON.stringify(obj);
Serial2.println(jsonString);
Serial2.flush();
}
void loop() {
if (Serial2.available() > 0) {
String line = Serial2.readStringUntil('\r');
while (line.length() && line[0] != '{') { // clear '\0'
line.remove(0, 1);
}
Serial2.flush();
JSONVar code_obj = JSON.parse(line);
// JSON.typeof(jsonVar) can be used to get the type of the var
if (!(JSON.typeof(code_obj) == "undefined")){
display.fillRect(0, 35, 320, 205, TFT_WHITE);
Serial.println(">>>>>>>>>>>>>>>>>>>>>>>>>>>>>>>>>>");
Serial.println("M5Stack Barcode Detect V-Func example");
if (code_obj.hasOwnProperty("FUNC")) {
Serial.print("V-Function = ");
Serial.println((const char*) code_obj["FUNC"]);
display.setCursor(0, 35);
display.printf(" V-Fun: %s\n", (const char*) code_obj["FUNC"]);
}
int barcode_cnt = 0;
if (code_obj.hasOwnProperty("count")) {
barcode_cnt = (int)code_obj["count"];
Serial.printf("Barcode number = %d\n", barcode_cnt);
display.printf(" Barcode number: %d\n", barcode_cnt);
}
for (int i = 0; i < barcode_cnt; i++) {
Serial.print("Barcode ");
Serial.print(i);
display.printf("Barcode %d:", i);
Serial.print(":\r\n\tX:");
Serial.println((int) code_obj[String(i)]["x"]);
display.printf("\r\n\t X: %d", (int) code_obj[String(i)]["x"]);
Serial.print("\tY:");
Serial.println((int) code_obj[String(i)]["y"]);
display.printf("\r\n\t Y: %d", (int) code_obj[String(i)]["y"]);
Serial.print("\tWidth:");
Serial.println((int) code_obj[String(i)]["w"]);
display.printf("\r\n\t Width: %d", (int) code_obj[String(i)]["w"]);
Serial.print("\tHeight:");
Serial.println((int) code_obj[String(i)]["h"]);
display.printf("\r\n\t Height: %d", (int) code_obj[String(i)]["h"]);
Serial.print("\tPayload:");
Serial.println((const char*) code_obj[String(i)]["payload"]);
display.printf("\r\n\t Payload: %s", (const char*) code_obj[String(i)]["payload"]);
Serial.print("\tType:");
Serial.println((int) code_obj[String(i)]["type"]);
display.printf("\r\n\t Type: %d", (int) code_obj[String(i)]["type"]);
Serial.print("\tRotation:");
Serial.println((double) code_obj[String(i)]["rotation"]);
display.printf("\r\n\t Rotation: %f", (double) code_obj[String(i)]["rotation"]);
Serial.print("\tQuality:");
Serial.println((int) code_obj[String(i)]["quality"]);
display.printf("\r\n\t Quality: %d", (int) code_obj[String(i)]["quality"]);
}
Serial.println("<<<<<<<<<<<<<<<<<<<<<<<<<<<<<<<<<<");
}
delay(50);
}
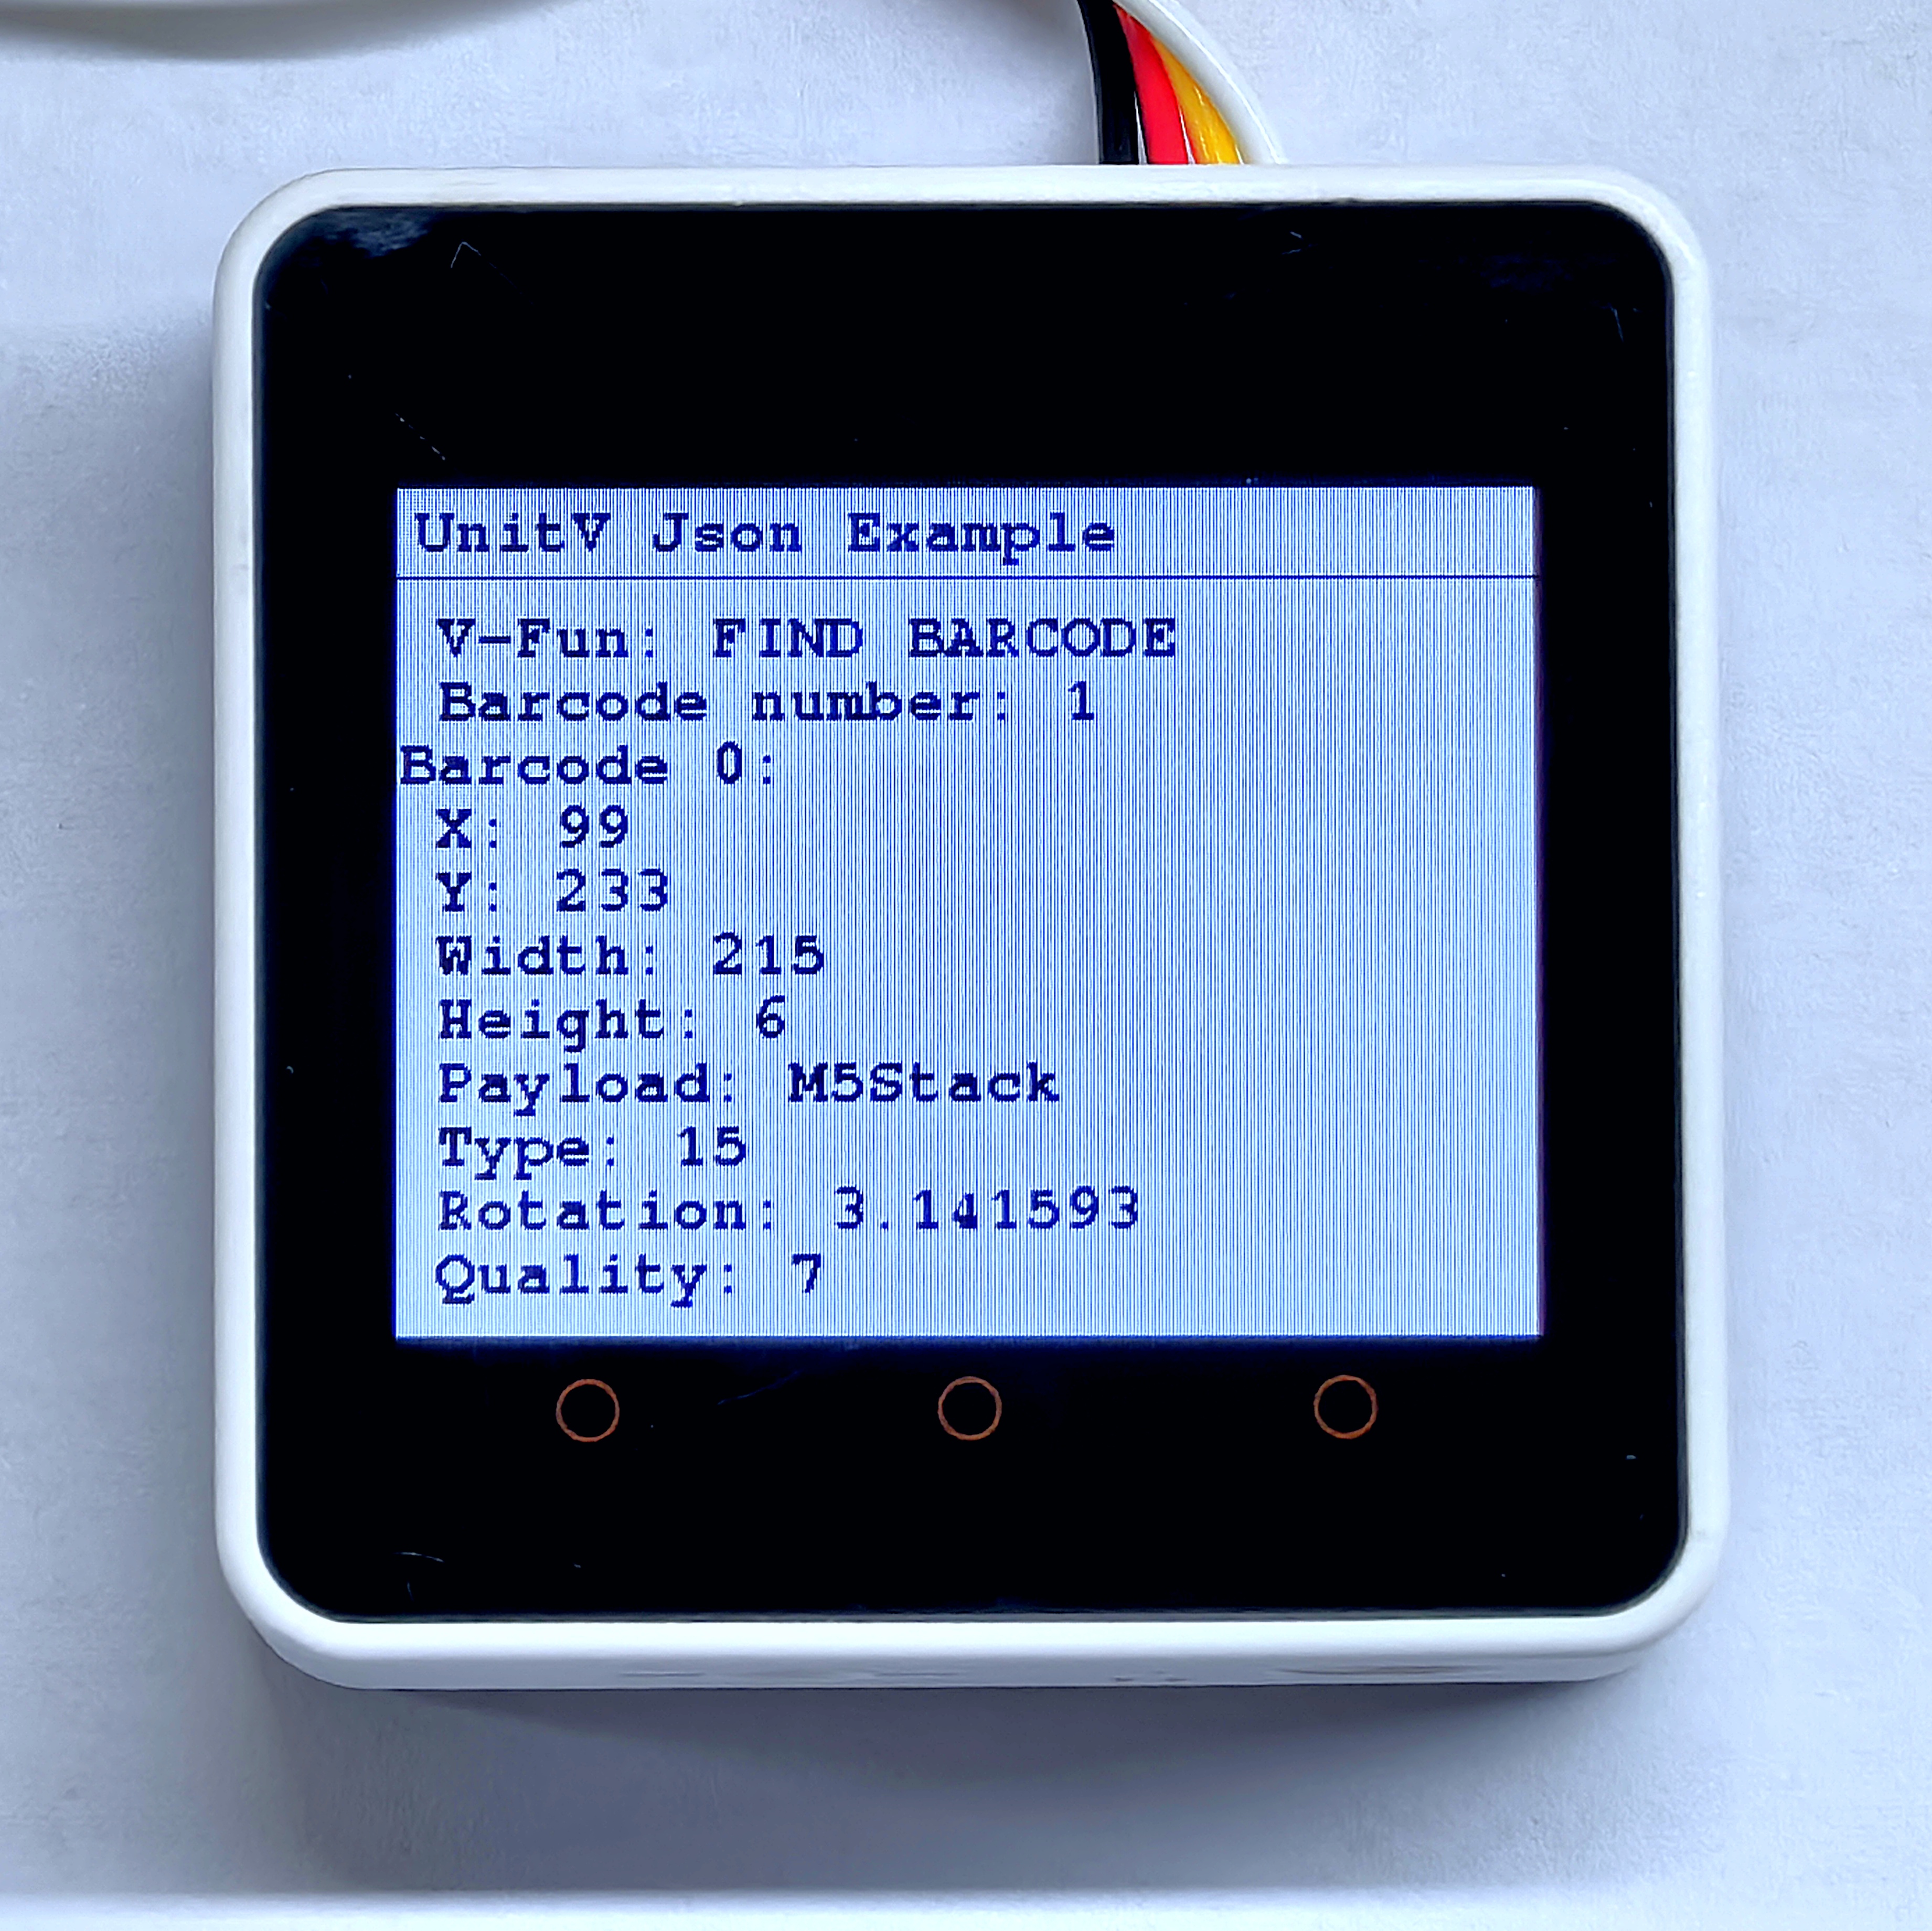
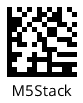
}下図の通りバーコードをスキャンします。

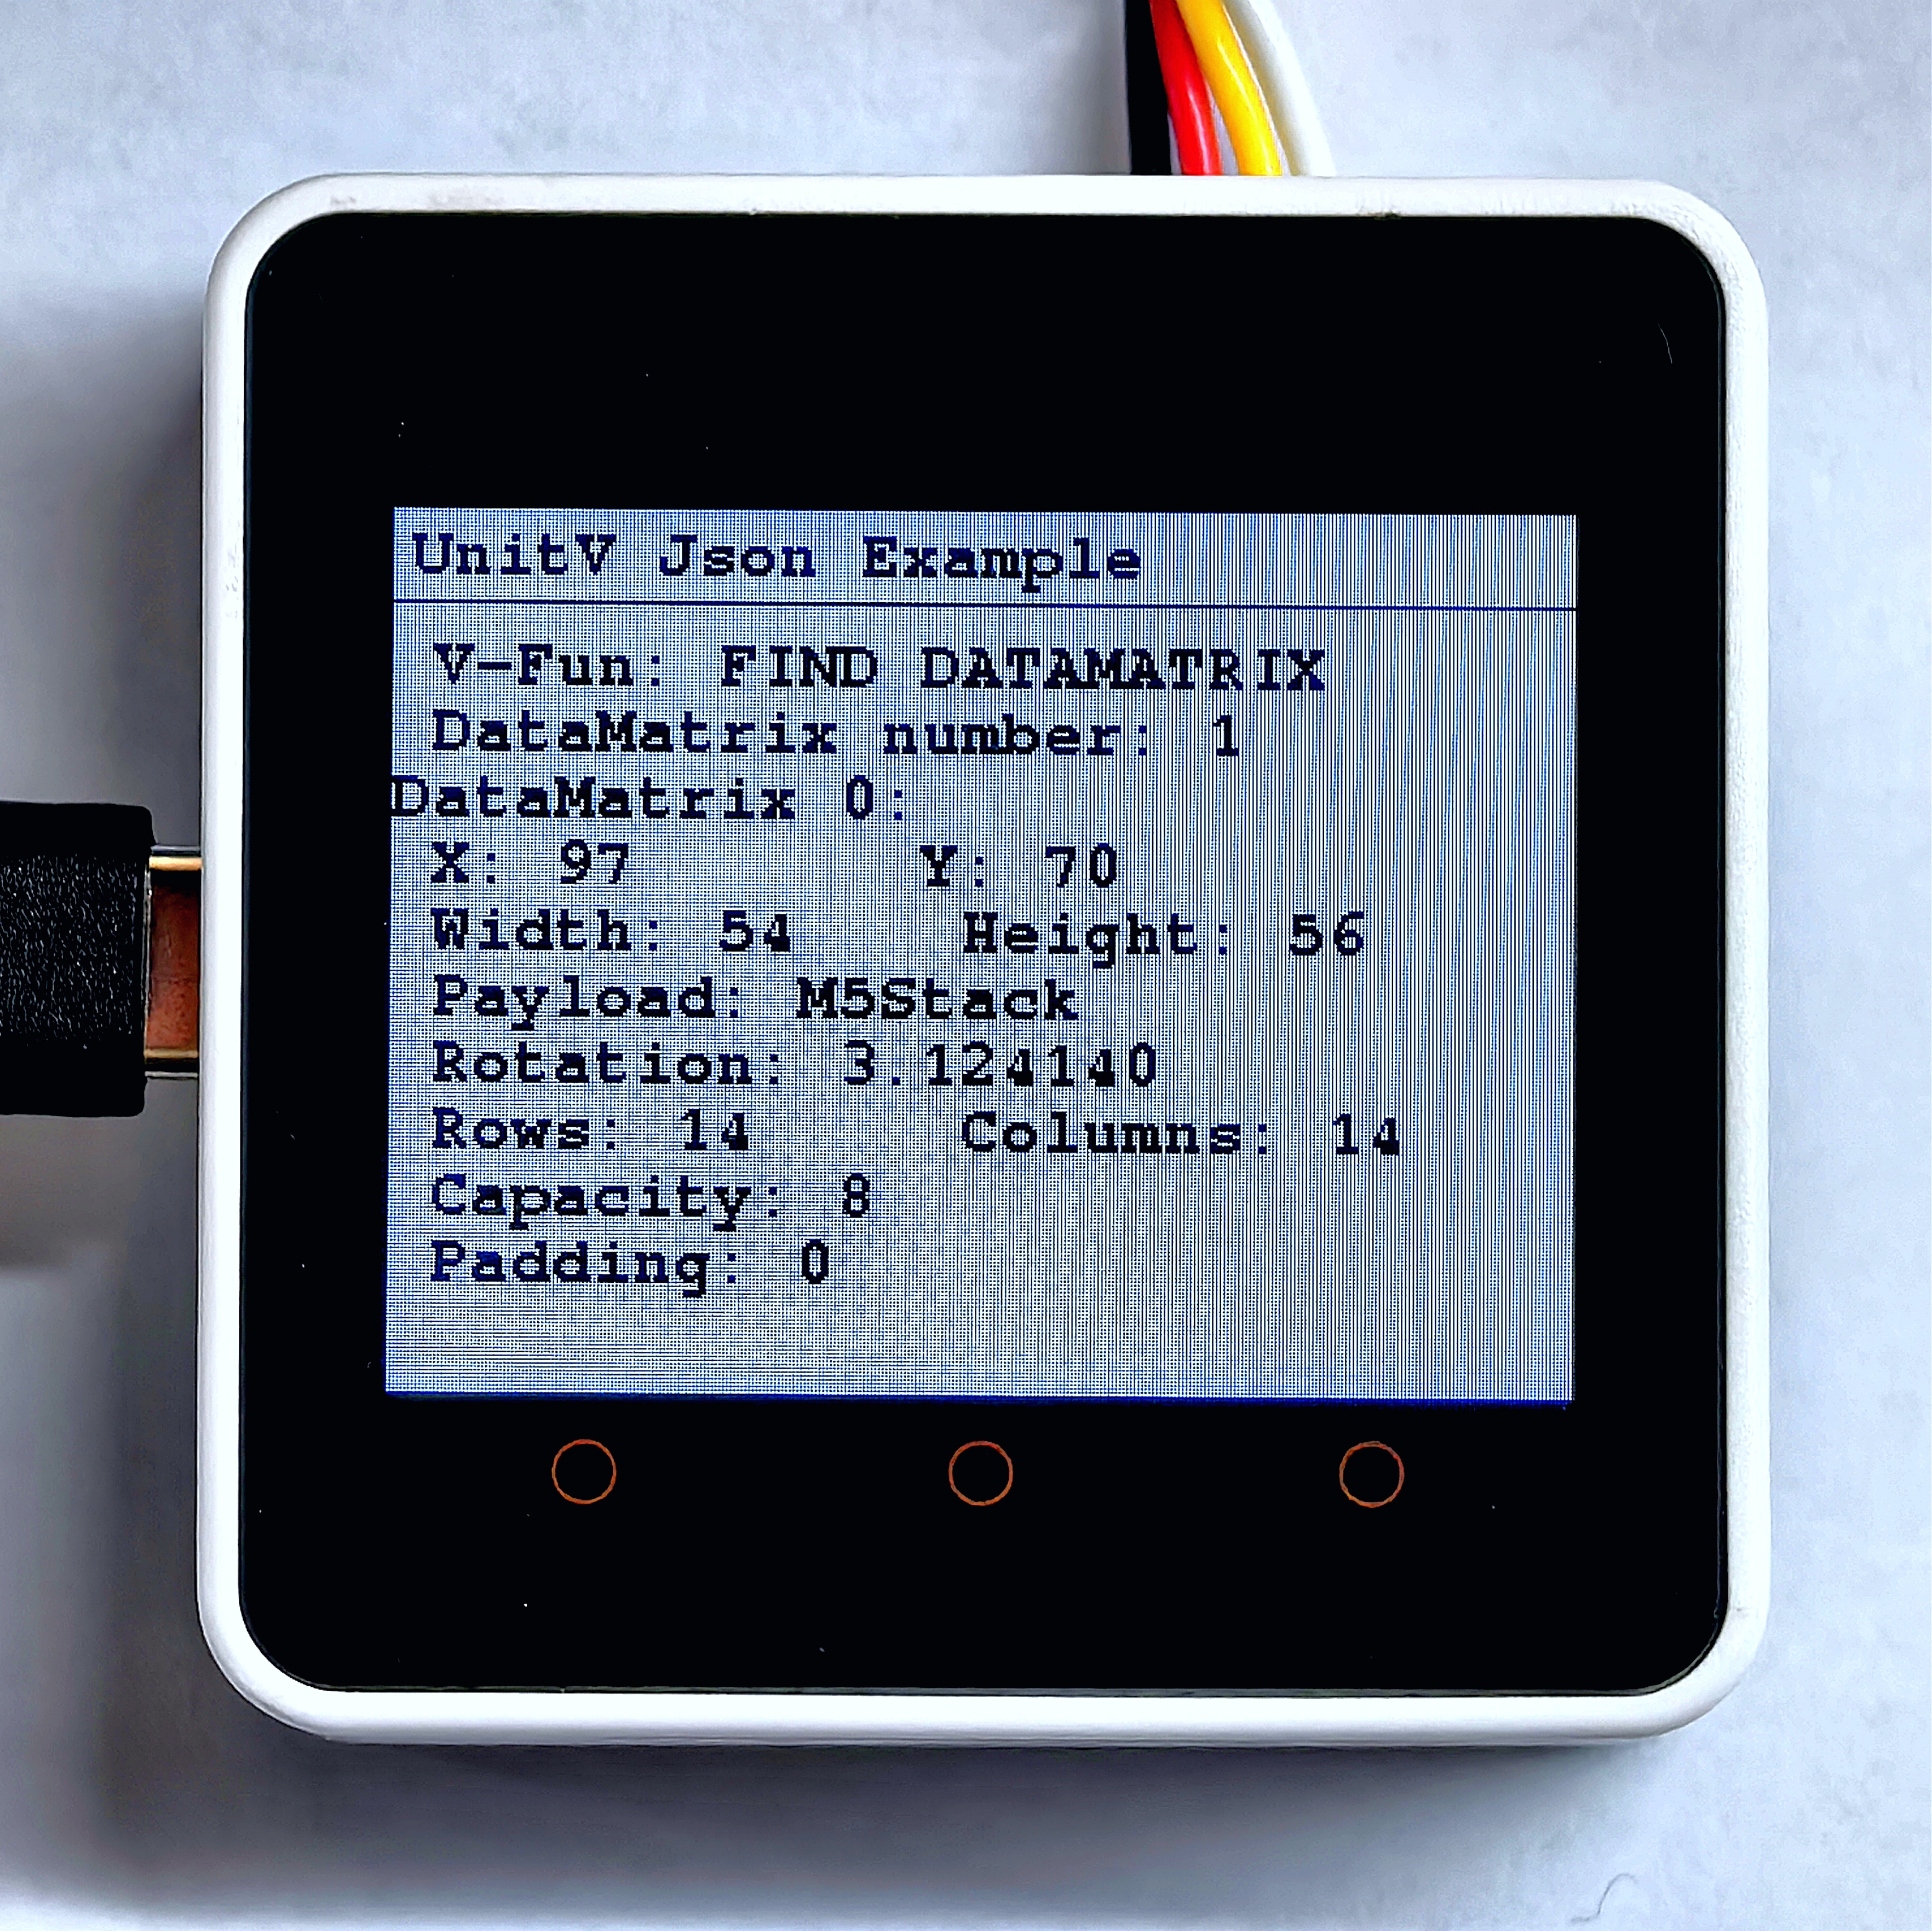
4.7 Datamatrix コード認識
Datamatrixコード認識機能の JSON データ形式についてはこちらをご参照ください。
#include <M5Unified.h>
#include <M5GFX.h>
#include <Arduino_JSON.h>

M5GFX display;

void setup() {

    display.begin();
    display.setRotation(1);
    display.clear(TFT_WHITE);
    display.setFont(&fonts::FreeMonoBold9pt7b);
    display.setTextColor(TFT_BLACK);
    delay(100);
    display.drawString("UnitV Json Example", 5, 5);
    display.drawLine(0, 25, 320, 25, TFT_BLACK);

    Serial.begin(115200);
    Serial2.begin(115200, SERIAL_8N1, 13, 14);//PORT.C

    JSONVar obj;
    obj["FIND CODE"] = 1.0;
    obj["mode"] = "DATAMATRIX";      // Recognition mode, optional: QRCODE, APRILTAG, DATAMATRIX, BARCODE
    String jsonString = JSON.stringify(obj);
    Serial2.println(jsonString);
    Serial2.flush();
}

void loop() {

    if (Serial2.available() > 0) {
      String line = Serial2.readStringUntil('\r');
      while (line.length() && line[0] != '{') {  // clear '\0'
        line.remove(0, 1);
      }
      Serial2.flush();

      JSONVar code_obj = JSON.parse(line);

      // JSON.typeof(jsonVar) can be used to get the type of the var
      if (!(JSON.typeof(code_obj) == "undefined")){
        display.fillRect(0, 40, 320, 200, TFT_WHITE);
        Serial.println(">>>>>>>>>>>>>>>>>>>>>>>>>>>>>>>>>>");
        Serial.println("M5Stack DataMatrix Detect V-Func example");
        if (code_obj.hasOwnProperty("FUNC")) {
          Serial.print("V-Function = ");
          Serial.println((const char*) code_obj["FUNC"]);
          display.setCursor(0, 35);
          display.printf(" V-Fun: %s\n", (const char*) code_obj["FUNC"]);
        }
        int dm_cnt = 0;
        if (code_obj.hasOwnProperty("count")) {
          dm_cnt = (int)code_obj["count"];
          Serial.printf("DataMatrix number = %d\n", dm_cnt);
          display.printf(" DataMatrix number: %d\n", dm_cnt);
        }
        for (int i = 0; i < dm_cnt; i++) {
          Serial.print("DataMatrix ");
          Serial.print(i);
          display.printf("DataMatrix %d:", i);
          Serial.print(":\r\n\tX:");
          Serial.println((int) code_obj[String(i)]["x"]);
          display.printf("\r\n\t X: %d", (int) code_obj[String(i)]["x"]);
          Serial.print("\tY:");
          Serial.println((int) code_obj[String(i)]["y"]);
          display.printf("       Y: %d", (int) code_obj[String(i)]["y"]);
          Serial.print("\tWidth:");
          Serial.println((int) code_obj[String(i)]["w"]);
          display.printf("\r\n\t Width: %d", (int) code_obj[String(i)]["w"]);
          Serial.print("\tHeight:");
          Serial.println((int) code_obj[String(i)]["h"]);
          display.printf("    Height: %d", (int) code_obj[String(i)]["h"]);
          Serial.print("\tPayload:");
          Serial.println((const char*) code_obj[String(i)]["payload"]);
          display.printf("\r\n\t Payload: %s", (const char*) code_obj[String(i)]["payload"]);
          Serial.print("\tRotation:");
          Serial.println((double) code_obj[String(i)]["rotation"]);
          display.printf("\r\n\t Rotation: %f", (double) code_obj[String(i)]["rotation"]);
          Serial.print("\tRows:");
          Serial.println((int) code_obj[String(i)]["rows"]);
          display.printf("\r\n\t Rows: %d", (int) code_obj[String(i)]["rows"]);
          Serial.print("\tColumns:");
          Serial.println((int) code_obj[String(i)]["columns"]);
          display.printf("     Columns: %d", (int) code_obj[String(i)]["columns"]);
          Serial.print("\tCapacity:");
          Serial.println((int) code_obj[String(i)]["capacity"]);
          display.printf("\r\n\t Capacity: %d", (int) code_obj[String(i)]["capacity"]);
          Serial.print("\tPadding:");
          Serial.println((int) code_obj[String(i)]["padding"]);
          display.printf("\r\n\t Padding: %d", (int) code_obj[String(i)]["padding"]);
        }
        Serial.println("<<<<<<<<<<<<<<<<<<<<<<<<<<<<<<<<<<");
      }
      delay(50);
    }
}左図のDatamatrixコードをスキャンした場合の結果が右図です。
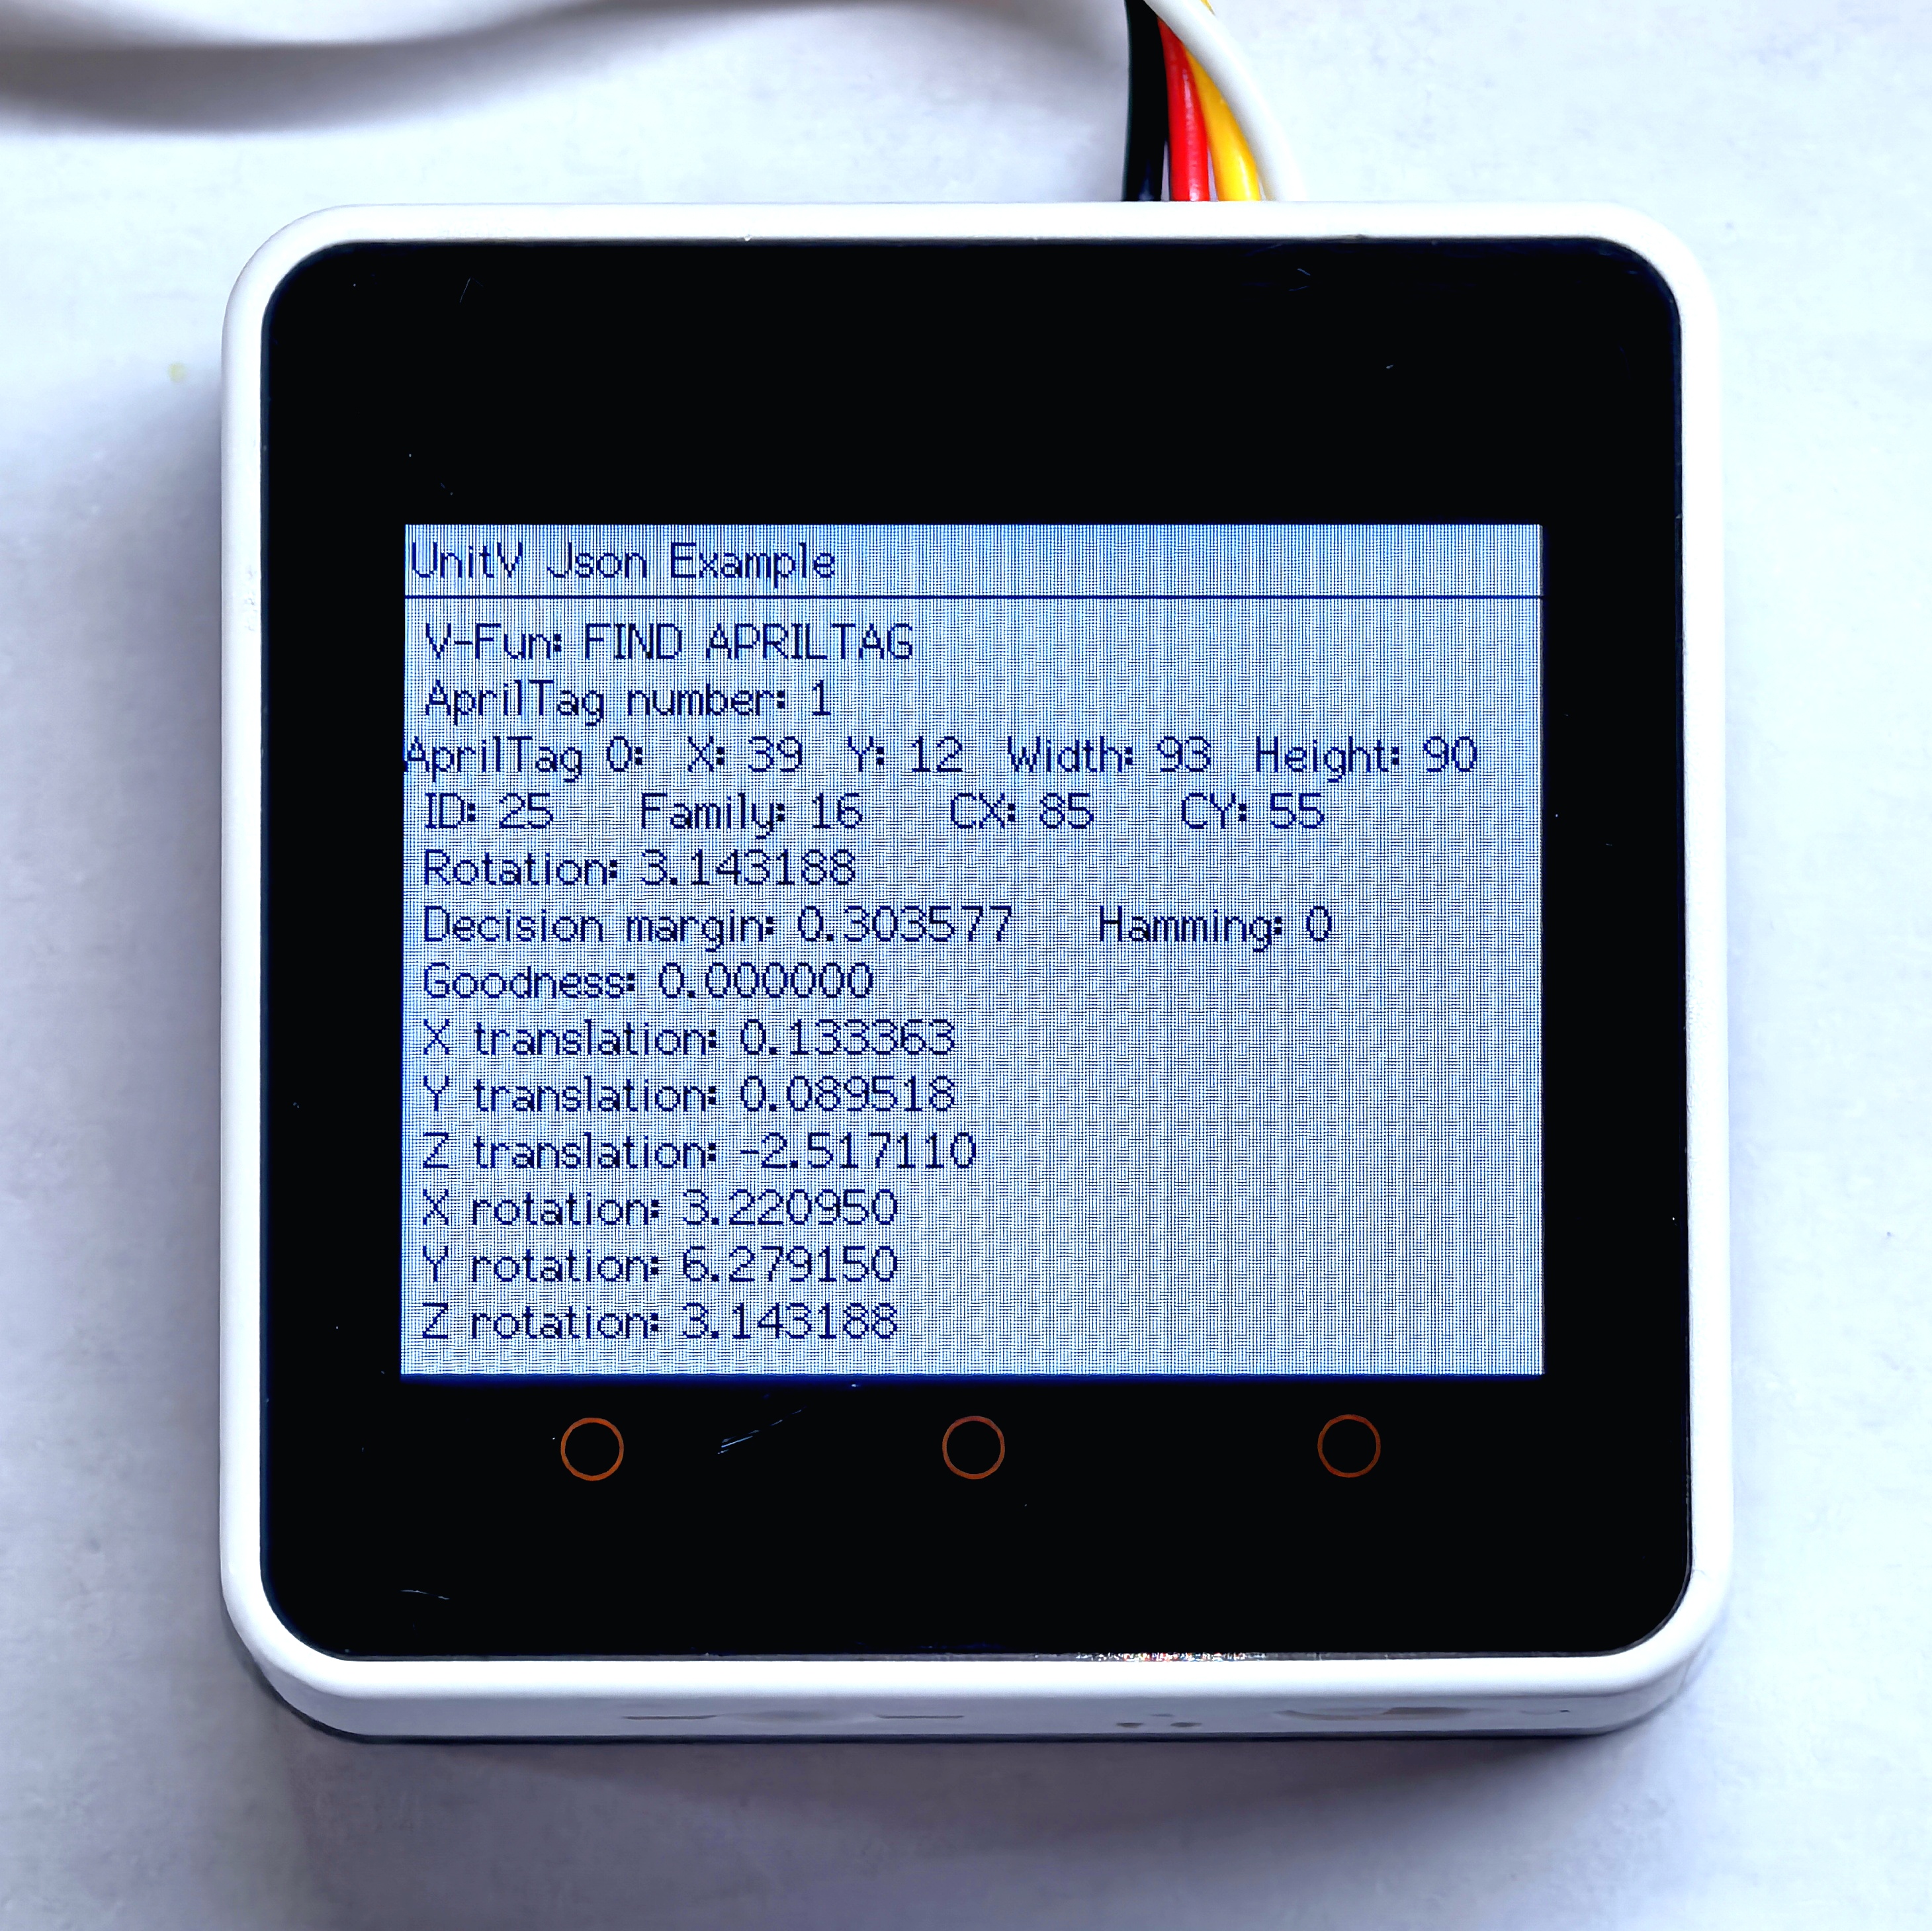
4.8 Apriltag コード認識
Apriltagコード認識機能の JSON データ形式についてはこちらをご参照ください。
#include <M5Unified.h>
#include <M5GFX.h>
#include <Arduino_JSON.h>

M5GFX display;

void setup() {

    display.begin();
    display.setRotation(1);
    display.clear(TFT_WHITE);
    display.setFont(&fonts::Font2);
    display.setTextColor(TFT_BLACK);
    delay(100);
    display.drawString("UnitV Json Example", 2, 2);
    display.drawLine(0, 20, 320, 20, TFT_BLACK);

    Serial.begin(115200);
    Serial2.begin(115200, SERIAL_8N1, 13, 14);//PORT.C

    JSONVar obj;
    obj["FIND CODE"] = 1.0;
    obj["mode"] = "APRILTAG";      // Recognition mode, optional: QRCODE, APRILTAG, DATAMATRIX, BARCODE
    String jsonString = JSON.stringify(obj);
    Serial2.println(jsonString);
    Serial2.flush();
}

void loop() {

    if (Serial2.available() > 0) {
      String line = Serial2.readStringUntil('\r');
      while (line.length() && line[0] != '{') {  // clear '\0'
        line.remove(0, 1);
      }
      Serial2.flush();

      JSONVar code_obj = JSON.parse(line);

      // JSON.typeof(jsonVar) can be used to get the type of the var
      if (!(JSON.typeof(code_obj) == "undefined")){
        display.fillRect(0, 25, 320, 215, TFT_WHITE);
        Serial.println(">>>>>>>>>>>>>>>>>>>>>>>>>>>>>>>>>>");
        Serial.println("M5Stack AprilTag Detect V-Func example");
        if (code_obj.hasOwnProperty("FUNC")) {
          Serial.print("V-Function = ");
          Serial.println((const char*) code_obj["FUNC"]);
          display.setCursor(0, 25);
          display.printf(" V-Fun: %s\n", (const char*) code_obj["FUNC"]);
        }
        int april_cnt = 0;
        if (code_obj.hasOwnProperty("count")) {
          april_cnt = (int)code_obj["count"];
          Serial.printf("AprilTag number = %d\n", april_cnt);
          display.printf(" AprilTag number: %d\n", april_cnt);
        }
        for (int i = 0; i < april_cnt; i++) {
          Serial.print("AprilTag ");
          Serial.print(i);
          display.printf("AprilTag %d:", i);
          Serial.print(":\r\n\tX:");
          Serial.println((int) code_obj[String(i)]["x"]);
          display.printf("  X: %d", (int) code_obj[String(i)]["x"]);
          Serial.print("\tY:");
          Serial.println((int) code_obj[String(i)]["y"]);
          display.printf("  Y: %d", (int) code_obj[String(i)]["y"]);
          Serial.print("\tWidth:");
          Serial.println((int) code_obj[String(i)]["w"]);
          display.printf("  Width: %d", (int) code_obj[String(i)]["w"]);
          Serial.print("\tHeight:");
          Serial.println((int) code_obj[String(i)]["h"]);
          display.printf("  Height: %d", (int) code_obj[String(i)]["h"]);
          Serial.print("\tID:");
          Serial.println((int) code_obj[String(i)]["id"]);
          display.printf("\r\n\t ID: %d", (int) code_obj[String(i)]["id"]);
          Serial.print("\tFamily:");
          Serial.println((int) code_obj[String(i)]["family"]);
          display.printf("    Family: %d", (int) code_obj[String(i)]["family"]);
          Serial.print("\tCX:");
          Serial.println((int) code_obj[String(i)]["cx"]);
          display.printf("    CX: %d", (int) code_obj[String(i)]["cx"]);
          Serial.print("\tCY:");
          Serial.println((int) code_obj[String(i)]["cy"]);
          display.printf("    CY: %d", (int) code_obj[String(i)]["cy"]);
          Serial.print("\tRotation:");
          Serial.println((double) code_obj[String(i)]["rotation"]);
          display.printf("\r\n\t Rotation: %f", (double) code_obj[String(i)]["rotation"]);
          Serial.print("\tDecision margin:");
          Serial.println((double) code_obj[String(i)]["decision_margin"]);
          display.printf("\r\n\t Decision margin: %f", (double) code_obj[String(i)]["decision_margin"]);
          Serial.print("\tHamming:");
          Serial.println((int) code_obj[String(i)]["hamming"]);
          display.printf("    Hamming: %d", (int) code_obj[String(i)]["hamming"]);
          Serial.print("\tGoodness:");
          Serial.println((double) code_obj[String(i)]["goodness"]);
          display.printf("\r\n\t Goodness: %f", (double) code_obj[String(i)]["goodness"]);
          Serial.print("\tX translation:");
          Serial.println((double) code_obj[String(i)]["x_translation"]);
          display.printf("\r\n\t X translation: %f", (double) code_obj[String(i)]["x_translation"]);
          Serial.print("\tY translation:");
          Serial.println((double) code_obj[String(i)]["y_translation"]);
          display.printf("\r\n\t Y translation: %f", (double) code_obj[String(i)]["y_translation"]);
          Serial.print("\tZ translation:");
          Serial.println((double) code_obj[String(i)]["z_translation"]);
          display.printf("\r\n\t Z translation: %f", (double) code_obj[String(i)]["z_translation"]);
          Serial.print("\tX rotation:");
          Serial.println((double) code_obj[String(i)]["x_rotation"]);
          display.printf("\r\n\t X rotation: %f", (double) code_obj[String(i)]["x_rotation"]);
          Serial.print("\tY rotation:");
          Serial.println((double) code_obj[String(i)]["y_rotation"]);
          display.printf("\r\n\t Y rotation: %f", (double) code_obj[String(i)]["y_rotation"]);
          Serial.print("\tZ rotation:");
          Serial.println((double) code_obj[String(i)]["z_rotation"]);
          display.printf("\r\n\t Z rotation: %f", (double) code_obj[String(i)]["z_rotation"]);
        }
        Serial.println("<<<<<<<<<<<<<<<<<<<<<<<<<<<<<<<<<<");
      }
      delay(50);
    }
}左図のApriltagコードをスキャンすると右図のように認識されます。

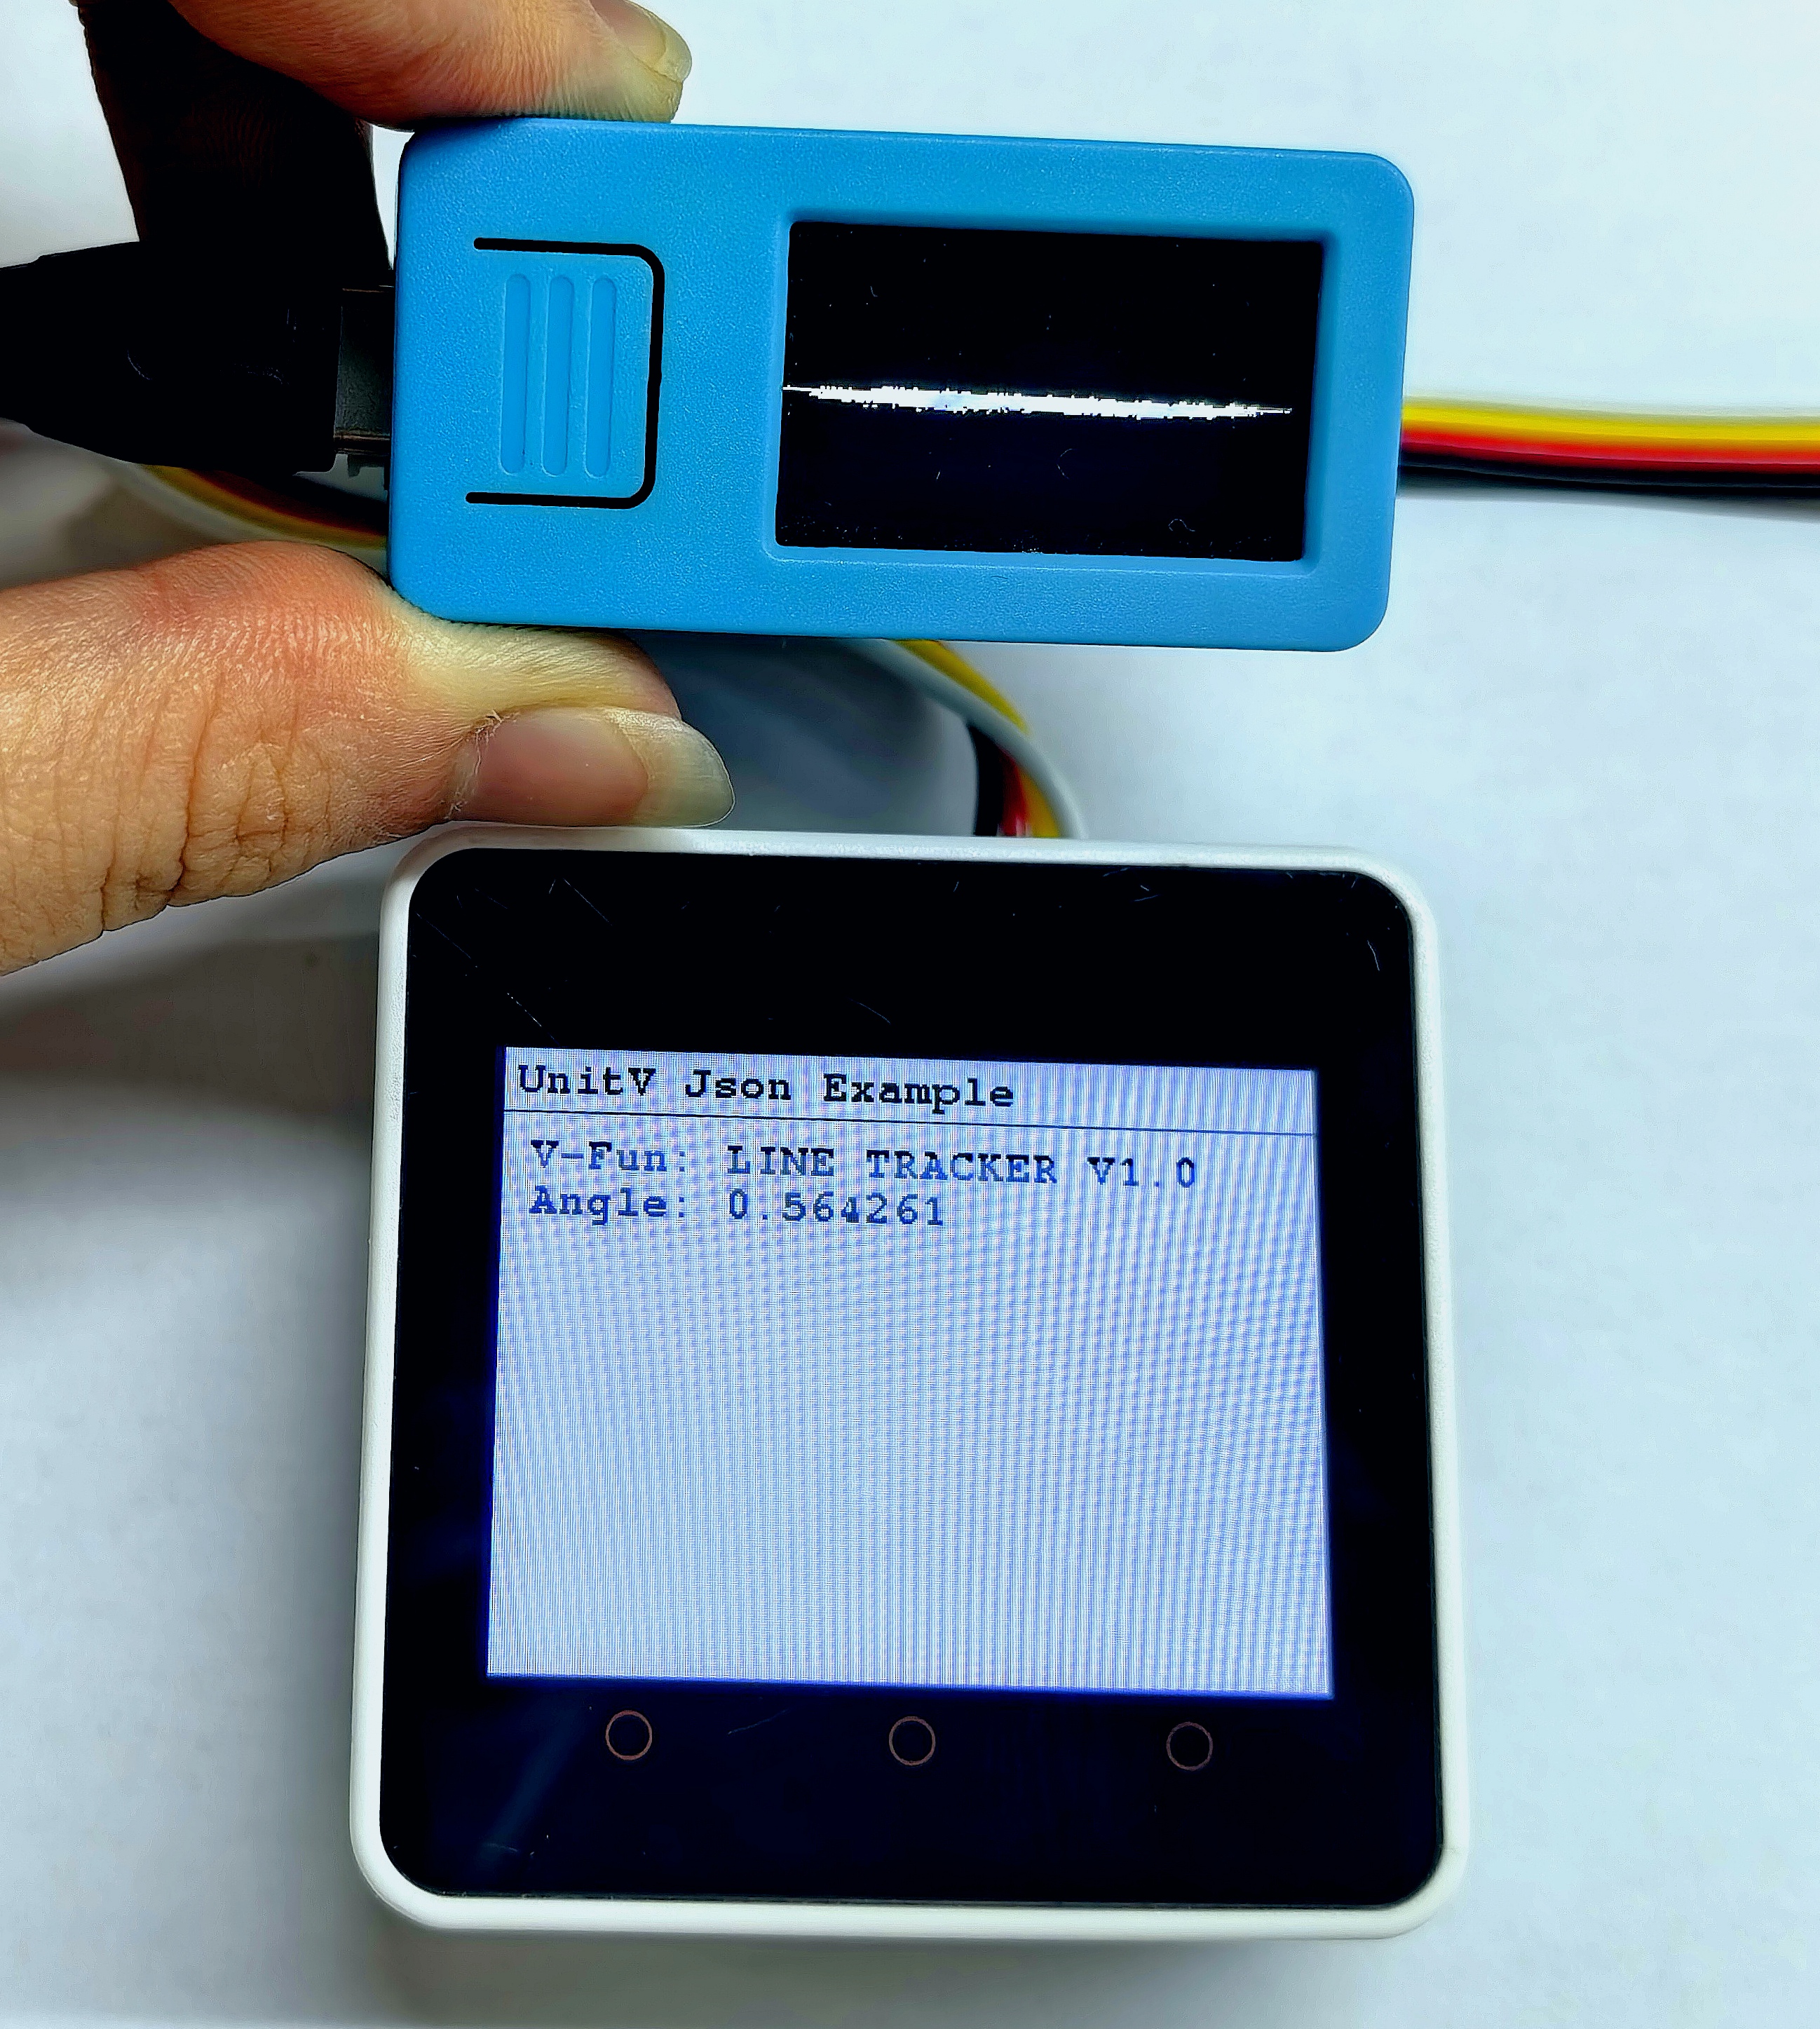
4.9 ライントレース
この機能ファームウェアは以下の通りです:
ライントレース機能は、UnitV/StickV の電源投入後に追跡する線のカラー値を設定して使用します。カラー値の取得には LAB カラー抽出ツール を使用します。
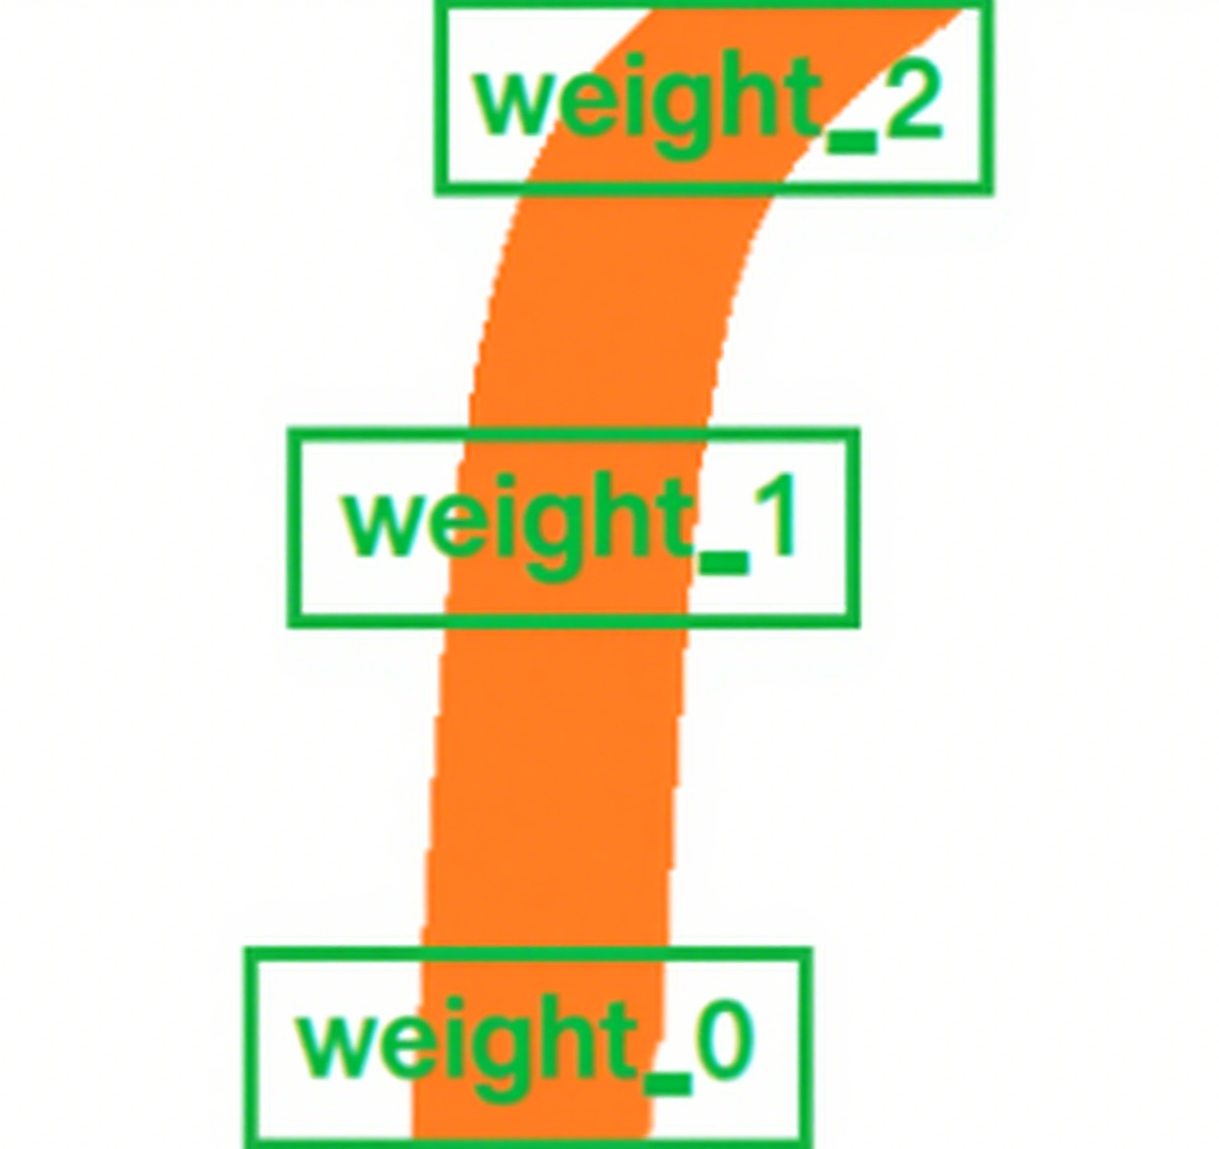
取得・設定方法はカラー追跡と同じです。重み(weight)サンプリング領域例を下に示しますので、必要に応じて比率を設定してください。
ライン追従機能の JSON データ形式についてはこちらをご参照ください。
#include <M5Unified.h>
#include <M5GFX.h>
#include <Arduino_JSON.h>

M5GFX display;

void setup() {

    display.begin();
    display.setRotation(1);
    display.clear(TFT_WHITE);
    display.setFont(&fonts::FreeMonoBold9pt7b);
    display.setTextColor(TFT_BLACK);
    delay(100);
    display.drawString("UnitV Json Example", 5, 5);
    display.drawLine(0, 25, 320, 25, TFT_BLACK);

    Serial.begin(115200);
    Serial2.begin(115200, SERIAL_8N1, 13, 14);//PORT.C

    //Setting JSON
    JSONVar obj;
    obj["LINE  TRACKER"] = 1.0;
    obj["thr_w"] = 20;
    obj["thr_h"] = 20;
    obj["stepx"] = 2;
    obj["stepy"] = 2;
    obj["merge"] = 10;
    //Please fill in the below six parameters with the values extracted from the LAB color selection tool.
    obj["Lmin"] = 0;
    obj["Lmax"] = 100;
    obj["Amin"] = 51;
    obj["Amax"] = 61;
    obj["Bmin"] = 34;
    obj["Bmax"] = 44;
    obj["weight_0"] = 0.1;
    obj["weight_1"] = 0.3;
    obj["weight_2"] = 0.6;
    String jsonString = JSON.stringify(obj);
    Serial2.println(jsonString);
    Serial2.flush();
}

void loop() {

    if (Serial2.available() > 0) {
      String line = Serial2.readStringUntil('\r');
      while (line.length() && line[0] != '{') {  // clear '\0'
        line.remove(0, 1);
      }
      Serial2.flush();

      JSONVar line_obj = JSON.parse(line);

      // JSON.typeof(jsonVar) can be used to get the type of the var
      if (!(JSON.typeof(line_obj) == "undefined")){
        display.fillRect(0, 40, 320, 200, TFT_WHITE);
        Serial.println(">>>>>>>>>>>>>>>>>>>>>>>>>>>>>>>>>>");
        Serial.println("M5Stack Line Tracker V-Func example");
        if (line_obj.hasOwnProperty("FUNC")) {
          Serial.print("V-Function = ");
          Serial.println((const char*) line_obj["FUNC"]);
          display.setCursor(0, 35);
          display.printf(" V-Fun: %s\n", (const char*) line_obj["FUNC"]);
        }
        if (line_obj.hasOwnProperty("angle")) {
          Serial.print("Angle: ");
          Serial.println((double) line_obj["angle"]);
          display.printf(" Angle: %f\n", (double) line_obj["angle"]);
        }
        Serial.println("<<<<<<<<<<<<<<<<<<<<<<<<<<<<<<<<<<");
      } else {
        return;
      }
    }
} 成功すればホストはリアルタイムで旋回角度を表示します。