

Arduino 上手教程
2. 设备开发 & 案例程序
3. M5Unified
4. M5GFX
5. 拓展模块
Unit
Atomic
Tab5
IoT
Dial Arduino 示例程序编译与烧录
1.准备工作
- 1.Arduino IDE 安装:参考Arduino IDE 安装教程,完成 IDE 安装。
- 2.板管理安装:参考板管理安装教程,完成 M5Stack 板管理安装并选择开发板
M5dial。
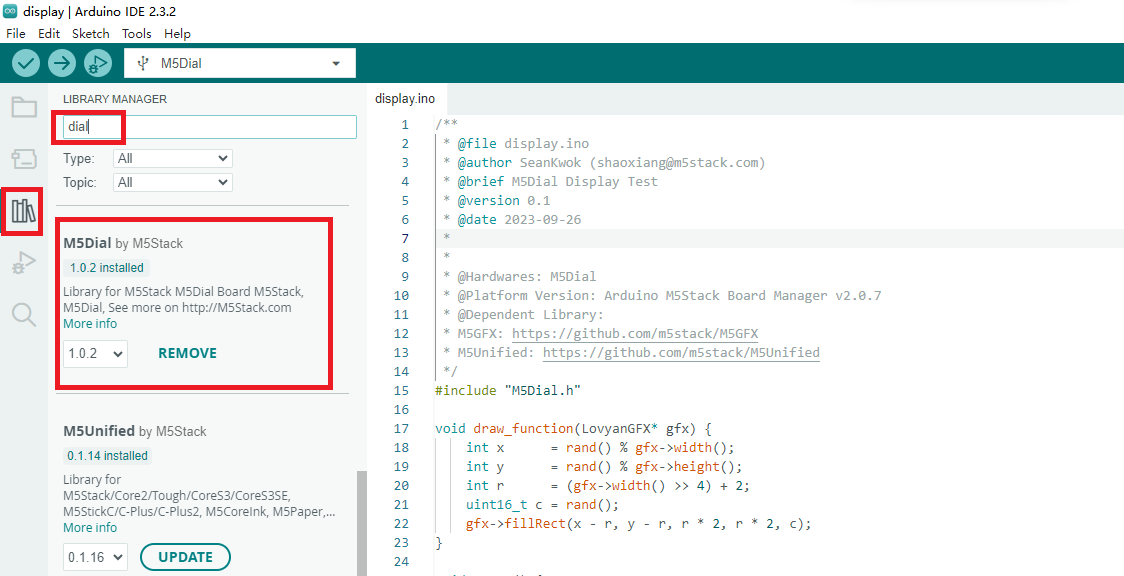
- 3.驱动库安装:参考库管理安装教程,完成
M5dial驱动库安装,并根据提示下载全部依赖库。
2.下载模式
按住产品背面 Stamp 模组上的 G0 按键,通过 USB-C 数据线连接至电脑后松开按键,设备将进入下载模式。
.gif)
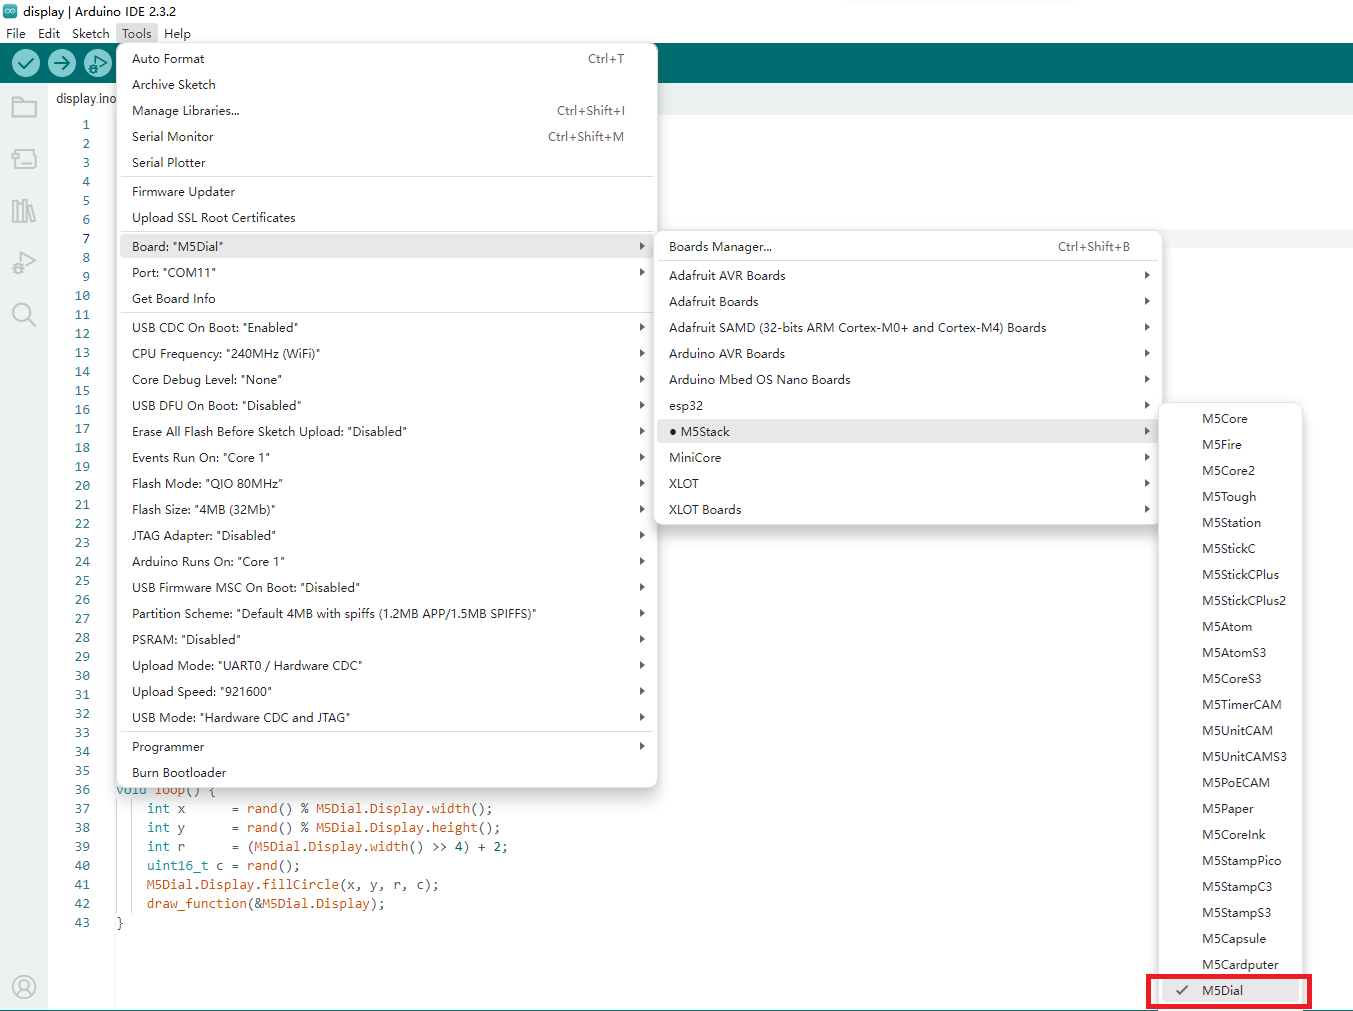
3.端口选择
完成上述步骤后,可在 Arduino IDE 中选择对应的控制板和设备端口。

4.程序编译&烧录
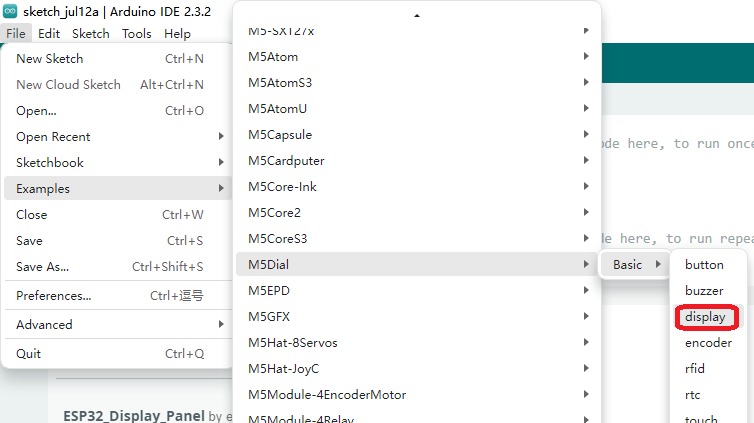
打开 M5Dial 库示例程序中的 display,点击上传代码。

编译、上传完成后,屏幕显示效果如下:
5.相关资源
Page Tools