Arduino入門
2. デバイス&サンプル
StackChan
3. M5Unified
4. M5GFX
5. 拡張モジュール&サンプル
Unit
Atomic
Base
IoT
アクセサリー
Atomic Audio-3.5 Base Arduino チュートリアル
1. 準備
1. 環境設定: Arduino IDE 入門ガイド を参照して IDE をインストールし、使用するボードに応じたボードマネージャーやドライバライブラリを導入してください。
2. 必要なライブラリ:
3. 本チュートリアルで使用するハードウェア:

2. マイク切替スイッチ
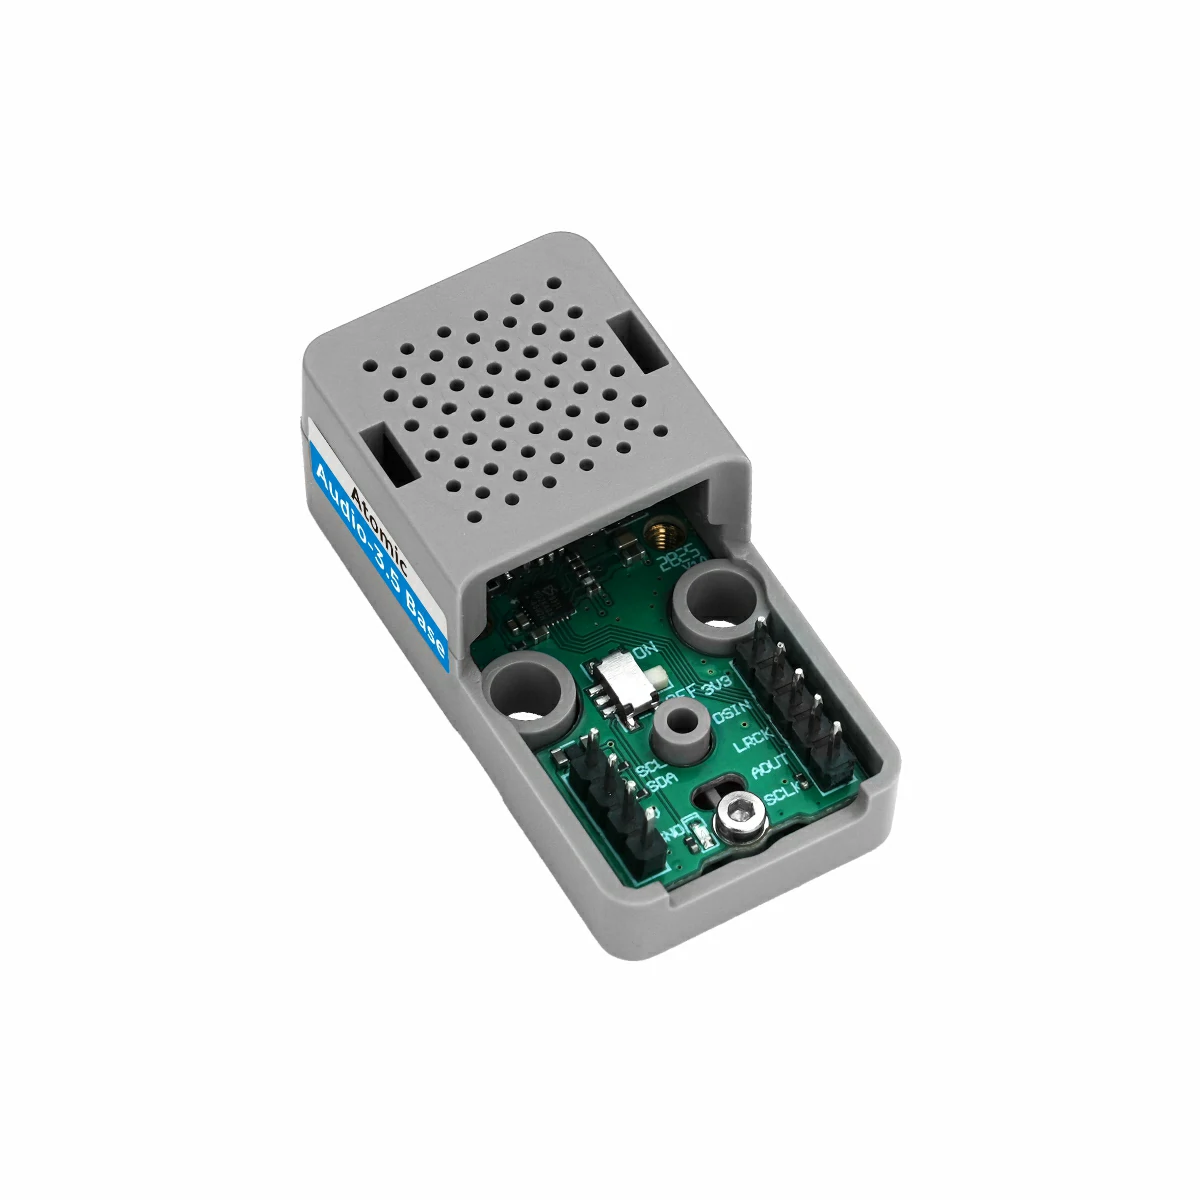
Atomic Audio-3.5 Base のマイク切替スイッチは下図の位置にあり、用途に応じてマイク入力チャネルを切り替えます。
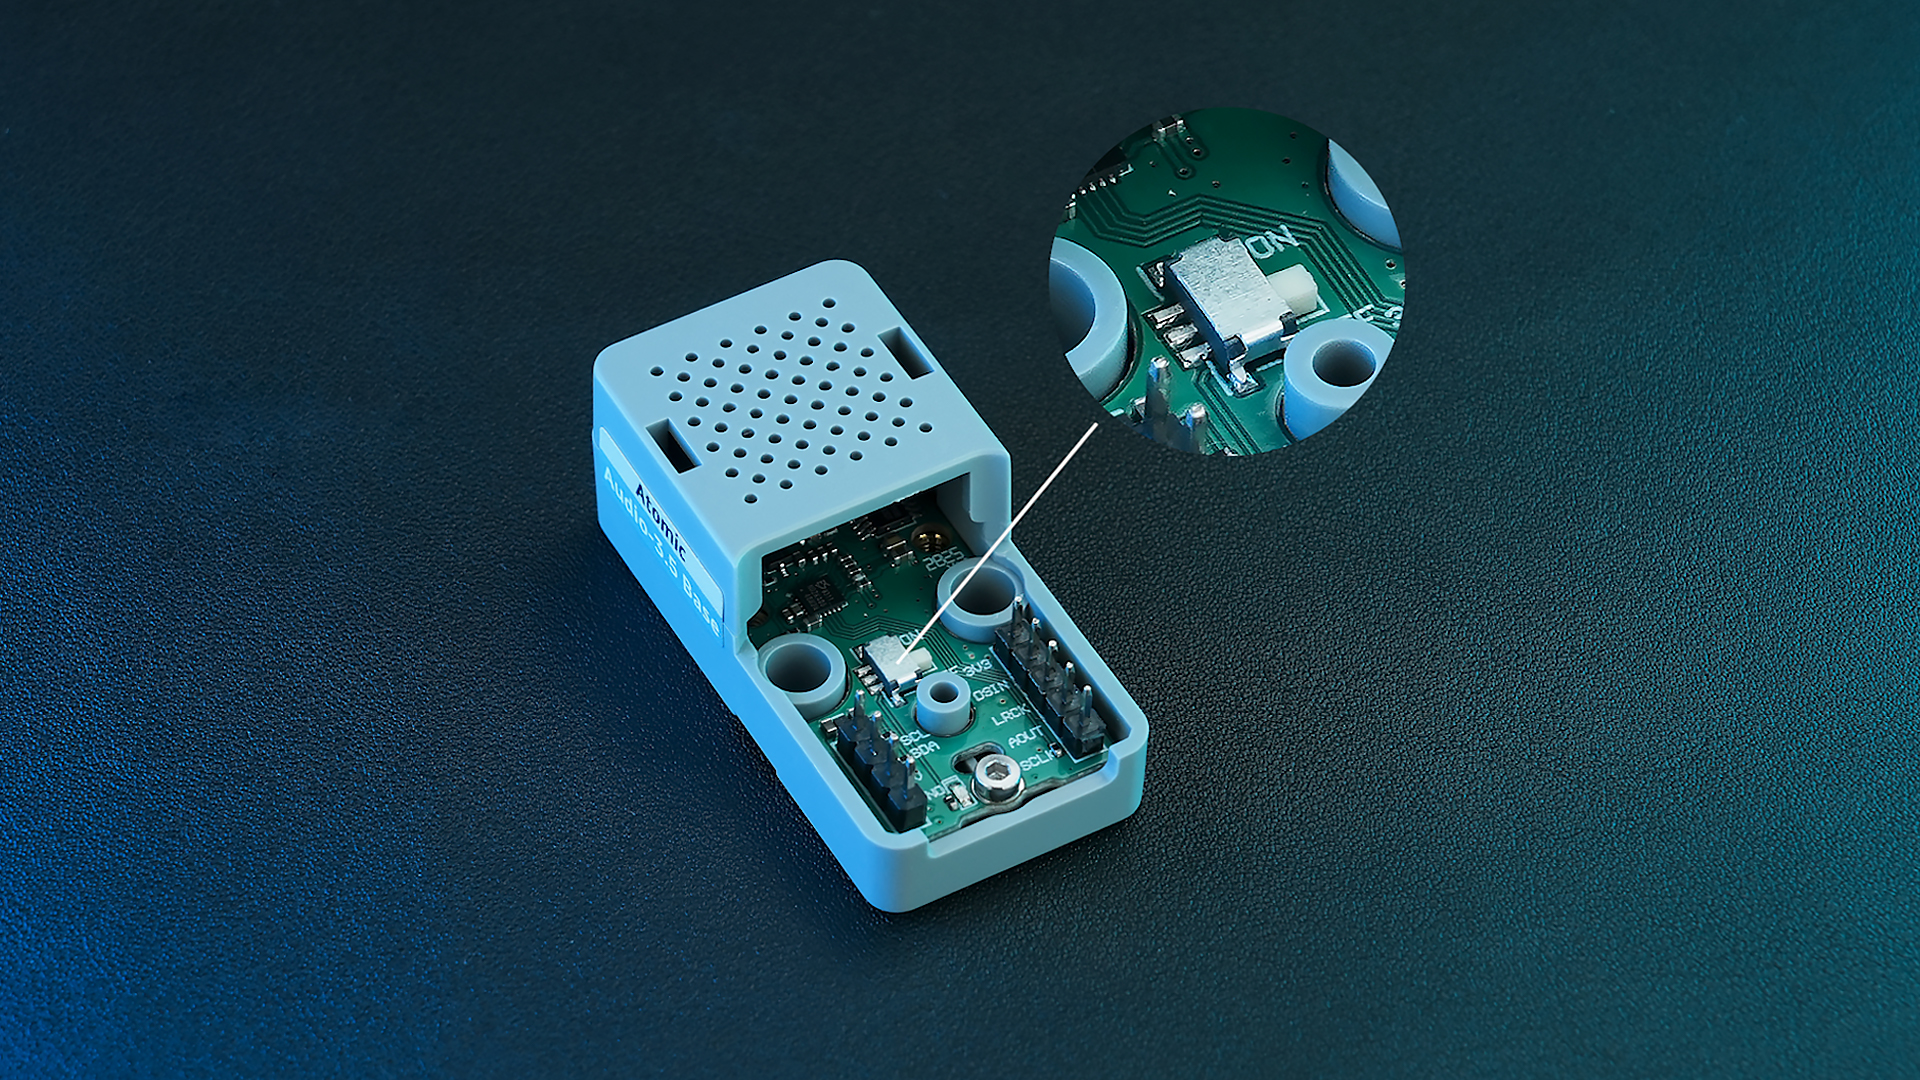
スイッチの位置:
- ON: 基板内蔵マイクの電源を維持します。外部スピーカー接続時でも内蔵マイクを使用します。
- OFF: 3.5mm ジャックに外部機器が接続された場合、自動的に外部マイクへ切り替わります(ヘッドセット等に適しています)。
3. サンプルプログラム
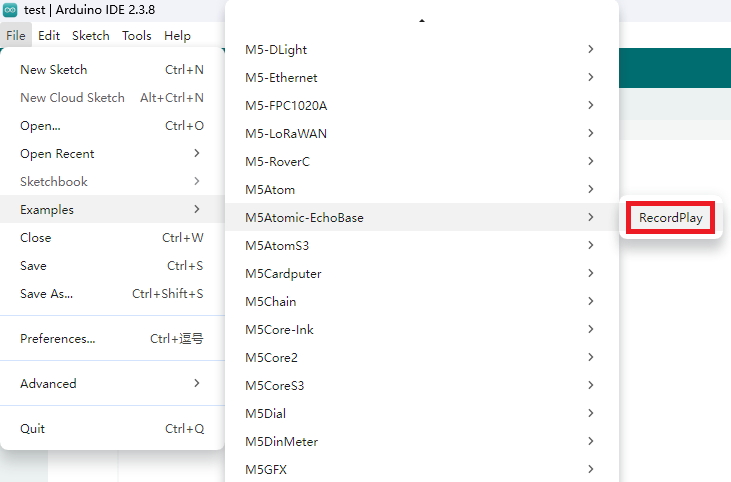
M5Atomic-EchoBase の RecordPlay サンプルを参照してください。接続に合わせてスケッチ内の IO を調整してください。本チュートリアルでは AtomS3R を対象とし、使用する IO マッピングは AtomS3 と同じです。
注意: Atomic Audio-3.5 Base のマイクは 16 kHz〜64 kHz のサンプルレートに対応しています。初期化時に有効な範囲のサンプルレートを設定してください。
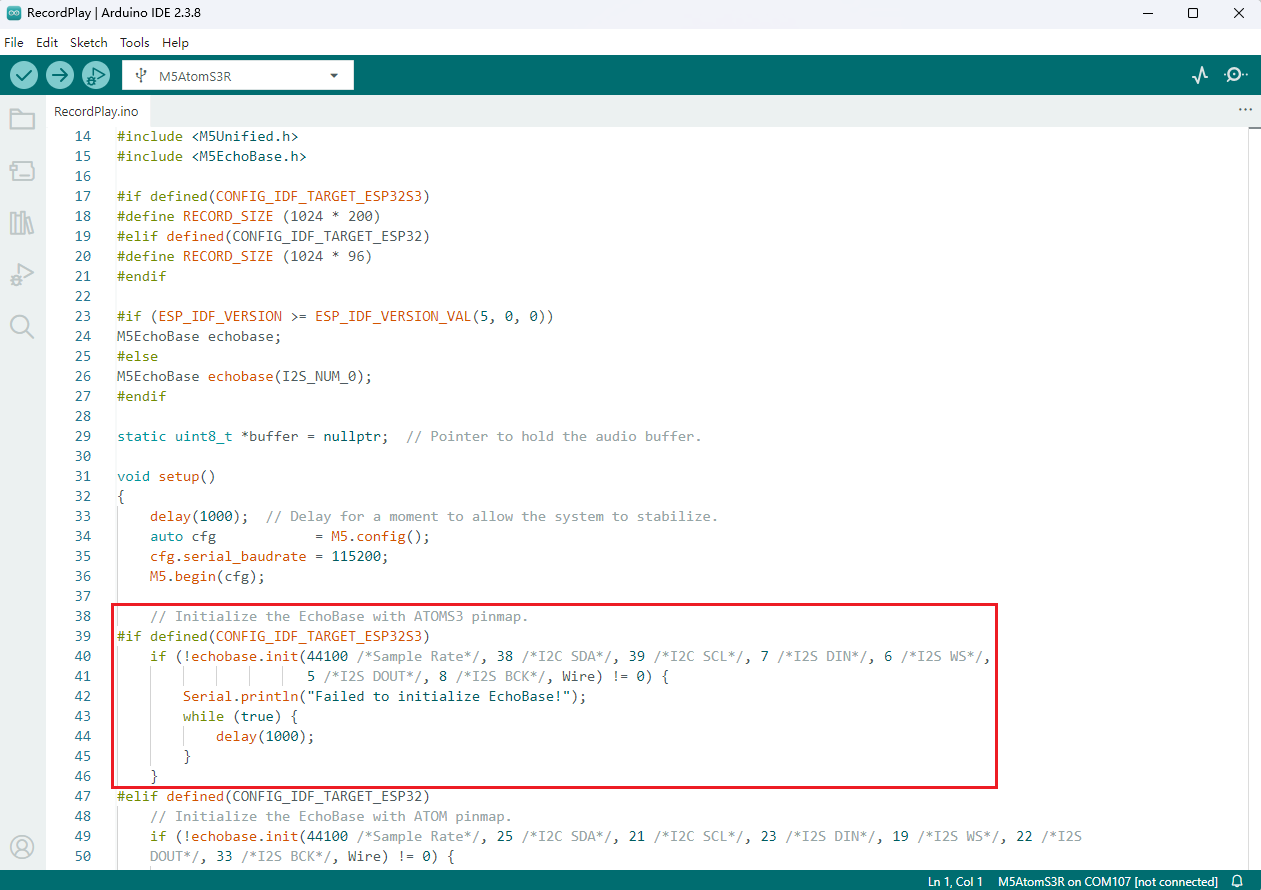
3.1 初期化
cpp
1 2 3 4 5 6
// Initialize the EchoBase with ATOMS3 pinmap.
echobase.init(44100 /*Sample Rate*/, 38 /*I2C SDA*/, 39 /*I2C SCL*/, 7 /*I2S DIN*/, 6 /*I2S WS*/,
                       5 /*I2S DOUT*/, 8 /*I2S BCK*/, Wire);

echobase.setSpeakerVolume(50);             // Set speaker volume to 50%.
echobase.setMicGain(ES8311_MIC_GAIN_6DB); // Set microphone gain to 6dB.3.2 録音と再生
cpp
1 2 3 4 5 6 7 8 9 10 11
// Recording
echobase.setMute(true);
delay(10);
echobase.record(buffer, RECORD_SIZE);  // Record audio into buffer.
delay(100);

// Playing
echobase.setMute(false);
delay(10);
echobase.play(buffer, RECORD_SIZE);  // Play audio from buffer.
delay(100);3.3 完全なスケッチ
以下の例では M5Unified と M5GFX を使用して簡易表示とボタン操作を実装しています。ボタンを押すと録音を行い、録音完了後に自動で再生します。
cpp
1 2 3 4 5 6 7 8 9 10 11 12 13 14 15 16 17 18 19 20 21 22 23 24 25 26 27 28 29 30 31 32 33 34 35 36 37 38 39 40 41 42 43 44 45 46 47 48 49 50 51 52 53 54 55 56 57 58 59 60 61 62 63 64 65 66 67 68 69 70 71 72 73 74 75 76 77 78 79 80 81 82 83 84 85 86
#include "M5Unified.h"
#include "M5EchoBase.h"
#if defined(CONFIG_IDF_TARGET_ESP32S3)
#define RECORD_SIZE (1024 * 200)
#elif defined(CONFIG_IDF_TARGET_ESP32)
#define RECORD_SIZE (1024 * 96)
#endif
// Create an instance of the M5EchoBase class
#if (ESP_IDF_VERSION >= ESP_IDF_VERSION_VAL(5, 0, 0))
M5EchoBase echobase;
#else
M5EchoBase echobase(I2S_NUM_0);
#endif
static uint8_t *buffer = nullptr; // Pointer to hold the audio buffer.
void setup()
{
M5.begin();
M5.Display.setFont(&fonts::FreeMonoBold9pt7b);
Serial.begin(115200);
#if defined(CONFIG_IDF_TARGET_ESP32S3)
// Initialize the EchoBase with ATOMS3 pinmap.
if (!echobase.init(44100 /*Sample Rate*/, 38 /*I2C SDA*/, 39 /*I2C SCL*/, 7 /*I2S DIN*/, 6 /*I2S WS*/,
5 /*I2S DOUT*/, 8 /*I2S BCK*/, Wire) != 0) {
Serial.println("Failed to initialize EchoBase!");
while (true) {
delay(1000);
}
}
#elif defined(CONFIG_IDF_TARGET_ESP32)
// Initialize the EchoBase with ATOM pinmap.
if (!echobase.init(44100 /*Sample Rate*/, 25 /*I2C SDA*/, 21 /*I2C SCL*/, 23 /*I2S DIN*/, 19 /*I2S WS*/, 22 /*I2S
DOUT*/, 33 /*I2S BCK*/, Wire) != 0) {
Serial.println("Failed to initialize EchoBase!");
while (true) {
delay(1000);
}
}
#endif
echobase.setSpeakerVolume(50); // Set speaker volume to 50%.
echobase.setMicGain(ES8311_MIC_GAIN_6DB); // Set microphone gain to 6dB.
buffer = (uint8_t *)malloc(RECORD_SIZE); // Allocate memory for the record buffer.
// Check if memory allocation was successful.
if (buffer == nullptr) {
// If memory allocation fails, enter an infinite loop.
while (true) {
Serial.println("Failed to allocate memory :(");
delay(1000);
}
}
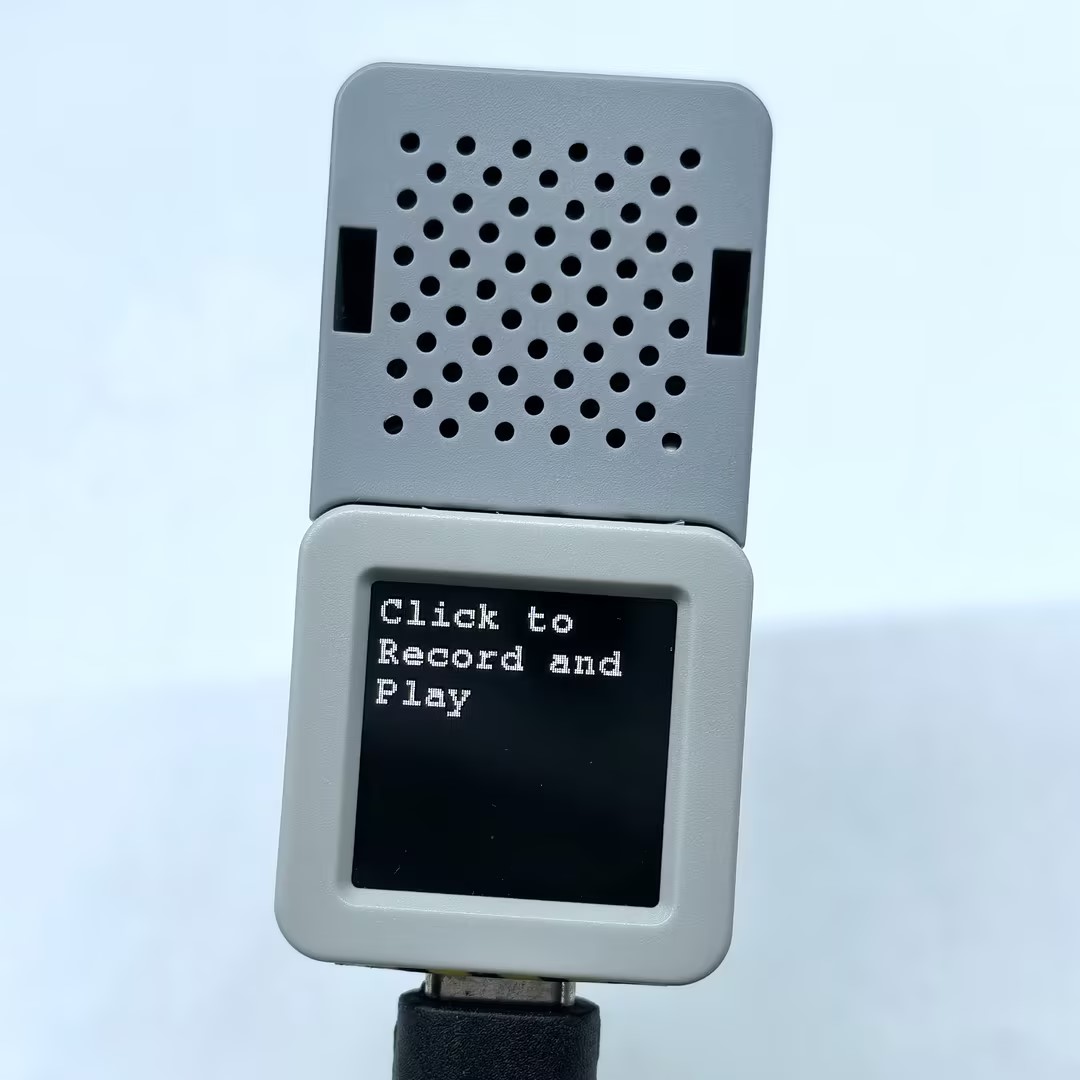
Serial.println("Device ready, start recording and playing!");
M5.Display.println("Click to \nRecord and Play");
}
void loop()
{
M5.update();
if (M5.BtnA.wasClicked()) {
M5.Display.fillScreen(BLACK);
M5.Display.setCursor(0, 0);
M5.Display.println("Recording");
Serial.println("Start recording...");
// Recording
echobase.setMute(true);
delay(10);
echobase.record(buffer, RECORD_SIZE); // Record audio into buffer.
delay(100);
M5.Display.println("Playing");
Serial.println("Start playing...");
// Playing
echobase.setMute(false);
delay(10);
echobase.play(buffer, RECORD_SIZE); // Play audio from buffer.
delay(100);
M5.Display.println("Done");
Serial.println("Done");
}
}4. コンパイルと書き込み
1. ダウンロードモード: 書き込み前にデバイスをダウンロードモードにする必要があります。デバイスによって手順が異なります。詳細は Arduino IDE 入門ガイド のデバイス別ダウンロード手順を参照してください。
AtomS3R の場合: リセットボタンを約 2 秒間長押しし、内部の緑色 LED が点灯したらボタンを離すとダウンロードモードに入ります。

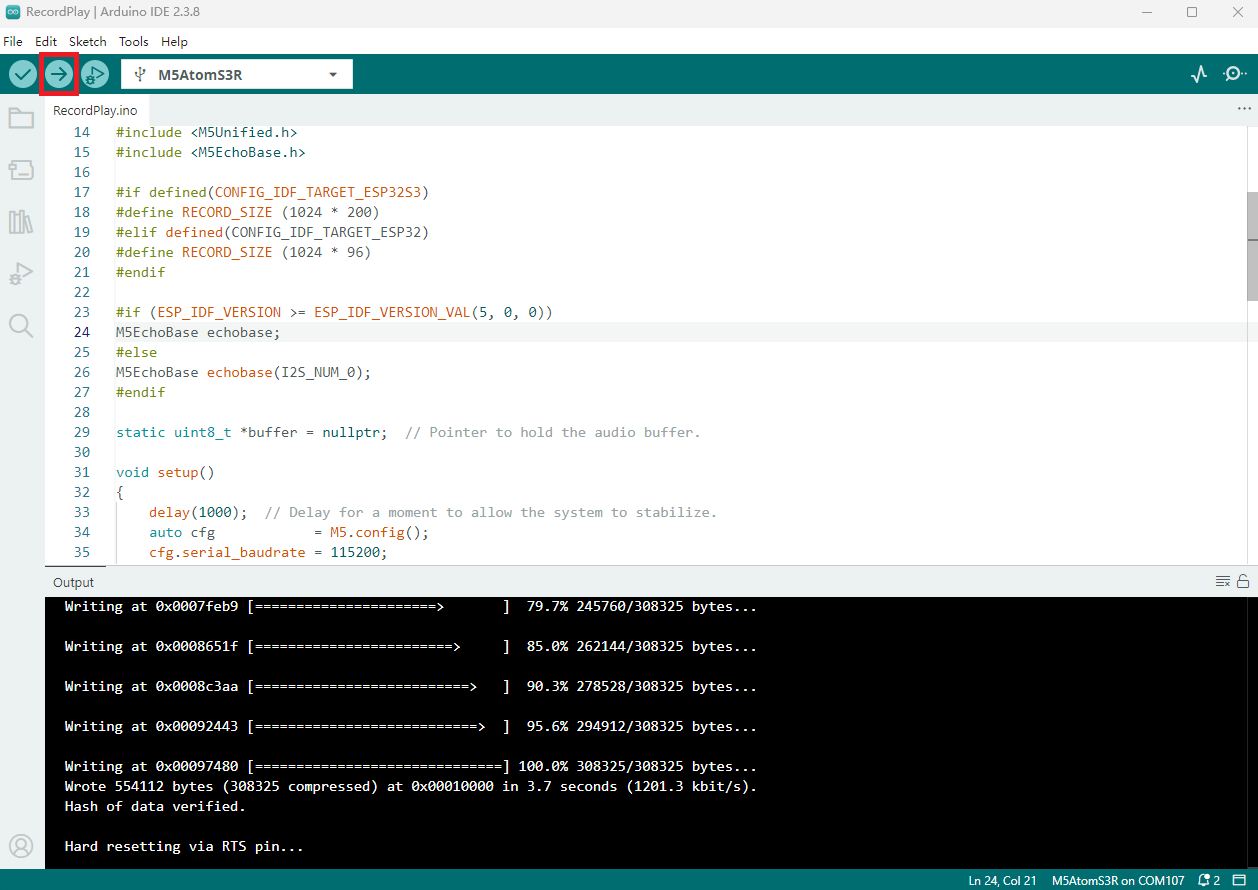
- 2. デバイスポートを選択し、Arduino IDE の左上にあるアップロードボタンをクリックします。コンパイルとアップロードが完了するまで待ちます。
5. 録音と再生