

Arduino 上手教程
2. 设备开发 & 案例程序
3. M5Unified
4. M5GFX
5. 拓展模块
Unit
Atomic
Tab5
IoT
Arduino Nesso N1 LoRa 通信
Arduino Nesso N1 LoRa 通信相关 API 与案例程序。
注意
Arduino Nesso N1 使用 SX1262 LoRa 通信芯片,开发时请注意选择相应的类。
案例程序
编译要求
- M5Stack 板管理版本 >= 3.2.5
- 开发板选项 = ArduinoNessoN1
- M5GFX 库版本 >= 0.2.17
- M5Unified 库版本 >= 0.2.11
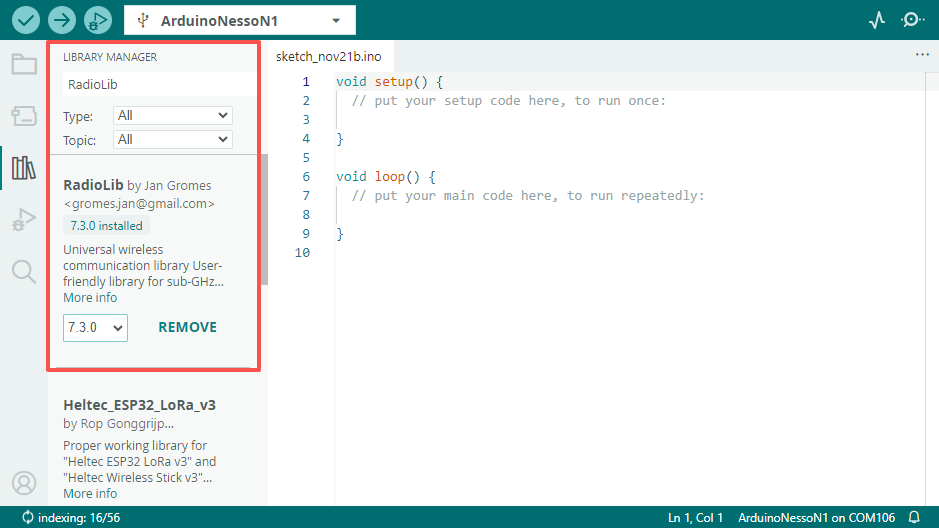
- RadioLib 库版本 >= 7.3.0
发送端
cpp
1 2 3 4 5 6 7 8 9 10 11 12 13 14 15 16 17 18 19 20 21 22 23 24 25 26 27 28 29 30 31 32 33 34 35 36 37 38 39 40 41 42 43 44 45 46 47 48 49 50 51 52 53 54 55 56 57 58 59 60 61 62 63 64 65 66 67 68 69 70 71 72 73 74 75 76 77 78 79 80 81 82 83 84 85 86 87 88 89 90 91 92 93 94 95 96 97 98 99 100 101 102 103 104 105 106 107 108 109 110 111 112 113 114 115 116 117 118 119 120
#include "M5Unified.h"
#include <RadioLib.h>

#define LORA_MOSI_PIN 21
#define LORA_MISO_PIN 22
#define LORA_SCK_PIN 20
#define LORA_IRQ_PIN 15
#define LORA_CS_PIN 23
#define LORA_BUSY_PIN 19

// SX1262: NSS, DIO1, NRST, BUSY
SX1262 radio = new Module(LORA_CS_PIN, LORA_IRQ_PIN, RADIOLIB_NC, LORA_BUSY_PIN);

// save transmission state between loops
int transmissionState = RADIOLIB_ERR_NONE;

// flag to indicate that a packet was sent
volatile bool transmittedFlag = false;

// this function is called when a complete packet is transmitted by the module
// IMPORTANT: this function MUST be 'void' type and MUST NOT have any arguments!
#if defined(ESP8266) || defined(ESP32)
ICACHE_RAM_ATTR
#endif

void setFlag(void) {
  // we sent a packet, set the flag
  transmittedFlag = true;
}

M5Canvas canvas(&M5.Display);

void setup() {
  M5.begin();
  Serial.begin(115200);
  M5.Display.setRotation(1);

  // LED_BUILTIN at E1.P7
  auto& ioe = M5.getIOExpander(0);

  //LORA_RESET
  ioe.digitalWrite(7, false);
  delay(100);
  ioe.digitalWrite(7, true);
  delay(100);

  ioe.digitalWrite(5, true);  //LORA_LNA_ENABLE
  ioe.digitalWrite(6, true);  //LORA_ANTENNA_SWITCH

  canvas.createSprite(M5.Display.width(), M5.Display.height());
  canvas.setTextColor(GREEN);
  canvas.setTextScroll(true);
  // initialize SX1262
  Serial.print(F("[SX1262] Initializing ... "));
  canvas.println("[SX1262] Initializing ... ");
  canvas.pushSprite(0, 0);

  // frequency, bandwidth, spreading factor, coding rate, sync word, power, preamble length, TCXO reference voltage,
  // useRegulatorLDO
  int state = radio.begin(868.0, 125.0f, 12, 5, 0x34, 22, 20, 3.0, true);
  if (state == RADIOLIB_ERR_NONE) {
    Serial.println(F("success!"));
  } else {
    Serial.print(F("failed, code "));
    Serial.println(state);
    while (true) {
      delay(10);
    }
  }

  // set the function that will be called when packet transmission is finished
  radio.setPacketSentAction(setFlag);

  // start transmitting the first packet
  Serial.print(F("[SX1262] Sending first packet ... "));

  // you can transmit C-string or Arduino string up to 256 characters long
  transmissionState = radio.startTransmit("Hello world from M5Stack!");
}

// counter to keep track of transmitted packets
int count = 0;

void loop() {
  // check if the previous transmission finished
  if (transmittedFlag) {
    // reset flag
    transmittedFlag = false;

    if (transmissionState == RADIOLIB_ERR_NONE) {
      // packet was successfully sent
      Serial.println(F("transmission finished!"));
      canvas.println("OK!");
      canvas.pushSprite(0, 0);
      // NOTE: when using interrupt-driven transmit method, it is not possible to automatically measure
      // transmission data rate using getDataRate()

    } else {
      Serial.print(F("failed, code "));
      Serial.println(transmissionState);
    }

    // clean up after transmission is finished. This will ensure transmitter is disabled, RF switch is powered down
    // etc.
    radio.finishTransmit();

    // wait a second before transmitting again
    delay(1000);

    // send another one
    Serial.print(F("[SX1262] Sending another packet ... "));

    // you can transmit C-string or Arduino string up to 256 characters long
    String str = "Hello Arduino Nesso N1 #" + String(count++);
    transmissionState = radio.startTransmit(str);
    canvas.println("Send:" + str);
    canvas.pushSprite(0, 0);
  }
  delay(100);
}接收端
cpp
1 2 3 4 5 6 7 8 9 10 11 12 13 14 15 16 17 18 19 20 21 22 23 24 25 26 27 28 29 30 31 32 33 34 35 36 37 38 39 40 41 42 43 44 45 46 47 48 49 50 51 52 53 54 55 56 57 58 59 60 61 62 63 64 65 66 67 68 69 70 71 72 73 74 75 76 77 78 79 80 81 82 83 84 85 86 87 88 89 90 91 92 93 94 95 96 97 98 99 100 101 102 103 104 105 106 107 108 109 110 111 112 113 114 115 116 117 118 119 120 121 122 123 124 125 126 127 128 129 130 131 132 133 134 135 136 137 138
#include "M5Unified.h"
#include <RadioLib.h>

#define LORA_MOSI_PIN 21
#define LORA_MISO_PIN 22
#define LORA_SCK_PIN 20
#define LORA_IRQ_PIN 15
#define LORA_CS_PIN 23
#define LORA_BUSY_PIN 19

// SX1262: NSS, DIO1, NRST, BUSY
SX1262 radio = new Module(LORA_CS_PIN, LORA_IRQ_PIN, RADIOLIB_NC, LORA_BUSY_PIN);

// flag to indicate that a packet was received
volatile bool receivedFlag = false;

// this function is called when a complete packet is received by the module
// IMPORTANT: this function MUST be 'void' type and MUST NOT have any arguments!
#if defined(ESP8266) || defined(ESP32)
ICACHE_RAM_ATTR
#endif

void setFlag(void) {
  // we got a packet, set the flag
  receivedFlag = true;
}

M5Canvas canvas(&M5.Display);

void setup() {
  M5.begin();
  Serial.begin(115200);
  M5.Display.setRotation(1);

  // LED_BUILTIN at E1.P7
  auto& ioe = M5.getIOExpander(0);

  //LORA_RESET
  ioe.digitalWrite(7, false);
  delay(100);
  ioe.digitalWrite(7, true);
  delay(100);

  ioe.digitalWrite(5, true);  //LORA_LNA_ENABLE
  ioe.digitalWrite(6, true);  //LORA_ANTENNA_SWITCH

  canvas.createSprite(M5.Display.width(), M5.Display.height());
  canvas.setTextColor(GREEN);
  canvas.setTextScroll(true);
  // initialize SX1262
  Serial.print(F("[SX1262] Initializing ... "));
  canvas.println("[SX1262] Initializing ... ");
  canvas.pushSprite(0, 0);

  // frequency, bandwidth, spreading factor, coding rate, sync word, power, preamble length, TCXO reference voltage, useRegulatorLDO
  int state = radio.begin(868.0, 125.0f, 12, 5, 0x34, 22, 20, 3.0, true);
  if (state == RADIOLIB_ERR_NONE) {
    Serial.println(F("success!"));
  } else {
    Serial.print(F("failed, code "));
    Serial.println(state);
    while (true) { delay(10); }
  }

  // set the function that will be called when new packet is received
  radio.setPacketReceivedAction(setFlag);

  // start listening for LoRa packets
  Serial.print(F("[SX1262] Starting to listen ... "));
  state = radio.startReceive();
  if (state == RADIOLIB_ERR_NONE) {
    Serial.println(F("success!"));
  } else {
    Serial.print(F("failed, code "));
    Serial.println(state);
    while (true) { delay(10); }
  }
}

void loop() {
  // check if the flag is set
  if (receivedFlag) {
    // reset flag
    receivedFlag = false;

    // you can read received data as an Arduino String
    String str;
    int state = radio.readData(str);

    if (state == RADIOLIB_ERR_NONE) {
      // packet was successfully received
      Serial.println(F("[SX1262] Received packet!"));

      // print data of the packet
      Serial.print(F("[SX1262] Data:\t\t"));
      Serial.println(str);

      canvas.print(F("[SX1262] Data:\t\t"));
      canvas.println(str);

      // print RSSI (Received Signal Strength Indicator)
      Serial.print(F("[SX1262] RSSI:\t\t"));
      Serial.print(radio.getRSSI());
      Serial.println(F(" dBm"));

      canvas.print(F("[SX1262] RSSI:\t\t"));
      canvas.print(radio.getRSSI());
      canvas.println(F(" dBm"));

      // print SNR (Signal-to-Noise Ratio)
      Serial.print(F("[SX1262] SNR:\t\t"));
      Serial.print(radio.getSNR());
      Serial.println(F(" dB"));

      canvas.print(F("[SX1262] SNR:\t\t"));
      canvas.print(radio.getSNR());
      canvas.println(F(" dB"));

      canvas.pushSprite(0, 0);

      // print frequency error
      Serial.print(F("[SX1262] Frequency error:\t"));
      Serial.print(radio.getFrequencyError());
      Serial.println(F(" Hz"));


    } else if (state == RADIOLIB_ERR_CRC_MISMATCH) {
      // packet was received, but is malformed
      Serial.println(F("CRC error!"));

    } else {
      // some other error occurred
      Serial.print(F("failed, code "));
      Serial.println(state);
    }
  }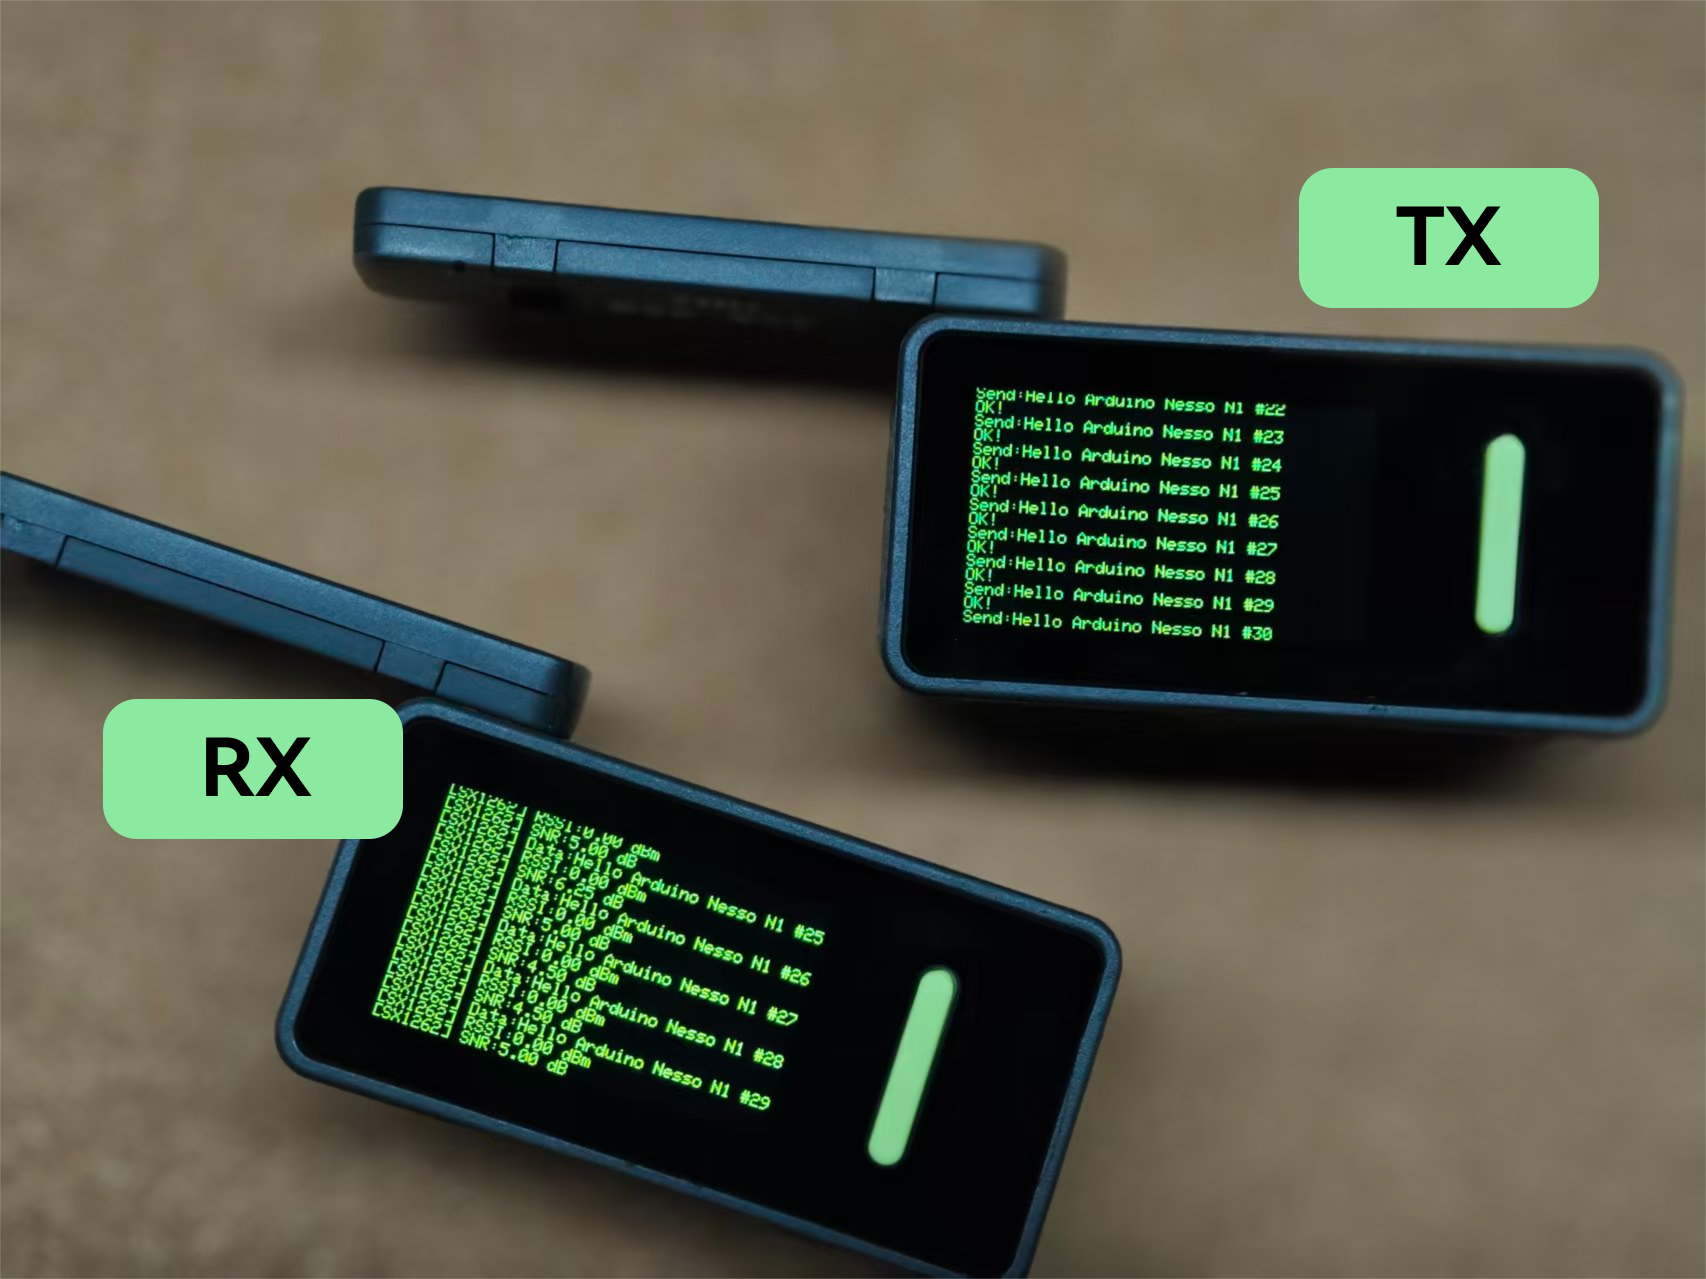
}运行结果
将以上两段代码分别编译上传至两个 Arduino Nesso N1,发送端和接收端将分别显示发送和接收状态。
API
Arduino Nesso N1 LoRa 通信部分使用了RadioLib库作为驱动,更多相关的 API 可以参考下方文档:
Page Tools