


Arduino Quick Start
2. Devices & Examples
3. M5Unified
4. M5GFX
5. Extensions
Unit
Atomic
Tab5
IoT
Accessories
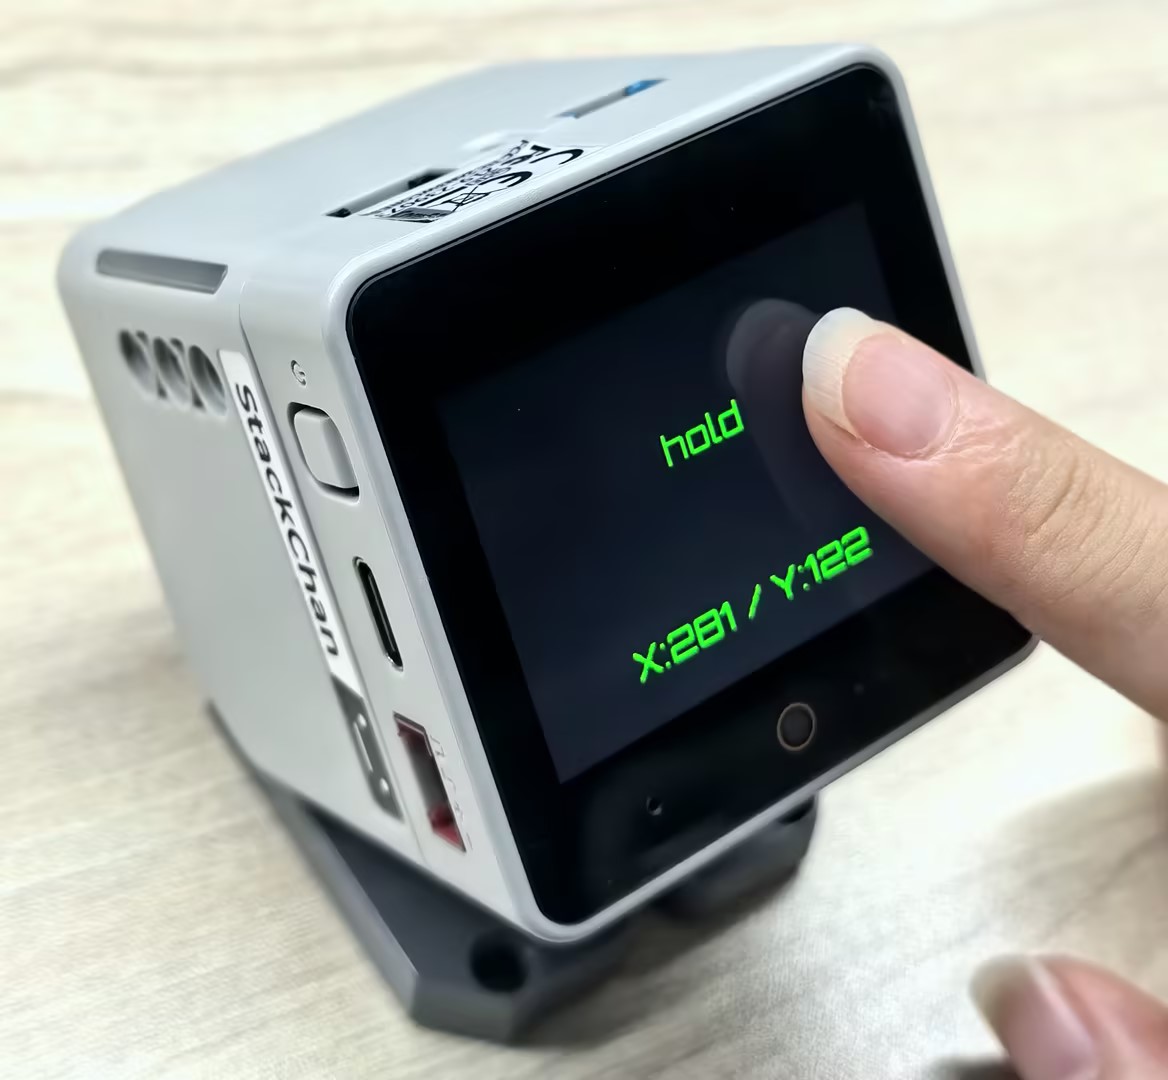
StackChan Touch Screen
Touch-related APIs and sample programs for the StackChan display.
Sample Program
Build Requirements
- M5Stack board manager version >= 3.2.2
- Board option = M5CoreS3
- M5Unified library version >= 0.2.11
cpp
1 2 3 4 5 6 7 8 9 10 11 12 13 14 15 16 17 18 19 20 21 22 23 24 25 26 27 28 29 30 31 32 33 34 35 36 37 38 39 40
#include <M5Unified.h>
void setup(void) {
    auto cfg = M5.config();
    M5.begin(cfg);
    M5.Display.setTextColor(GREEN);
    M5.Display.setTextDatum(middle_center);
    M5.Display.setFont(&fonts::Orbitron_Light_24);
    M5.Display.setTextSize(1);
    M5.Display.drawString("Touch Test", M5.Display.width() / 2,
                              M5.Display.height() / 2);
}
int prev_x = -1;
int prev_y = -1;
static m5::touch_state_t prev_state;
void loop(void) {
    M5.update();
    auto t = M5.Touch.getDetail();
    if (prev_state != t.state) {
        prev_state                                  = t.state;
        static constexpr const char* state_name[16] = {
            "none", "touch", "touch_end", "touch_begin",
            "___",  "hold",  "hold_end",  "hold_begin",
            "___",  "flick", "flick_end", "flick_begin",
            "___",  "drag",  "drag_end",  "drag_begin"};
        M5_LOGI("%s", state_name[t.state]);
        M5.Display.fillRect(0, 0, M5.Display.width(), 140, BLACK);
        M5.Display.drawString(state_name[t.state],
                                  M5.Display.width() / 2,
                                  M5.Display.height() / 2 - 30);
    }
    if (prev_x != t.x || prev_y != t.y) {
        M5.Display.fillRect(0, 140, M5.Display.width(), 100, BLACK);
        M5.Display.drawString(
            "X:" + String(t.x) + " / " + "Y:" + String(t.y),
            M5.Display.width() / 2, 200);
        prev_x = t.x;
        prev_y = t.y;
        M5.Display.fillCircle(prev_x, prev_y, 4, GREEN);
    }
}Once the firmware is successfully flashed, you can interact with the device by touching the StackChan's screen. When the screen is touched, it displays the current touch state (e.g., touch, hold, flick, drag) along with the coordinates of the touch point.
API
The StackChan touchscreen functionality is implemented using the Touch_Class from the M5Unified library. For more related APIs, refer to the documentation below: