

Arduino入門
2. デバイス&サンプル
3. M5Unified
4. M5GFX
5. 拡張モジュール&サンプル
Unit
Atomic
Tab5
IoT
アクセサリー
StackChan サーボ
StackChan サーボ制御サンプルプログラム。
原点校正
cpp
1 2 3 4 5 6 7 8 9 10 11 12 13 14 15 16 17 18 19 20 21 22 23 24 25 26 27 28 29 30 31 32 33 34 35 36 37 38 39 40 41 42 43 44 45 46 47 48 49 50 51 52 53 54 55 56 57 58 59 60 61 62 63 64 65 66 67 68 69 70 71 72 73 74 75 76 77 78 79 80 81 82 83 84 85 86 87 88 89 90 91 92 93 94 95 96 97 98 99 100 101 102 103 104 105
#include <M5StackChan.h>

namespace {

constexpr uint16_t kBackgroundColor          = TFT_BLACK;
constexpr uint16_t kBorderColor              = TFT_WHITE;
constexpr uint16_t kTopButtonColor           = 0x39C7;
constexpr uint16_t kTopButtonPressedColor    = 0x2204;
constexpr uint16_t kBottomButtonColor        = 0x03EF;
constexpr uint16_t kBottomButtonPressedColor = 0x01E8;
constexpr uint16_t kTextColor                = TFT_WHITE;

enum class ButtonZone {
    None,
    SetHome,
    GoHome,
};

ButtonZone pressed_zone = ButtonZone::None;

ButtonZone getButtonZone(const int16_t y, const int16_t height)
{
    return y < (height / 2) ? ButtonZone::SetHome : ButtonZone::GoHome;
}

void drawButton(const int16_t x, const int16_t y, const int16_t w, const int16_t h, const uint16_t color,
                const char* line_1, const char* line_2)
{
    auto& display = M5StackChan.Display();

    display.fillRect(x, y, w, h, color);
    display.drawRect(x, y, w, h, kBorderColor);

    display.setTextDatum(middle_center);
    display.setTextColor(kTextColor, color);
    display.setTextSize(2);
    display.drawString(line_1, x + w / 2, y + h / 2 - 12);
    display.drawString(line_2, x + w / 2, y + h / 2 + 12);
}

void drawUi(ButtonZone active_zone)
{
    auto& display          = M5StackChan.Display();
    const int16_t width    = display.width();
    const int16_t height   = display.height();
    const int16_t gap      = 8;
    const int16_t button_x = 8;
    const int16_t button_w = width - button_x * 2;
    const int16_t half_h   = (height - gap) / 2;

    display.startWrite();
    display.fillScreen(kBackgroundColor);
    display.fillRect(0, half_h, width, gap, kBackgroundColor);

    drawButton(button_x, 8, button_w, half_h - 12,
               active_zone == ButtonZone::SetHome ? kTopButtonPressedColor : kTopButtonColor, "set current postion",
               "as home");

    drawButton(button_x, half_h + gap + 4, button_w, height - (half_h + gap + 12),
               active_zone == ButtonZone::GoHome ? kBottomButtonPressedColor : kBottomButtonColor, "move to", "home");

    display.endWrite();
}

}  // namespace

void setup()
{
    /* Init StackChan */
    M5StackChan.begin();

    /* Setup display */
    M5StackChan.Display().setTextScroll(false);
    drawUi(ButtonZone::None);
}

void loop()
{
    M5StackChan.update();
    auto& display               = M5StackChan.Display();
    const int16_t screen_height = display.height();
    int16_t touch_x             = 0;
    int16_t touch_y             = 0;
    const bool touching         = display.getTouch(&touch_x, &touch_y);

    if (touching) {
        const ButtonZone current_zone = getButtonZone(touch_y, screen_height);
        if (current_zone != pressed_zone) {
            pressed_zone = current_zone;
            drawUi(pressed_zone);
        }
    } else if (pressed_zone != ButtonZone::None) {
        const ButtonZone released_zone = pressed_zone;
        pressed_zone                   = ButtonZone::None;
        drawUi(ButtonZone::None);

        if (released_zone == ButtonZone::SetHome) {
            M5StackChan.Motion.setCurrentPostionAsHome();
        } else if (released_zone == ButtonZone::GoHome) {
            M5StackChan.Motion.goHome();
        }
    }

    delay(20);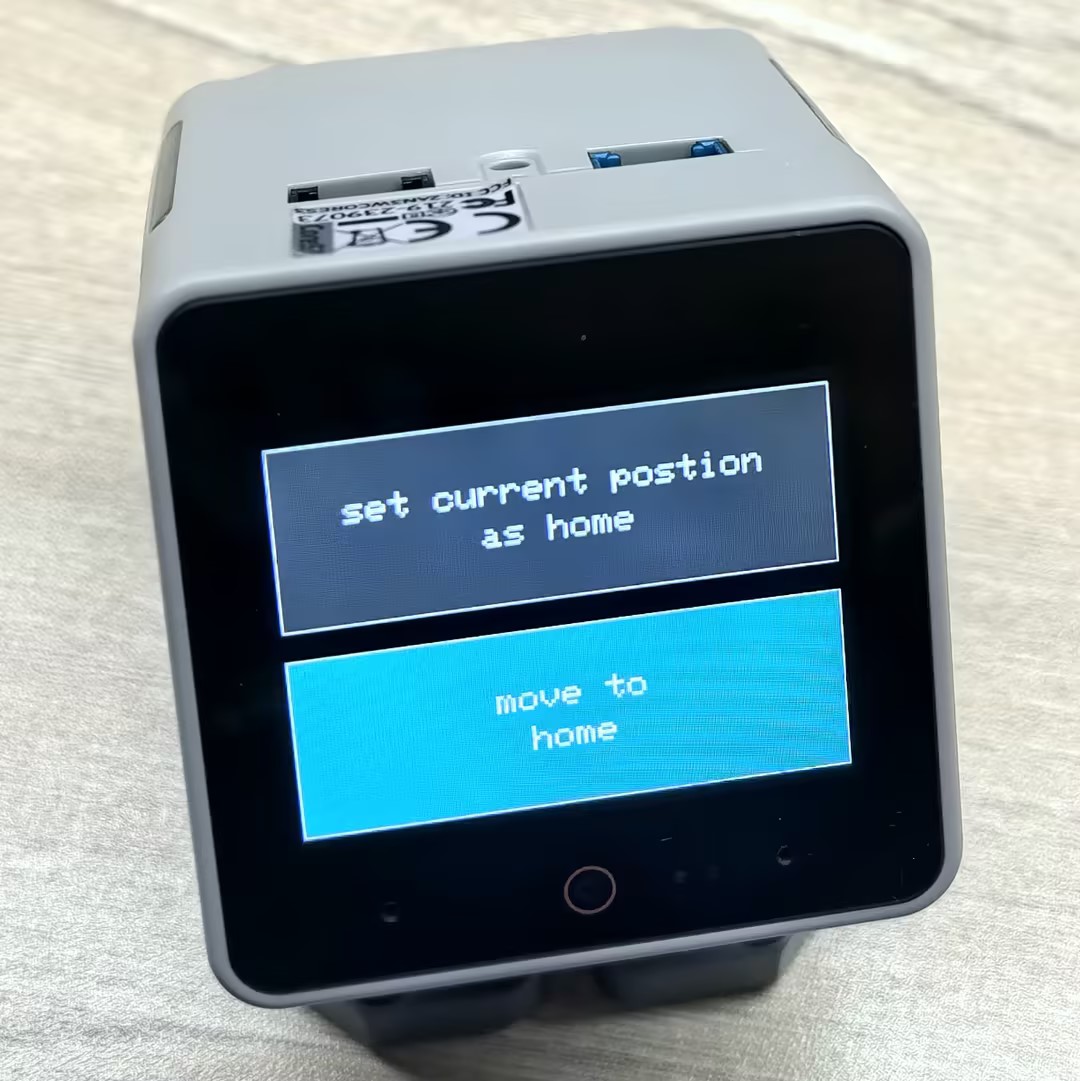
}このプログラムはスクリーン上に 2 つのボタンを表示し、現在のサーボ位置を原点として設定し、原点に戻るために使用されます。スクリーン上のボタンに触れてデバイスと相互作用できます。「set current position as home」ボタンを押して離すと、現在のサーボ位置が原点として設定されます。「move to home」ボタンを押して離すと、サーボが原点位置に戻ります。
サーボ制御
注意
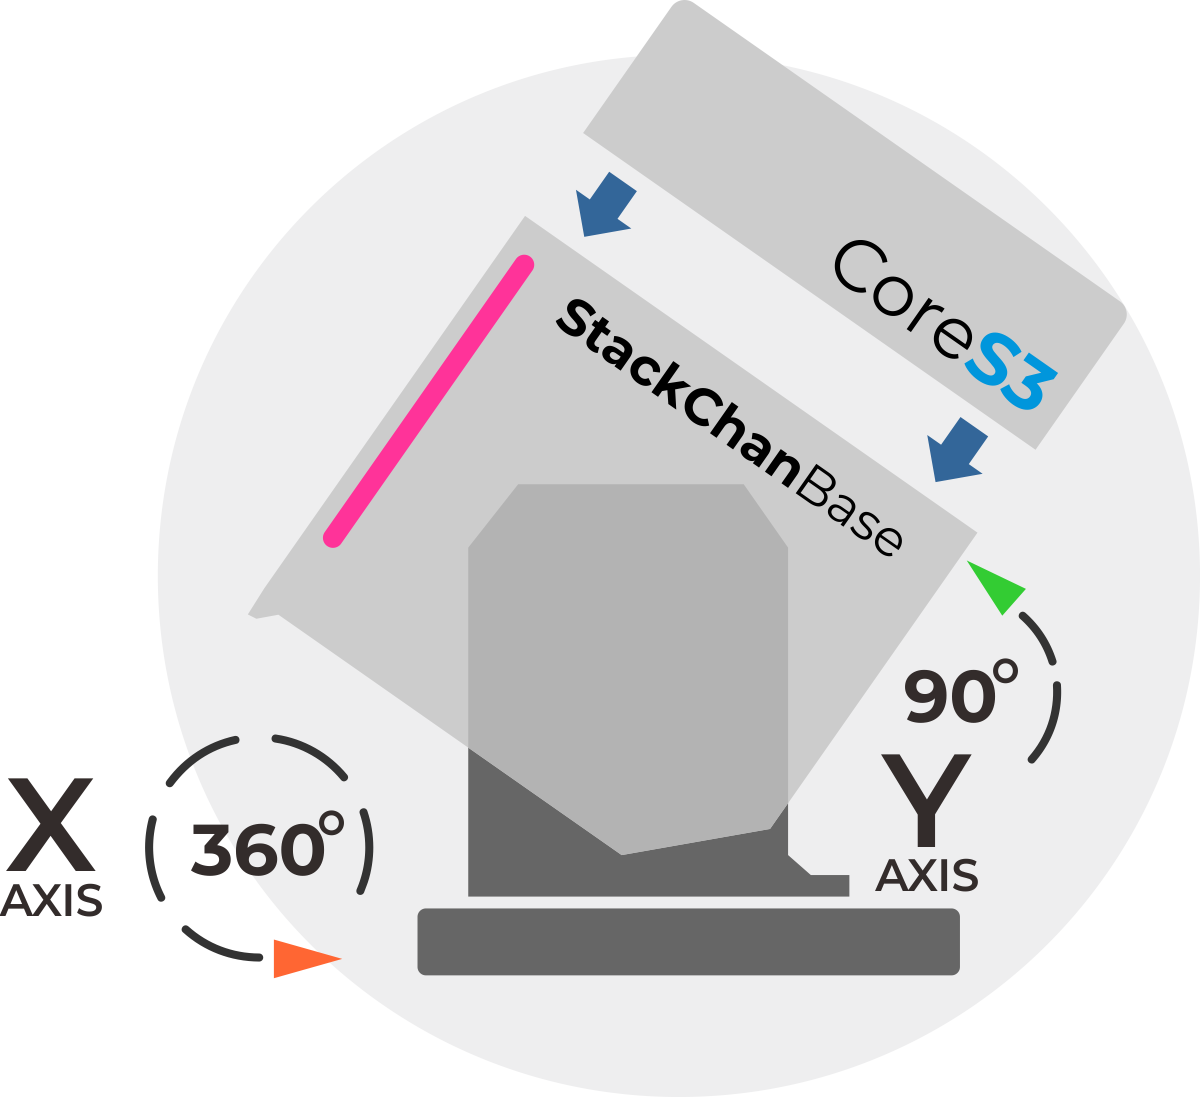
StackChan の Y 軸サーボ(垂直方向)の動作角度は 5 ~ 85° の範囲内に制御することを推奨します。極限角度ではサーボがストールして破損しやすくなります。
cpp
1 2 3 4 5 6 7 8 9 10 11 12 13 14 15 16 17 18 19 20 21 22 23 24 25 26 27 28 29 30 31 32 33 34 35 36 37 38 39 40 41 42 43 44 45 46 47 48 49 50 51 52 53 54 55 56 57 58 59 60 61 62 63 64 65 66 67 68 69 70 71 72 73 74 75 76 77 78 79 80 81 82 83 84 85 86
#include <M5StackChan.h>

int state = 1;
const int MAX_STATE = 8;

void setup()
{
    /* Init StackChan */
    M5StackChan.begin();
    M5StackChan.Motion.goHome();

    /* Setup display */
    M5StackChan.Display().setTextSize(2);
    M5StackChan.Display().setTextScroll(true);
    M5StackChan.Display().setTextColor(TFT_ORANGE);
    M5StackChan.Display().printf("> Touch the top to start\n");
    M5StackChan.Display().setTextColor(TFT_GREEN);

    // Set to false if high-frequency updates are needed
    // M5StackChan.Motion.setAutoAngleSyncEnabled(false);
}

void loop()
{
    M5StackChan.update();
    if (M5StackChan.TouchSensor.wasPressed()) {
        switch(state){
            /* Angle unit: 10 = 1 degrees, Speed range: 0~1000 */
            /* Range X: -1280 ~ 1280 (-128° ~ 128°), Range Y: 0 ~ 900 (0° ~ 90°) */
            case 1:
                /* Move X servo to 0°, Y servo to 45° */
                M5StackChan.Motion.move(0, 450);
                M5StackChan.Display().printf("> Turn Y to 45\n");
                break;
            case 2:
                /* Move X servo to 90° */
                M5StackChan.Motion.moveX(900, 500);
                M5StackChan.Display().printf("> Turn Left\n");
                break;
            case 3:
                /* Move X servo to -90° */
                M5StackChan.Motion.moveX(-900, 500);
                M5StackChan.Display().printf("> Turn Right\n");
                break;
            case 4:
                /* Move Y servo to 90° */
                M5StackChan.Motion.moveY(900, 300);
                M5StackChan.Display().printf("> Look Up\n");
                break;
            case 5:
                /* Move Y servo to 0° */
                M5StackChan.Motion.moveY(0, 300);
                M5StackChan.Display().printf("> Look Down\n");
                break;
            /* Only X axis supports continuous 360° rotation. Y axis does not. */
            /* Velocity range: -1000 ~ 1000 (Negative: CW, Positive: CCW) */
            case 6:
                /* Rotate clockwise */
                M5StackChan.Motion.rotateX(-800);
                M5StackChan.Display().printf("> Rotate clockwise\n");
                delay(2000);
                M5StackChan.Motion.stop();
                break;
            case 7:
                /* Rotate counter-clockwise */
                M5StackChan.Motion.rotateX(800);
                M5StackChan.Display().printf("> Rotate counter-clockwise\n");
                delay(2000);
                M5StackChan.Motion.stop();
                break;
            default:
                M5StackChan.Motion.goHome();
                M5StackChan.Display().printf("> Go home\n");
                break;
        }

        state++;
        if (state > MAX_STATE) {
            state = 1;
            M5StackChan.Display().setTextColor(TFT_ORANGE);
            M5StackChan.Display().printf("> Touch the top to start\n");
            M5StackChan.Display().setTextColor(TFT_GREEN);
        }
    }
    delay(10);
}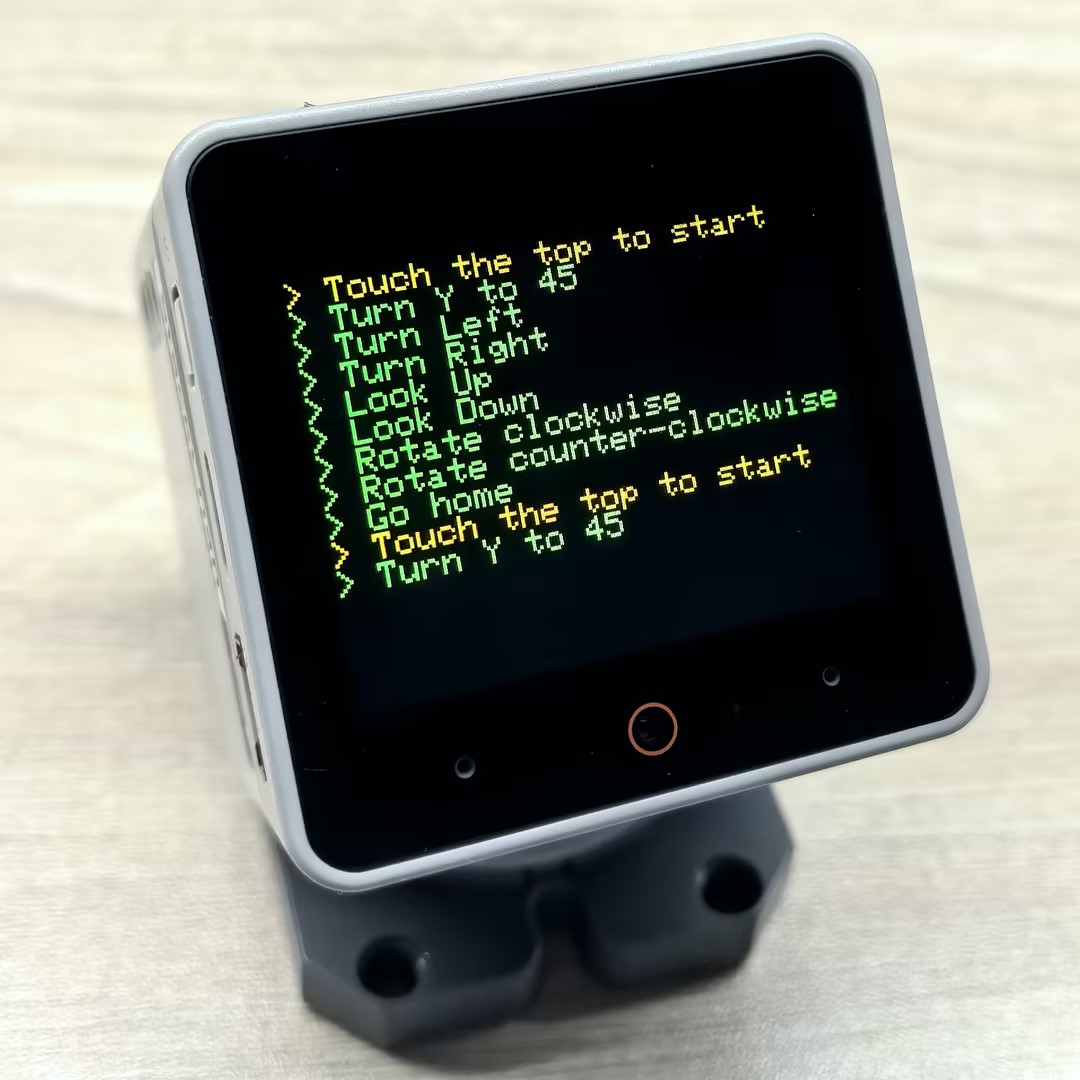
このプログラムはスクリーン操作によってサーボ運動を制御します。スクリーンをタッチするたびに、プログラムは次のアクションを順番に実行します:
- X 軸サーボを 0°、Y 軸サーボを 45° に移動
- X 軸サーボを 90° に移動(左を向く)
- X 軸サーボを -90° に移動(右を向く)
- Y 軸サーボを 90° に移動(上を向く)
- Y 軸サーボを 0° に移動(下を向く)
- X 軸サーボを速度 800 で時計方向に 2 秒間回転してから停止
- X 軸サーボを速度 800 で反時計方向に 2 秒間回転してから停止
- ホーム位置に戻る
Page Tools