

Arduino入門
2. デバイス&サンプル
3. M5Unified
4. M5GFX
5. 拡張モジュール&サンプル
Unit
Atomic
Tab5
IoT
アクセサリー
Chain Key 使用チュートリアル
1. 準備作業
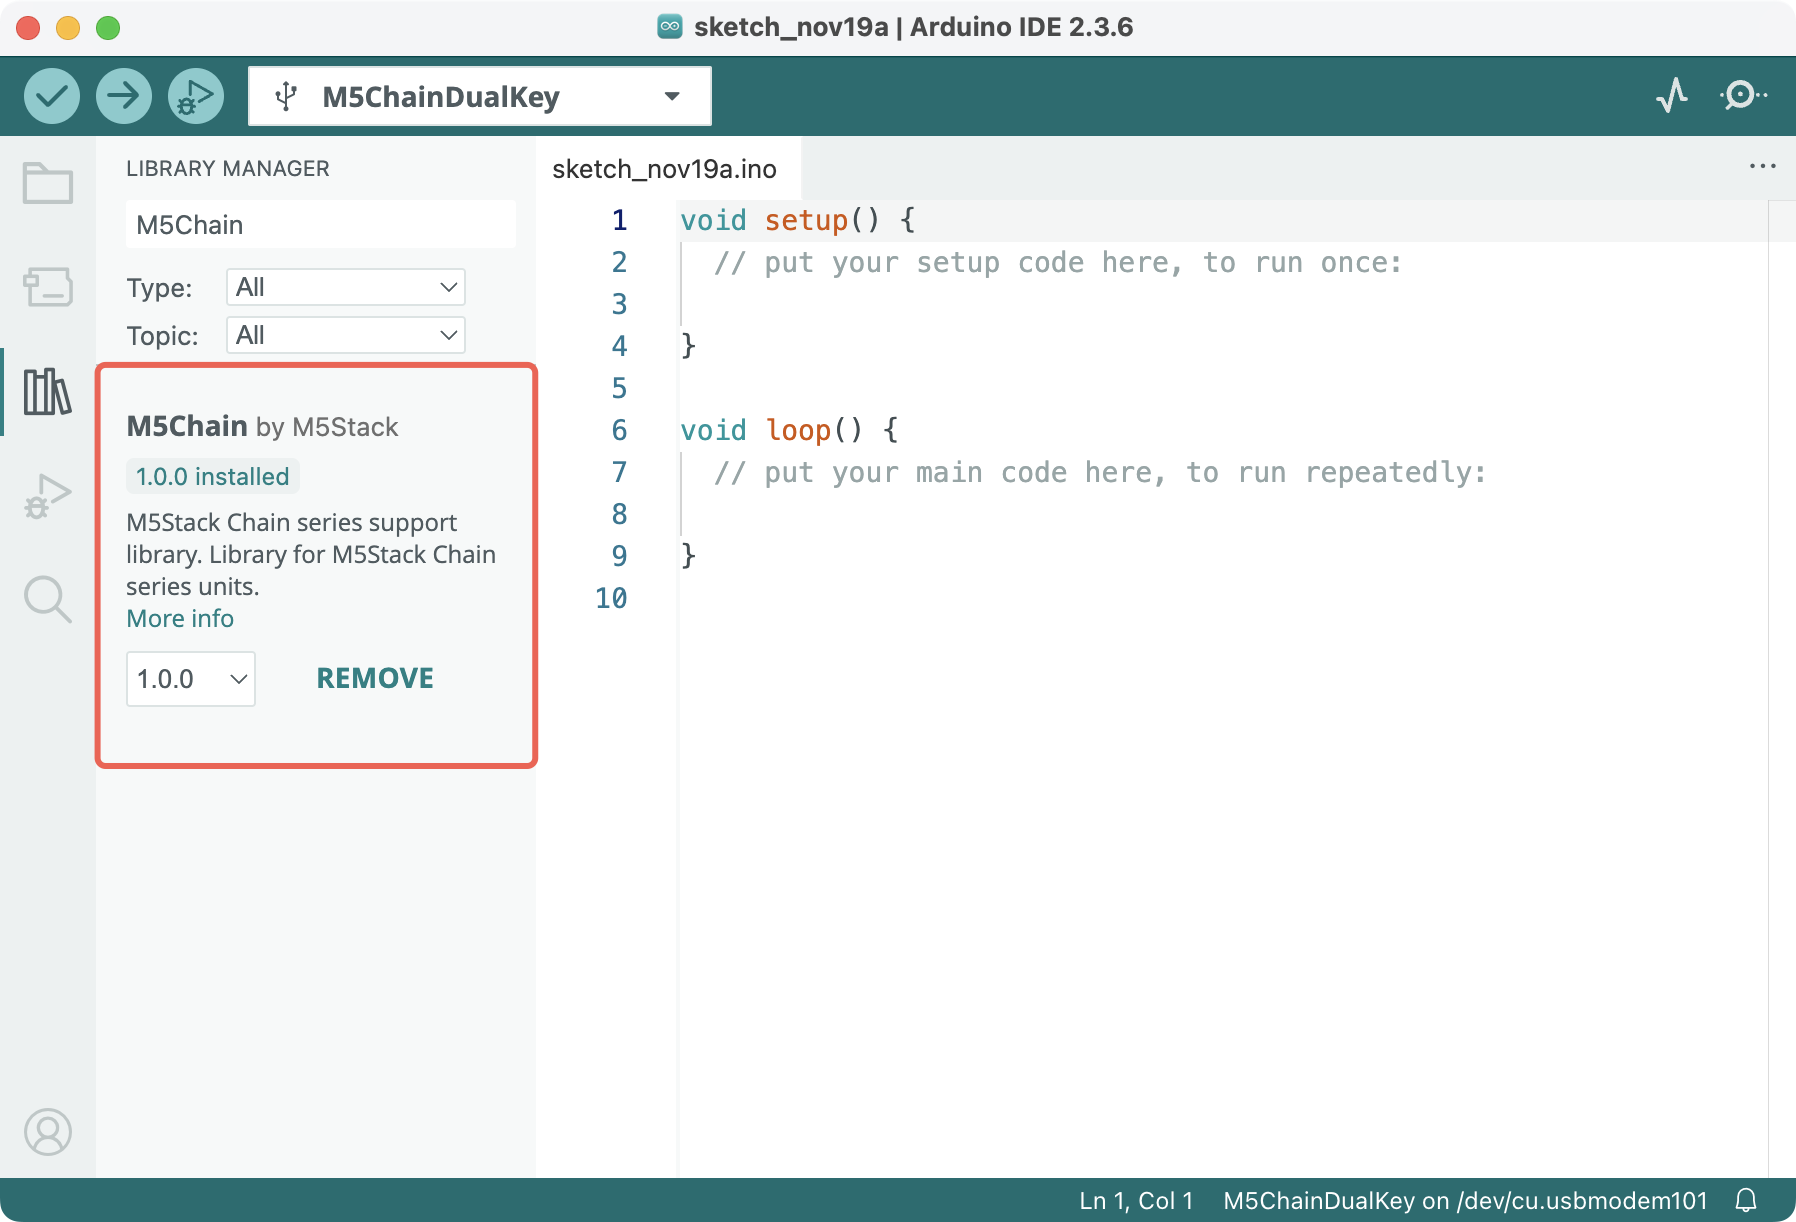
- 環境構成: Arduino IDE 入門チュートリアルを参照して IDE のインストールを完了し、使用する開発ボードに応じたボードマネージャと必要なドライバライブラリをインストールします。
- 使用するドライバライブラリ:
- 使用するハードウェア製品:
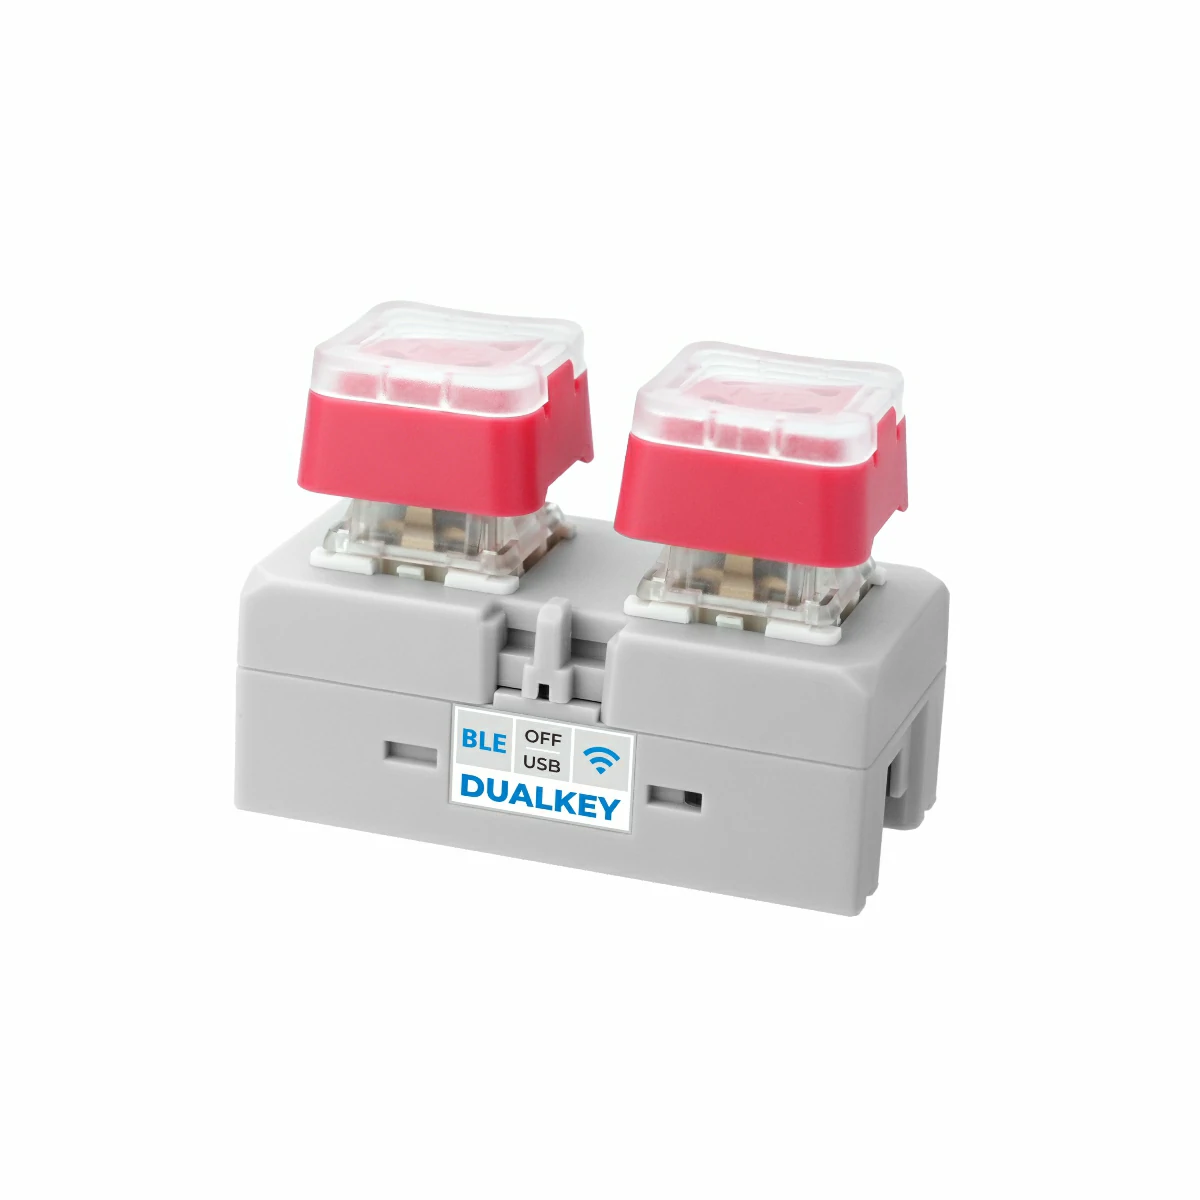
- Chain DualKey
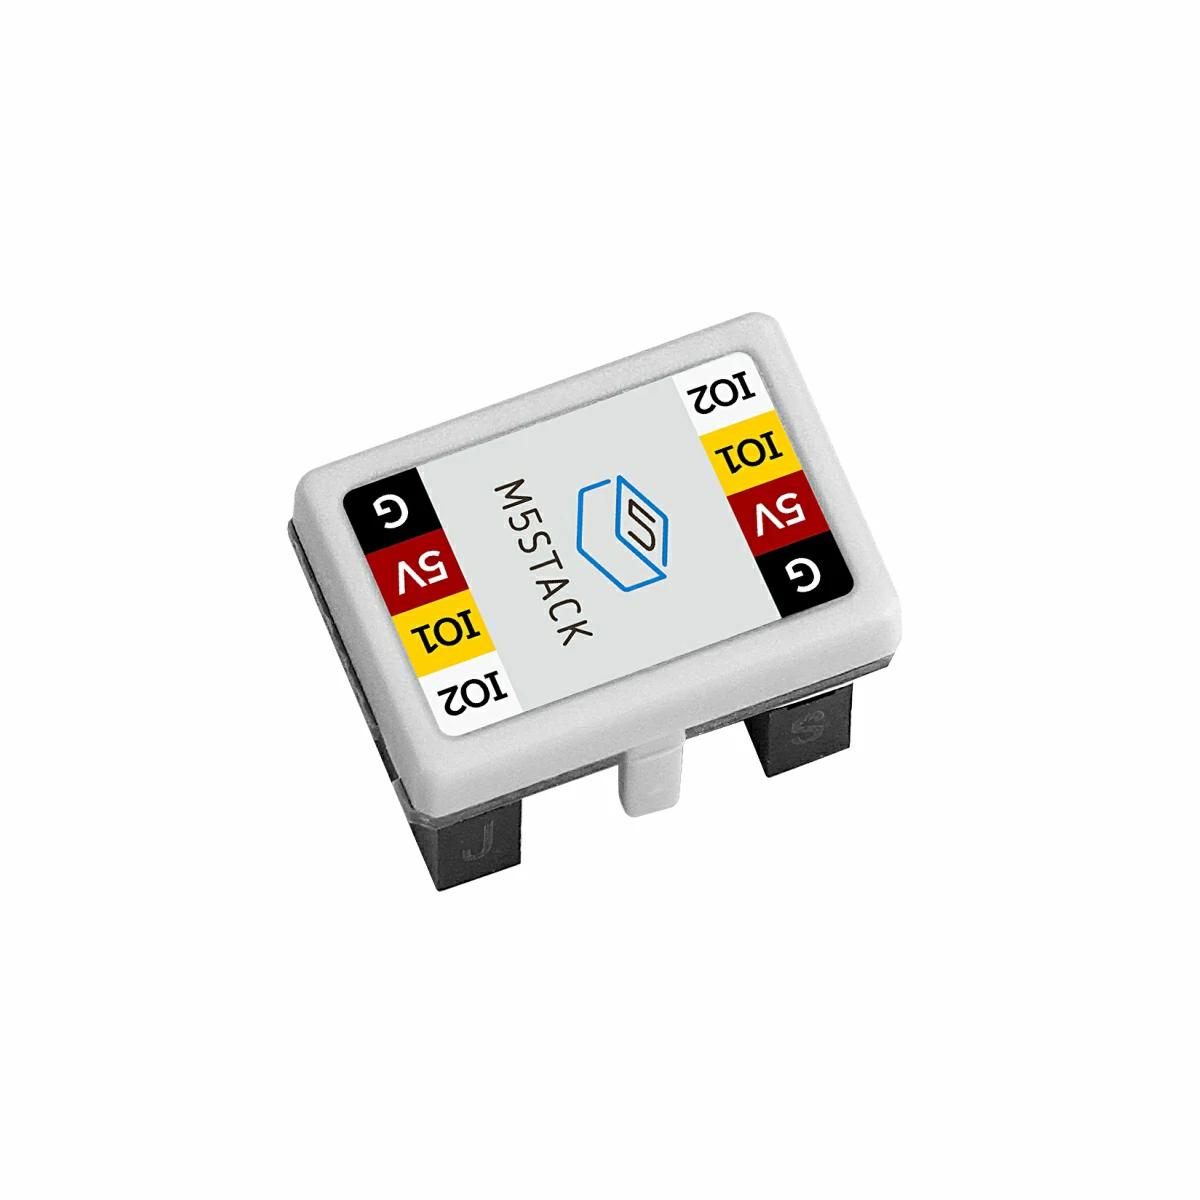
- Chain シリーズのコネクタ(例:Chain Bridge または Chain Return)
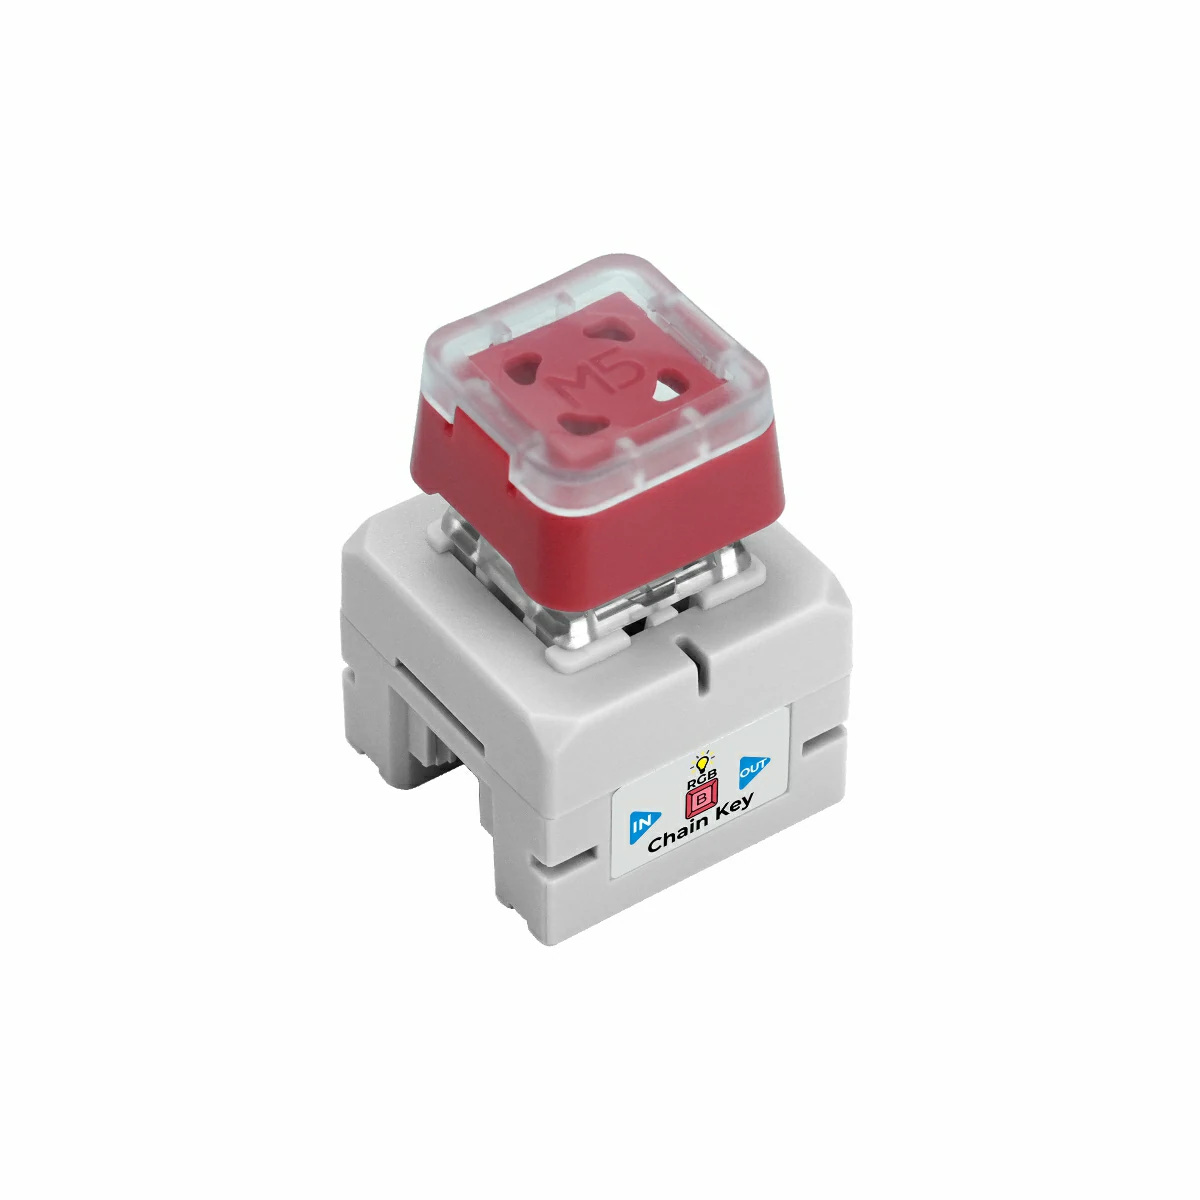
- Chain Key
2. サンプルプログラム
コンパイル要件
M5Stack ボードマネージャ バージョン >= 3.2.4
M5Chain ライブラリ バージョン >= 1.0.0
M5Chain ライブラリ バージョン >= 1.0.0
cpp
1 2 3 4 5 6 7 8 9 10 11 12 13 14 15 16 17 18 19 20 21 22 23 24 25 26 27 28 29 30 31 32 33 34 35 36 37 38 39 40 41 42 43 44 45 46 47 48 49 50 51 52 53 54 55 56 57 58 59 60 61 62 63 64
#include "M5Chain.h"

#define RXD_PIN GPIO_NUM_5  // Chain DualKey のもう一方の側では 47
#define TXD_PIN GPIO_NUM_6  // Chain DualKey のもう一方の側では 48

Chain M5Chain;

device_list_t *device_list = NULL;
uint16_t device_count = 0;
uint8_t opr_status = 0;

uint8_t button_status;
chain_button_press_type_t button_press_type;

void setup() {
  Serial.begin(115200);
  delay(1000);
  Serial.println("===========================");
  Serial.println("M5Stack Chain Key Test");

  M5Chain.begin(&Serial2, 115200, RXD_PIN, TXD_PIN);
  while (!M5Chain.isDeviceConnected()) {
    Serial.println("No device connected");
    delay(1000);
  }

  M5Chain.getDeviceNum(&device_count);
  device_list = (device_list_t *)malloc(sizeof(device_list_t));
  device_list->count = device_count;
  device_list->devices = (device_info_t *)malloc(sizeof(device_info_t) * device_count);
  M5Chain.getDeviceList(device_list);

  if (device_list->devices[0].device_type == CHAIN_KEY_TYPE_CODE) {
    Serial.println("ID[1] is Chain Key");
  } else {
    Serial.println("ID[1] is NOT Chain Key");
    return;
  }

  // デバイス ID、ダブルクリック間隔 (100MS/200MS/.../900MS/1000MS)、長押し間隔 (3S/4S/.../9S/10S)、動作ステータス
  M5Chain.setKeyButtonTriggerInterval(1, BUTTON_DOUBLE_CLICK_TIME_500MS, BUTTON_LONG_PRESS_TIME_5S, &opr_status);
  Serial.println("Set double and long press intervals\n");
  delay(1000);
}

void loop() {
  M5Chain.getKeyButtonStatus(1, &button_status);  // デバイス ID
  // Serial.print("button_status: ");
  // Serial.println(button_status);

  while (M5Chain.getKeyButtonPressStatus(1, &button_press_type)) {  // デバイス ID
    switch (button_press_type) {
      case CHAIN_BUTTON_PRESS_SINGLE:
        Serial.println("Single pressed");
        break;
      case CHAIN_BUTTON_PRESS_DOUBLE:
        Serial.println("Double pressed");
        break;
      case CHAIN_BUTTON_PRESS_LONG:
        Serial.println("Long pressed");
        break;
    }
  }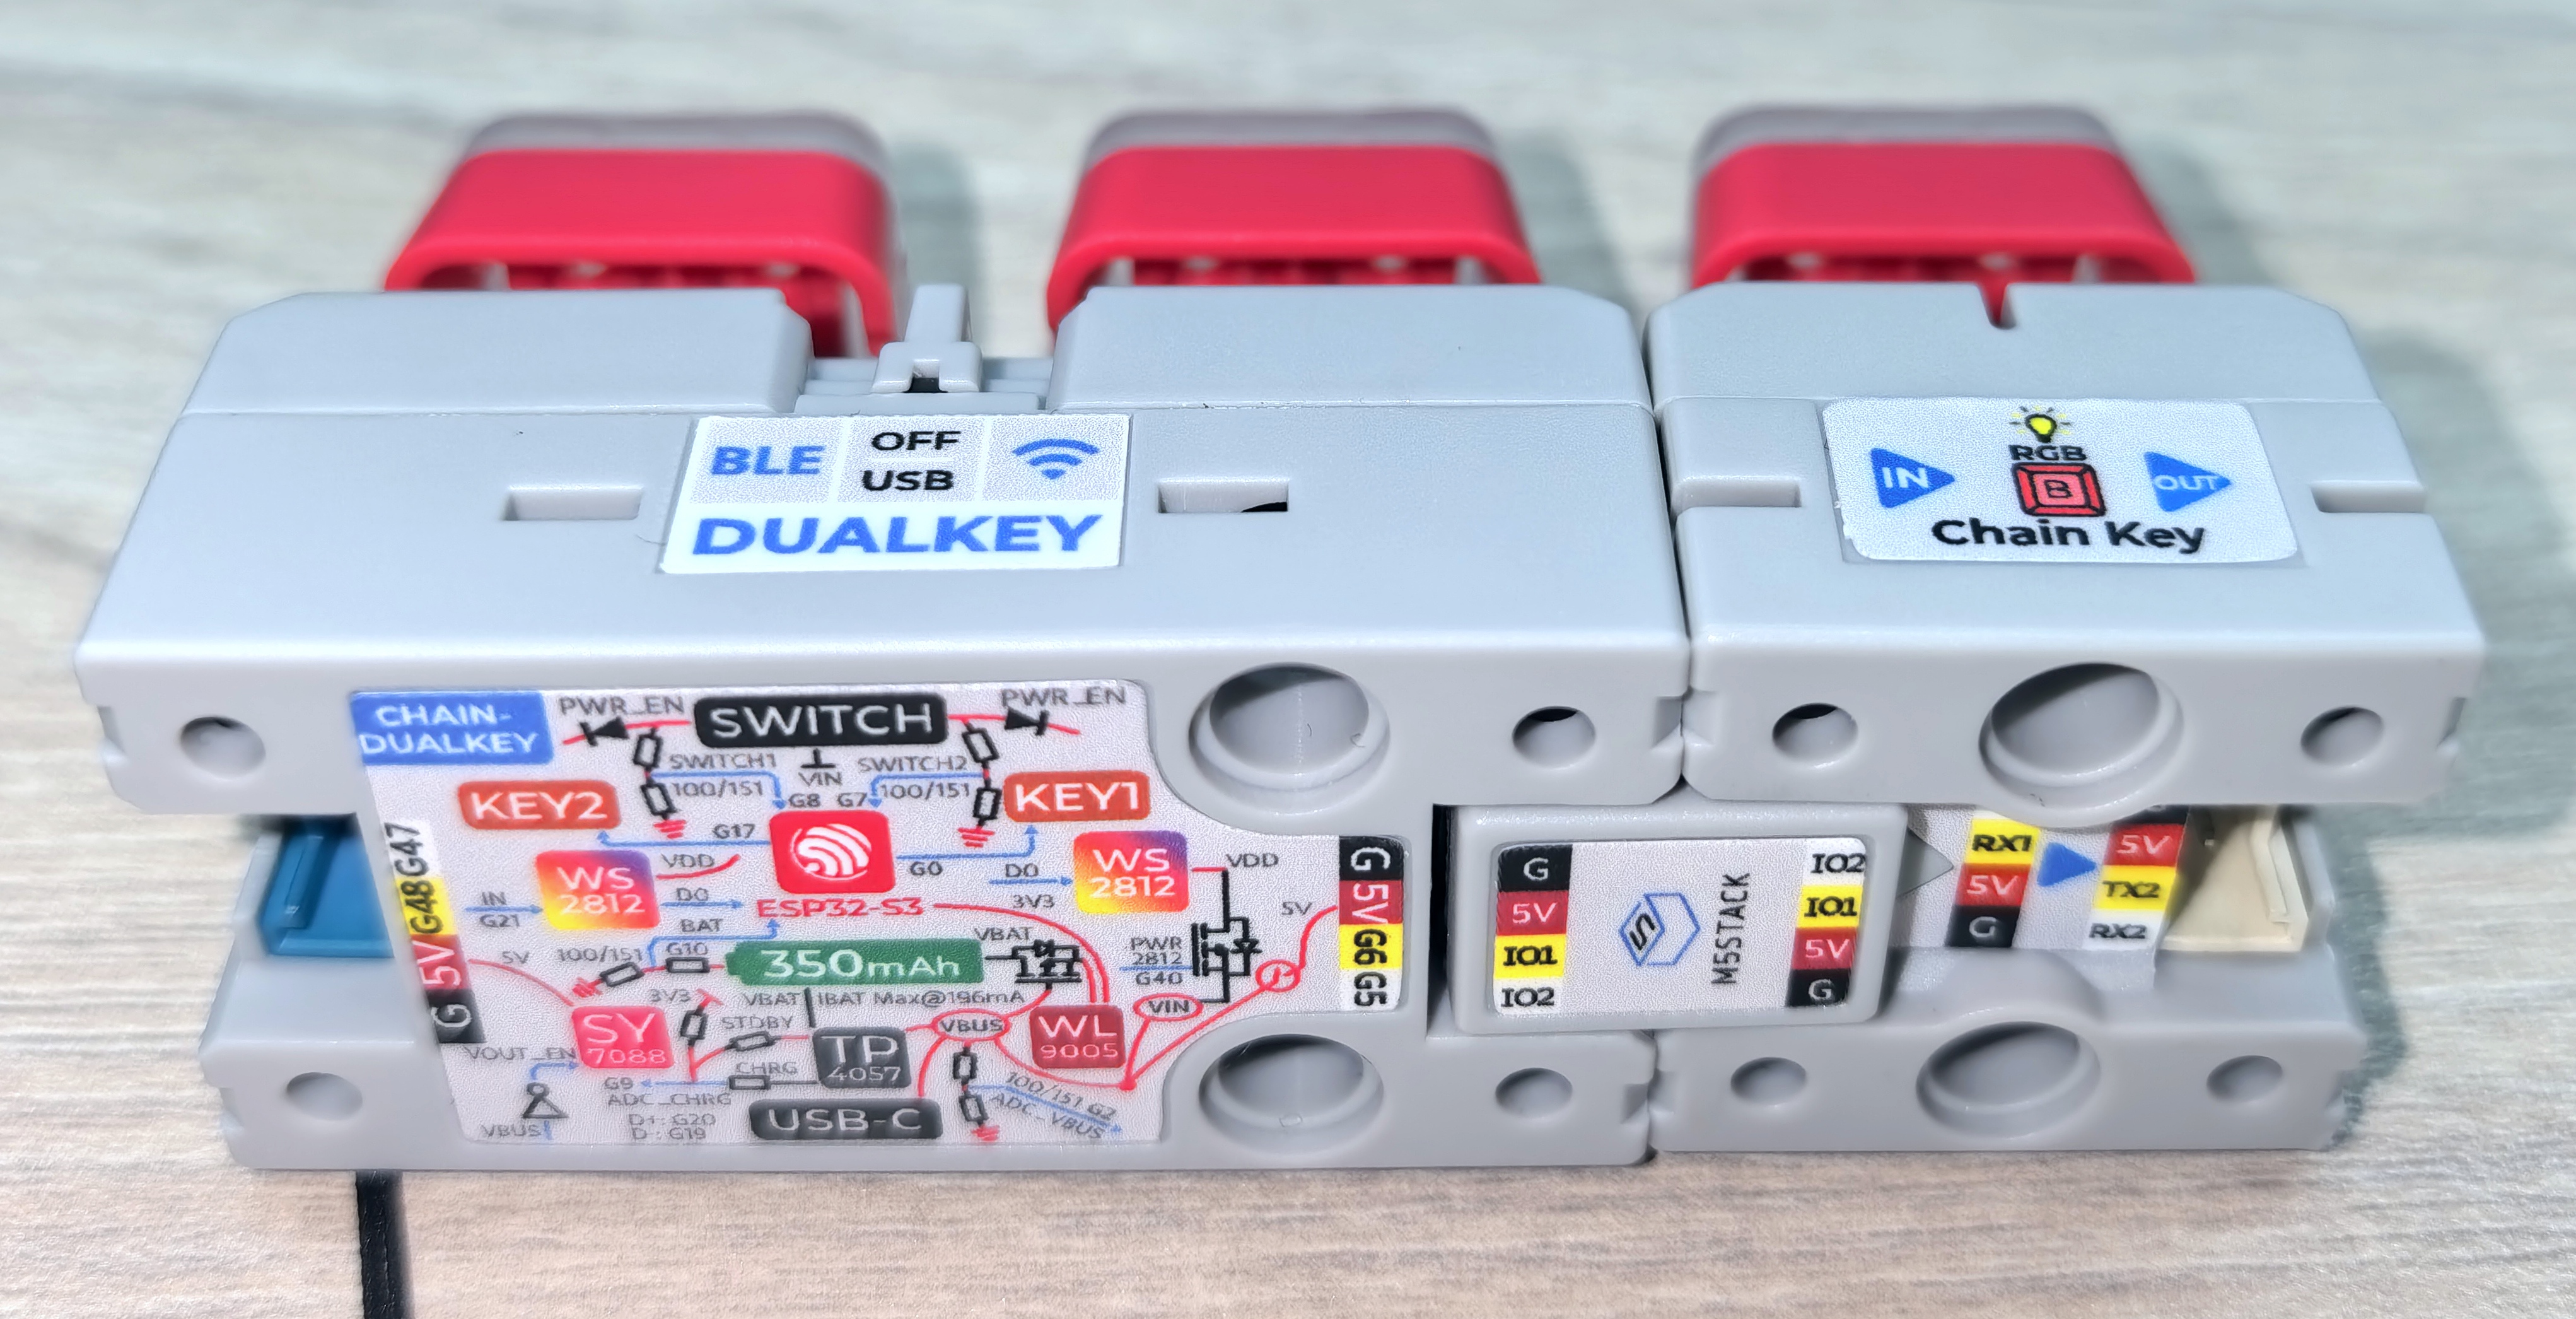
}Chain Bridge コネクタを使用してメインコントローラ Chain DualKey と Chain Key を接続します。接続時は、三角の矢印がメインコントローラ Chain DualKey から外側を向くように注意してください。図を参照してください:
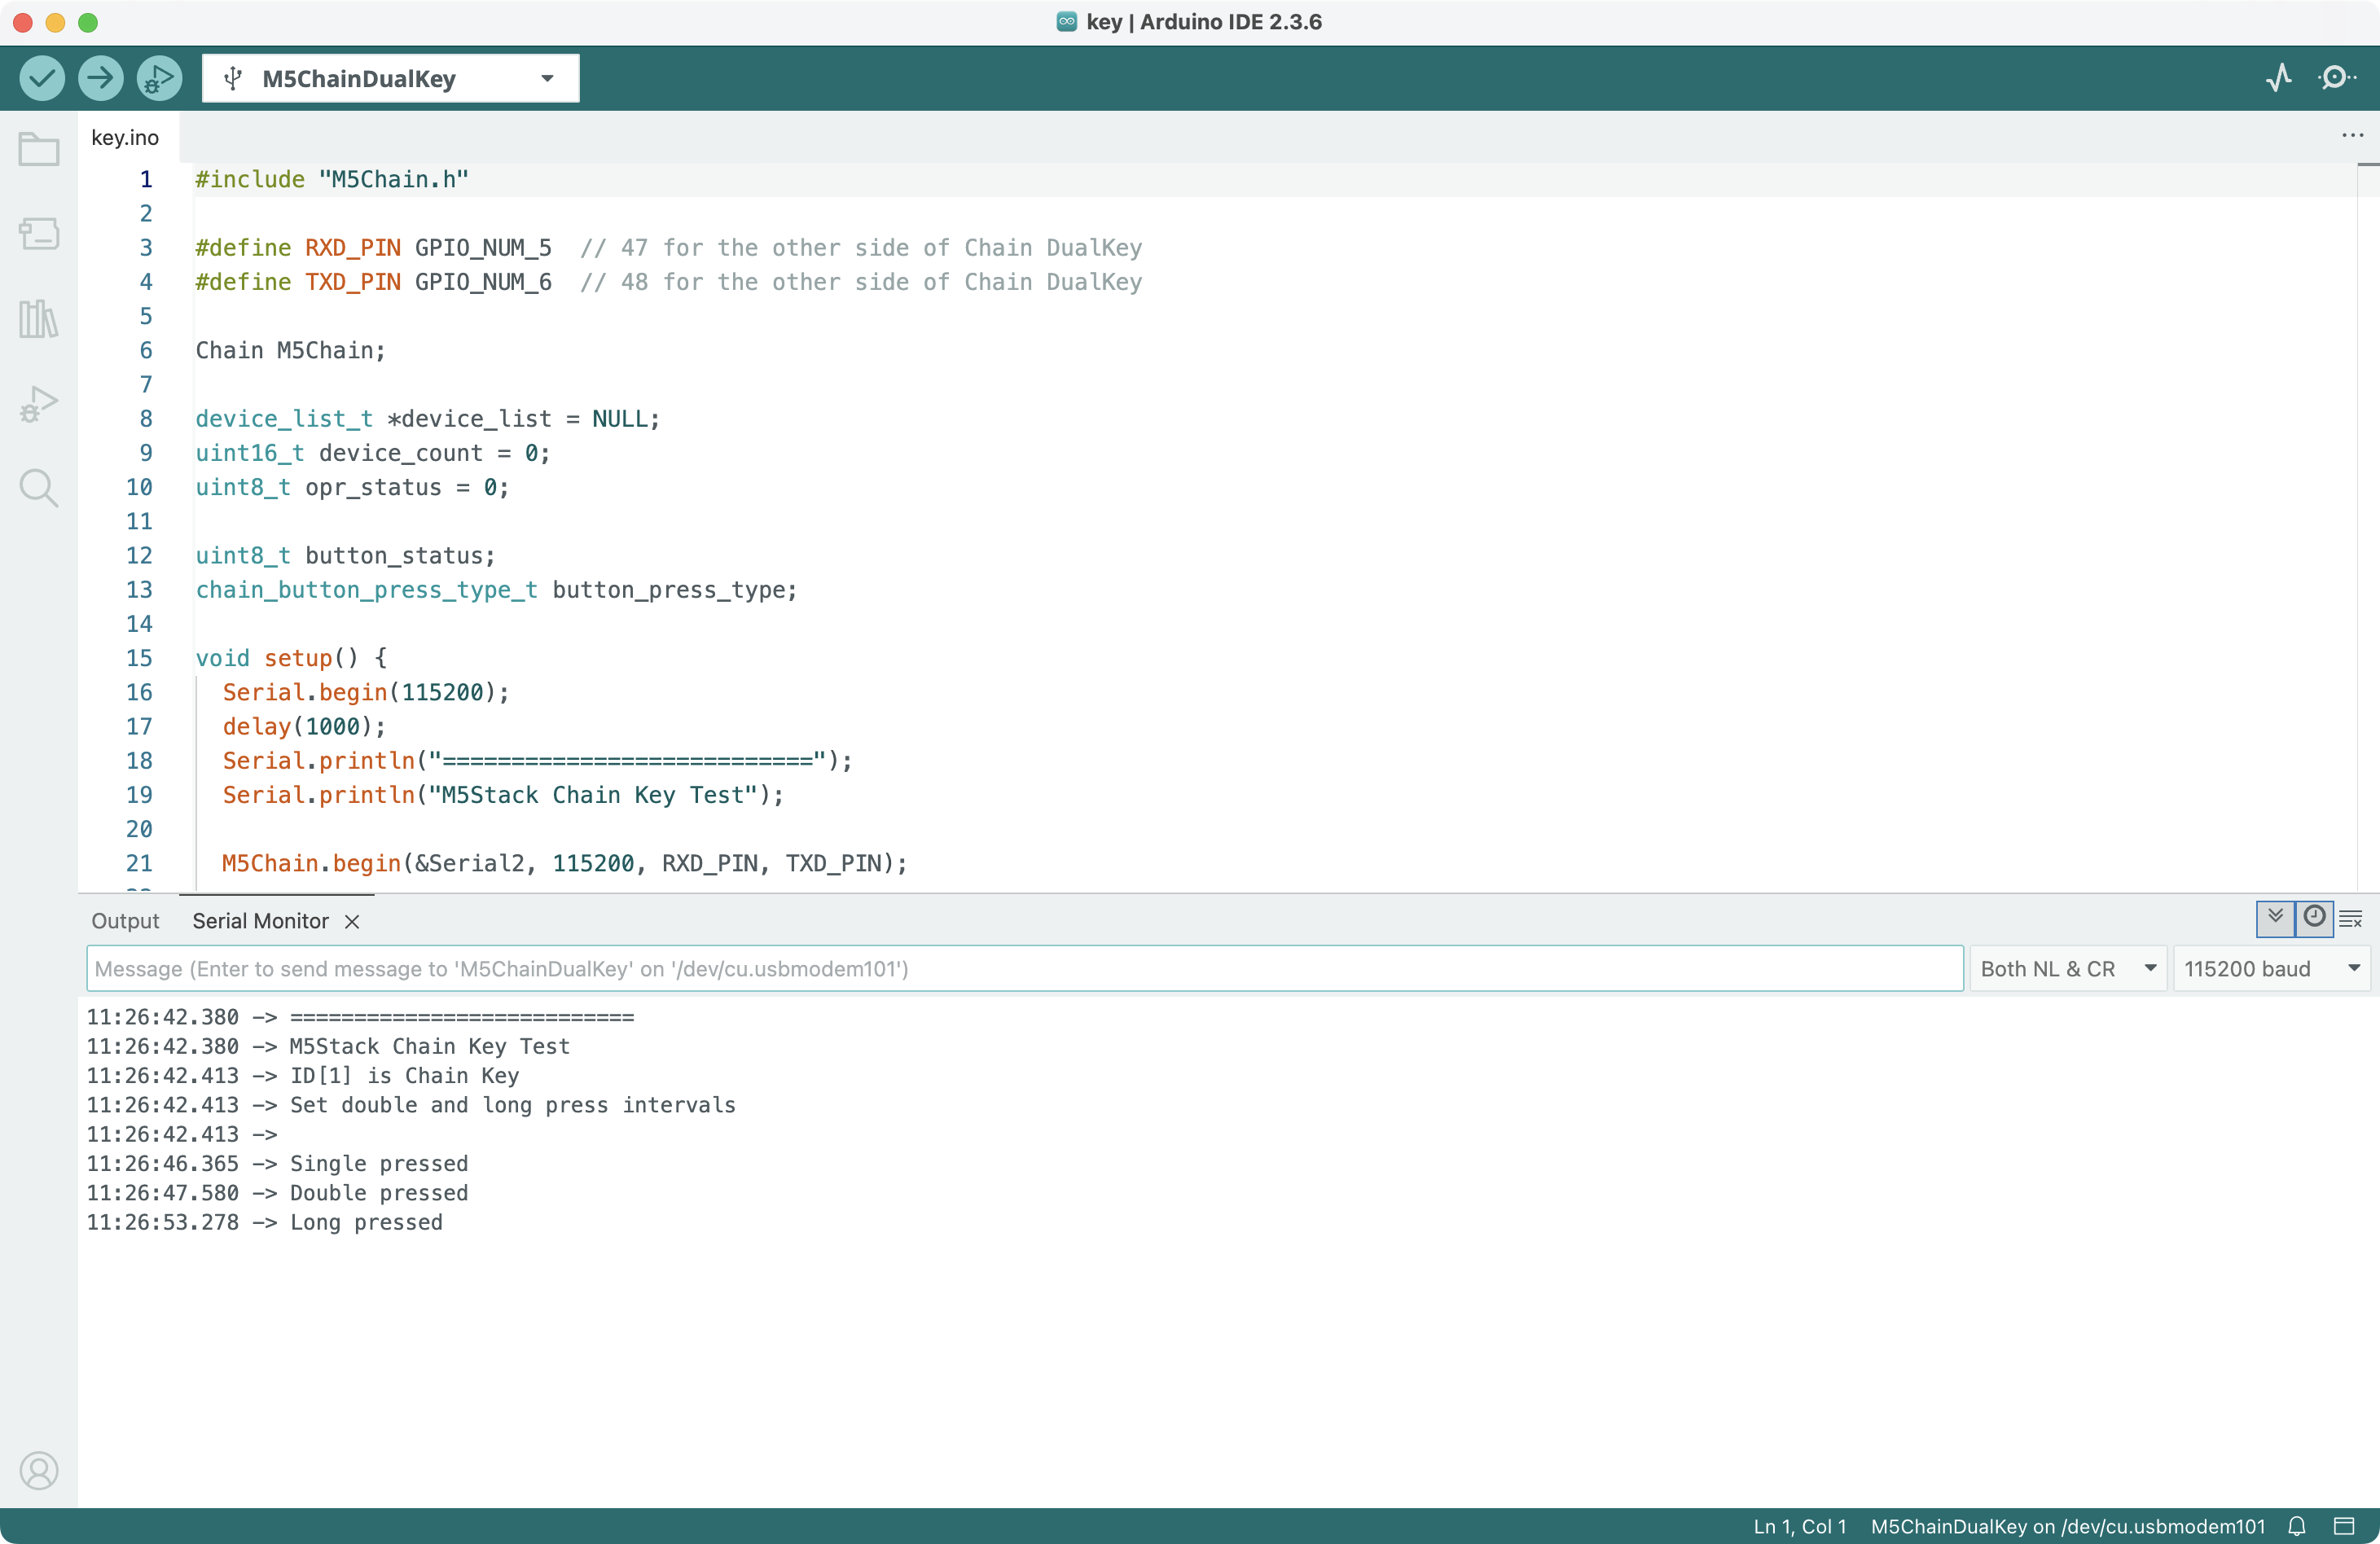
上記のプログラムをコンパイルしてデバイスに書き込み、シリアルモニタを開きます。プログラムはボタンの押下イベント(シングルクリック・ダブルクリック・長押し)を検出してメッセージを出力します:
また、プログラム内の BUTTON_DOUBLE_CLICK_TIME_500MS と BUTTON_LONG_PRESS_TIME_5S を変更することで、ダブルクリックおよび長押しイベントのトリガー間隔時間を設定することができます。
3. 参考リンク
Page Tools