

Arduino 上手教程
2. 设备开发 & 案例程序
3. M5Unified
4. M5GFX
5. 扩展模块
Unit
Module
Atomic
Tab5
IoT
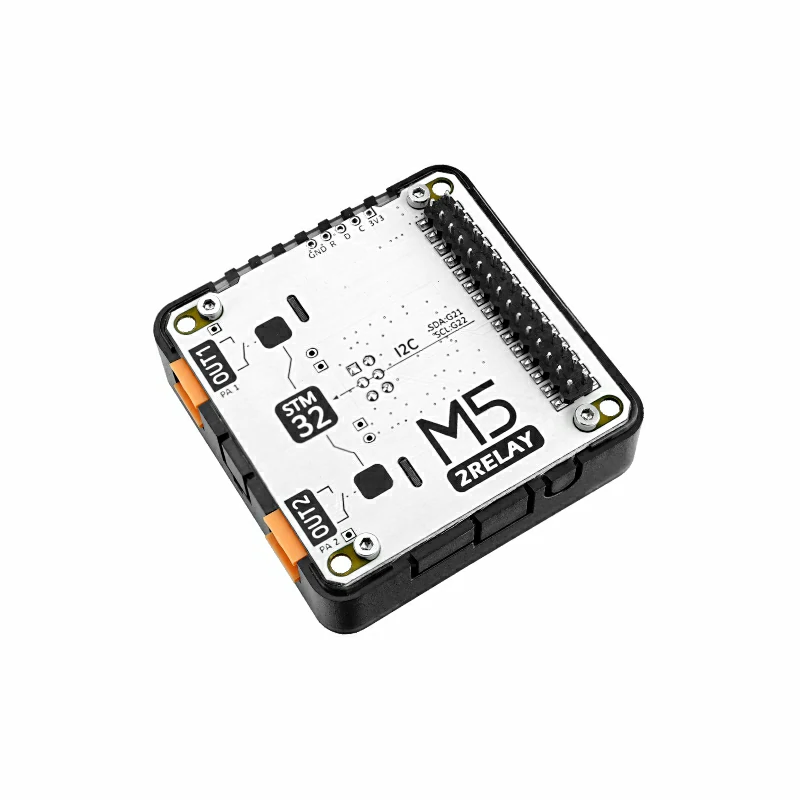
Module13.2 2Relay Arduino 使用教程
1. 准备工作
- 环境配置:参考 Arduino IDE 上手教程 完成 IDE 安装,并根据实际使用的开发板安装对应的板管理与驱动。
- 使用到的驱动库:
- 使用到的硬件产品:

2. 注意事项
高压触点
Module13.2 2Relay 的继电器触点最高支持 AC 250V@5A。接线、拆线或更换负载前必须断开电源,禁止在裸露触点带电时操作。实际使用时请根据负载类型、接线方式和继电器规格书确认安全工作范围。
引脚兼容性
由于每款主机的引脚配置不同,使用前请参考产品文档中的引脚兼容表,并根据实际连接修改案例程序。
3. 案例程序
3.1 继电器控制
cpp
1 2 3 4 5 6 7 8 9 10 11 12 13 14 15 16 17 18 19 20 21 22 23 24 25 26 27 28 29 30 31 32 33 34 35 36 37 38 39 40 41 42 43 44 45 46 47 48 49 50 51 52 53 54 55 56 57 58 59 60 61 62 63 64 65 66 67 68 69 70 71 72 73 74 75 76 77 78 79 80 81 82 83 84 85 86 87 88 89 90 91 92 93 94 95 96 97 98 99 100 101 102 103 104 105 106 107 108 109 110 111 112 113 114 115 116 117 118 119 120 121 122 123 124 125 126 127 128 129 130 131 132 133 134 135 136 137 138 139 140 141 142 143 144 145 146 147 148 149
#include <M5Unified.h>
#include <M5GFX.h>
#include <Wire.h>
#include "MODULE_2RELAY.h"

M5Canvas canvas(&M5.Display);
MODULE_2RELAY RELAY;

constexpr uint8_t RELAY_I2C_ADDRESS = MODULE_2RELAY_ADDR;
constexpr uint8_t RELAY_SDA = 12;
constexpr uint8_t RELAY_SCL = 11;

uint8_t stepChannel = 0;

constexpr int16_t TOUCH_BUTTON_Y = 176;
constexpr int16_t TOUCH_BUTTON_HEIGHT = 58;
constexpr int16_t TOUCH_BUTTON_WIDTH = 100;
constexpr int16_t TOUCH_BUTTON_GAP = 6;

int16_t getButtonX(uint8_t index)
{
    return TOUCH_BUTTON_GAP + index * (TOUCH_BUTTON_WIDTH + TOUCH_BUTTON_GAP);
}

int8_t getTouchedButton(int16_t x, int16_t y)
{
    if (y < TOUCH_BUTTON_Y || y >= TOUCH_BUTTON_Y + TOUCH_BUTTON_HEIGHT) {
        return -1;
    }

    for (uint8_t index = 0; index < 3; ++index) {
        const int16_t buttonX = getButtonX(index);
        if (x >= buttonX && x < buttonX + TOUCH_BUTTON_WIDTH) {
            return index;
        }
    }
    return -1;
}

void drawTouchButton(uint8_t index, const char *label)
{
    const int16_t x = getButtonX(index);
    canvas.fillRoundRect(x, TOUCH_BUTTON_Y, TOUCH_BUTTON_WIDTH,
                         TOUCH_BUTTON_HEIGHT, 5, TFT_DARKGREY);
    canvas.drawRoundRect(x, TOUCH_BUTTON_Y, TOUCH_BUTTON_WIDTH,
                         TOUCH_BUTTON_HEIGHT, 5, TFT_ORANGE);
    canvas.drawString(label, x + TOUCH_BUTTON_WIDTH / 2,
                      TOUCH_BUTTON_Y + TOUCH_BUTTON_HEIGHT / 2);
}

void drawStatus(const char *action)
{
    canvas.fillSprite(TFT_BLACK);
    canvas.setTextDatum(MC_DATUM);
    canvas.setTextColor(TFT_WHITE);
    canvas.drawString("Module13.2 2Relay", 160, 12);
    canvas.drawString(action, 160, 32);

    for (uint8_t channel = 0; channel < 2; ++channel) {
        const int16_t y = 50 + 42 * channel;
        const bool state = RELAY.getRelayState(channel);

        if (state) {
            canvas.fillRect(12, y, 136, 32, TFT_GREEN);
        } else {
            canvas.drawRect(12, y, 136, 32, TFT_LIGHTGREY);
        }
        canvas.drawString("CH" + String(channel + 1) +
                              (state ? ": ON" : ": OFF"),
                          80, y + 16);
    }

    canvas.drawString("FW: " + String(RELAY.getVersion()),
                      160, 138);
    drawTouchButton(0, "REVERSE");
    drawTouchButton(1, "STEP");
    drawTouchButton(2, "ALL");
    canvas.pushSprite(0, 0);
}

void drawInitError()
{
    canvas.fillSprite(TFT_BLACK);
    canvas.setTextDatum(MC_DATUM);
    canvas.setTextColor(TFT_RED);
    canvas.drawString("Module13.2 2Relay ERROR", 160, 108);
    canvas.setTextColor(TFT_WHITE);
    canvas.drawString("Check address / wiring", 160, 136);
    canvas.pushSprite(0, 0);
}

void setup()
{
    M5.begin();
    Serial.begin(115200);

    canvas.setColorDepth(8);
    canvas.setFont(&fonts::FreeMonoBold9pt7b);
    canvas.setTextSize(1);
    canvas.createSprite(M5.Display.width(), M5.Display.height());

    // while(!RELAY.begin(&Wire1, RELAY_SDA, RELAY_SCL, RELAY_I2C_ADDRESS)){
    while(!RELAY.begin(&M5.In_I2C, RELAY_I2C_ADDRESS)){
        Serial.println("Module13.2 2Relay INIT ERROR");
        drawInitError();
    }
    Serial.println("Module13.2 2Relay INIT SUCCESS");
    drawStatus("Ready");
}

void loop()
{
    M5.update();
    const auto touch = M5.Touch.getDetail();

    if (touch.wasClicked()) {
        switch (getTouchedButton(touch.x, touch.y)) {
        case 0:
            drawStatus(RELAY.reverseRelay() ? "Reverse" : "Reverse Error");
            break;

        case 1: {
            const bool currentState = RELAY.getRelayState(stepChannel);
            if (RELAY.setRelay(stepChannel, !currentState)) {
                stepChannel = (stepChannel + 1) % 2;
                drawStatus("Step");
            } else {
                drawStatus("Step Error");
            }
            break;
        }

        case 2: {
            const bool channel0 = RELAY.getRelayState(0);
            const bool channel1 = RELAY.getRelayState(1);
            const bool allOn = channel0 && channel1;
            const bool success = RELAY.setAllRelay(!allOn);
            drawStatus(success ? (allOn ? "All OFF" : "All ON")
                               : "All Error");
            break;
        }

        default:
            break;
        }
    }

    delay(20);
}3.2 配置 I2C 地址
本案例使用 CoreS3 触摸屏和 setDeviceAddr() 在 0x26 与 0x66 之间切换 Module13.2 2Relay 的 I2C 地址。程序启动时会依次检测 0x26 和 0x66:检测到 0x26 时,按钮目标地址为 0x66;检测到 0x66 时,按钮目标地址为 0x26。如果两个地址都未检测到,屏幕会显示错误信息。代码支持 Wire1 和 M5.In_I2C 两种 I2C 初始化方式,按照 3.1 节通过注释和取消注释对应的 begin() 调用进行二选一。点击屏幕上的 SET ADDRESS 区域执行切换。
cpp
1 2 3 4 5 6 7 8 9 10 11 12 13 14 15 16 17 18 19 20 21 22 23 24 25 26 27 28 29 30 31 32 33 34 35 36 37 38 39 40 41 42 43 44 45 46 47 48 49 50 51 52 53 54 55 56 57 58 59 60 61 62 63 64 65 66 67 68 69 70 71 72 73 74 75 76 77 78 79 80 81 82 83 84 85 86 87 88 89 90 91 92 93 94 95 96 97 98 99 100 101 102
#include <M5Unified.h>
#include <M5GFX.h>
#include <Wire.h>
#include "MODULE_2RELAY.h"

MODULE_2RELAY RELAY;

constexpr uint8_t RELAY_ADDRESS_26 = 0x26;
constexpr uint8_t RELAY_ADDRESS_66 = 0x66;
constexpr uint8_t RELAY_SDA = 12;
constexpr uint8_t RELAY_SCL = 11;

constexpr int16_t ADDRESS_BUTTON_X = 60;
constexpr int16_t ADDRESS_BUTTON_Y = 110;
constexpr int16_t ADDRESS_BUTTON_WIDTH = 200;
constexpr int16_t ADDRESS_BUTTON_HEIGHT = 60;

bool moduleReady = false;
uint8_t currentRelayAddress = 0;
uint8_t newRelayAddress = 0;

void drawAddressScreen(const char *result = nullptr)
{
    M5.Display.fillScreen(TFT_BLACK);
    M5.Display.setFont(&fonts::FreeMonoBold9pt7b);
    M5.Display.setTextSize(1);
    M5.Display.setTextDatum(MC_DATUM);
    M5.Display.setTextColor(TFT_WHITE);
    M5.Display.drawString("Module13.2 2Relay", 160, 32);
    const String currentAddress = moduleReady ? String(currentRelayAddress, HEX)
                                              : String("--");
    const String newAddress = moduleReady ? String(newRelayAddress, HEX)
                                          : String("--");
    M5.Display.drawString("Current: 0x" + currentAddress +
                              " -> New: 0x" + newAddress,
                          160, 75);
    M5.Display.drawRoundRect(ADDRESS_BUTTON_X, ADDRESS_BUTTON_Y,
                             ADDRESS_BUTTON_WIDTH, ADDRESS_BUTTON_HEIGHT,
                             6, TFT_ORANGE);
    M5.Display.drawString("SET ADDRESS", 160, 140);

    if (result != nullptr) {
        M5.Display.drawString(result, 160, 205);
    }
}

void setup()
{
    M5.begin();
    Serial.begin(115200);

    M5.Display.setFont(&fonts::FreeMonoBold9pt7b);
    // moduleReady = RELAY.begin(&Wire1, RELAY_SDA, RELAY_SCL, RELAY_ADDRESS_26);
    moduleReady = RELAY.begin(&M5.In_I2C, RELAY_ADDRESS_26);
    if (moduleReady) {
        currentRelayAddress = RELAY_ADDRESS_26;
        newRelayAddress = RELAY_ADDRESS_66;
    } else {
        // moduleReady = RELAY.begin(&Wire1, RELAY_SDA, RELAY_SCL, RELAY_ADDRESS_66);
        moduleReady = RELAY.begin(&M5.In_I2C, RELAY_ADDRESS_66);
        if (moduleReady) {
            currentRelayAddress = RELAY_ADDRESS_66;
            newRelayAddress = RELAY_ADDRESS_26;
        }
    }
    if (moduleReady) {
        Serial.printf("Module13.2 2Relay found at 0x%02X\n",
                      currentRelayAddress);
        drawAddressScreen();
    } else {
        Serial.println("Module13.2 2Relay INIT ERROR");
        drawAddressScreen("Module13.2 2Relay ERROR");
    }
}

void loop()
{
    M5.update();
    const auto touch = M5.Touch.getDetail();

    if (touch.wasClicked() && touch.x >= ADDRESS_BUTTON_X &&
        touch.x < ADDRESS_BUTTON_X + ADDRESS_BUTTON_WIDTH &&
        touch.y >= ADDRESS_BUTTON_Y &&
        touch.y < ADDRESS_BUTTON_Y + ADDRESS_BUTTON_HEIGHT) {
        if (!moduleReady) {
            drawAddressScreen("Module not found");
        } else if (RELAY.setDeviceAddr(newRelayAddress)) {
            currentRelayAddress = newRelayAddress;
            newRelayAddress = (currentRelayAddress == RELAY_ADDRESS_26)
                                  ? RELAY_ADDRESS_66
                                  : RELAY_ADDRESS_26;
            Serial.printf("I2C address updated to 0x%02X\n",
                          currentRelayAddress);
            drawAddressScreen("Success!");
        } else {
            Serial.println("I2C address update failed");
            drawAddressScreen("Failed!");
        }
    }

    delay(20);
}4. 编译上传
- 1. 进入下载模式:CoreS3 长按复位按键 (大约 2 秒) 直到内部绿色 LED 灯亮起后松开按键。松开后绿色 LED 灯熄灭,表示设备已进入下载模式,等待烧录。
说明
不同设备进行程序烧录前需要进入下载模式,不同的主控设备该步骤可能有所不同。详情可参考Arduino IDE上手教程页面底部的设备程序下载教程列表,查看具体的操作方式。
.gif)
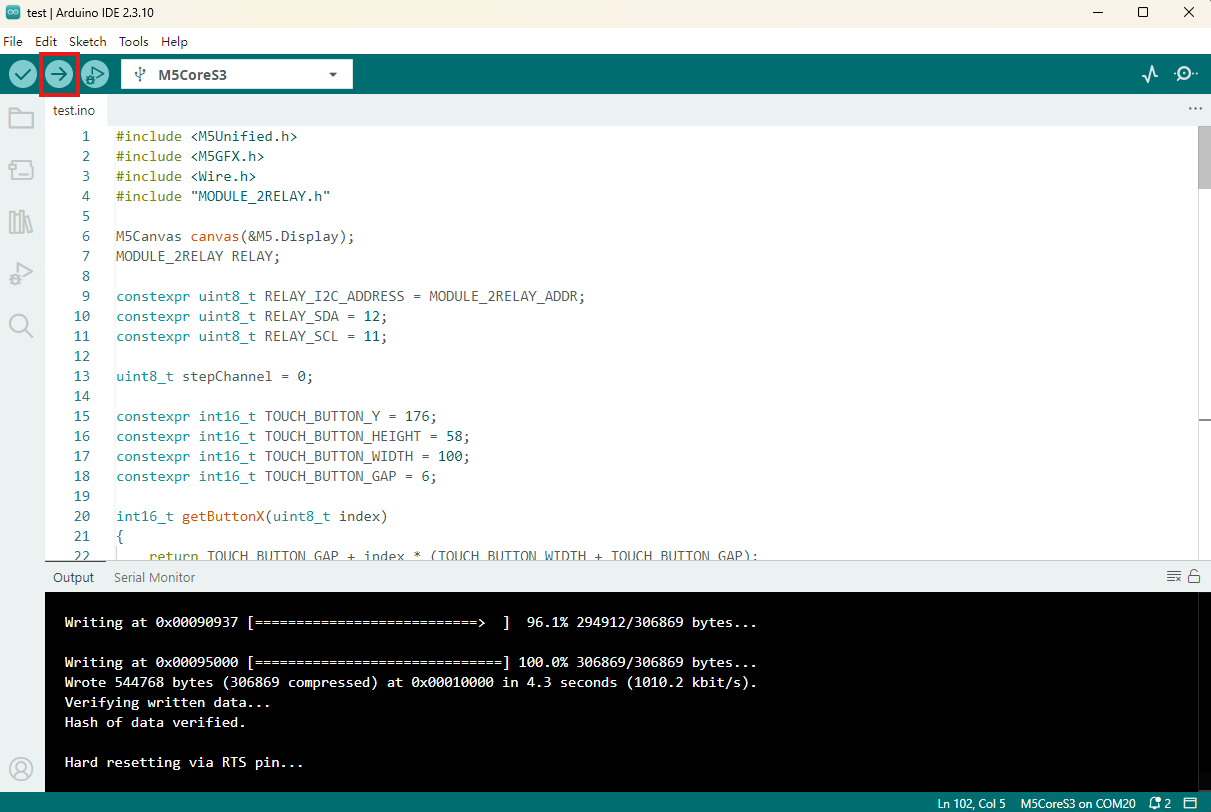
- 2. 选中设备端口,点击 Arduino IDE 左上角编译上传按钮,等待程序完成编译并上传至设备。
5. 继电器控制
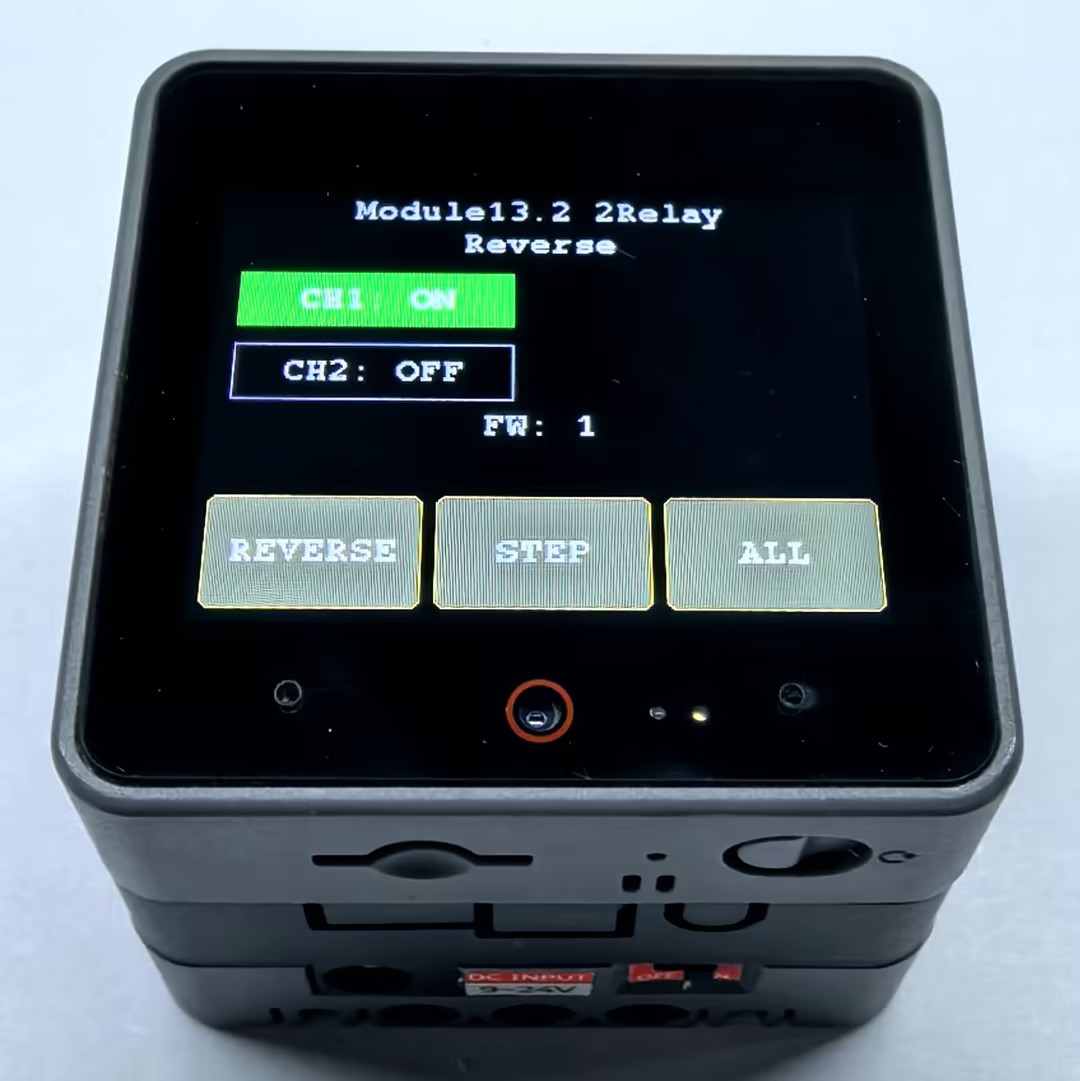
- 烧录完成后,重启 CoreS3 运行程序,点击
REVERSE按钮会将两个继电器的状态反转,点击STEP按钮将依次切换两个继电器的状态,点击ALL按钮会将两个继电器同时打开或关闭。
Page Tools