

Arduino Quick Start
2. Devices & Examples
3. M5Unified
4. M5GFX
5. Extensions
Unit
Module
Atomic
Tab5
IoT
Accessories
ToughC5 RS485 Communication
ToughC5 RS485 communication example program.
Example Program
Compilation Requirements
- M5Stack Board Manager Version >=
3.3.9 - Board Selection =
M5ToughC5 - M5Unified Library Version >=
0.2.22 - M5GFX Library Version >=
0.2.28
cpp
1 2 3 4 5 6 7 8 9 10 11 12 13 14 15 16 17 18 19 20 21 22 23 24 25 26 27 28 29 30 31 32 33 34 35 36 37 38 39 40 41 42 43 44 45 46 47 48 49 50 51 52 53 54
#include <M5Unified.h>
#include <M5GFX.h>

static int cnt = 0;          // Counter for RS485 sent messages (increments per transmission)
String recvBuffer;           // Buffer to store received RS485 data

void setup() {
    M5.begin();
    M5.Display.clear();
    M5.Display.setFont(&fonts::FreeMonoBold9pt7b);
    M5.Display.drawString("Send :", 5, 5);
    M5.Display.drawString("Receive :", 5, 125);

    Serial.begin(115200);

    // ESP32-C5 GPIO23=RX, GPIO24=TX on the ToughC5 M5BUS
    Serial1.begin(115200, SERIAL_8N1, 23, 24);
}

void loop() {
    M5.update();

    // --- Send Data ---
    String msg = "RS485 #" + String(++cnt);
    Serial1.println(msg);
    Serial.printf("Send: %s\n", msg.c_str());

    // Display sent message on screen
    M5.Display.fillRect(0, 25, 320, 30, TFT_BLACK);
    M5.Display.setTextColor(GREEN);
    M5.Display.setCursor(20, 25);
    M5.Display.printf("%s\n", msg.c_str());

    // --- Receive Data ---
    recvBuffer = "";
    while (Serial1.available()) {
        char ch = Serial1.read();
        recvBuffer += ch;
    }

    // If valid data is received
    if (recvBuffer.length() > 0) {
        Serial.print("Recv: ");
        Serial.print(recvBuffer);

        // Display received message on screen
        M5.Display.setTextColor(YELLOW);
        M5.Display.fillRect(0, 145, 320, 30, TFT_BLACK);
        M5.Display.setCursor(20, 145);
        M5.Display.printf("%s", recvBuffer.c_str());
    }

    delay(2000);
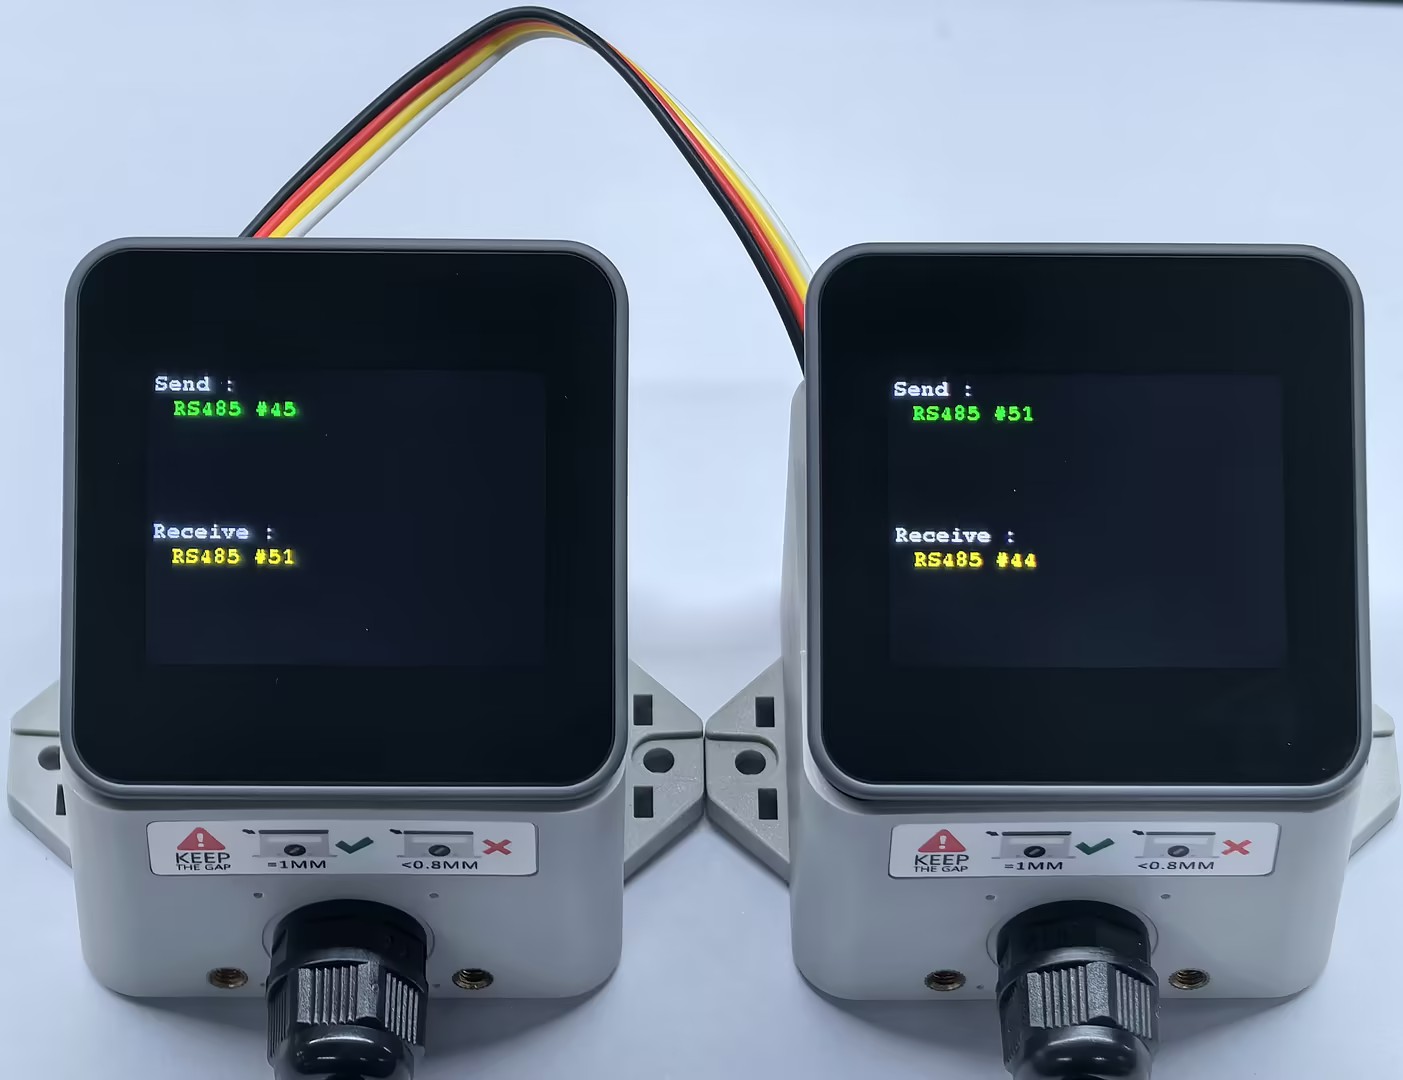
}The program sends a data packet through the RS485 interface every 2 seconds while listening for and receiving data over the same interface. You can view the transmitted and received data in the serial monitor and on the device display. The program uses the Serial2 object to configure and operate the RS485 interface. You can change the data content and transmission interval as needed.
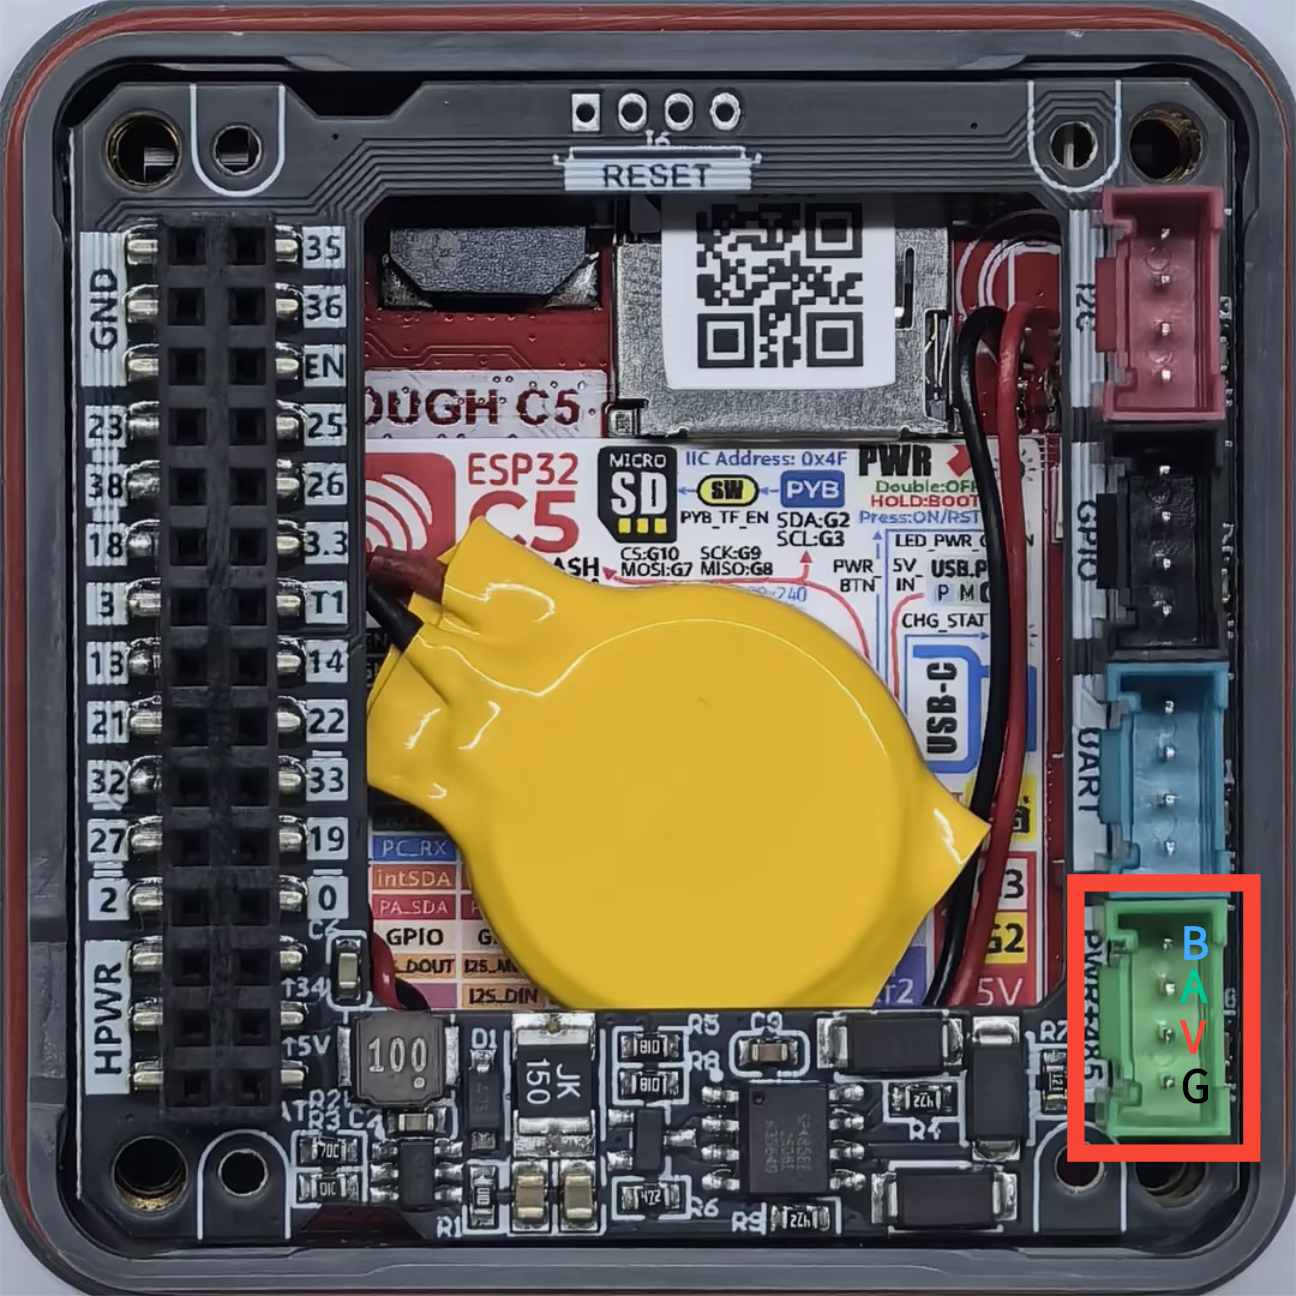
The Tough RS485 interface is on the Tough Ext Board. It is the green port, as shown below:
The example output is shown below:
Page Tools