

Arduino Quick Start
2. Devices & Examples
Demo Board-SHT30
3. M5Unified
4. M5GFX
5. Extensions
Unit
Module
Atomic
Tab5
IoT
Accessories
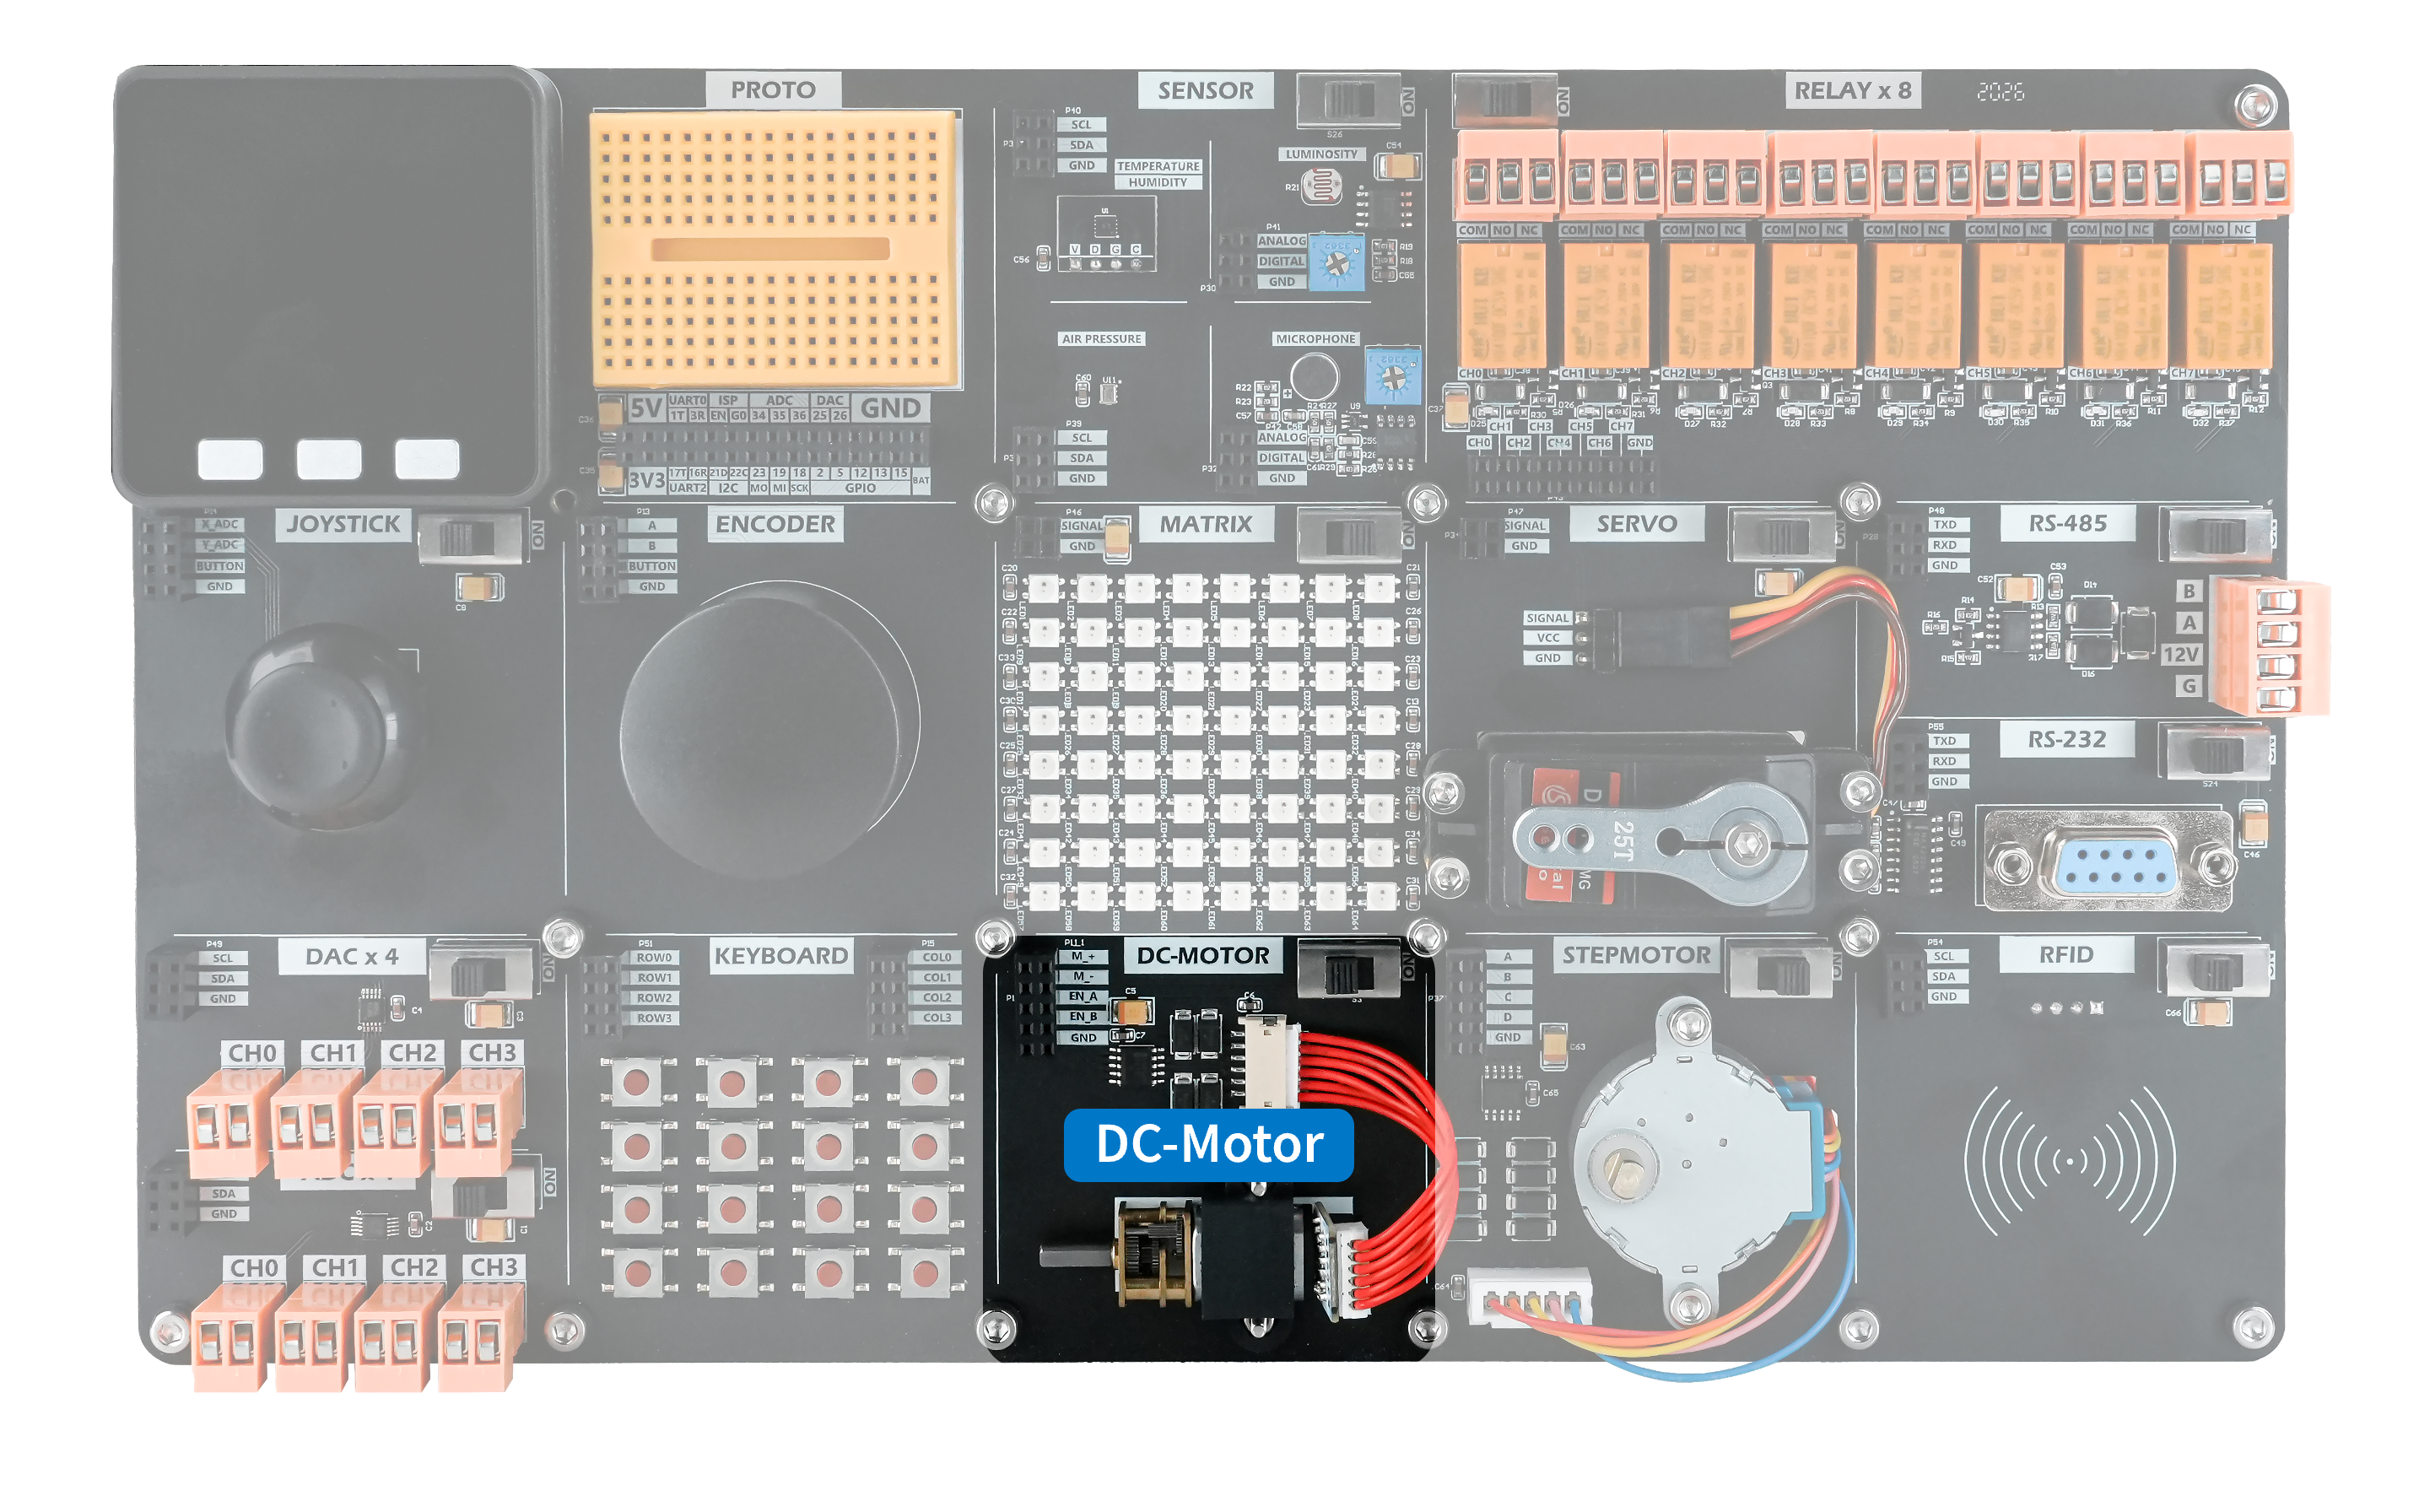
DC-Motor Module
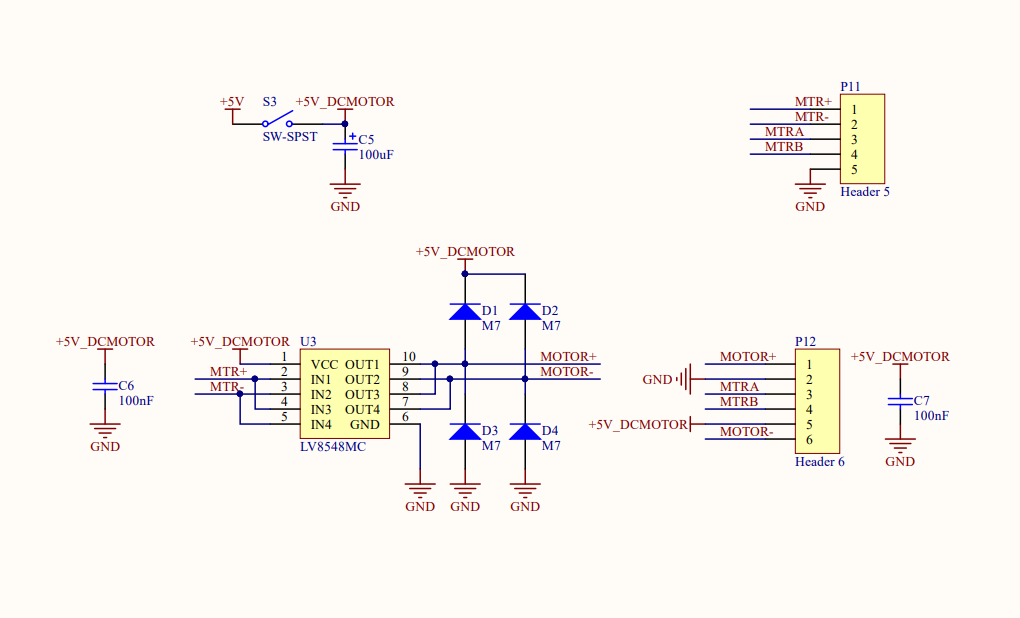
The DC Motor is a brushed DC motor module with feedback, built around the LV8548MC motor driver. The M+ and M- inputs control the rotation direction. When M+ is HIGH and M- is LOW, the motor rotates forward. When M+ is LOW and M- is HIGH, it rotates in reverse. When both inputs are LOW, the motor brakes.
Hardware Connection
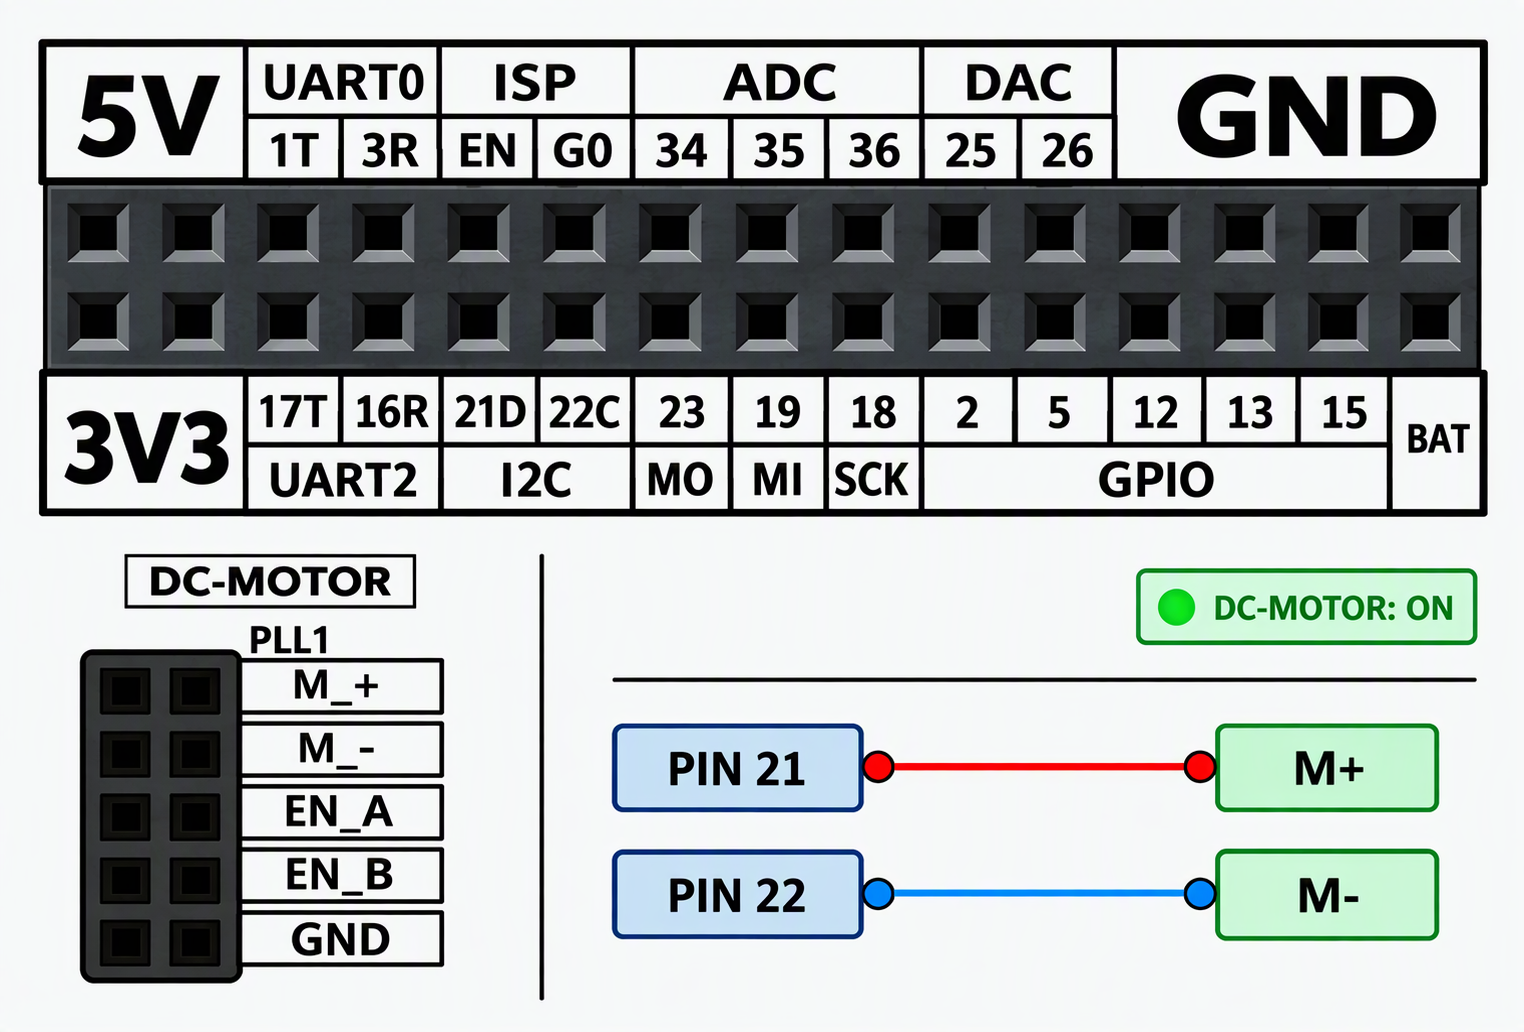
Connect control pins PIN21 and PIN22 to the module's M+ and M- inputs, respectively, and turn on the independent power supply.
Example Program
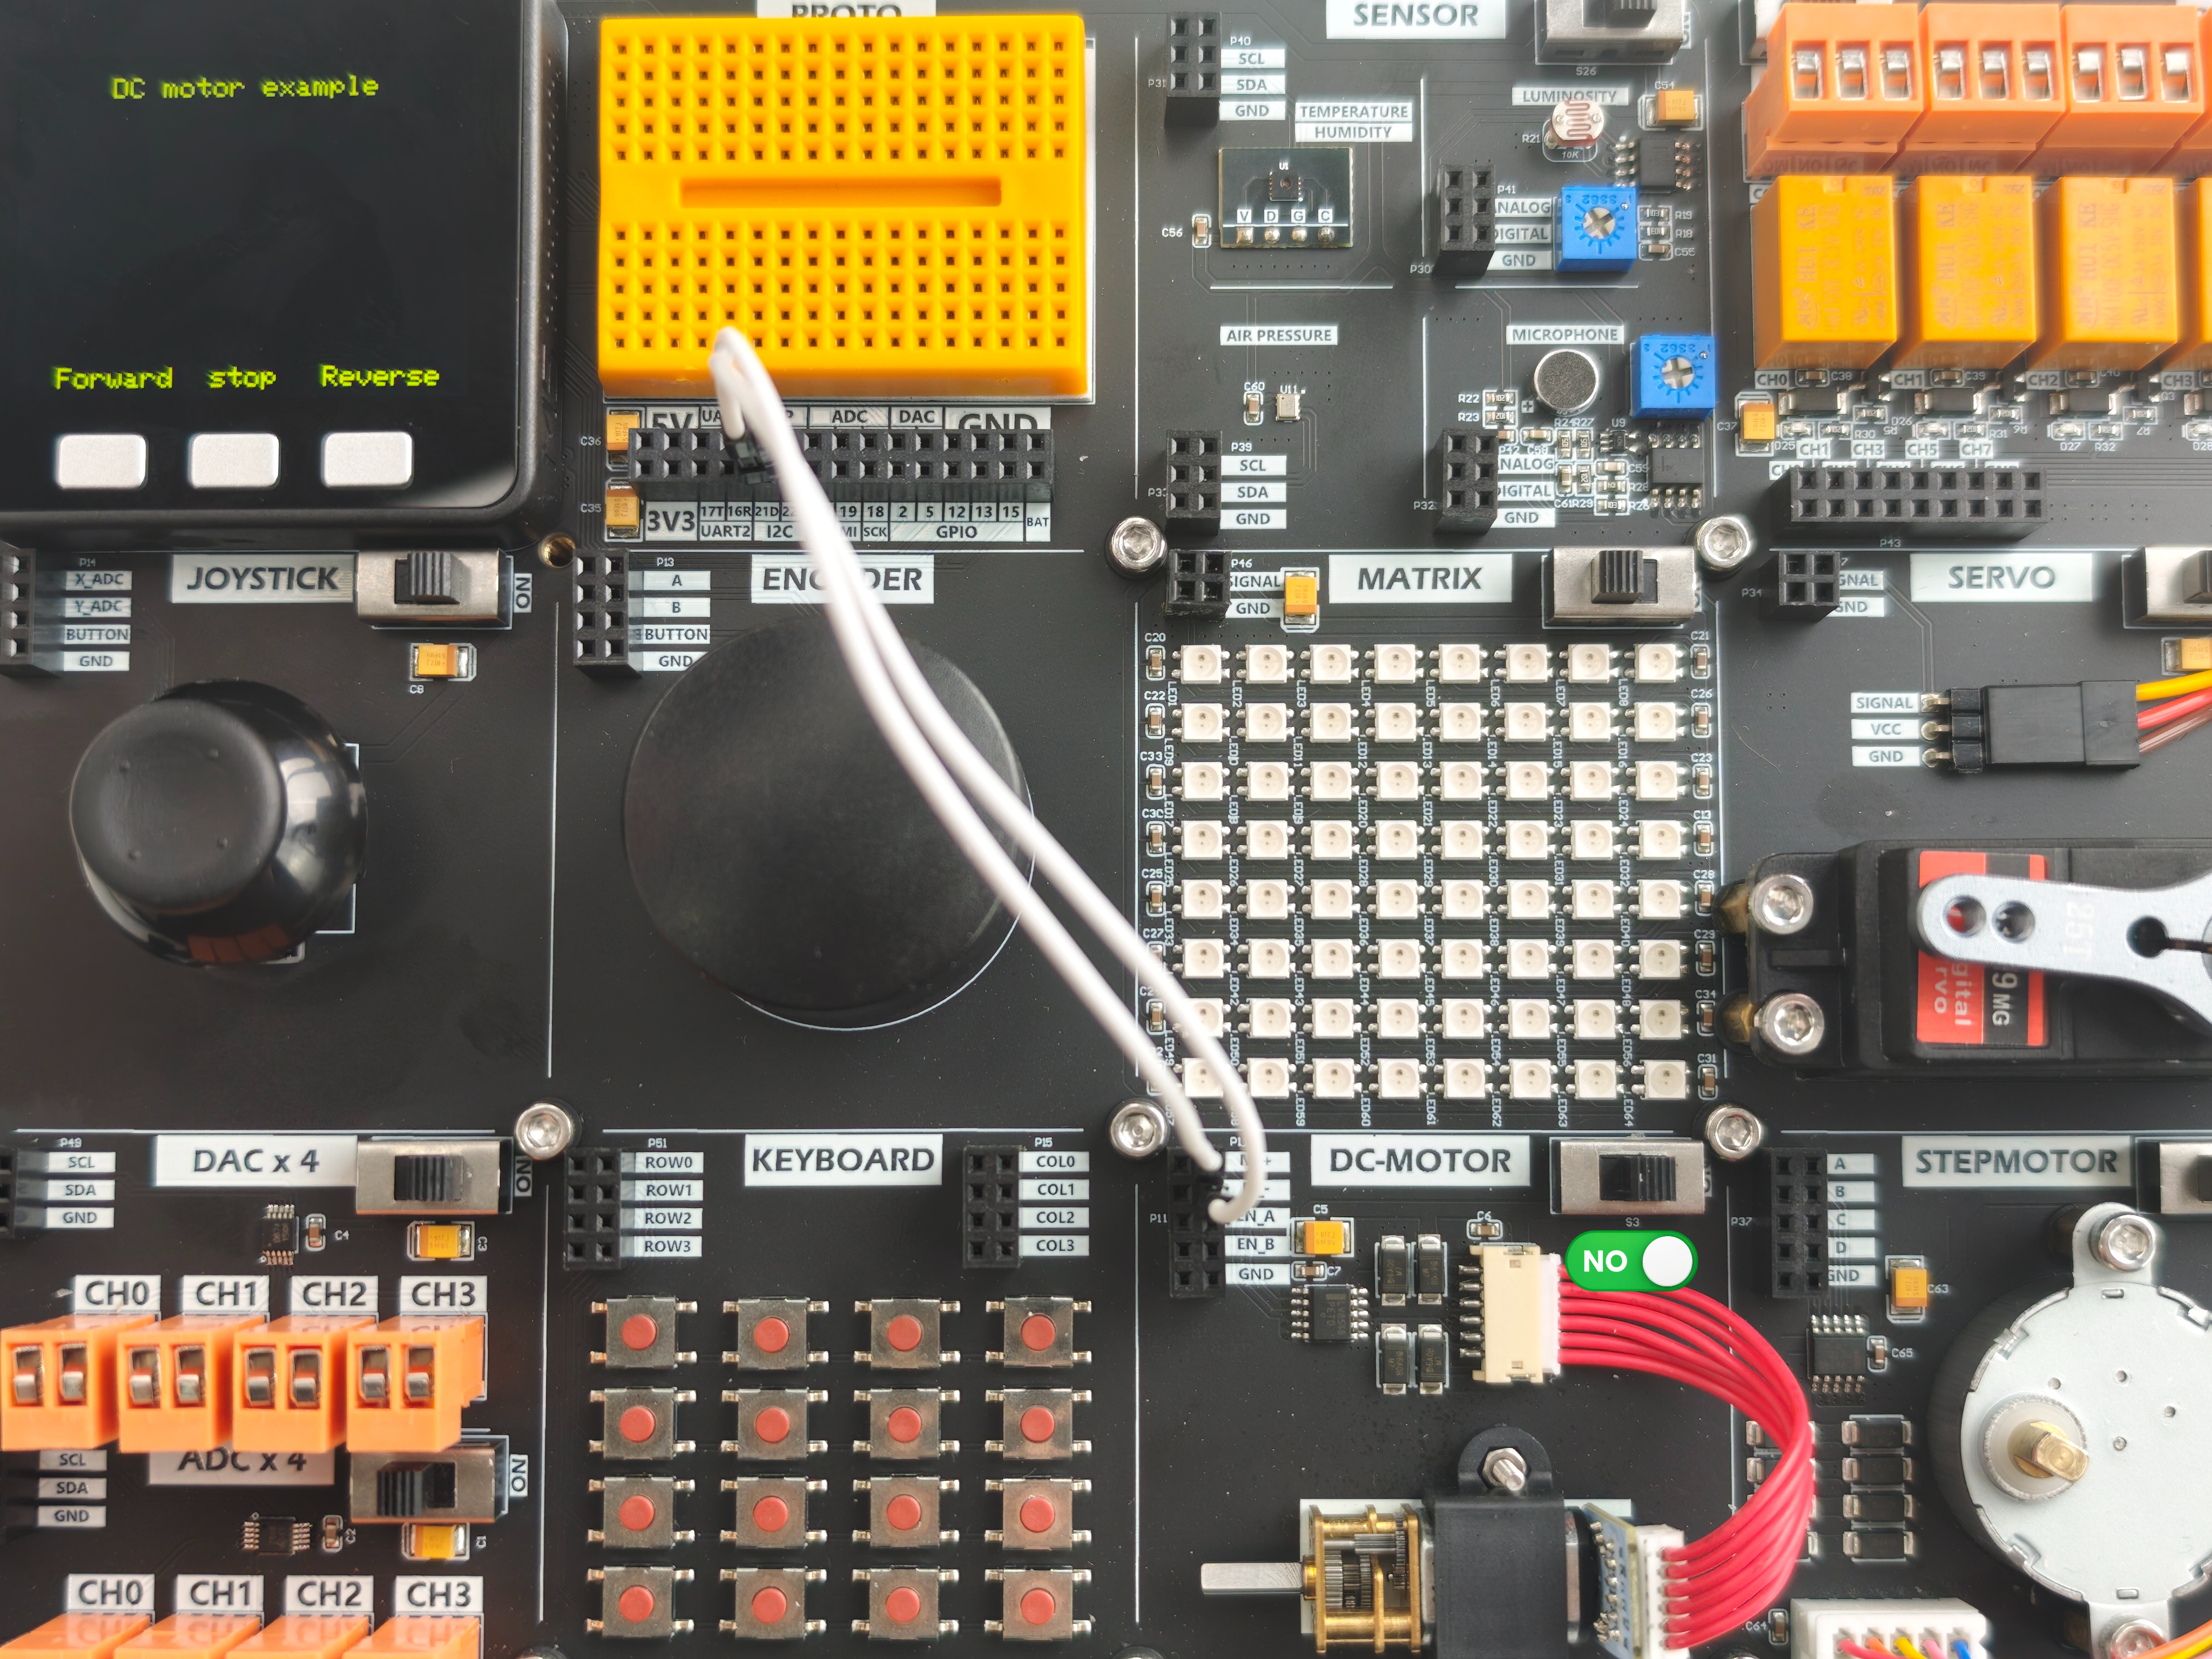
This example uses buttons A, B, and C to control forward rotation, stop, and reverse rotation, while displaying the button history on the screen.
cpp
1 2 3 4 5 6 7 8 9 10 11 12 13 14 15 16 17 18 19 20 21 22 23 24 25 26 27 28 29 30 31 32 33 34 35 36 37 38 39 40 41 42 43 44 45 46 47 48 49 50 51 52 53 54 55 56 57 58 59 60 61 62 63 64 65 66 67 68
#include "M5Unified.h"
#include <M5GFX.h>

constexpr int kTextX      = 10;
constexpr int kTextY      = 50;
constexpr int kCharWidth  = 12;
constexpr int kCharHeight = 16;

int cursorX = kTextX;
int cursorY = kTextY;

void appendChar(char c) {
  M5.Lcd.setCursor(cursorX, cursorY);
  M5.Lcd.print(c);

  cursorX += kCharWidth;
  if (cursorX > M5.Lcd.width() - kCharWidth) {
    cursorX = kTextX;
    cursorY += kCharHeight;

    if (cursorY > 200) {
      M5.Lcd.fillRect(0, kTextY, M5.Lcd.width(), 200 - kTextY, BLACK);
      cursorX = kTextX;
      cursorY = kTextY;
    }
    M5.Lcd.setCursor(cursorX, cursorY);
  }
}

// The setup() function runs once each time the microcontroller starts
void setup() {
  // init lcd, serial, but don't init sd card
  M5.begin();
  M5.Lcd.clear(BLACK);
  M5.Lcd.setTextColor(YELLOW);
  M5.Lcd.setTextSize(2);
  M5.Lcd.setCursor(65, 10);
  M5.Lcd.println("DC motor example");
  M5.Lcd.setCursor(30, 220);
  M5.Lcd.println("Forward");
  M5.Lcd.setCursor(140, 220);
  M5.Lcd.println("stop");
  M5.Lcd.setCursor(220, 220);
  M5.Lcd.println("Reverse");
  pinMode(21, OUTPUT);
  pinMode(22, OUTPUT);

  M5.Lcd.setCursor(cursorX, cursorY);
}

// Add the main program code into the continuous loop() function
void loop() {
  M5.update();

  if (M5.BtnA.wasReleased()) {
    appendChar('A');
    digitalWrite(22, LOW);
    digitalWrite(21, HIGH);
  } else if (M5.BtnB.wasReleased()) {
    appendChar('B');
    digitalWrite(21, LOW);
    digitalWrite(22, LOW);
  } else if (M5.BtnC.wasReleased()) {
    appendChar('C');
    digitalWrite(21, LOW);
    digitalWrite(22, HIGH);
  }
}After uploading the program, you should see the following result.
Page Tools