

Arduino Quick Start
2. Devices & Examples
Demo Board-SHT30
3. M5Unified
4. M5GFX
5. Extensions
Unit
Module
Atomic
Tab5
IoT
Accessories
Keyboard Matrix Keypad
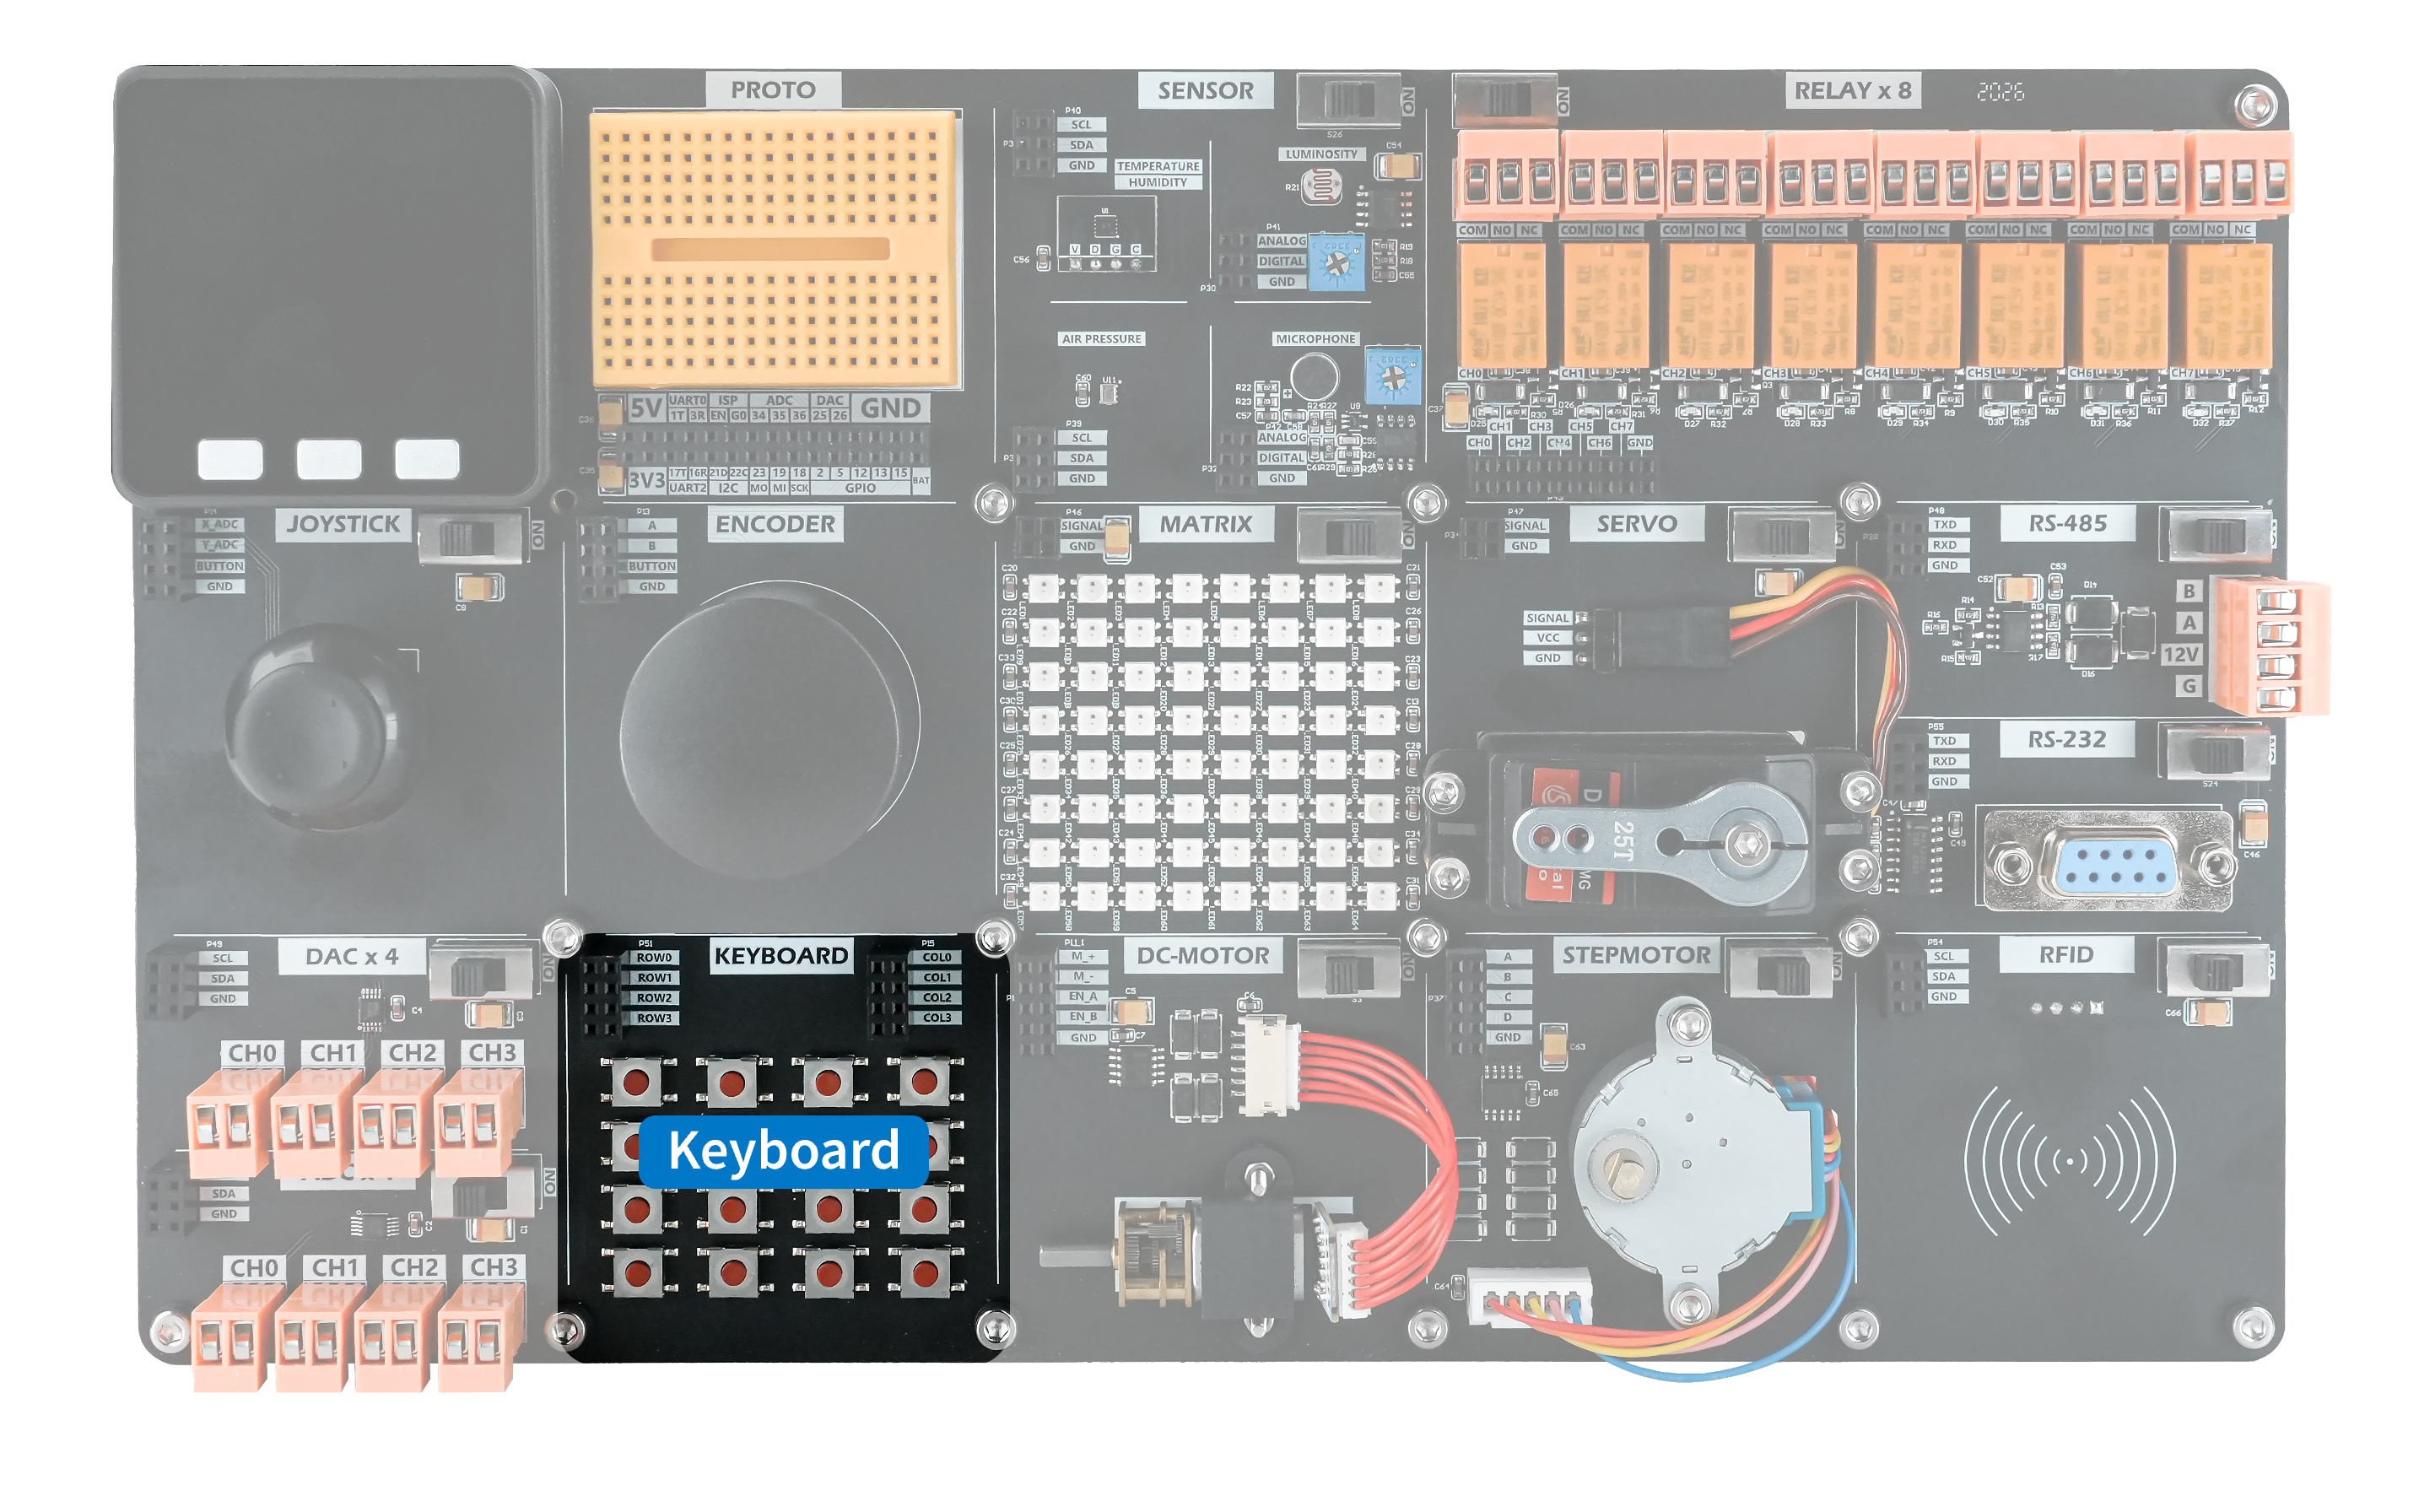
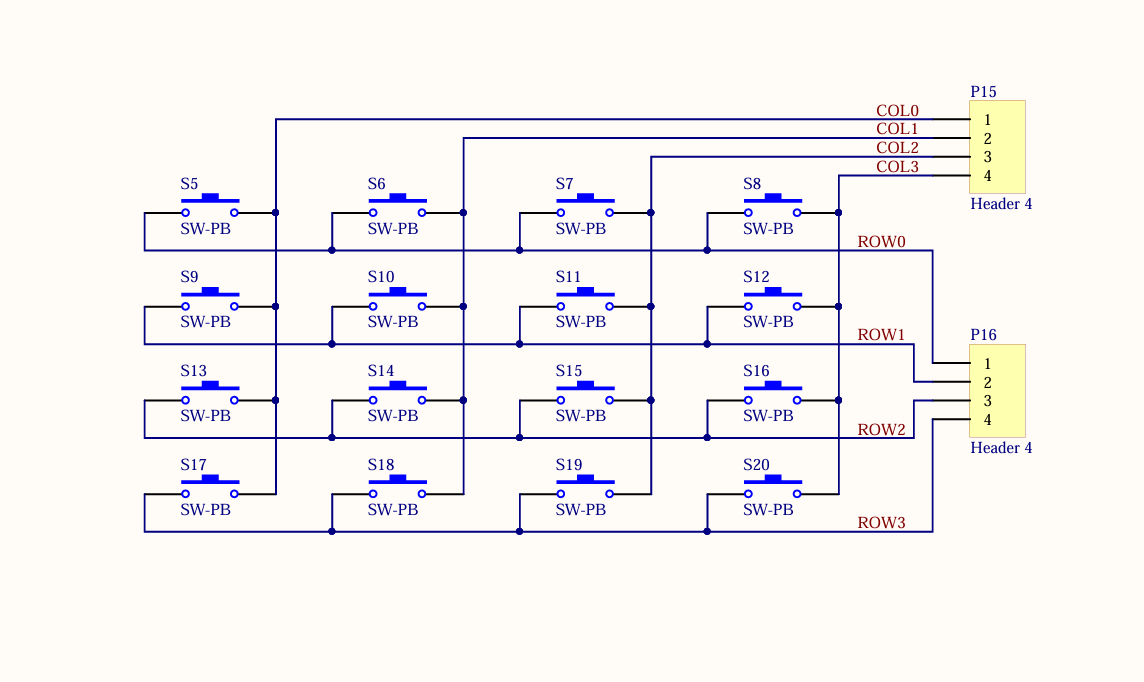
The demo board includes a 4 x 4 matrix keypad. By scanning the matrix in software, the program can identify the pressed key, enabling richer key input and a wider range of control functions.
Hardware Connection
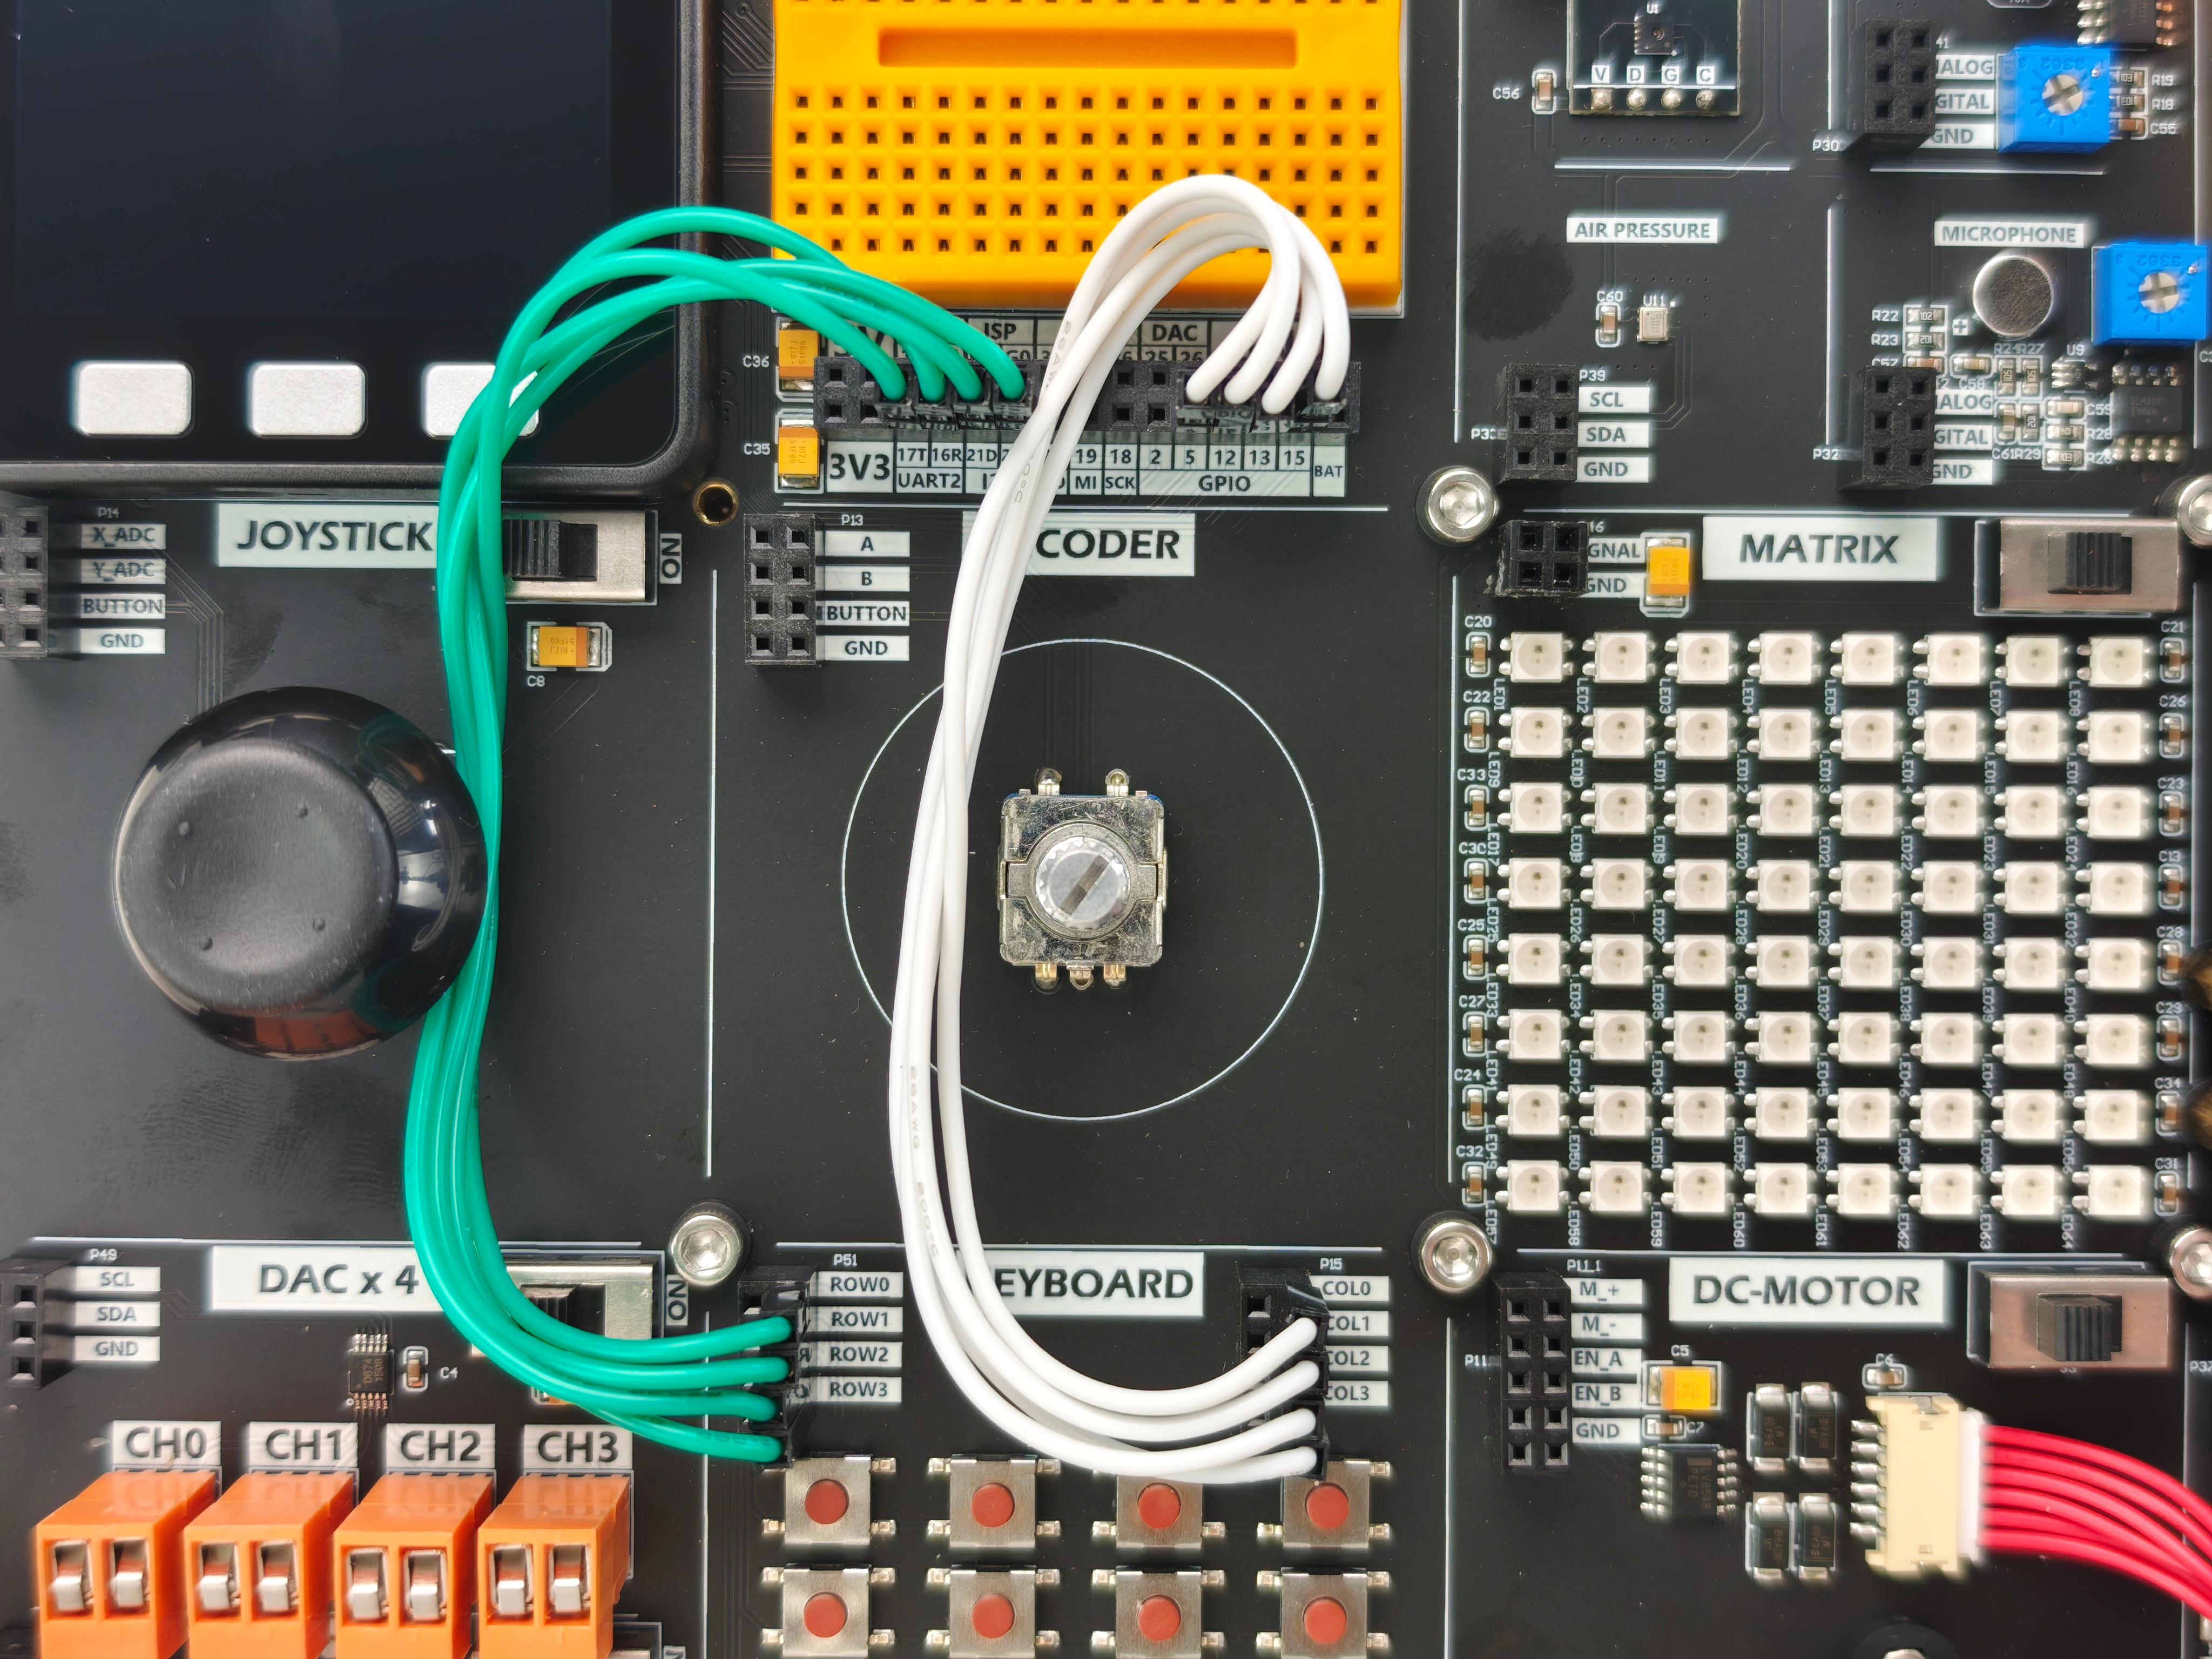
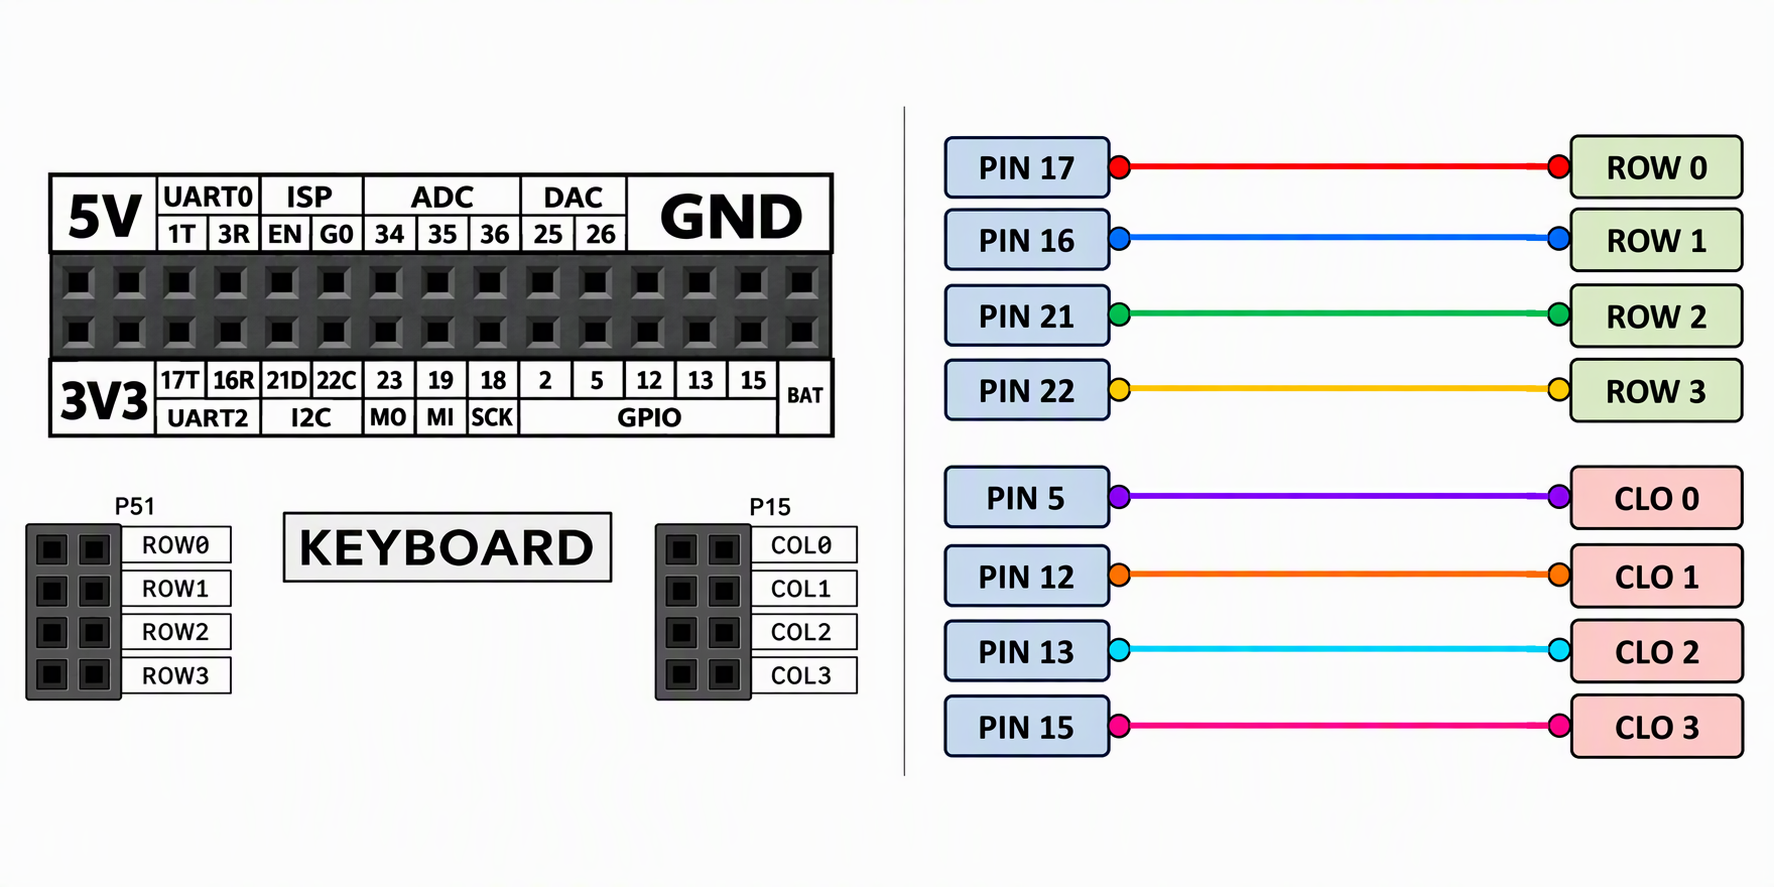
Connect the control pins to the corresponding rows and columns of the keypad matrix so that the program can scan key presses.
Example Program
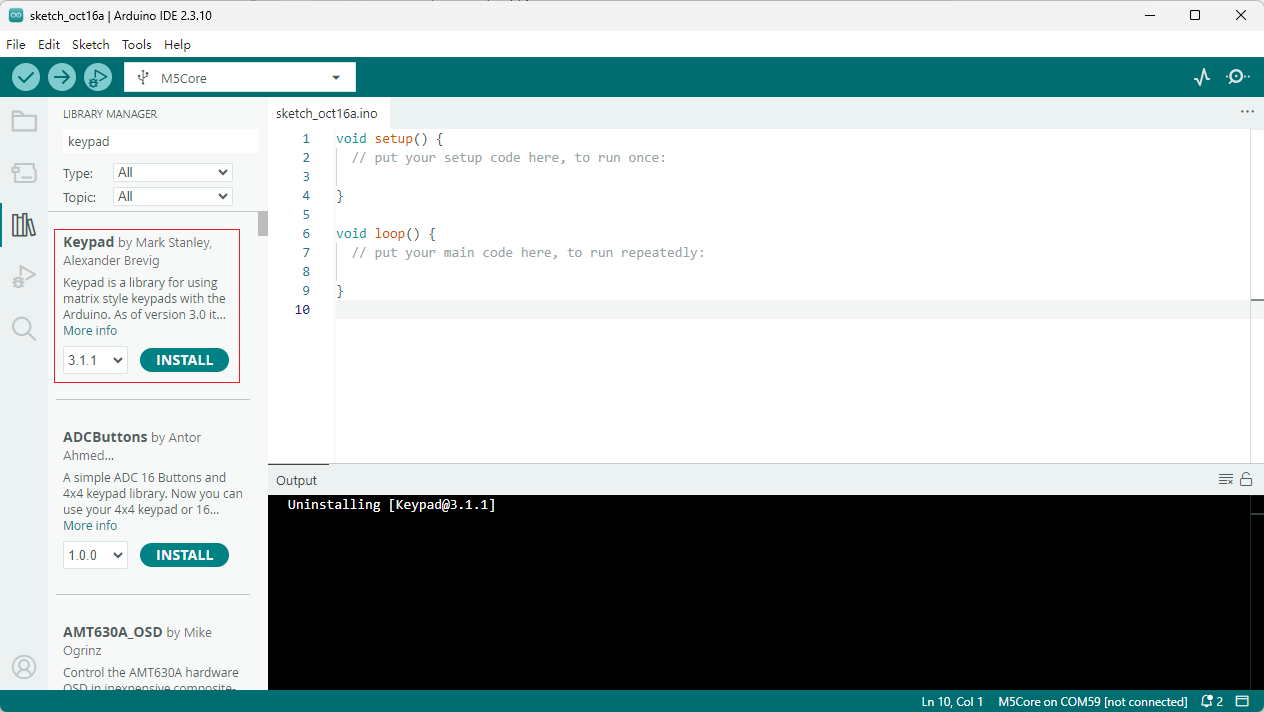
This example uses the Keypad.h library. Search for and install it through the Arduino Library Manager.
The program reads keys from the matrix keypad and displays them on the screen.
cpp
1 2 3 4 5 6 7 8 9 10 11 12 13 14 15 16 17 18 19 20 21 22 23 24 25 26 27 28 29 30 31 32 33 34 35 36 37 38
#include "M5Unified.h"
#include <M5GFX.h>
#include <Keypad.h>

const byte ROWS = 4;
const byte COLS = 4;

byte rowPins[ROWS] = {17, 16, 21, 22};
byte colPins[COLS] = {5, 12, 13, 15};

char keys[ROWS][COLS] = {
  {'a', 'b', 'c', 'd'},
  {'e', 'f', 'g', 'h'},
  {'i', 'j', 'k', 'l'},
  {'m', 'n', 'o', 'p'}
};

Keypad keypad = Keypad(makeKeymap(keys), rowPins, colPins, ROWS, COLS);

void setup() {
  M5.begin();
  Serial.begin(115200);

  M5.Lcd.setCursor(100, 0, 4);
  M5.Lcd.println("KEYBOARD");
}

void loop() {
  char key = keypad.getKey();

  if (key) {
    Serial.println(key);

    M5.Lcd.fillRect(150, 140, 80, 50, BLACK);
    M5.Lcd.setCursor(150, 140, 4);
    M5.Lcd.printf("%c", toupper(key));
  }
}After uploading the program, press a key on the matrix keypad to see its value on the screen.
Page Tools