

Arduino 上手教程
2. 设备开发 & 案例程序
3. M5Unified
4. M5GFX
5. 扩展模块
Unit
Module
Atomic
Tab5
IoT
CoreMatrix IMU 姿态传感器
CoreMatrix IMU 姿态传感器输入相关 API 与案例程序。
案例程序
编译要求
- M5Stack 板管理版本 >=
3.3.10-a - 开发板选项 =
M5CoreMatrix - M5Unified 库版本 >=
0.2.29 - M5GFX 库版本 >=
0.2.36
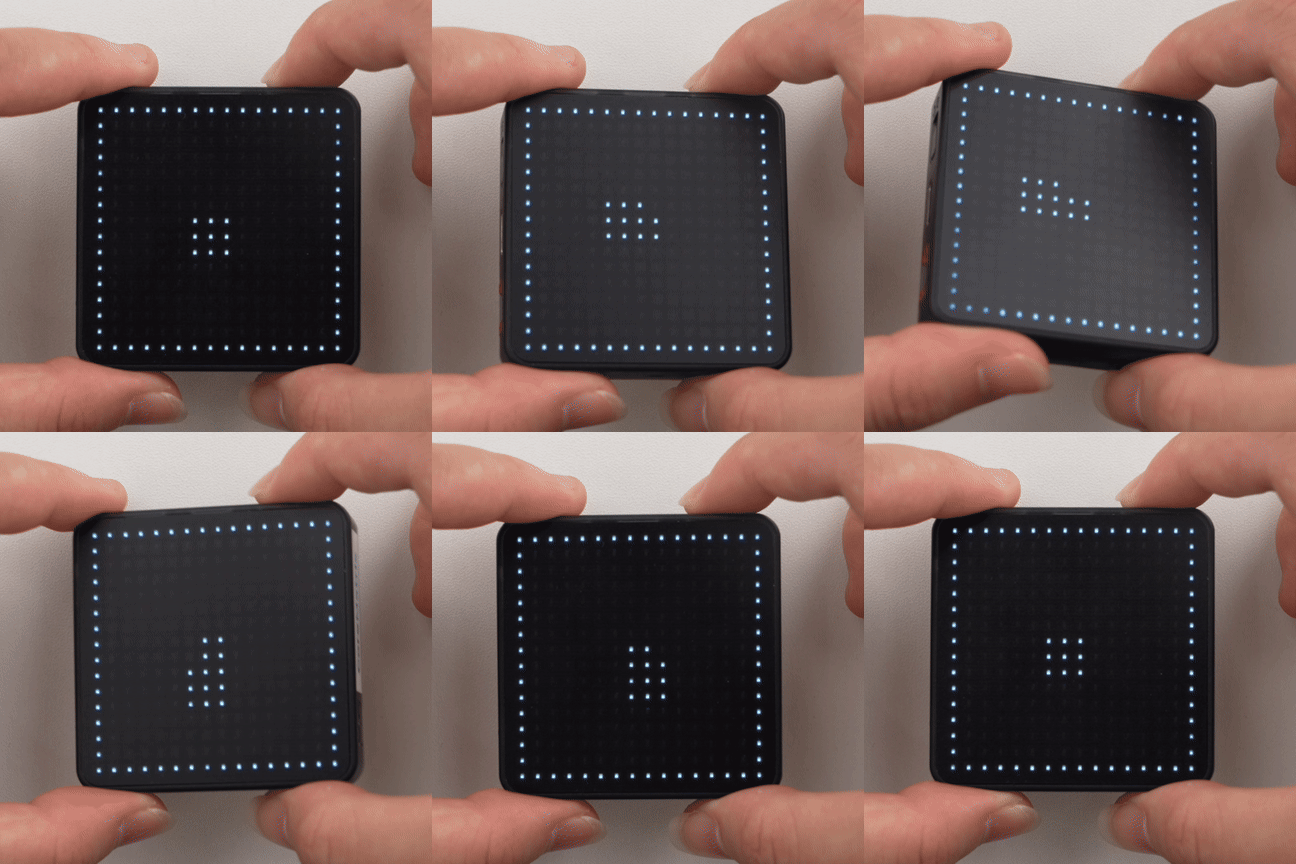
本示例读取正常上电状态下的加速度和角速度数据,并将倾斜方向映射到 16 x 16 点阵。
cpp
1 2 3 4 5 6 7 8 9 10 11 12 13 14 15 16 17 18 19 20 21 22 23 24 25 26 27 28 29 30 31 32 33 34 35 36 37 38 39 40 41 42 43 44 45 46 47 48 49 50 51 52 53 54 55 56 57
#include <M5Unified.h>

static void drawStatus(bool ready, int x = 7, int y = 7)
{
  M5.Display.startWrite();
  M5.Display.fillScreen(TFT_BLACK);
  M5.Display.drawRect(0, 0, 16, 16, TFT_WHITE);

  if (!ready) {
    M5.Display.drawLine(3, 3, 12, 12, TFT_WHITE);
    M5.Display.drawLine(12, 3, 3, 12, TFT_WHITE);
  } else {
    M5.Display.fillRect(7, 7, 2, 2, TFT_WHITE);
    M5.Display.fillRect(x, y, 3, 3, TFT_WHITE);
  }

  M5.Display.endWrite();
  M5.Display.display();
}

void setup()
{
  auto cfg = M5.config();
  cfg.serial_baudrate = 115200;
  M5.begin(cfg);

  M5.Display.setColorDepth(8);
  M5.Display.setRotation(1);
  M5.Display.setBrightness(128);

  Serial.printf("BMI270 enabled: %s\n", M5.Imu.isEnabled() ? "yes" : "no");
  drawStatus(M5.Imu.isEnabled());
}

void loop()
{
  if (!M5.Imu.isEnabled()) {
    delay(1000);
    return;
  }

  const auto updated = M5.Imu.update();
  if (updated & m5::IMU_Class::sensor_mask_accel) {
    const auto& data = M5.Imu.getImuData();

    const int x = constrain(static_cast<int>((data.accel.y + 1.0f) * 7.5f), 1, 13);
    const int y = constrain(static_cast<int>((data.accel.x + 1.0f) * 7.5f), 1, 13);
    drawStatus(true, x, y);

    Serial.printf("ax: %.3f  ay: %.3f  az: %.3f\n",
                  data.accel.x, data.accel.y, data.accel.z);
    Serial.printf("gx: %.3f  gy: %.3f  gz: %.3f\n",
                  data.gyro.x, data.gyro.y, data.gyro.z);
  }

  delay(50);
}点阵中央保持一个中心点,一个 3 x 3 方块根据加速度数据移动,串口监视器输出加速度与角速度。若显示方向与外壳摆放方向相反,可在坐标计算中交换 x/y 或对相应轴取反。
API
CoreMatrix IMU 部分使用了 M5Unified 库中的 IMU_Class,更多 IMU 相关的 API 可以参考下方文档:
Page Tools