

Arduino 上手教程
2. 设备开发 & 案例程序
3. M5Unified
4. M5GFX
5. 扩展模块
Unit
Module
Atomic
Tab5
IoT
StopWatch Battery 电池状态
StopWatch 电池状态相关 API 与案例程序。
案例程序
编译要求
- M5Stack 板管理版本 >= 3.3.7
- 开发板选项 = M5StopWatch
- M5Unified 库版本 >= 0.2.15
- M5GFX 库版本 >= 0.2.21
- M5PM1 库版本 >= 1.0.7
cpp
1 2 3 4 5 6 7 8 9 10 11 12 13 14 15 16 17 18 19 20 21 22 23 24 25 26 27 28 29 30 31 32 33 34 35 36 37 38 39 40 41 42 43 44 45 46 47 48 49 50 51 52 53 54 55 56 57 58 59 60 61 62 63 64 65 66 67 68 69 70 71 72 73 74 75 76 77 78 79 80 81 82 83 84 85 86 87 88 89 90 91 92 93
#include <M5Unified.h>
#include <M5PM1.h>

M5PM1 pm1;

bool highCurrent = false;   // false: 185mA (default), true: 425mA

// PYG3 -> LGS4056H PROG: Hi-Z = 185mA, LOW = 425mA
void setChargeCurrent(bool high)
{
    if (high) {
        pm1.gpioSetFunc(M5PM1_GPIO_NUM_3, M5PM1_GPIO_FUNC_GPIO);
        pm1.gpioSetMode(M5PM1_GPIO_NUM_3, M5PM1_GPIO_MODE_OUTPUT);
        pm1.gpioSetPull(M5PM1_GPIO_NUM_3, M5PM1_GPIO_PULL_NONE);
        pm1.gpioSetDrive(M5PM1_GPIO_NUM_3, M5PM1_GPIO_DRIVE_PUSHPULL);
        pm1.gpioSetOutput(M5PM1_GPIO_NUM_3, 0);
        // Equivalent: pm1.gpioSet(M5PM1_GPIO_NUM_3, M5PM1_GPIO_MODE_OUTPUT, 0, M5PM1_GPIO_PULL_NONE, M5PM1_GPIO_DRIVE_PUSHPULL);
    } else {
        pm1.gpioSetFunc(M5PM1_GPIO_NUM_3, M5PM1_GPIO_FUNC_GPIO);
        pm1.gpioSetMode(M5PM1_GPIO_NUM_3, M5PM1_GPIO_MODE_INPUT);
        pm1.gpioSetPull(M5PM1_GPIO_NUM_3, M5PM1_GPIO_PULL_NONE);
    }
}

void drawLabels()
{
    M5.Lcd.setRotation(0);
    M5.Lcd.setFont(&fonts::FreeMonoBold12pt7b);
    M5.Lcd.setTextDatum(middle_center);
    M5.Lcd.drawString("StopWatch Realtime", M5.Lcd.width() / 2, 50);
    M5.Lcd.drawString("Battery Status\n",  M5.Lcd.width() / 2, 80);
    M5.Lcd.setCursor(40, 170);
    M5.Lcd.print("Battery Charging:");
    M5.Lcd.setCursor(40, 210);
    M5.Lcd.print("Battery    Level:");
    M5.Lcd.setCursor(40, 250);
    M5.Lcd.print("Battery  Voltage:");
    M5.Lcd.setCursor(40, 290);
    M5.Lcd.print("Charge  Current:");
    M5.Lcd.drawString("BtnA: switch 185 / 425 mA", M5.Lcd.width() / 2, 330);
}

void drawRuntime()
{
    M5.Lcd.setCursor(290, 170);
    M5.Lcd.printf("%s \n", M5.Power.isCharging() ? "Yes" : "No");

    M5.Lcd.setCursor(290, 210);
    M5.Lcd.printf("%d %%\n", M5.Power.getBatteryLevel());

    M5.Lcd.setCursor(290, 250);
    M5.Lcd.printf("%d mV\n", M5.Power.getBatteryVoltage());

    M5.Lcd.setCursor(290, 290);
    M5.Lcd.printf("%d mA\n", highCurrent ? 425 : 185);
}

void setup()
{
    M5.begin();
    Serial.begin(115200);

    // M5PM1 is initialized by M5.begin(); use its GPIO API for PYG3
    pm1.begin(&M5.In_I2C, M5PM1_DEFAULT_ADDR, M5PM1_I2C_FREQ_100K);
    pm1.setChargeEnable(true);
    setChargeCurrent(highCurrent);   // Default to 185mA
    pm1.setSingleResetDisable(false);  // Enable single reset: short press power button resets M5PM1

    drawLabels();
    drawRuntime();
}

void loop()
{
    M5.update();

    if (M5.BtnA.wasPressed()) {
        highCurrent = !highCurrent;
        setChargeCurrent(highCurrent);

        M5.Lcd.setCursor(290, 290);
        M5.Lcd.printf("%d mA\n", highCurrent ? 425 : 185);

        Serial.printf("Charge current setting: %d mA\n", highCurrent ? 425 : 185);
    }

    // Refresh every 2 seconds
    static uint32_t lastUpdate = 0;
    if (millis() - lastUpdate >= 2000) {
        lastUpdate = millis();
        drawRuntime();
    }
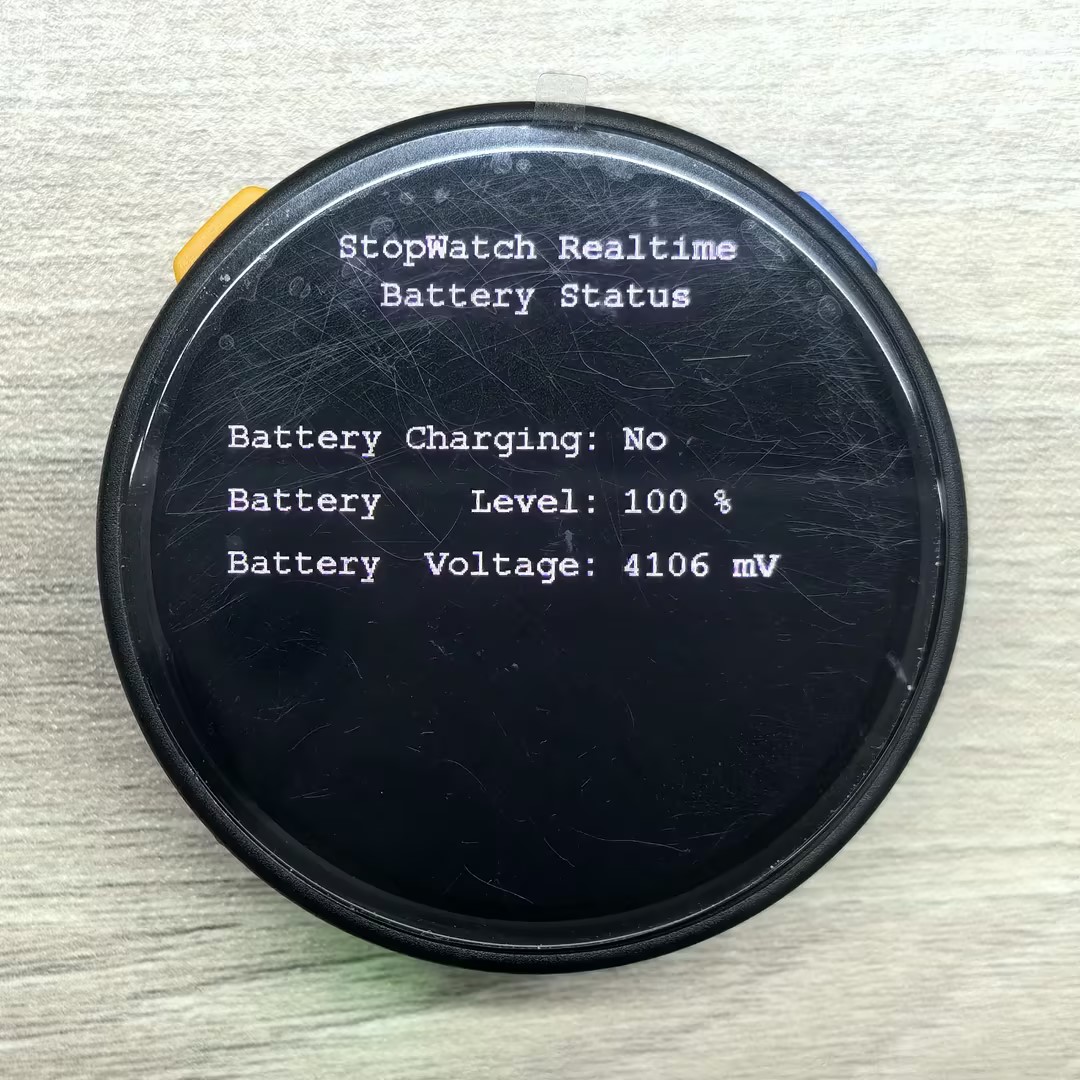
}该程序将在屏幕上显示电池是否正在充电、电量百分比、电池电压,以及当前充电电流档位,每2秒刷新一次。按下按键 A(BtnA)可在 185mA 与 425mA 两档之间切换充电电流。
注意
425mA 档位由 M5PM1 的 PYG3 引脚保持。短按电源键(M5PM1 复位)、双击关机、进入下载模式或断电后,PYG3 会恢复为高阻,充电电流回到默认的 185mA。
API
StopWatch 电池状态部分使用了 M5Unified 库中的 Power_Class,更多相关的API可以参考下方文档:
Page Tools