

Arduino入門
2. デバイス&サンプル
3. M5Unified
4. M5GFX
5. 拡張モジュール&サンプル
Unit
Module
Atomic
Tab5
IoT
アクセサリー
CoreMatrix Arduino プログラムのコンパイルと書き込み
1. 準備
- 1. Arduino IDE のインストール:Arduino IDE インストールガイドを参照して IDE をインストールします。
- 2. ボードパッケージのインストール:基本環境構築ガイドを参照して M5Stack ボードパッケージをインストールし、ボードに
M5CoreMatrixを選択します。
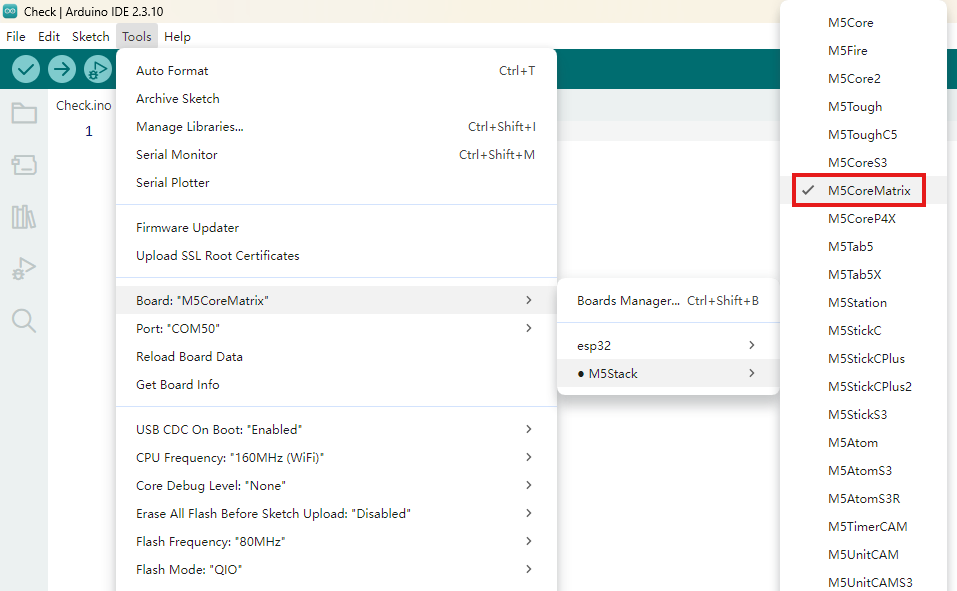
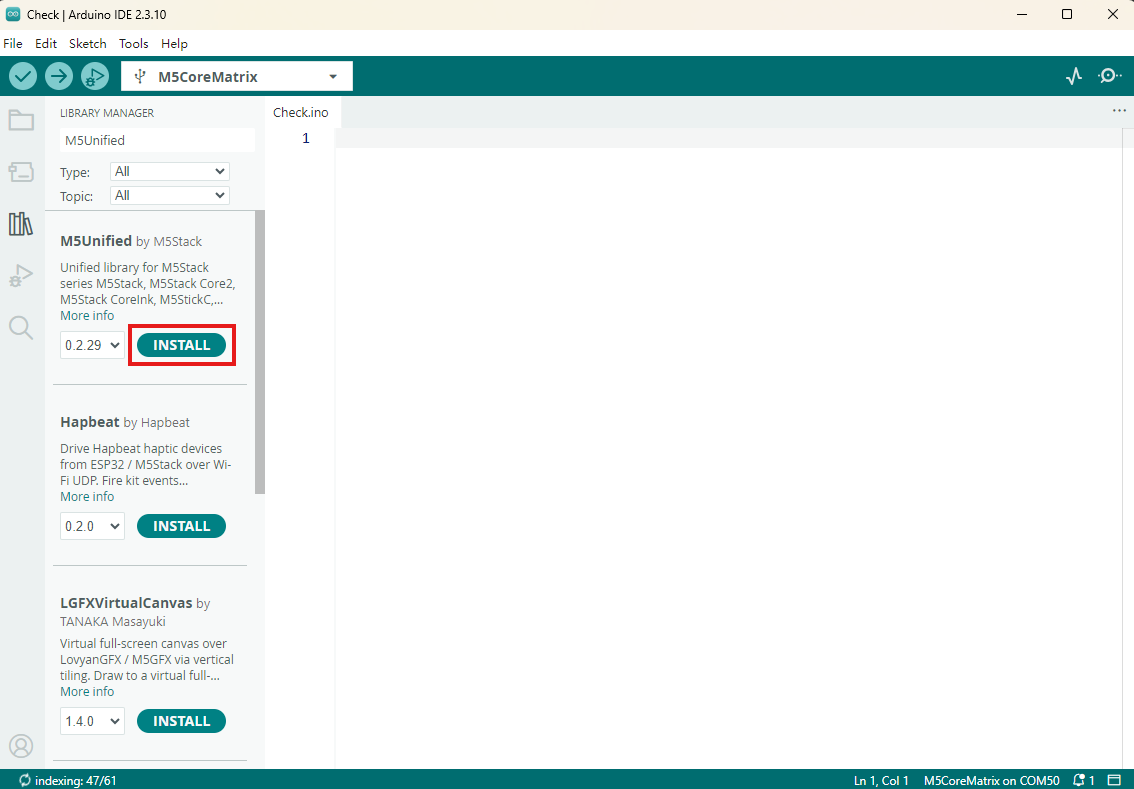
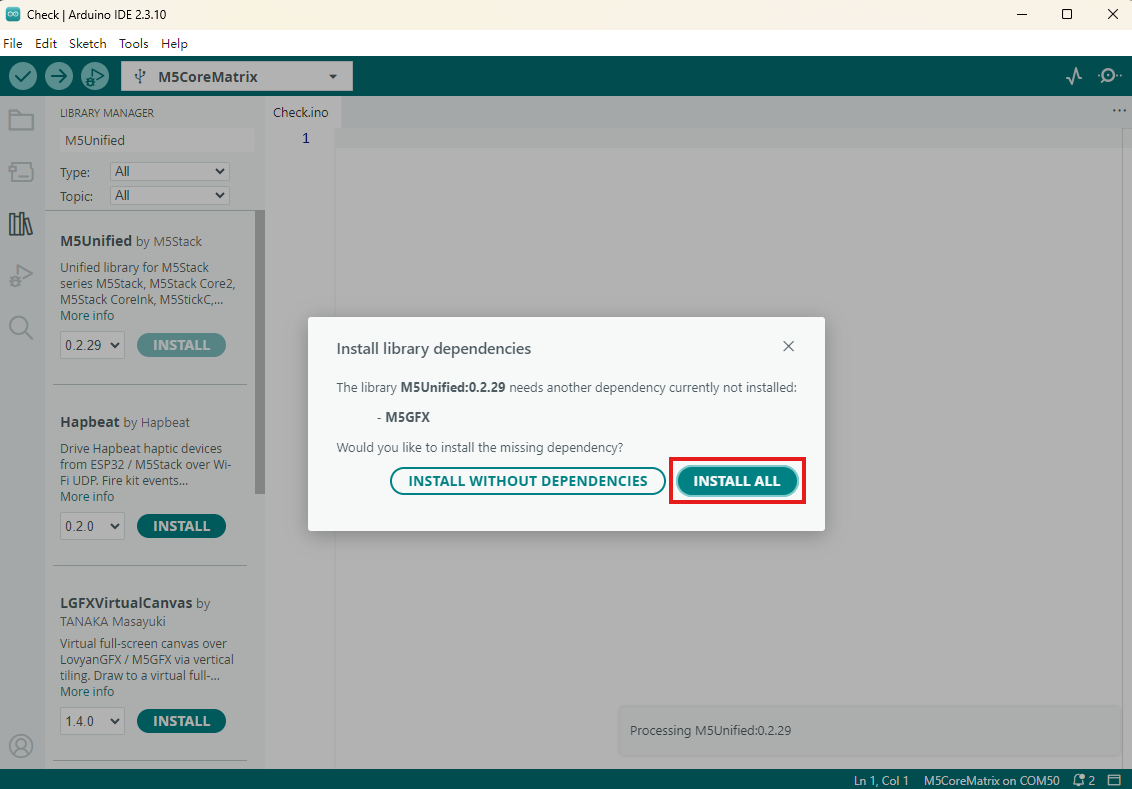
- 3. 依存ライブラリのインストール:ライブラリマネージャーのインストールガイドを参照して、
M5UnifiedとM5GFXライブラリをインストールし、表示される案内に従ってすべての依存ライブラリをインストールします。
2. ダウンロードモード
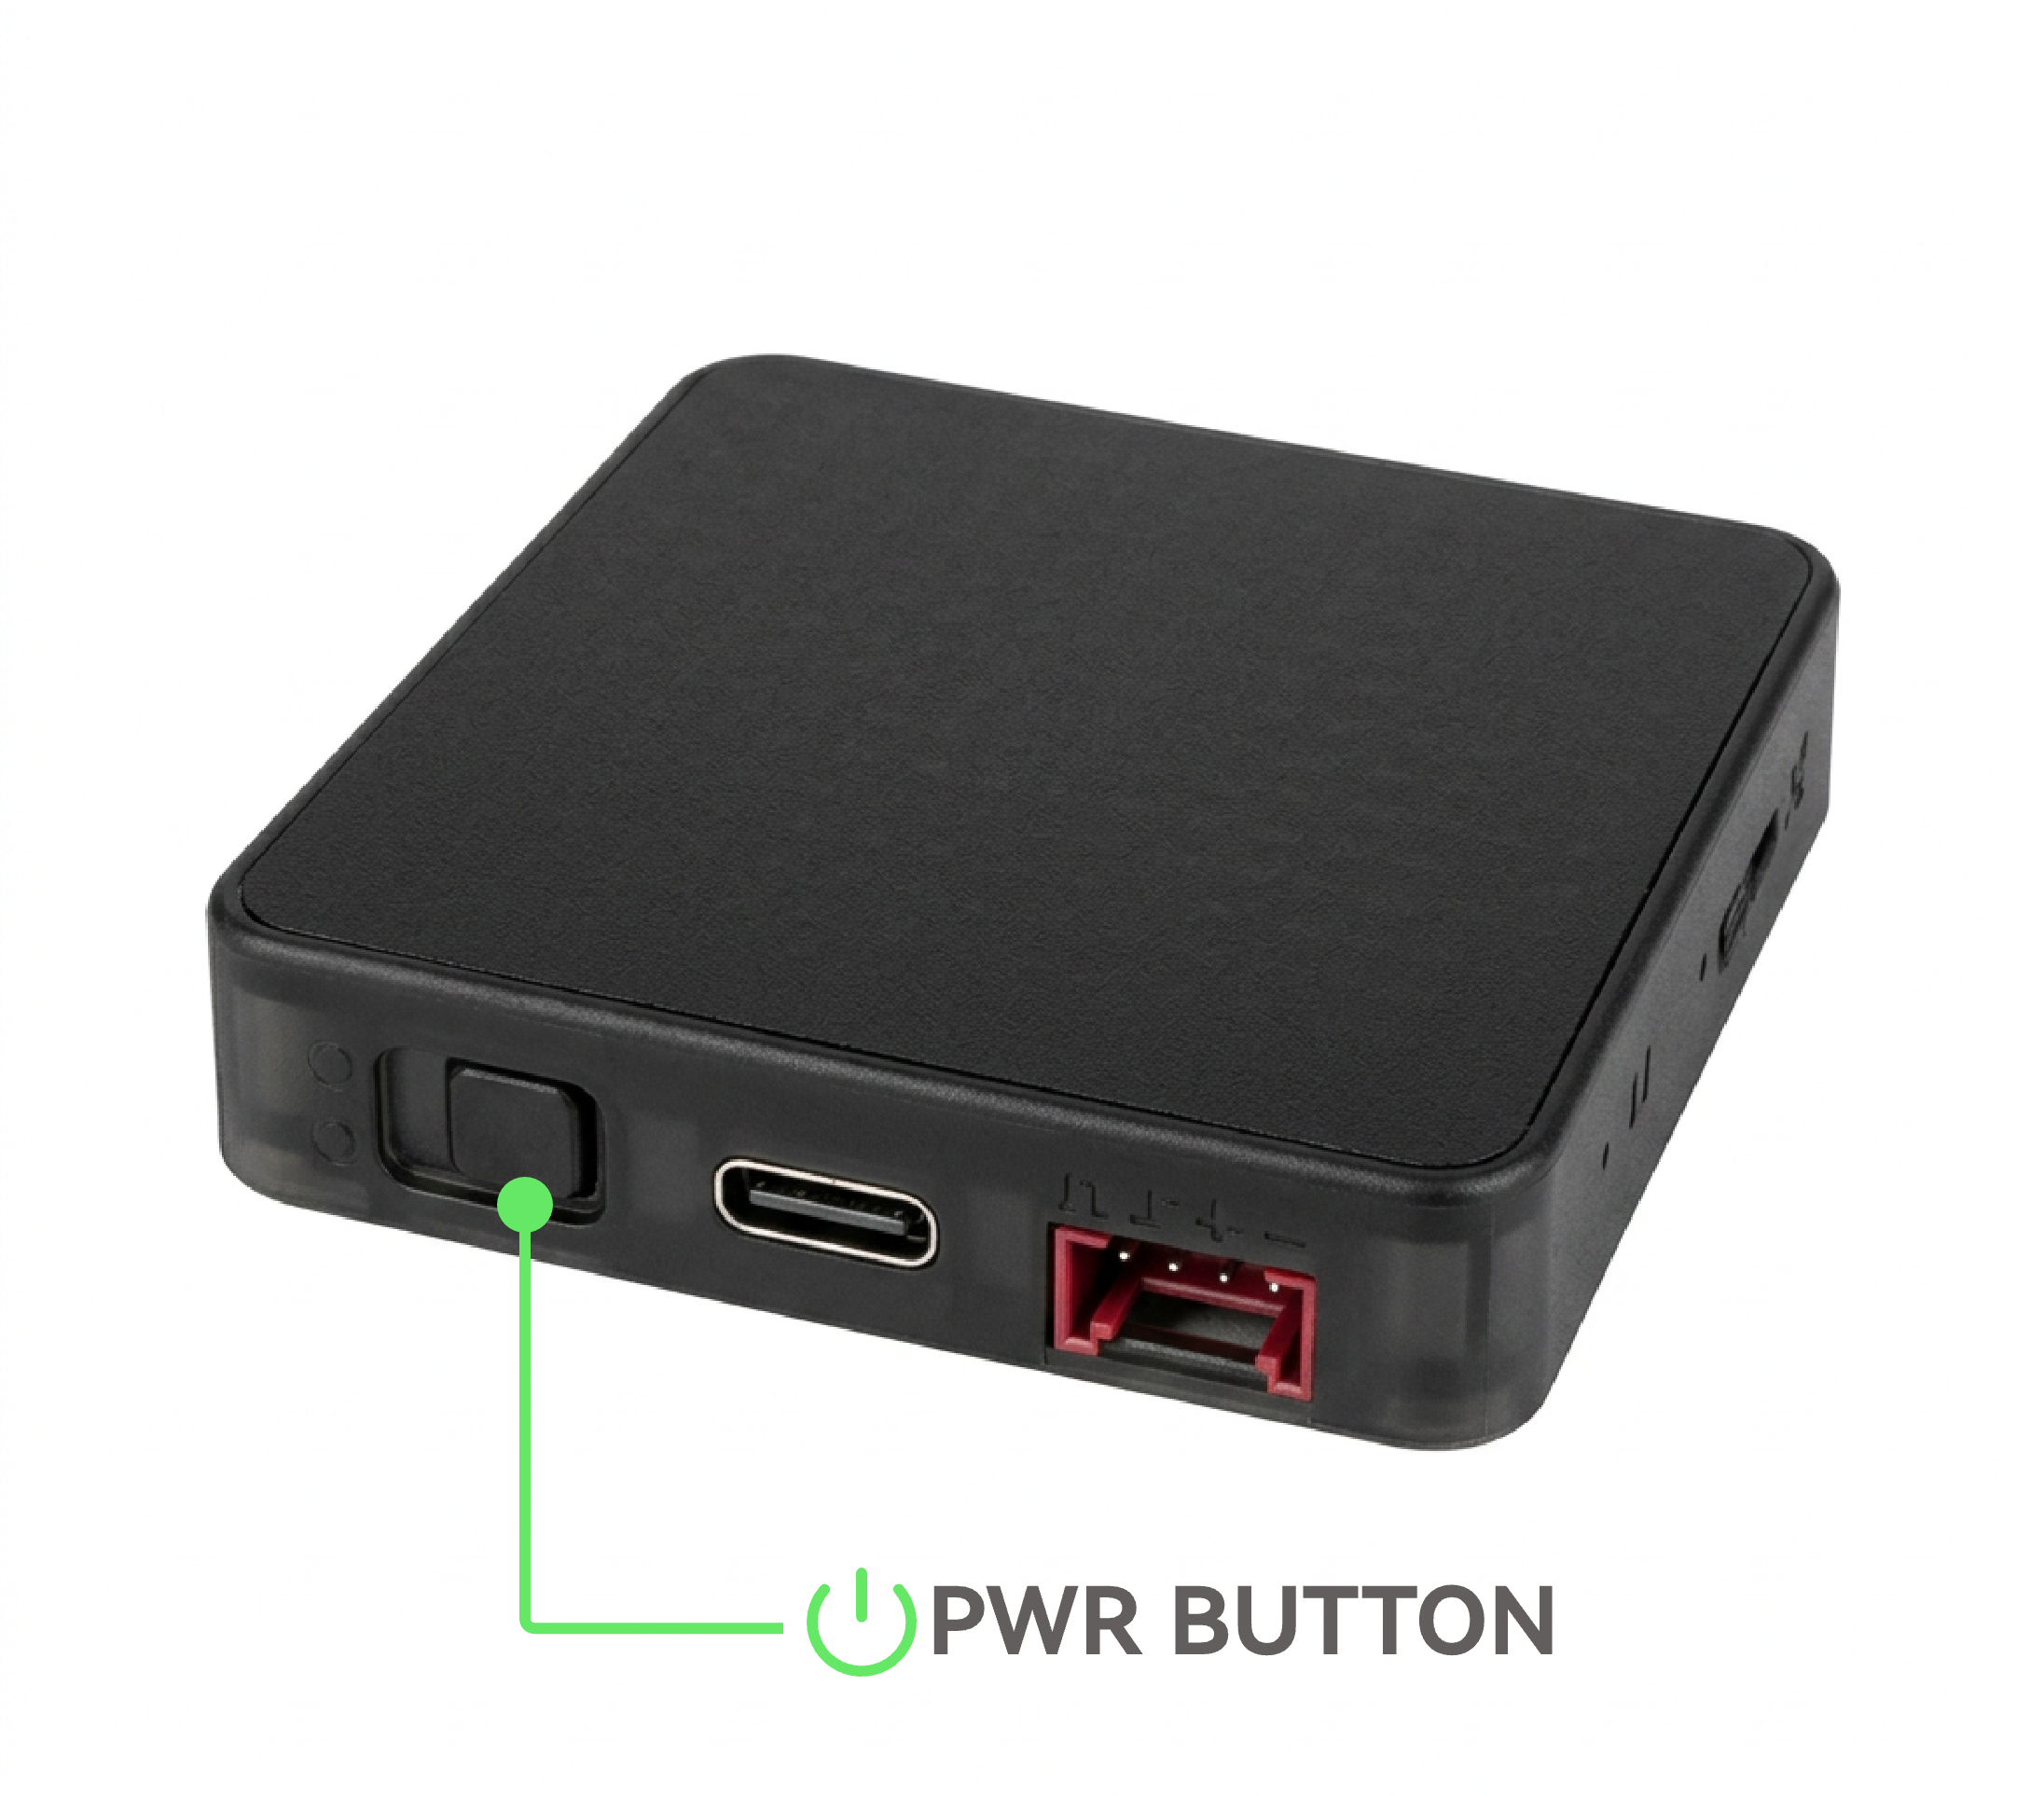
通常、CoreMatrix は USB Type-C データケーブルを介して直接プログラムを書き込めます。開発・デバッグ中に書き込みエラーが発生した場合は、電源ボタンを長押しして強制的にダウンロードモードにします。
3. ポートの選択
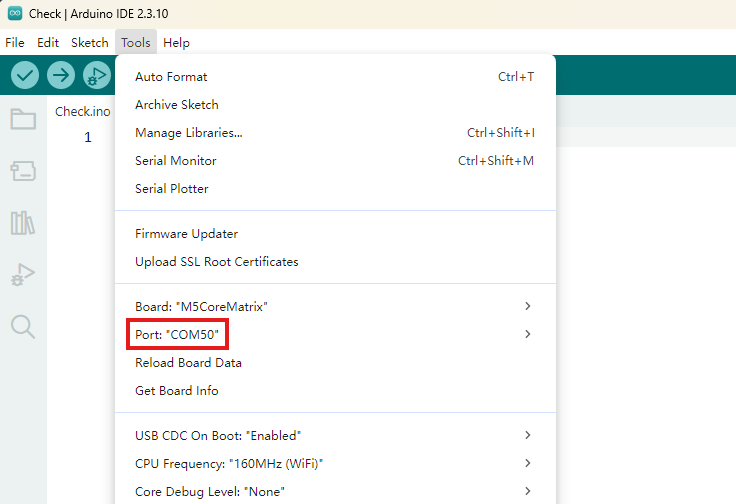
USB データケーブルでデバイスをコンピューターに接続します。Arduino IDE で対応するデバイスのポートを選択します。
4. プログラムのコンパイルと書き込み
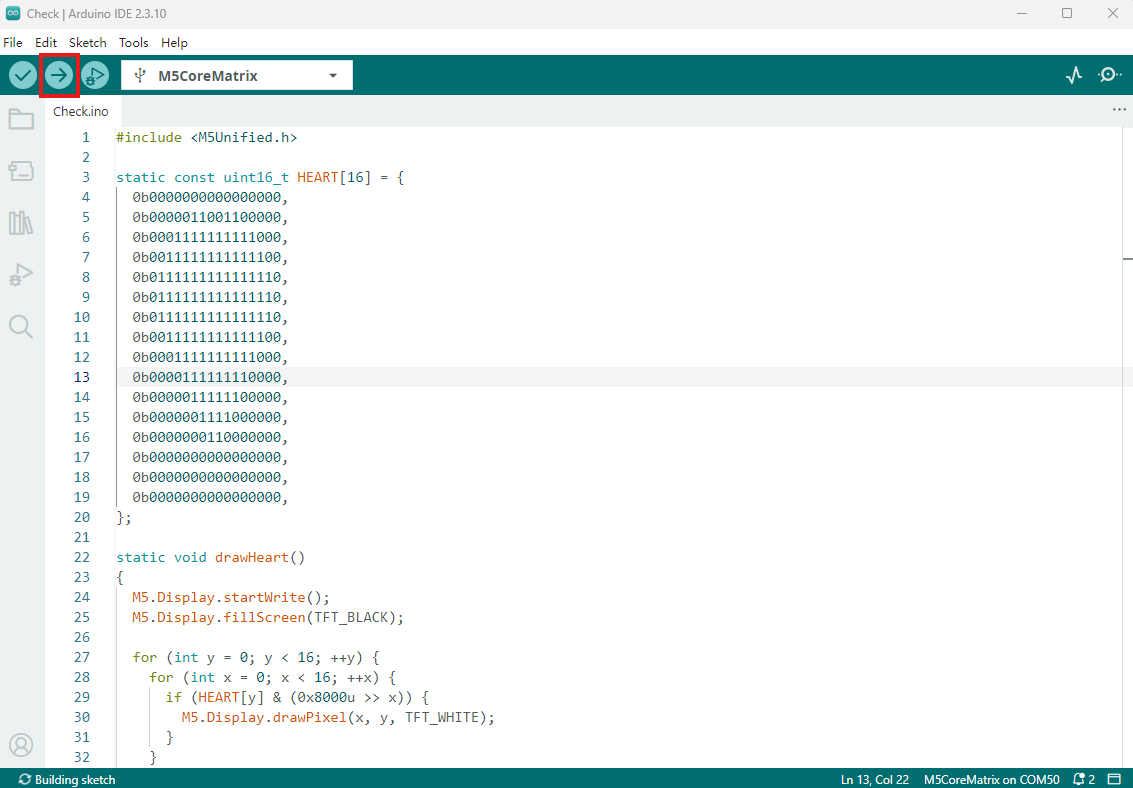
Arduino IDE で新しいプログラムを作成し、以下のコードをエディターにコピーして、アップロードボタンをクリックするとコンパイルと書き込みが行われます。
cpp
1 2 3 4 5 6 7 8 9 10 11 12 13 14 15 16 17 18 19 20 21 22 23 24 25 26 27 28 29 30 31 32 33 34 35 36 37 38 39 40 41 42 43 44 45 46 47 48 49 50 51 52 53 54 55 56 57 58
#include <M5Unified.h>

static const uint16_t HEART[16] = {
  0b0000000000000000,
  0b0000011001100000,
  0b0001111111111000,
  0b0011111111111100,
  0b0111111111111110,
  0b0111111111111110,
  0b0111111111111110,
  0b0011111111111100,
  0b0001111111111000,
  0b0000111111110000,
  0b0000011111100000,
  0b0000001111000000,
  0b0000000110000000,
  0b0000000000000000,
  0b0000000000000000,
  0b0000000000000000,
};

static void drawHeart()
{
  M5.Display.startWrite();
  M5.Display.fillScreen(TFT_BLACK);

  for (int y = 0; y < 16; ++y) {
    for (int x = 0; x < 16; ++x) {
      if (HEART[y] & (0x8000u >> x)) {
        M5.Display.drawPixel(x, y, TFT_WHITE);
      }
    }
  }

  M5.Display.endWrite();
  M5.Display.display();
}

void setup()
{
  auto cfg = M5.config();
  cfg.serial_baudrate = 115200;
  M5.begin(cfg);

  M5.Display.setColorDepth(8);
  M5.Display.setRotation(1);
  M5.Display.setBrightness(128);

  Serial.printf("CoreMatrix display: %d x %d\n",
                M5.Display.width(), M5.Display.height());
  drawHeart();
}

void loop()
{
  M5.update();
  delay(100);
}
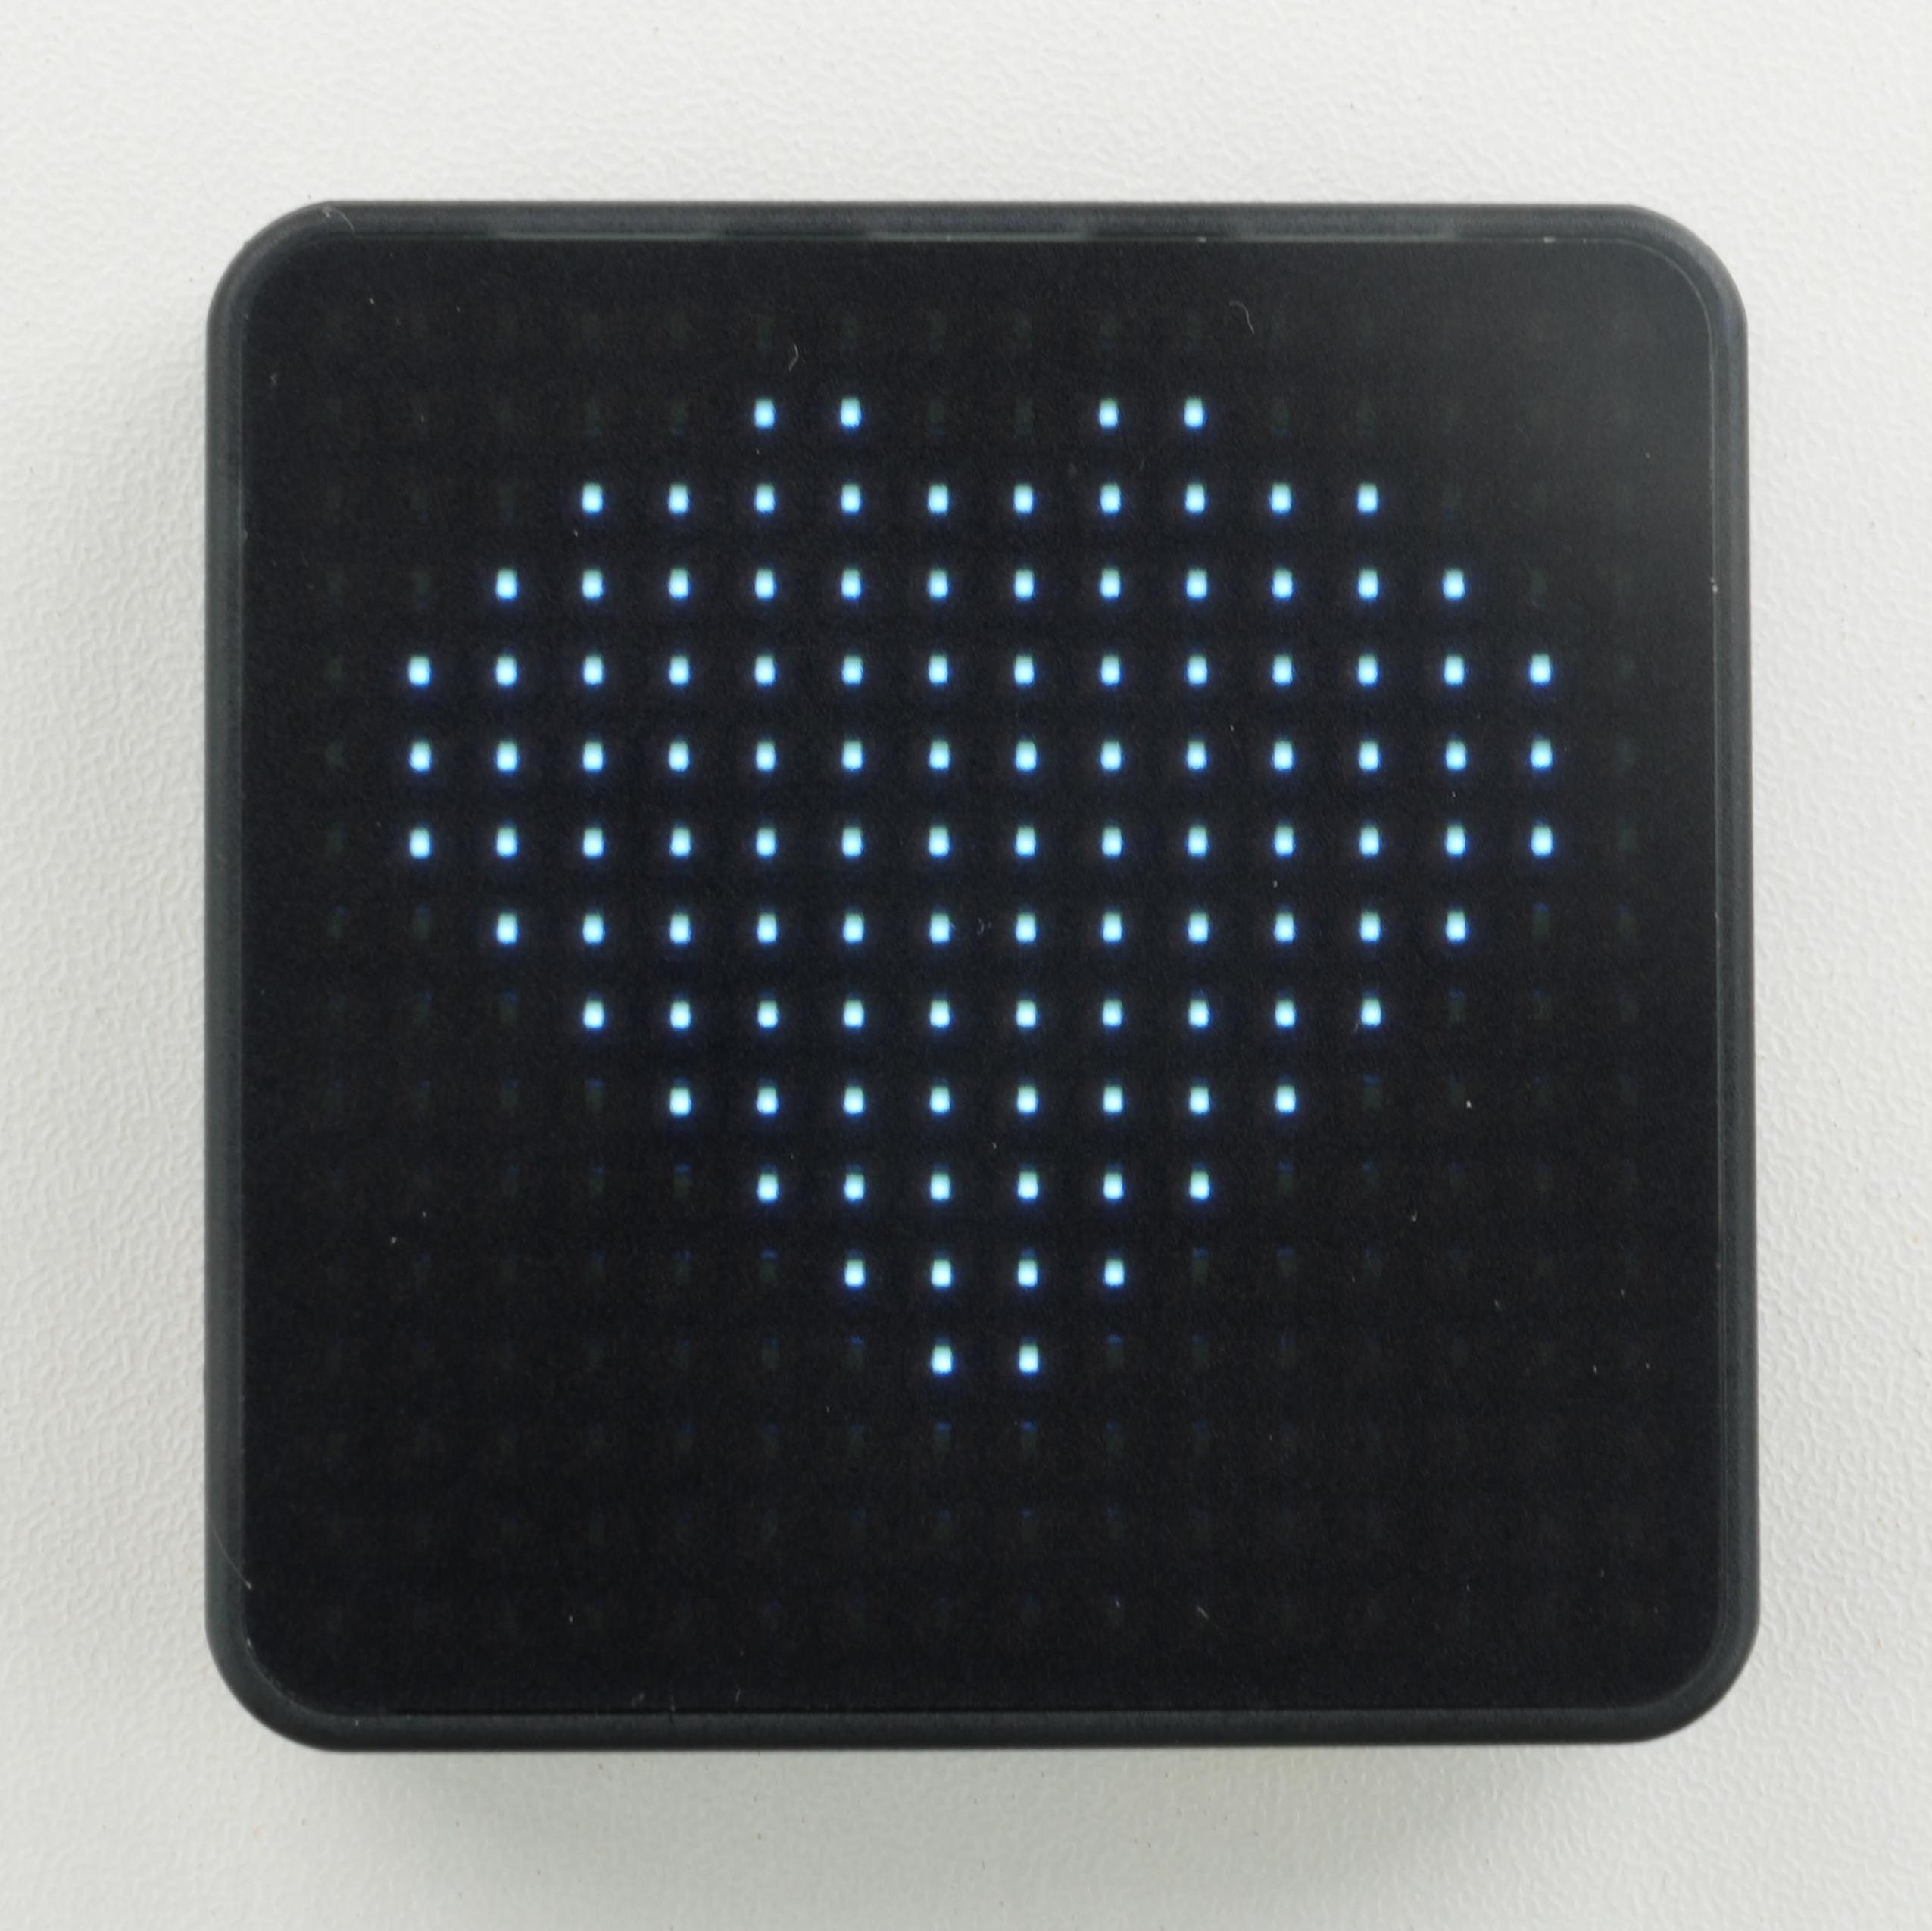
書き込みが完了すると、CoreMatrix の LED マトリクスに 16 x 16 のハートの模様が表示されます。
5. 関連リソース
Page Tools